To install a relay for LED lights, you will need to follow these steps: connect the red wire from the relay to the battery’s positive terminal, connect the black wire from the relay to the LED lights’ negative terminal, and connect the yellow wire from the relay to a switch. Finally, connect the switch to a power source.
When installing LED lights, it is essential to use a relay to ensure proper functionality and prevent any electrical issues. This guide will walk you through the steps to install a relay for LED lights, providing you with a seamless and efficient lighting setup.
By following these steps, you can enjoy the benefits of LED lighting while ensuring a safe and reliable connection. So, let’s get started with the installation process.
Factors To Consider
When it comes to installing relay for LED lights, there are several factors to consider. These factors will help ensure that the installation goes smoothly and that your LED lights perform optimally. In this section, we will discuss two key factors that you should keep in mind: current and voltage requirements, and the size and type of LED lights. Additionally, we will also touch upon the compatibility of the relay with your existing wiring. Let’s dive into each of these factors in detail.
Current and Voltage Requirements
The first factor to consider when installing a relay for LED lights is the current and voltage requirements. It is crucial to ensure that the relay you choose can handle the current and voltage demanded by your LED lights. Failure to do so can result in inadequate performance or even damage to the lights.
Before selecting a relay, make sure to check the specifications of your LED lights and understand the current and voltage they require. You can typically find this information on the packaging or in the product manual. It is important to select a relay that not only meets but also exceeds these requirements to ensure reliable operation.
Size and Type of LED Lights
The size and type of LED lights play a significant role in determining the appropriate relay for your installation. LED lights come in various shapes and sizes, including strips, bulbs, and panels. Each type may have different power demands and may require a specific relay.
When choosing a relay, consider the physical dimensions of your LED lights and the number of lights that you plan to install. These factors will help determine the capacity and compatibility of the relay. Some relays are specially designed for specific types of LED lights, so it is essential to find one that is suitable for your specific application.
Compatibility with Existing Wiring
In addition to considering the current and voltage requirements and the size and type of LED lights, it is crucial to ensure compatibility with your existing wiring. If you are upgrading from traditional lighting to LED lights, you may need to make adjustments to the wiring setup.
Before installing the relay, carefully examine your current wiring system. Determine if any modifications are necessary to accommodate the relay and LED lights. It is recommended to consult an electrician or refer to the documentation provided by the manufacturer for proper guidance.
In conclusion, when installing a relay for LED lights, consider the current and voltage requirements, the size and type of LED lights, and the compatibility with your existing wiring. By taking these factors into account, you can ensure a smooth and successful installation that enhances the performance and longevity of your LED lights.
Relay Terminology
Before diving into the installation process of a relay for LED lights, it is important to familiarize yourself with some essential relay terminology. Understanding these terms will not only make the installation easier but also enable you to troubleshoot any issues that may arise.
Coil
The coil is the primary component of a relay responsible for generating a magnetic field. It consists of a coil of wire wrapped around a metal core. When an electrical current flows through the coil, it creates a magnetic field that activates the relay. It is crucial to choose a relay with a coil voltage that matches the voltage of the LED lights you intend to install.
Contacts
Contacts are the switch-like components within a relay that control the flow of electricity. They are typically made of high-quality materials to ensure a reliable and long-lasting connection. There are two types of contacts – normally open (NO) and normally closed (NC). The NO contacts remain open when the relay is idle, while the NC contacts are closed.
Switching Voltage
The switching voltage refers to the maximum voltage that a relay can handle before it becomes unstable or fails. It is essential to select a relay with a switching voltage higher than the voltage of your LED lights to prevent any damage.
Rating and Specifications
Relay rating and specifications provide crucial information about the relay’s capabilities and limitations. These include the contact ratings (current and voltage), coil resistance, operating temperature range, and mechanical life. It is essential to carefully read and understand the relay’s rating and specifications to ensure compatibility with your LED lights.
Gather The Necessary Tools And Materials
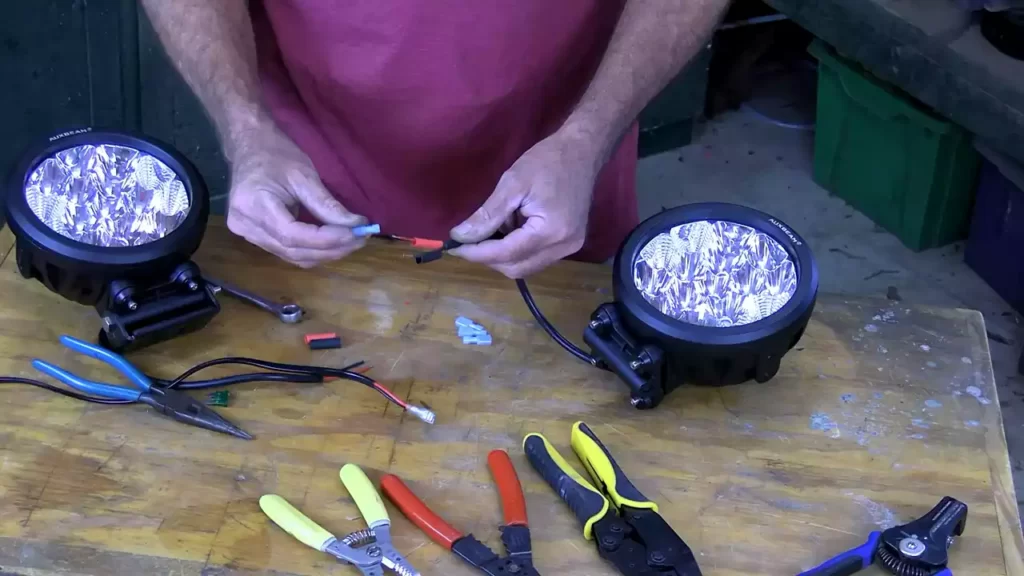
When it comes to installing relay for LED lights, gathering the necessary tools and materials is crucial to ensure a successful and efficient installation process. In this section, we will discuss the essential tools and materials you need to have on hand before starting the installation. With these tools, you’ll be well-prepared to tackle the task at hand.
Relay
The first and most important tool you’ll need is a relay. A relay is an electrical switch that allows low-current signals to control high-current circuits. It acts as a mediator between the LED lights and the power source, ensuring that the lights receive the proper amount of voltage and protection. Make sure to choose a relay that is suitable for your specific LED lights.
Wire Cutters
Wire cutters are indispensable when it comes to installing a relay for LED lights. These tools allow you to cut wires to the desired length, ensuring a clean and precise installation. It’s important to use wire cutters that are designed for electrical work to ensure safety and accuracy. Remember to choose a wire cutter that can handle the gauge of wires you’ll be working with.
Crimping Tool
A crimping tool is another essential tool you’ll need for installing a relay for LED lights. This tool allows you to join wires together by creating a secure and reliable connection. With a crimping tool, you can easily attach connectors to the ends of the wires, ensuring a solid electrical connection. Make sure to choose a crimping tool that is compatible with the size and type of connectors you’ll be using.
Electrical Tape
Electrical tape is a must-have material for any electrical installation, including installing a relay for LED lights. This tape is designed to provide insulation and protection to wires and connections, preventing any potential damage or short-circuits. It’s important to wrap the exposed wires and connections with electrical tape to ensure a safe and long-lasting installation.
By gathering these necessary tools and materials, you’ll be well-prepared to install a relay for LED lights. These tools and materials will enable you to complete the installation process efficiently, ensuring that your LED lights operate properly. Now that you have everything you need, it’s time to move on to the next step: Wiring the Relay.
Disconnect The Power Source
Turn off the Power
Before proceeding with the installation process of a relay for LED lights, it is crucial to disconnect the power source. This step ensures your safety and prevents any electrical mishaps. Turning off the power before you begin will eliminate the risk of electric shock and potential damage to the electrical system.
Identify the Power Source
To disconnect the power source, you need to identify where it is coming from. Locate the main electrical panel or fuse box in your home or building. This is typically found in a garage, basement, or utility room.
Once you’ve identified the main electrical panel, open it to reveal the circuit breakers or fuses. Each circuit breaker or fuse controls power to a specific area or appliance in your home. Look for the one that corresponds to the area where you will be installing the relay for LED lights.
If you are uncertain which circuit breaker or fuse controls the power to the specific area, you can use a voltage tester. Simply test each circuit breaker or fuse until you find the one that is supplying power to the area. Ensure you follow proper safety precautions and procedures when using a voltage tester.
Once you have identified the correct circuit breaker or fuse, turn it off by flipping the switch to the “off” position or removing the fuse. This will cut off power to the area where you will be installing the relay.
Remember, safety should be your top priority when working with electrical systems. Taking the necessary precautions and following these steps will help ensure a successful and safe installation of the relay for LED lights.
Identify The Connections
Before you embark on installing a relay for LED lights, it’s crucial to identify the connections properly. This will ensure a safe and efficient installation process. In this section, we will guide you through the steps of locating the ground wire and finding the positive wire.
Locate the Ground Wire
The ground wire is an essential component of any electrical system, including LED lights. It provides a pathway for the electrical current to return to the source, completing the circuit. To locate the ground wire, follow these steps:
- First, identify the negative terminal on your car battery.
- Next, examine the LED light’s wiring harness and look for the wire that is connected to the negative (-) terminal.
- Once you have identified the ground wire, use a multimeter or a test light to verify its connection. This will ensure that you have correctly identified the ground wire.
Remember, the ground wire is usually black or brown in color, but it’s always a good idea to consult the manufacturer’s instructions to confirm.
Find the Positive Wire
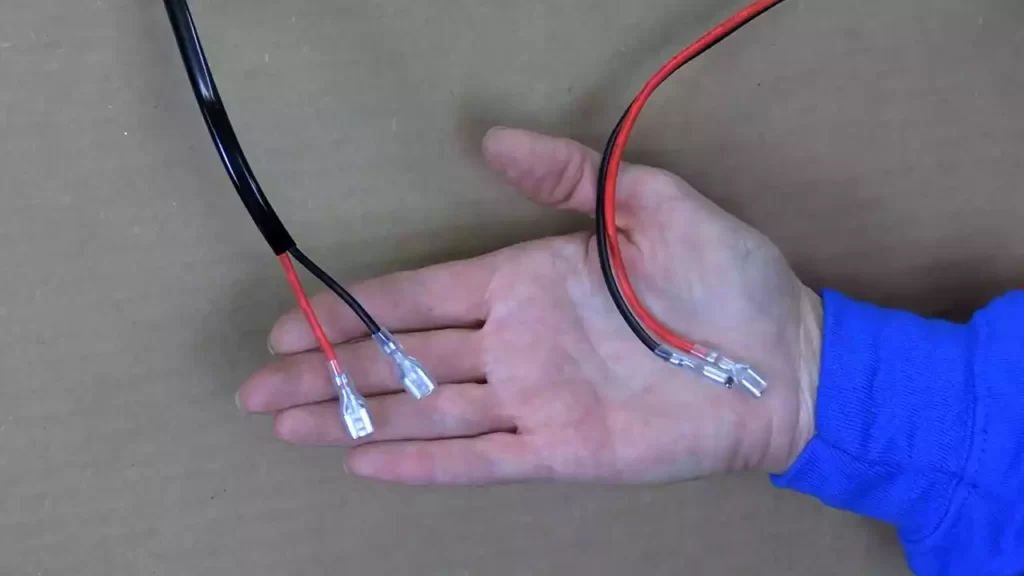
Now that you’ve identified the ground wire, it’s time to find the positive wire. The positive wire carries the electrical current from the power source to the LED lights. Follow these steps to locate the positive wire:
- Check the LED light’s wiring harness for a wire that is connected to the positive (+) terminal.
- If you cannot determine the positive wire based on the color coding, consult the manufacturer’s instructions.
- Once you have located the positive wire, use a multimeter or a test light to confirm its connection.
It’s important to note that the positive wire is usually red, but as mentioned earlier, always refer to the manufacturer’s instructions for accuracy.
By carefully identifying the ground wire and finding the positive wire, you are now ready to install a relay for LED lights. This process ensures a safe and efficient installation, enabling you to enjoy the benefits of LED lighting in your vehicle.
Connect The Relay
Now that you have successfully stripped the positive wire and connected it to the relay, the next step is to attach the ground wire to the relay. This is an important step in ensuring the proper functioning of your LED lights and maintaining a safe electrical connection. Follow the steps below to complete this process:
Strip the Positive Wire
- Locate the positive wire that you want to connect to the relay.
- Strip about half an inch of insulation from the end of the positive wire using wire strippers. This will expose the bare copper wire.
Connect the Positive Wire to the Relay
- Identify the terminal on the relay that is labeled “Positive” or “+”. This terminal is usually marked with the letter “P”.
- Insert the stripped end of the positive wire into the designated terminal on the relay.
- Use a pair of pliers or a small screwdriver to tighten the terminal screw securely, ensuring a proper connection.
Attach the Ground Wire to the Relay
- Locate the ground wire that is connected to your LED lights. This wire is typically black or green and is responsible for creating a safe electrical path.
- Identify the terminal on the relay that is labeled “Ground” or “-“. This terminal is usually marked with the letter “G”.
- Insert the exposed end of the ground wire into the designated terminal on the relay.
- Tighten the terminal screw securely using pliers or a small screwdriver to ensure a solid connection.
By following these steps, you can successfully connect the relay for your LED lights. It is crucial to make sure all connections are secure and that the wires are properly stripped to avoid any potential hazards. Now that the relay is connected, you are one step closer to enjoying the benefits of your LED lights!
Test The Installation
Turn on the Power
After installing the relay for your LED lights, it’s time to test the installation. One of the first steps is to turn on the power.
Locate the power source for your LED lights and flip the switch to the “on” position. This will activate the electrical circuit and power the relay. Pay attention to any indicators or lights on the relay that may illuminate, confirming that the power is indeed flowing through the system.
Check the LED Lights
Once the power is turned on, the next step is to check the LED lights themselves.
Inspect each LED light to ensure that they are receiving power and functioning properly. Look for any signs of flickering or dimming, as this could indicate an issue with the installation. If you notice any abnormalities, double-check the connections and wiring to ensure everything is secure and properly connected.
Take note of the color and brightness of the LED lights. If they meet your expectations, then chances are that the installation was successful. However, if you are dissatisfied with the results, it may be necessary to revisit the installation process or seek professional assistance.
Verify Proper Functionality
The final step in testing the installation is to verify the proper functionality of the relay and the LED lights.
You can accomplish this by testing different lighting modes or adjusting the brightness settings if available. Turn the lights on and off multiple times to ensure that the relay responds appropriately and that there are no delays or malfunctions.
If everything appears to be working smoothly, congratulations! You have successfully installed the relay for your LED lights. However, if you encounter any issues or inconsistencies, it may be necessary to troubleshoot or seek professional assistance to guarantee a safe and efficient lighting system.
Led Lights Not Turning On
If you’ve recently installed LED lights and they’re not turning on, it can be frustrating. But don’t worry, there are a few troubleshooting steps you can take to figure out the issue and get your lights up and running. In this guide, we’ll discuss three common reasons why LED lights may not be turning on: wiring connections, power supply, and the relay itself.
Check the Wiring Connections
In many cases, LED lights not turning on can be attributed to loose or incorrect wiring connections. As you install your LED lights, double-check that all connections are secure and properly fitted. Here’s a step-by-step guide on how to check your wiring connections:
- Ensure that you’ve connected the positive (+) wire from the power source to the positive (+) terminal on the LED light.
- Similarly, connect the negative (-) wire from the power source to the negative (-) terminal on the LED light.
- If you’re using multiple LED lights, make sure to connect them in series or parallel as per the manufacturer’s instructions.
- Inspect the wiring for any signs of damage, such as frayed or exposed wires. If you find any, replace the damaged sections immediately.
- If everything seems to be connected correctly, try removing and reattaching the wires to ensure a secure connection.
Verify Power Supply
In some cases, LED lights not turning on can be due to an insufficient or faulty power supply. It’s essential to ensure that your power supply is compatible with the LED lights you’re using and that it’s providing sufficient voltage. Follow these steps to verify your power supply:
- Check the voltage requirements of your LED lights and compare them to the output of your power supply. Ensure they match.
- If your power supply has multiple outputs, make sure you’re using the correct one for your LED lights.
- If possible, test your power supply with a multimeter to verify that it’s providing the correct voltage.
- If your power supply is not providing enough voltage, consider upgrading to a higher-rated power supply that meets the requirements of your LED lights.
Troubleshoot the Relay
The relay plays a crucial role in controlling the power supply to your LED lights. If the relay is malfunctioning, your LED lights may not turn on. Follow these steps to troubleshoot the relay:
- Double-check the wiring connections between the relay, power supply, and LED lights.
- Inspect the relay for any signs of damage, such as burnt or loose connections. Replace the relay if necessary.
- Test the relay using a multimeter to ensure that it’s functioning correctly.
- If the relay is not working, consider replacing it with a new one that matches the specifications of your LED lights.
By following these troubleshooting steps, you should be able to identify and resolve the issue of LED lights not turning on. Ensure that all your wiring connections are secure, verify your power supply, and troubleshoot the relay if necessary. With a little patience and diligence, you’ll have your LED lights shining brightly in no time!
Fuse Blowing
One common issue that can occur when installing relays for LED lights is fuse blowing. Fuse blowing can happen due to several reasons, including short circuits, incorrect fuse rating, or faulty wiring. In this section, we will discuss each of these factors and how to address them effectively.
Check for Short Circuits
A short circuit is a direct path between the positive and negative terminals of a power source, causing excessive current flow and potentially leading to fuse blowing. To check for short circuits, follow these steps:
- Disconnect the power source and remove the fuse.
- Inspect the wiring for any signs of damage or exposed wires.
- Use a multimeter to test for continuity between the positive and negative terminals.
- If continuity is detected, there is a short circuit that needs to be fixed.
- Locate and repair the damaged wire or component causing the short circuit.
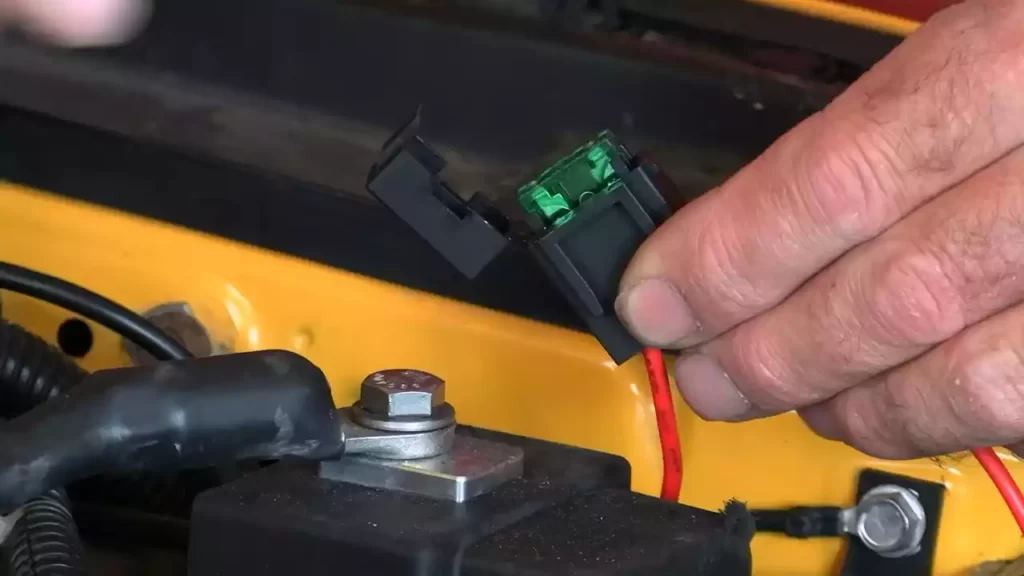
Verify Correct Fuse Rating
Using the correct fuse rating is crucial for preventing fuse blowing. Installing a fuse with a lower rating than required can cause it to blow frequently. To ensure the correct fuse rating, follow these steps:
- Refer to the manufacturer’s specifications to determine the appropriate fuse rating for your specific LED lights.
- Choose a fuse with the same rating as recommended by the manufacturer.
- Inspect the fuse box to verify the correct fuse rating is installed.
- If the current fuse has a lower rating, replace it with a fuse of the correct rating.
Inspect Wiring
Faulty or damaged wiring can cause fuse blowing. Performing a thorough inspection of the wiring is necessary to identify any issues. Here’s how to inspect the wiring:
- Visually examine the wiring for any signs of fraying, overheating, or loose connections.
- Tighten any loose connections using appropriate tools.
- Replace any frayed or damaged wires.
- Ensure all wires are properly routed and insulated to prevent potential shorts.
By checking for short circuits, verifying the correct fuse rating, and inspecting the wiring, you can effectively troubleshoot and avoid fuse blowing when installing relays for LED lights. Taking these precautions will not only save you from frequent fuse replacements but also ensure a safer and more reliable LED lighting setup.
Frequently Asked Questions For How To Install Relay For Led Lights
Does A Led Light Need A Relay?
A LED light does not necessarily need a relay. The use of a relay depends on the specific requirements of the LED light installation.
How Do You Connect Led To Relay?
To connect an LED to a relay, follow these steps: 1. Identify the relay’s coil pins and the LED’s anode and cathode. 2. Connect the LED’s anode to the relay’s common pin using a resistor for protection. 3. Connect the LED’s cathode to the relay’s normally closed pin.
4. Apply power to the relay coil and the LED will illuminate when the relay is activated.
What Kind Of Relay Do I Need For A Led Light Bar?
You need a standard 12V relay for a LED light bar. A relay helps control the high current flow needed by the light bar and prevents damage to the switch. Make sure the relay can handle the current rating of your light bar.
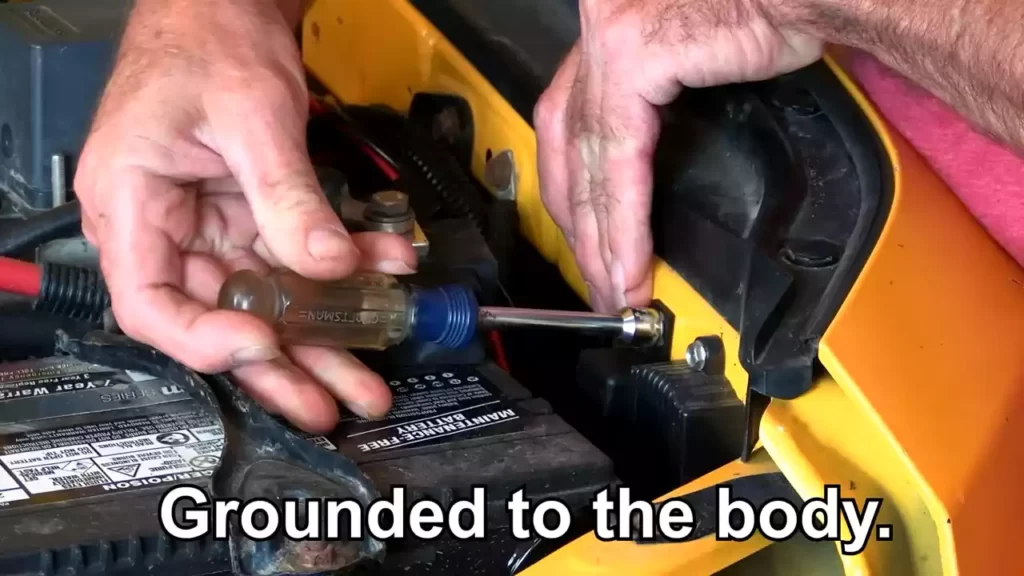
Does A Relay Need To Be Grounded?
Yes, a relay needs to be grounded to ensure proper functioning. Grounding provides a reference point and helps prevent electrical issues such as voltage spikes or shorts. By connecting the relay to a solid ground, it ensures stable operation and avoids potential damage to the relay and other components.
Conclusion
Installing a relay for LED lights is a straightforward process that can greatly enhance your lighting setup. By following the step-by-step instructions outlined in this blog post, you can effortlessly install a relay and ensure the efficient functioning of your LED lights.
Remember to gather all the necessary tools and materials before you begin. With the right guidance and attention to detail, you’ll have your LED lights up and running smoothly in no time. Happy installing!