To install neon lights under your car, first, gather the necessary tools and materials. Then, follow these steps: (rest of the answer) Car enthusiasts often strive to enhance the appearance of their vehicles, and one popular way to achieve this is by installing neon lights underneath the car.
These vibrant lights not only add a unique and eye-catching element to the vehicle but also create a dynamic glow while driving at night. While the installation process may seem daunting, it can be accomplished with the right tools and careful guidance.
In this guide, we will outline the steps required to install neon lights under your car. By following these instructions, you can transform your vehicle into a mesmerizing sight on the road. So, let’s dive into the details of how to achieve this stunning light display beneath your car’s chassis.
Understanding The Basics Of Neon Lights For Cars
Neon lights have become increasingly popular among car enthusiasts who want to add a touch of style and attitude to their vehicles. Installing neon lights under a car can instantly transform its appearance, creating an eye-catching display of vibrant colors. In this section, we will explore the basics of neon lights for cars, including what they are, the benefits of installing them, and the different types available in the market.
What are neon lights for cars?
Neon lights for cars are a type of lighting accessory that can be affixed to the underside of a vehicle. They utilize neon gas, which, when charged with electricity, emits a bright and distinctive glow. This glowing effect, combined with a wide range of color options, allows car owners to personalize their vehicles and make them stand out on the road.
Benefits of installing neon lights under your car
There are several benefits to installing neon lights under your car. Here are some of the most notable advantages:
- Enhanced visibility: Neon lights can improve your visibility on the road, especially during nighttime driving. Their bright and vibrant glow helps other drivers see your vehicle more clearly, reducing the risk of accidents.
- Customizable aesthetics: Neon lights come in various colors, allowing you to customize the appearance of your car. Whether you prefer a subtle glow or a bold, attention-grabbing display, neon lights can help you achieve the desired look.
- Increased personalization: Installing neon lights under your car is an excellent way to showcase your unique style and personality. With a wide range of color options and lighting effects available, you can create a one-of-a-kind visual experience that represents you and your vehicle.
- Easy installation: Contrary to popular belief, installing neon lights under a car is a relatively straightforward process. With a few basic tools and some mechanical knowledge, you can have your neon lights up and running in no time.
Types of neon lights available in the market
When it comes to neon lights for cars, there are several types available in the market. Here are some of the most common options:
| Type | Description |
|---|---|
| Tube lights | These neon lights consist of a long, flexible tube that can be bent to fit the shape of your car’s undercarriage. They are the most popular type of neon lights due to their flexibility and ease of installation. |
| LED strip lights | LED strip lights are a modern alternative to traditional neon lights. They are more energy-efficient and offer a wider range of colors and lighting effects. LED strip lights are often the preferred choice for car enthusiasts seeking a high-tech and dynamic lighting display. |
| Wireless remote-controlled lights | These neon lights can be controlled wirelessly through a remote. They offer convenient options to adjust the color, brightness, and lighting effects of your car’s neon lights with ease, providing a truly customizable experience. |
Now that we have covered the basics of neon lights for cars, it’s time to dive deeper into the installation process. In the next section, we will walk you through step-by-step instructions on how to install neon lights under your car, ensuring a seamless and professional-looking result.
Preparing For Neon Light Installation
Installing neon lights under your car is a fantastic way to add a touch of style and personality to your vehicle. Not only do these lights make your car stand out from the crowd, but they also enhance visibility and safety on the road. However, before you start the installation process, it’s crucial to prepare adequately. This section will guide you through the necessary steps to ensure a smooth and successful installation of neon lights under your car.
Gathering the necessary tools and materials
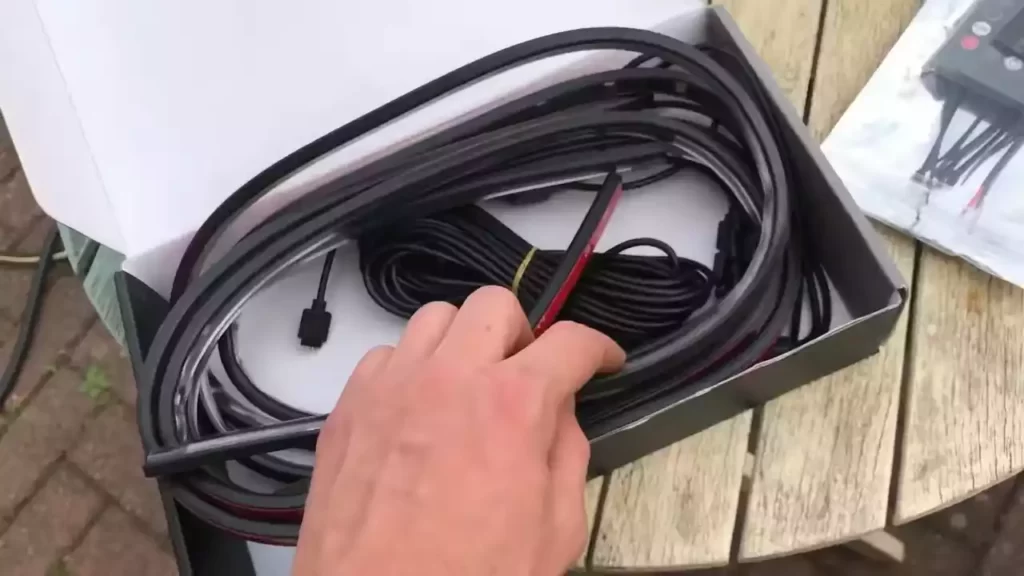
To begin, you will need to gather all the tools and materials required for the installation. Having everything on hand will save you time and prevent any interruptions during the process. Here is a list of items that you will need:
| Tools | Materials |
|---|---|
| Wire cuttersWire strippersElectrical tapeHex key or Allen wrenchDrill with drill bits | Neon light kitMounting bracketsCable tiesFuse holder and fuseZip ties |
Choosing the right location and positioning for the lights
Once you have gathered all the necessary tools and materials, the next step is to determine the ideal location for installing the neon lights. Consider the style and design of your car, as well as any legal restrictions in your area regarding neon light usage. Aim for a position that not only enhances the appearance of your car but also allows for optimal illumination.
When positioning the lights, keep in mind the following points:
- Ensure the lights are installed securely to avoid any damage while driving
- Place them in a location that does not obstruct any essential parts of your vehicle
- Consider the visibility of the lights from different angles
- Avoid locations that may be prone to damage from debris or water
Assessing the electrical system of your car
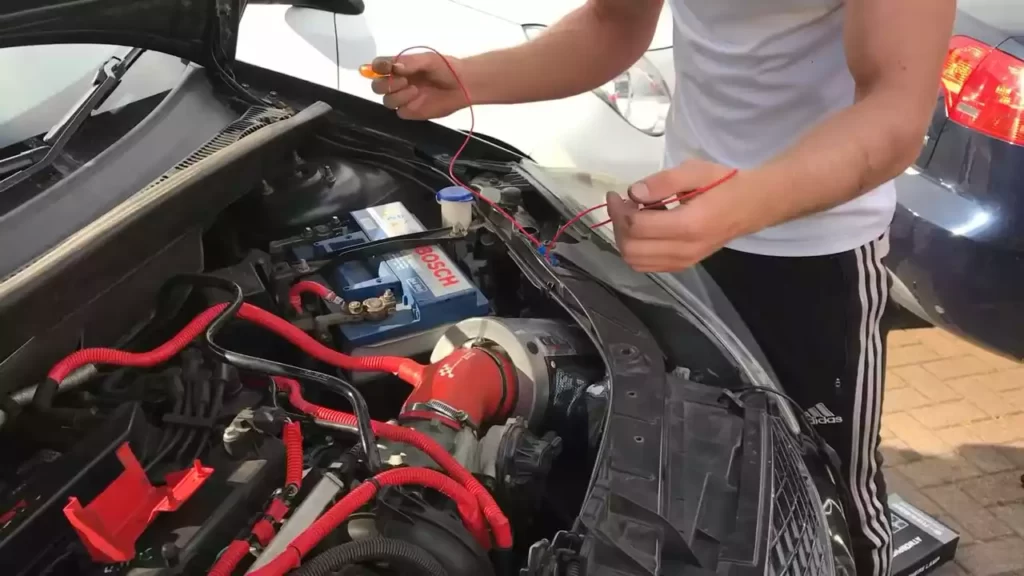
Before proceeding with the installation, it is crucial to assess the electrical system of your car. This step ensures that your car’s electrical components are compatible with the neon light kit and prevents any potential damage to your vehicle. Follow these steps to assess your car’s electrical system:
- Inspect the car’s battery to ensure it is in good condition and has sufficient power
- Check the wiring system and examine if any repairs or replacements are necessary
- Identify a suitable location to connect the neon light kit to the car’s power supply
- Ensure the power supply can handle the additional load of the neon lights
By completing these steps, you will guarantee a safe and efficient installation of neon lights under your car. Now that you have gathered the necessary tools, chosen the right location, and assessed your car’s electrical system, you are ready to move on to the next step: installing the neon lights.
Wiring And Electrical Connections
One of the key steps in installing neon lights under your car is ensuring proper wiring and electrical connections. This is crucial for the lights to function correctly and safely. In this section, we will cover the necessary preparations for the installation process, explain the essential electrical connections, and guide you through the process of connecting the neon lights to your car’s battery.
Preparing the car for the installation process
Before you begin the installation, it’s important to prepare your car to ensure a smooth and trouble-free process. Here are the necessary steps:
- Find a suitable location: Look for an ideal spot under your car where you want to install the neon lights. Ensure that the area is free from any obstructions and that the lights will be well-protected.
- Clean the underside of your car: Thoroughly clean the area where the lights will be mounted. Remove any dirt, debris, or oil residue to ensure a secure installation.
- Locate a power source: Before you start wiring, find a nearby power source that you can connect the neon lights to. In most cases, the car’s battery will serve as the primary power supply.
- Ensure proper grounding: Good grounding is essential for the proper functioning of your neon lights. Locate a suitable grounding point near the installation area and make sure it’s clean and securely attached.
- Take necessary safety precautions: Before you start working with the electrical connections, disconnect the negative terminal of your car’s battery to prevent any accidental electrical shocks.
Understanding the electrical connections required
Proper understanding of the electrical connections required for installing neon lights is crucial to ensure a successful installation. Here are the key aspects:
- Positive and negative wires: Neon lights typically consist of a positive wire (power) and a negative wire (ground). These wires are essential to establish the electrical connection.
- Fuse and relay: It’s highly recommended to incorporate a fuse and relay in the wiring to protect your car’s electrical system. The fuse serves as a safety measure in case of a power surge, while the relay controls the power supply to the neon lights.
- Wire gauges: Choosing the right wire gauge is crucial to ensure proper electrical connections. The gauge should be able to handle the power demand of your neon lights without overheating or causing a voltage drop.
- Waterproof connectors: To protect the electrical connections from moisture and water damage, it’s important to use waterproof connectors. These connectors ensure a secure and reliable connection, even in challenging weather conditions.
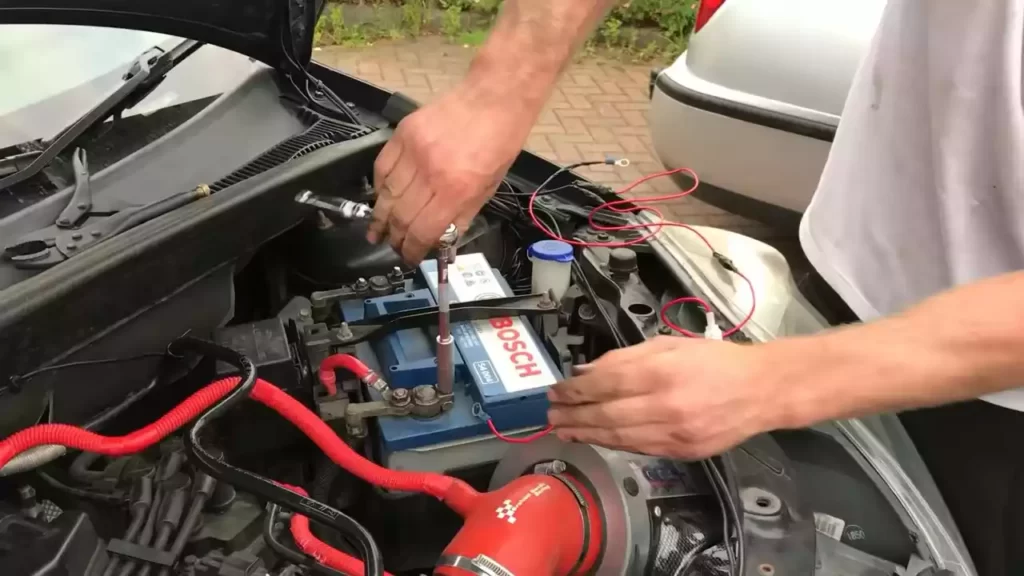
Properly connecting the neon lights to the car’s battery
Now that the necessary preparations and understanding of electrical connections are in place, let’s guide you through the process of connecting the neon lights to your car’s battery. Follow these steps:
- Position the neon lights: Securely mount the neon lights in the chosen location under your car, ensuring they are positioned correctly.
- Run the wires: Route the positive and negative wires towards the car’s battery, being mindful of any obstacles or heat sources that could potentially damage the wires.
- Connect the positive wire: Strip the end of the positive wire and attach it to the positive terminal of your car’s battery. Ensure a secure connection.
- Connect the negative wire: Strip the end of the negative wire and attach it to the grounding point you located earlier. Again, make sure the connection is secure.
- Install a fuse and relay: Incorporate a fuse and relay into the positive wire for added protection. Connect the fuse close to the battery and the relay to ensure proper functionality.
- Test the lights: Once all the connections are properly secured, reconnect the negative terminal of your car’s battery. Turn on the ignition and test the neon lights to ensure they are functioning correctly.
By following these steps and guidelines for wiring and electrical connections, you’ll have successfully installed neon lights under your car. Enjoy the vibrant glow and increased visibility they provide!
Mounting And Securing The Neon Lights
Installing neon lights under your car can instantly enhance its appearance, giving it a bold and futuristic look. However, to ensure the lights stay in place and withstand the rigors of the road, it’s crucial to mount and secure them properly. This not only guarantees durability but also ensures the lights remain stable while driving. In this section, we will explore the various aspects of mounting and securing neon lights under your car.
Choosing the mounting method that suits your car
When it comes to mounting neon lights, there are several options to consider, and the best choice depends on your car’s specific characteristics and personal preferences. Below, we discuss some popular mounting methods:
- Bumper Mounting: One common method is attaching the neon lights to the car’s bumper. This provides a secure and easily accessible location for the lights.
- Frame Mounting: Another option is mounting the neon lights directly to the car’s frame. This method offers increased stability and ensures the lights are well protected.
- Wheel Well Mounting: Mounting the neon lights in the wheel wells can create an eye-catching effect when the wheels are in motion. This method requires careful installation to avoid any interference with the wheels.
Consider the design and structure of your car, as well as the desired lighting effect, when choosing a mounting method. This will help you ensure the lights are securely positioned and align with your aesthetic preferences.
Preparing the car’s undercarriage for mounting
Before mounting the neon lights, it is crucial to prepare the car’s undercarriage to achieve optimal results:
- Clean and Dry: Thoroughly clean the undercarriage, removing any dirt or debris. This will provide a clean surface for the mounting brackets.
- Inspect for Damage: Check for any existing damage or corrosion in the undercarriage. Repair or address these issues before proceeding with the installation.
- Measure and Plan: Determine the placement of the neon lights on the undercarriage. Take accurate measurements and mark the positions to ensure precise installation.
By properly preparing the car’s undercarriage, you create a solid foundation for mounting the neon lights, allowing for a professional and flawless installation.
Securing the neon lights in place to ensure durability and stability
Securing the neon lights is crucial to maintain their longevity and stability. Consider the following steps to ensure the lights remain firmly in place:
- Use Sturdy Mounting Brackets: Select high-quality mounting brackets that complement your chosen mounting method. These brackets will support the lights and ensure they stay securely attached.
- Tighten the Brackets: Carefully fasten the brackets to the undercarriage, ensuring a tight and secure fit. Use appropriate tools to tighten the screws, but be cautious not to overtighten and damage the brackets or the car’s frame.
- Test for Stability: Once the neon lights are mounted, conduct a visual inspection, ensuring they are aligned and secure. Gently shake the lights to verify they don’t wobble or move excessively.
By following these steps, you can guarantee that your neon lights are correctly secured, promoting durability, stability, and ultimately enhancing your car’s aesthetic appeal.
Protecting The Neon Lights From Damage
Installation of neon lights under your car not only enhances its appearance but also adds a cool and stylish touch to your ride. However, it is vital to protect these neon lights from potential damage to ensure their longevity and optimal performance. This section will cover key aspects of safeguarding your neon lights:
Installing protective covers or guards for the lights
One of the best ways to shield your neon lights from damage is by installing protective covers or guards. These accessories act as a physical barrier, preventing debris, dirt, and small stones from hitting the lights directly. To install these protective covers, follow these simple steps:
- Clean the surface of the neon light housing using a gentle cleaning solution to remove any dirt or dust particles.
- Measure the dimensions of the light housing to choose the appropriate size of the protective cover.
- Place the protective cover over the housing and ensure a snug fit.
- Secure the cover in place using adhesive or by following the manufacturer’s instructions.
Remember, the protective covers should not impede the light emission or alter the visual effect of the neon lights. Regularly inspect these covers and replace them if they become cracked or damaged.
Choosing the right material for protection against debris and
potential damage
When selecting protective covers or guards for your neon lights, it is essential to choose the right material. The material should be durable, impact-resistant, and suitable for outdoor use. Some common materials used for neon light protection include:
| Material | Features |
|---|---|
| Polycarbonate | Durable, lightweight, and resistant to shattering |
| Acrylic | Transparent, scratch-resistant, and weather-resistant |
| Aluminum | Strong, resistant to corrosion, and provides added support |
Consider the specific needs of your vehicle and the type of protection required before making a decision. Consulting with a professional or referring to the manufacturer’s recommendations can also help you in selecting the right material for your neon light protection.
Properly sealing the lights to prevent water damage
Water can be detrimental to the functionality and lifespan of neon lights. To protect your lights from water damage:
- Ensure that the lights are properly sealed during installation. Use waterproof sealant or silicone caulk around the edges and seams of the neon light housing.
- Pay close attention to areas where electrical connections are made, as these are vulnerable spots for water penetration. Apply additional sealant or use specialized waterproof connectors.
- Regularly inspect the sealant and reapply as needed, especially after washing your car or driving in heavy rain.
By sealing your neon lights effectively, you can safeguard them from potential water damage and prolong their lifespan.
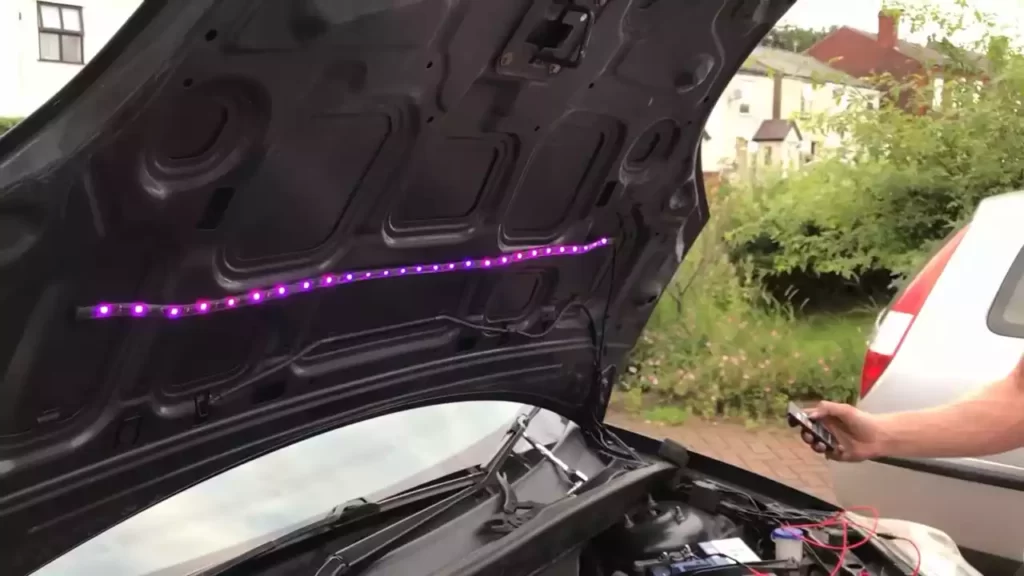
Testing And Adjusting The Neon Lights
After successfully installing neon lights under your car, the next step is to test and adjust the lights to ensure they are functioning properly and meet your desired brightness, color, and alignment preferences. Proper testing and adjusting of neon lights can make a significant difference in the overall appearance and impact of your car’s lighting display.
Checking the functionality of the lights before finalizing installation
Before finalizing the installation of neon lights under your car, it is crucial to check their functionality to avoid any potential issues later on. To do this, follow these steps:
- Inspect the power connection: Ensure that the power cables are securely connected to the power source and that there are no loose connections. This will help prevent any intermittent power supply or flickering issues.
- Test each individual light: Turn on each neon light individually to check if they all illuminate properly. This will help you identify any faulty lights that may need to be replaced or repaired.
- Check the control unit: If your neon lights have a control unit, test each of its functions to ensure they are working correctly. This includes testing the different lighting modes, color options, and brightness settings.
Adjusting the brightness and color settings to your preference
Once you have confirmed that all the neon lights are functioning properly, the next step is to adjust their brightness and color settings according to your preference. This will help you achieve the desired lighting effect for your car. Follow these steps to make adjustments:
- Refer to the user manual: Consult the user manual that came with your neon lights to understand how to adjust the brightness and color settings.
- Access the control unit: If your neon lights have a control unit, access it and navigate through the menu options to find the brightness and color settings.
- Make gradual adjustments: Start by making small adjustments to the brightness and color settings and observe the results. Continue making gradual adjustments until you achieve the desired lighting effect.
Ensuring that the lights are properly aligned for an optimal lighting effect
In addition to testing and adjusting the functionality, it is equally important to ensure that the neon lights are properly aligned for an optimal lighting effect. Here are some steps to help you align the lights:
- Choose the positioning: Decide where exactly under your car you want the neon lights to be installed. It could be along the sides, front, or rear.
- Measure and mark: Use a measuring tape to mark the desired positions for the neon lights. This will help ensure that the lights are evenly spaced and aligned.
- Secure the lights: Use the provided brackets or adhesive tape to securely attach the neon lights to the marked positions. Make any necessary adjustments to align them properly.
By following these steps to test, adjust, and align your neon lights, you can enhance the overall visual impact of your car and create a captivating lighting display that will turn heads wherever you go.
Maintaining And Troubleshooting Neon Lights
Maintaining and troubleshooting neon lights is essential to ensure their longevity and optimal performance. Regular cleaning and maintenance can help prolong the life of the lights, while troubleshooting common issues can prevent any potential problems from escalating. Seeking professional help, if needed, can provide expert assistance in addressing more complex issues. In this section, we will delve into the importance of regular cleaning and maintenance, explore the common problems you may encounter with neon lights, and discuss when it might be necessary to seek professional help.
Regular Cleaning and Maintenance to Prolong the Life of the
Lights
To keep your neon lights glowing brightly for years to come, it’s crucial to establish a routine for regular cleaning and maintenance. The accumulation of dirt, dust, and other debris can dim the lights and impact their overall performance. Follow these simple steps to ensure your neon lights stay vibrant:
- Dust off the lights: Use a soft cloth or a feather duster to gently remove the dust accumulated on the surface of the neon lights. Avoid using harsh cleaning agents or abrasive materials that may damage the lights.
- Clean with a mild detergent: Prepare a solution of mild detergent and warm water. Dampen a soft cloth with this solution and gently wipe the lights. This will help remove any stubborn stains or residue that may have accumulated over time.
- Inspect the wiring: Periodically check the wiring connections to ensure they’re secure and free from any signs of damage. Loose or damaged wires can affect the performance of the neon lights.
- Avoid exposure to harsh elements: If your car is frequently subjected to extreme weather conditions or harsh environments, consider adding an extra layer of protection to shield the neon lights from potential damage.
Troubleshooting Common Issues with Neon Lights
While neon lights are known for their durability, they can still encounter some common issues. Being aware of these problems can help you troubleshoot and resolve them effectively:
- Flickering lights: If you notice your neon lights flickering, it could indicate a loose connection or a faulty power supply. Check the wiring connections and ensure they’re firmly secured. If the problem persists, consider replacing the power supply.
- Dim or uneven illumination: Dim or uneven lighting can be a sign of a dying neon tube. In this case, it’s best to replace the entire tube to restore the brightness and uniformity of the lights.
- Unresponsive lights: If your neon lights fail to turn on, check the power source first to ensure it’s functioning properly. If the power source is fine, inspect the wiring and connections, as a loose or damaged wire could be causing the issue.
- Physical damage: Accidental bumps or impacts can cause physical damage to the neon lights. Inspect the lights regularly for any cracks or breakages. If you notice any damage, it’s advisable to replace the affected tube or seek professional assistance.
Seeking Professional Help if Needed
No matter how meticulous you are with maintenance and troubleshooting, some neon light issues may require professional expertise. Certified technicians possess the knowledge and experience to handle complex problems that are beyond the scope of DIY repairs. Don’t hesitate to consult a professional if:
- You’re unsure about the cause of the problem or lack the necessary tools for proper diagnosis.
- The issue persists despite your attempts at troubleshooting.
- Physical damage to the neon lights is extensive and beyond your capabilities to repair.
- You want to ensure the safety and optimal performance of your neon lights by entrusting the job to professionals.
By following a regular cleaning and maintenance routine, troubleshooting common issues, and seeking professional help when needed, you can prolong the life of your neon lights and enjoy their vibrant glow for years to come.
Safety Precautions And Legal Considerations
When it comes to installing neon lights under your car, it’s important to prioritize safety and ensure that you comply with all legal requirements. Understanding safety guidelines, adhering to local traffic laws, and following proper installation procedures are crucial steps in minimizing risks and preventing accidents.
Understanding safety guidelines for installing neon lights on your car
Prior to embarking on the installation process, it is essential to familiarize yourself with the safety guidelines specific to installing neon lights on your car. These guidelines are designed to protect both you and other road users. Here are some important safety considerations:
- Make sure to only use neon lights specifically designed for automotive use, as they are built to withstand the vibrations and temperature fluctuations that occur while driving.
- Ensure that the neon lights you choose are water-resistant and capable of withstanding exposure to various weather conditions.
- Before starting the installation process, disconnect the car battery to avoid any electrical mishaps or short circuits.
- Wear appropriate safety gear, such as protective eyewear and gloves, to protect yourself during the installation process.
- Follow the manufacturer’s instructions carefully to avoid any potential hazards or damage to your vehicle.
- Regularly inspect the neon lights for any signs of wear and tear, and replace them as necessary to maintain optimal performance and safety.
Ensuring compliance with local traffic laws and regulations
Installing neon lights on your car may be an exciting modification, but it’s essential to ensure compliance with local traffic laws and regulations. Failure to adhere to these laws can result in fines or even legal consequences. Here’s what you need to consider:
- Research the specific laws and regulations in your area regarding the use of neon lights on vehicles.
- Check if there are any restrictions on color, brightness, or positioning of neon lights.
- Verify whether you need to obtain any permits or certifications before installing neon lights.
- Ensure that the lights are not obstructing your visibility or distracting to other drivers on the road.
- Remember to use neon lights responsibly and avoid any behavior that may be considered reckless or illegal.
Adhering to proper installation procedures to minimize risks and prevent accidents
Proper installation procedures are crucial in minimizing risks and preventing accidents related to neon lights under your car. Follow these steps to ensure a safe installation:
- Read the installation instructions provided by the manufacturer carefully before starting the installation process.
- Make sure you have all the necessary tools and equipment on hand.
- Clean and prepare the surface where you intend to install the neon lights to ensure proper adhesion.
- Securely mount the neon lights, following the recommended installation method provided by the manufacturer.
- Properly route and secure the wiring to prevent any potential hazards or damage.
- After installation, test the lights to ensure they are working correctly and troubleshoot any issues if necessary.
By understanding safety guidelines, complying with local traffic laws, and adhering to proper installation procedures, you can enjoy the aesthetic appeal of neon lights under your car while ensuring the safety of yourself and others on the road.
Frequently Asked Questions For How To Install Neon Lights Under Car
Do Underglow Lights Drain Your Battery?
Underglow lights can drain your car’s battery if they are left on for an extended period. It is recommended to use them sparingly and avoid leaving them on while the engine is off.
How Do I Add Underglow To My Car?
To add underglow to your car, follow these simple steps: 1. Decide on the color and type of underglow lights you want. 2. Check local laws and regulations to ensure underglow is legal in your area. 3. Purchase a reliable underglow kit from a reputable supplier.
4. Plan the placement of the lights, considering visibility and wiring. 5. Install the lights securely, following the instructions provided. Enjoy your new underglow! Remember, always prioritize safety and follow instructions carefully.
How Do You Hook Up Neon Lights To A Car?
To hook up neon lights to a car, follow these steps: 1. Locate the car’s battery and disconnect the negative terminal. 2. Choose the appropriate mounting location for the lights. 3. Connect the positive wire to the car’s battery positive terminal.
4. Attach the negative wire to a metal ground surface. 5. Test the lights to ensure they’re working properly.
How Do You Stick Led Lights Under A Car?
To stick LED lights under a car, follow these steps: 1. Clean the surface thoroughly. 2. Measure and plan the placement of the lights. 3. Use adhesive tape or mounting brackets to secure the lights underneath. 4. Connect the wiring to the car’s electrical system.
5. Test the lights to ensure they are working properly.
Conclusion
Installing neon lights under your car can be a fun and eye-catching way to enhance its appearance. By following these easy steps, you can successfully install neon lights without any hassle. Remember to gather all the necessary tools, prepare your car properly, and follow the manufacturer’s instructions for a safe and efficient installation.
Don’t forget to enjoy the stunning glow of your neon lights as you hit the streets, turning heads wherever you go. Upgrade your car’s style today!