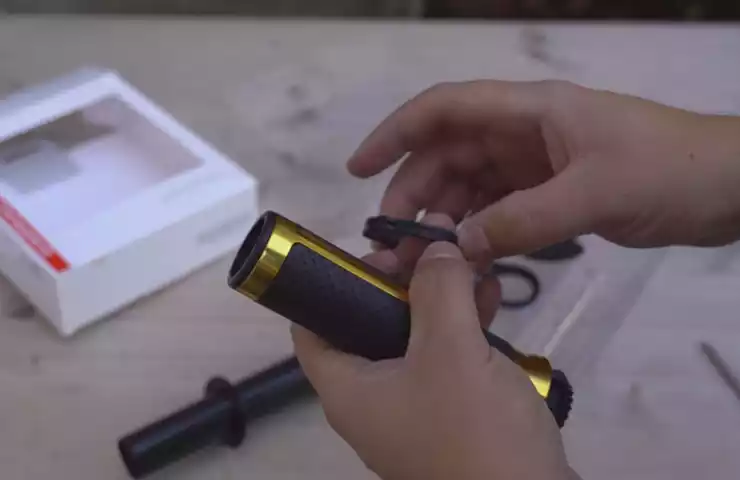
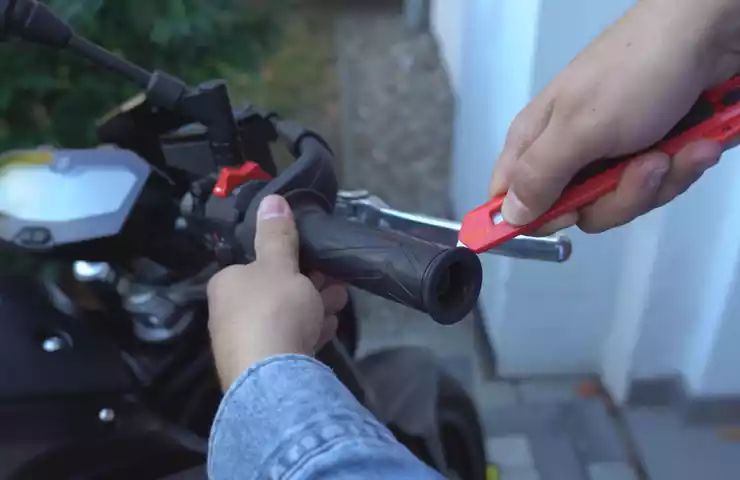
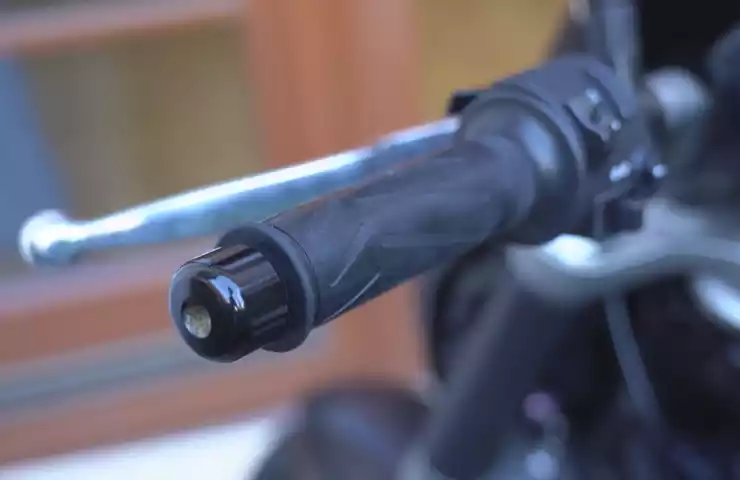
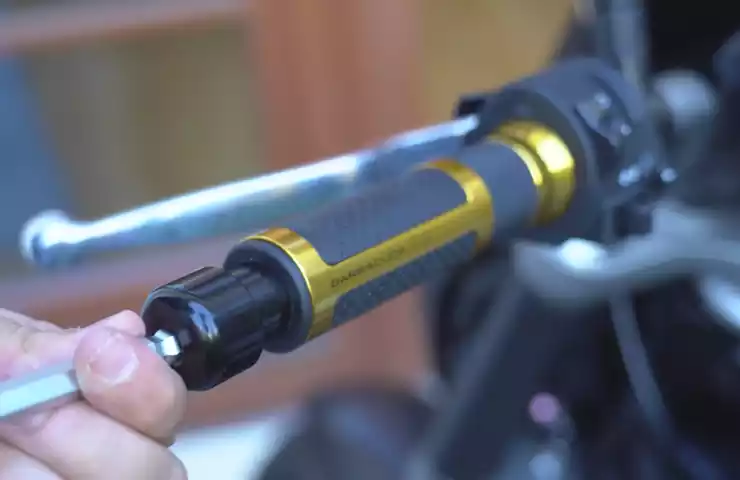
To install motorcycle grips, first remove the old grips and clean the handlebars thoroughly. Then apply grip glue to the handlebars and slide the new grips onto the bars, ensuring they are aligned with the throttle.
Installing motorcycle grips involves a few simple steps that can be completed with basic tools and a bit of patience. This article will guide you through the process of installing new motorcycle grips, providing you with step-by-step instructions to ensure a secure and comfortable grip on your handlebars.
By following these instructions, you can easily replace old worn-out grips or customize your bike with a personalized touch. So, let’s dive into the process and get your motorcycle looking and feeling its best with new grips.
Preparing For Installation
Before you start the installation process, it is important to prepare yourself and gather all the necessary tools and materials. By taking the time to choose the right grips and ensuring you have everything you need, you can make the installation process much smoother.
Choosing the Right Grips
When it comes to motorcycle grips, there are a wide variety of options to choose from. Grips come in different materials, sizes, and designs, so it’s important to select the one that suits your riding style and personal preference.
To choose the right grips, consider factors such as:
- Material: Grips are commonly made of rubber, foam, or even gel. Each material has its own pros and cons, so choose the one that offers the best comfort and durability for you.
- Design: Grips come in different patterns and textures. Look for a design that ensures a secure grip and minimizes hand fatigue during long rides.
- Size: Grips are available in various sizes to accommodate different hand sizes. It’s crucial to choose a size that fits your hand comfortably, allowing you to maintain proper control of the motorcycle.
Gathering the Necessary Tools
Once you have chosen the right grips, gather all the tools and materials you will need for the installation process. Having everything you need within reach will save you time and prevent frustration while you’re in the middle of the installation.
The tools you will need include:
| Tool | Description |
| Flathead screwdriver | For removing the existing grips |
| Air compressor or soapy water | To help with installing the new grips |
| Grip adhesive | To secure the new grips in place |
| Scissors or a utility knife | To trim the excess grip material, if necessary |
| Electrical tape | To provide additional grip and prevent the grips from rotating |
Having these tools ready before you start the installation will ensure a seamless process without any unnecessary interruptions.
Now that you have chosen the right grips and gathered all the necessary tools, it’s time to move on to the installation process itself. In the next section, we will guide you through the step-by-step instructions to help you install your new motorcycle grips.

Removing The Old Grips
Before you can install new motorcycle grips, you need to remove the old ones. This step is essential to ensure a secure and comfortable grip on your handlebars. In this section, we will guide you through the process of removing the old grips using a few simple steps.
Inspecting the Current Grips
The first step in removing the old motorcycle grips is to inspect their condition. Look for any signs of wear and tear, cracks, or damage that may require immediate replacement. Inspecting the grips before removal will help you determine if there are any underlying issues that need to be addressed.
Loosening the Grip from the Handlebar
Once you have assessed the condition of the old grips, you can proceed to loosen them from the handlebar. To do this, start by spraying a generous amount of grip adhesive remover or rubbing alcohol under the grip. This will help break down the adhesive and make it easier to remove the grip.
Next, wiggle the grip back and forth while pulling it away from the handlebar. You may need to apply some force to fully loosen the grip. Be careful not to use excessive force as this may damage the handlebar or the grip itself.
Removing the Grip
After loosening the grip, you can now remove it from the handlebar. This can be done by continuing to pull the grip away from the handlebar until it is completely detached. If the grip is stubborn and difficult to remove, you can use a small flathead screwdriver to carefully slide it off.
It’s important to note that some motorcycle grips may have an end cap or bar end weight that needs to be removed before the grip can be fully detached. Check your specific motorcycle model and grip design to ensure you remove any additional components before completely removing the grip.
Once the grip is removed, take the time to clean the handlebar thoroughly. Use a clean cloth or paper towel to wipe away any residue left behind by the old grip adhesive remover or rubbing alcohol.
With the old grips successfully removed and the handlebar clean, you are now ready to proceed to the next step: installing the new motorcycle grips. Stay tuned for the next section, where we will guide you through the installation process to give your motorcycle a fresh and comfortable grip!

Installing The New Grips
Now that you have prepared the handlebar and applied grip glue, it’s time to install the new motorcycle grips. Follow these steps to ensure a proper installation:
Preparing the Handlebar
Before installing the new grips, make sure that the handlebar is clean and free of any debris. Use a soft cloth to wipe away any dirt or residue that may affect the grip’s adhesion. This step is crucial for ensuring a secure and long-lasting grip installation.
Applying Grip Glue
Next, apply grip glue to the inner side of the new grips. Grip glue is specially formulated to create a strong bond between the grip and the handlebar, minimizing any chance of slippage or movement during rides. Squeeze a small amount of glue onto the inside of the grip, spreading it evenly.
It’s essential to work quickly and efficiently during this step, as grip glue dries fast. Make sure that you have the grip properly aligned before applying the glue, as repositioning once the glue is applied can be challenging.

Sliding on the Grips
Once the glue is applied, it’s time to slide the grip onto the handlebar. Start by positioning the grip at the end of the handlebar and slowly push it towards the center. Apply gentle pressure to ensure a snug fit. If necessary, you can twist the grip lightly to help it slide on smoothly.
Make sure the grip is aligned with the handlebar, ensuring a comfortable and ergonomic position. Take note of any ridges or patterns on the grip that are meant to enhance grip and ensure they are correctly positioned for your hands.
Adjusting the Grip Position
After sliding the grip onto the handlebar, you may need to make some adjustments to ensure the most comfortable riding position. Experiment with different grip positions until you find the one that feels natural and allows for easy access to the controls. Remember to consider factors such as hand size, riding style, and comfort.
Once you are satisfied with the grip position, give it a few minutes to allow the glue to set and create a strong bond. Avoid riding the motorcycle immediately after installation to give the glue sufficient time to cure.
Installing new motorcycle grips may seem intimidating at first, but by following these steps, you can ensure a successful and secure grip installation. Properly installed grips enhance comfort, control, and safety during rides, making them an essential aspect of motorcycle maintenance.

Finalizing The Installation
Allowing the Glue to Dry
Once you have installed your new motorcycle grips and applied the adhesive, it is crucial to allow the glue to dry completely before using your bike. This process usually takes around 24 to 48 hours, but it’s essential to consult the manufacturer’s instructions for the specific drying time.
During this waiting period, it’s advisable not to touch or manipulate the grips in any way to ensure a secure and long-lasting installation. Keep the motorcycle in a well-ventilated area with moderate temperature to facilitate faster drying.
Testing the Grips
After the glue has dried, it’s time to test the grips to ensure they have been installed correctly and provide the desired comfort and functionality. Follow these steps to properly test your motorcycle grips:
- Check for Stability: Gently tug on the grips to make sure they are securely attached to the handlebars. If there is any movement or looseness, it may indicate an insufficient installation.
- Examine Comfort: Sit on your motorcycle and grasp the handles firmly, assessing how comfortable they feel in your hands. The grips should provide a firm and ergonomic grip, helping to reduce fatigue during long rides.
- Assess Vibration Dampening: While riding at varying speeds, pay attention to the level of vibration transmitted to your hands. High-quality grips should effectively dampen vibrations, providing a smoother and more enjoyable riding experience.
- Evaluate Control: Test your control over the throttle and brake levers. The grips should allow for quick and precise adjustments, ensuring optimal control over your motorcycle.
If you encounter any issues during the testing phase or feel that the grips are not meeting your expectations, you may need to reevaluate the installation or consider replacing them.

Finishing Touches
Once you have confirmed that the grips are secure and functioning correctly, it’s time to add some finishing touches to enhance their appearance and longevity:
- Clean the Grips: Use a mild cleaner and a soft cloth to remove any excess adhesive, dirt, or debris from the grips.
- Apply Grip Glue Remover: If there are any stubborn adhesive residues on the grips or handlebars, apply a grip glue remover according to the manufacturer’s instructions and wipe clean.
- Inspect Regularly: Periodically inspect your grips to ensure they remain in good condition. Look for signs of wear, such as cracks or loose ends, and replace them if necessary.
- Consider Grip Covers: To provide an additional layer of protection and personalized style, you may choose to install grip covers. These accessories can help to minimize wear and tear while adding a unique touch to your motorcycle’s handlebars.
By following these final steps, you can complete the installation process of your motorcycle grips with confidence and enjoy a comfortable and reliable riding experience.
Frequently Asked Questions For How To Install Motorcycle Grips
How Do You Install Motorcycle Grips Easily?
Installing motorcycle grips is easy. First, remove the old grips by spraying some lubricant and twisting them off. Then, clean the handlebars thoroughly. Apply grip glue to the inside of the new grips and slide them onto the handlebars. Finally, let them dry for a few hours before riding.
Do You Need Grip Glue For Motorcycle Grips?
Yes, grip glue is essential for motorcycle grips to ensure a secure and durable hold. It prevents the grips from slipping or rotating during rides, enhancing safety and control. Make sure to use a reliable grip glue specifically designed for motorcycles for best results.
How Do You Secure Motorcycle Grips?
To secure motorcycle grips, clean the handlebars thoroughly, apply grip glue evenly on the handlebars, and slide the grips into place. Allow the glue to set for at least 24 hours before riding. Repeat the process for the other grip.
How Do You Install Handlebar Grips Easily?
To easily install handlebar grips, start by removing the old grips. Apply a small amount of rubbing alcohol or spray cleaner inside the new grips and onto the handlebars. Quickly slide the new grips onto the handlebars, making sure they are aligned.
Secure the grips by tightening the end caps.
Conclusion
To ensure a successful motorcycle grip installation, follow these step-by-step instructions. First, gather all the necessary tools and materials. Next, remove the existing grips and clean the handlebars thoroughly. Then, apply grip adhesive and slide the new grips into place.
Finally, allow the adhesive to dry before taking your motorcycle for a test ride. By following these easy steps, you can enjoy a comfortable and secure grip for your motorcycle. Happy riding!
