To install Crank Brothers cleats, position the cleat on the shoe and secure it with the provided hardware. Next, adjust the position as desired and tighten the bolts to ensure a secure fit.
Introducing the Crank Brothers cleats to your cycling shoes can greatly improve your performance and riding experience. These cleats are designed to enhance the connection between your shoes and the pedals, providing maximum power transfer and stability. If you’re wondering how to install Crank Brothers cleats, this article will guide you through the simple process.
Whether you’re a beginner or a seasoned cyclist, installing these cleats can be done in a few easy steps. By the end of this guide, you’ll have your cleats securely fitted to your cycling shoes, ready to hit the road or trail with confidence. So, let’s get started!
Factors To Consider When Choosing Crank Brothers Cleats
In this section, we will discuss the important factors to consider when choosing Crank Brothers cleats. These factors will help you make an informed decision and ensure that the cleats you choose are compatible with your cycling shoes and provide the desired performance and adjustability options.
Compatibility with Cycling Shoe Brands
One of the primary factors to consider when choosing Crank Brothers cleats is their compatibility with your cycling shoe brand. It is essential to ensure that the cleats are designed to fit your specific brand of cycling shoes. Different cycling shoe brands may have slight variations in their cleat mounting systems, so it’s crucial to check if Crank Brothers cleats are compatible with your shoes before making a purchase.
Cleat Float and Performance
Another crucial factor to consider is the cleat float and its impact on performance. Cleat float refers to the degree of angular rotation that the cleat allows before it disengages from the pedal. Cleats with higher float values allow more freedom of movement, which can be beneficial for riders with knee issues or those who prefer a natural foot motion. On the other hand, cleats with lower float values provide a more locked-in feel and are often favored by riders who prioritize power transfer and efficiency.
When choosing Crank Brothers cleats, it’s essential to consider your riding style and personal preferences regarding float. Crank Brothers offers cleats with different float options to cater to a variety of rider needs. Be sure to choose the float option that aligns with your riding style and provides the desired level of comfort and performance.
Adjustability Options
Lastly, the adjustability options of the Crank Brothers cleats are worth considering. The ability to make precise adjustments to the position and angle of the cleats can significantly impact your riding comfort and power transfer. Crank Brothers cleats are designed with adjustable positioning to ensure optimal rider alignment and efficiency.
When installing Crank Brothers cleats, take advantage of their adjustability features to fine-tune the cleat position. Experiment with different angles and positions to find the setup that offers maximum comfort and power transfer for your specific needs.
In conclusion, when choosing Crank Brothers cleats, consider their compatibility with your cycling shoe brand, the cleat float and its impact on performance, as well as the available adjustability options. By taking these factors into account, you can select the ideal Crank Brothers cleats that will enhance your cycling experience and provide the desired level of comfort and performance.
Cleaning And Maintaining Cycling Shoes
Cleaning and maintaining your cycling shoes is essential to ensure optimal performance and longevity. Regularly removing dirt and debris, checking for any damage, and applying lubrication as necessary will not only extend the life of your shoes but also enhance your cycling experience. In this section, we will guide you through the process of cleaning and maintaining your cycling shoes step by step.
Removing Dirt and Debris

The first step in cleaning your cycling shoes is to remove any dirt and debris that may have accumulated on them during your rides. This is crucial as dirt and debris can interfere with the smooth functioning of your cleats. Here’s how you can effectively clean them:
- Gently tap your shoes together to loosen any loose dirt or debris.
- Use a soft brush or an old toothbrush to scrub away the remaining dirt and debris from the surface of your shoes.
- If there are any stubborn stains or dirt, you can dampen a cloth with mild soapy water and gently wipe them away. Avoid using harsh chemicals or abrasive cleaners as they may damage your shoes.
- Once you have removed all the dirt, let your shoes air dry completely before moving on to the next step.
Checking for Damage
After cleaning your cycling shoes, it’s important to inspect them for any signs of damage. Regular maintenance and early detection of issues can prevent further damage and save you from costly repairs or replacement. Here’s what you need to look out for:
- Inspect the upper part of your shoes for any tears, loose stitching, or excessive wear.
- Check the sole of your shoes for any cracks, delamination, or signs of wear that may affect their performance or stability.
- Ensure that the fastening mechanisms, such as buckles or Velcro straps, are in good working condition and securely attached.
- If you notice any damage or wear, consult a professional or consider replacing the affected parts or the shoes altogether.
Applying Lubrication if Necessary
Lubrication is crucial for maintaining the smooth functioning of your cleats and ensuring a secure connection with your pedals. Here’s how you can apply lubrication to your cycling shoes:
- Remove the cleats from the shoes if necessary. Follow the manufacturer’s instructions for proper removal.
- Clean the cleats thoroughly using a soft brush or cloth to remove any dirt or debris.
- Apply a small amount of lubricant to the contact points of the cleats. Be sure to use a lubricant specifically designed for cycling applications.
- Reinstall the cleats onto your shoes according to the manufacturer’s instructions, ensuring they are securely fastened.
By regularly cleaning and maintaining your cycling shoes, you can ensure optimal performance, prolong their lifespan, and enjoy your rides to the fullest.
Positioning The Cleat On The Cycling Shoe
Properly positioning the cleat on the cycling shoe is crucial for ensuring optimal efficiency and comfort during your rides. The correct positioning not only helps to maximize power transfer, but also minimizes the risk of injury and discomfort. In this article, we will discuss how to identify the ideal position for efficiency and comfort, how to mark the position on the shoe, and why considering the rider’s individual biomechanics is important.
Identifying the Ideal Position for Efficiency and Comfort
When it comes to positioning the cleat on your cycling shoe, it’s important to consider both efficiency and comfort. The ideal position will vary depending on your individual preferences and riding style. However, there are a few general guidelines that can help you find the best starting point.
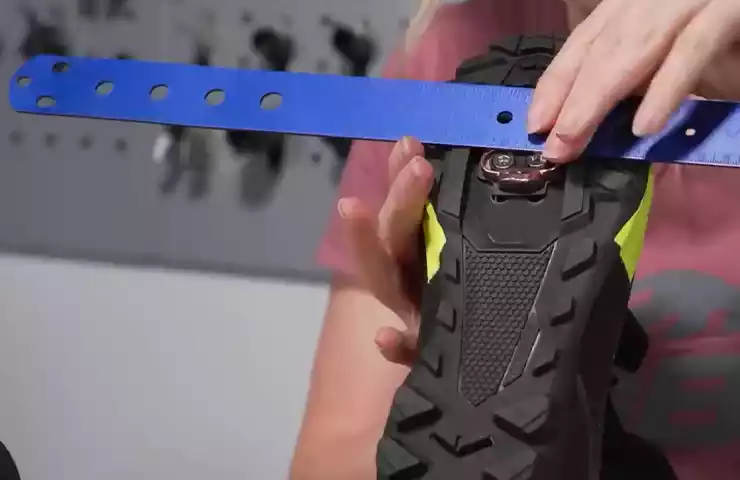
1. Aligning the Cleat with the Ball of the Foot: Start by aligning the center of the cleat with the ball of your foot. This allows for a more balanced and natural foot position, promoting efficient pedaling.
2. Adjusting Fore-Aft Position: Next, consider adjusting the fore-aft position of the cleat. This refers to the position of the cleat along the length of the shoe. A good starting point is to position the cleat so that the ball of your foot is directly over the pedal axle when the crank arm is parallel to the ground.
3. Fine-Tuning Cleat Angle: The angle of the cleat also plays a role in comfort and efficiency. While there isn’t a one-size-fits-all solution, a common recommendation is to position the cleat with a slight toe-in angle (around 2-5 degrees). This helps to align the natural angle of your foot with the angle of the pedal stroke.
Marking the Position on the Shoe
Once you have identified the ideal position for your cleats, it’s important to mark it on the shoe for future reference. Here are some steps to guide you:
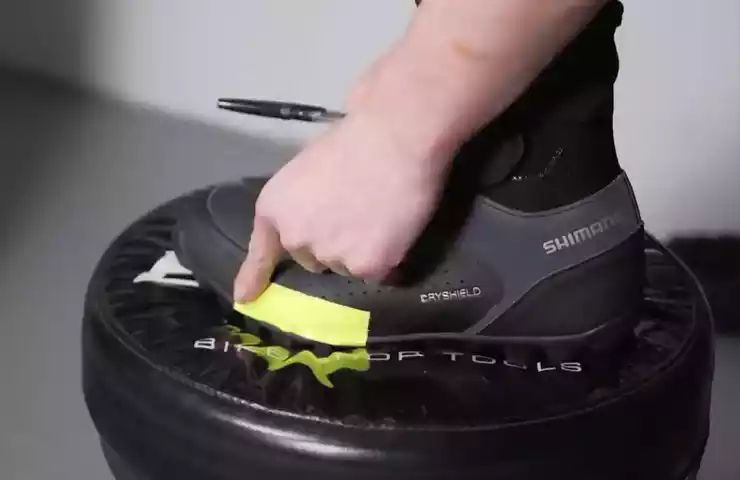
- Clean the sole of the shoe to ensure an accurate and long-lasting mark.
- Place the shoe on a stable surface and position the cleat according to the identified ideal position.
- Use a permanent marker or a pen to make small marks around the cleat holes.
- If desired, you can also mark the center of the cleat for easier alignment in the future.
- Allow the marks to dry before reattaching the cleat to prevent smudging.
Considering the Rider’s Individual Biomechanics

When positioning the cleat on the cycling shoe, it’s essential to consider the rider’s individual biomechanics. Every rider is unique, and factors such as foot structure, leg length discrepancy, and any existing joint issues can affect how the cleat should be positioned.
Consulting with an Expert: If you are unsure about the ideal position for your cleats, it can be beneficial to consult with a bike fit professional or a knowledgeable bike shop staff member. They can assess your individual biomechanics and provide personalized recommendations for cleat positioning.
By following these guidelines and considering the rider’s individual biomechanics, you can position your cleats on your cycling shoes in a way that maximizes efficiency and comfort, allowing you to get the most out of your rides.
Attaching The Cleat To The Shoe
Properly attaching the cleat to your shoe is an essential step for optimizing your cycling experience. The cleat acts as a crucial interface between your shoe and the pedal, enabling efficient power transfer and control. In this section, we will guide you through the process of attaching the crank brothers cleat to your shoe using a step-by-step approach.
Aligning the Cleat with the Marked Position
To ensure optimal performance and comfort, it is important to align the cleat with the marked position on your shoe. The marked position is typically denoted by a set of lines or indicators on the sole of your cycling shoe.
To align the cleat properly, follow these steps:
- Start by placing your shoe on a stable surface, with the sole facing upwards.
- Locate the marked position on your shoe. This is usually represented by a set of lines or indicators.
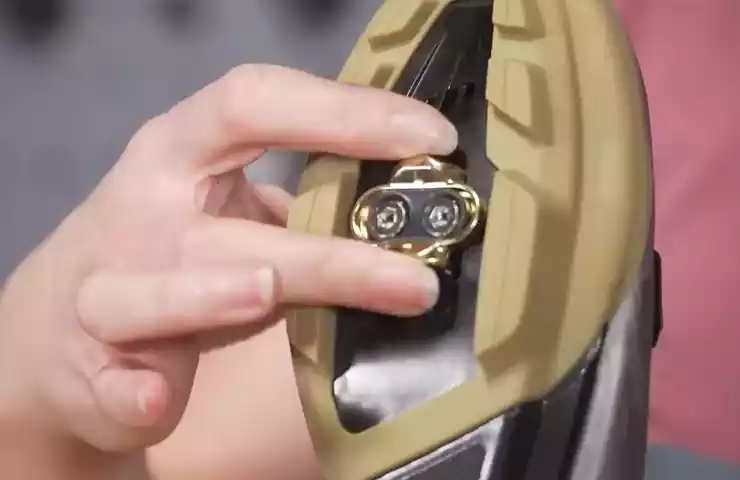
- Position the crank brothers cleat over the marked position, ensuring that the holes on the cleat align with the corresponding holes on your shoe.
Securing the Cleat with Screws
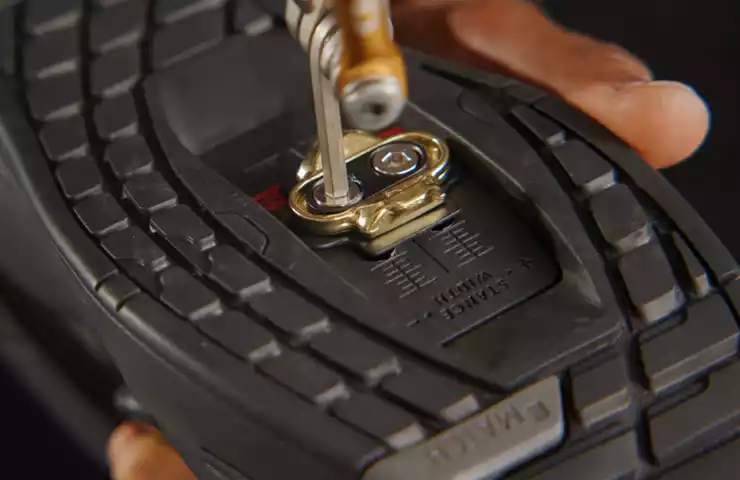
Once the cleat is properly aligned with the marked position on your shoe, the next step is to secure it in place using screws. The crank brothers cleat typically comes with the necessary screws for installation. Follow these steps to secure the cleat:
- Using an appropriate screwdriver, align the holes on the cleat with the holes on your shoe.
- Insert the screws into the aligned holes, ensuring they are snugly fitted. Be careful not to overtighten the screws, as this can damage the shoe or cleat.
- Repeat the process for all the screws, ensuring that each one is securely fastened.
Adjusting Cleat Alignment as Needed
After attaching the cleat and securing it with screws, it is important to test the alignment and make any necessary adjustments. Proper cleat alignment is crucial for efficient power transfer and can help prevent discomfort or injury during cycling. Follow these steps to adjust cleat alignment:
- Put on your cycling shoes and mount them on the pedals.
- Take a short ride to assess your foot position and comfort. Pay attention to any areas of discomfort or strain.
- If necessary, loosen the screws on the cleat just enough to allow for adjustment.
- Make small adjustments to the cleat position by sliding it slightly in the desired direction. Take note of how these adjustments affect your riding experience.
- Once you find the optimal position, secure the cleat by tightening the screws. Ensure that they are snugly fitted without being overtightened.
By following these steps, you can confidently attach crank brothers cleats to your cycling shoes, ensuring optimal performance and comfort on your rides. Remember that proper alignment and adjustment of the cleat are key to maximizing your cycling experience. Take the time to fine-tune the cleat position to suit your individual preferences and riding style.

Adjusting Cleat Float And Tension
Understanding how to adjust cleat float and tension is crucial for cyclists seeking optimal power transfer and comfort during their rides. Cleat float refers to the degree of rotational movement allowed between the cleat and the pedal, while tension affects how securely the cleat is held in place. In this section, we will delve into the significance of cleat float and how to set your preferred float options. Additionally, we will explore the process of adjusting tension to ensure maximum power transfer.
Understanding Cleat Float and Its Impact on Pedaling
Cleat float plays a significant role in the biomechanics of pedaling. It allows your feet to move naturally and find their most comfortable position while still maintaining a solid connection to the bike. When the cleat has limited float, the movement of your feet becomes restricted, potentially leading to discomfort, uneven pedal strokes, and increased pressure on certain areas of the foot.
To adjust cleat float, locate the float adjustment screws on the cleats and loosen them. This will enable a greater range of rotational movement. By experimenting with different float settings, you can find the balance that suits your riding style and body mechanics.
Setting Cleat Float Options
Each crank brothers cleat offers multiple float options to accommodate a range of preferences. To set your preferred float option, follow these steps:
- First, identify the float range provided by your specific crank brothers cleats. Refer to the product manual or the manufacturer’s website for this information.
- Next, use a hex key to loosen the float adjustment screws on the cleats.
- Gently rotate the cleats to the desired position within the specified float range.
- Tighten the adjustment screws to secure the cleats in place.
Remember to test your new float settings on short rides before embarking on longer or more intensive rides. This will allow you to make any necessary adjustments for optimal comfort and performance.
Adjusting Tension for Optimum Power Transfer
Tension adjustment determines how securely the cleats are held in place, influencing the efficiency of power transfer from the legs to the pedals. To adjust tension for optimum power transfer, follow these steps:
- Locate the tension adjustment mechanism on the pedals. This is typically a small screw near the center of the pedal.
- Using an appropriate tool, such as a hex key or screwdriver, rotate the tension adjustment screw clockwise to increase tension or counterclockwise to decrease tension.
- Find the tension setting that provides a secure connection without causing excessive difficulty in clipping in and out.
- Once you have found the ideal tension, ensure that the adjustment screw is tightened securely to maintain the desired setting.
Remember to periodically check and adjust your cleat tension, especially after extended periods of use, to ensure consistent and efficient power transfer throughout your rides.
By understanding and adjusting cleat float and tension, you can optimize your pedal stroke biomechanics, increase comfort, and enhance overall cycling performance.
Evaluating Cleat Position On The Bike
Proper cleat positioning plays a crucial role in ensuring a comfortable and efficient cycling experience. Evaluating the position of your Crank Brothers cleats on the bike can help you achieve optimal performance and prevent discomfort or injury. In this section, we’ll explore two key aspects to consider when evaluating your cleat position: observing knee alignment and tracking, and adjusting the fore-aft position for optimal pedaling efficiency.
Observing Knee Alignment and Tracking
One of the first things to assess when evaluating your cleat position is the alignment and tracking of your knees during pedaling. Improper cleat placement can lead to knee pain and inefficiencies in your pedal stroke. To observe knee alignment:
- Mount your bike on a stationary trainer or have a friend hold the bike steady.
- Put on your cycling shoes and align your feet with the pedals.
- Begin pedaling smoothly.
- Observe the movement of your knees: they should track directly over your feet.
- If your knees move inward (towards the top tube) or outward (away from the bike), it may indicate misalignment.
- Adjust the cleat position laterally by small increments to correct any misalignment. Gradual adjustments are recommended to avoid overcorrecting.
Adjusting Fore-Aft Position for Optimal Pedaling Efficiency

In addition to knee alignment, the fore-aft position of your cleats also plays a vital role in maximizing pedaling efficiency. Finding the optimal fore-aft position can vary depending on personal preference and cycling discipline. Follow these steps to adjust the fore-aft position:
- Start with the cleats positioned in the middle of the shoe’s sole.
- Mount your bike on a trainer or have a friend hold the bike steady.
- Clip into the pedals and pedal with moderate force.
- Pay attention to the engagement of your muscles and how your body feels during the pedal stroke.
- If you feel excessive strain on your calves or are unable to engage your glutes properly, the cleats may be too far forward.
- If you cannot maintain a proper level of power or are pushing through your toes, the cleats may be too far back.
- Make small adjustments to the fore-aft position, using a trial and error approach until you find the position that feels balanced and efficient.
Addressing Any Alignment Issues or Discomfort
If, after evaluating your cleat position, you still experience alignment issues or discomfort during your rides, it’s crucial to address them promptly. Persistent misalignment or discomfort can lead to inefficient pedal strokes and increased risk of injury. Here are a few tips to address any alignment issues or discomfort:
- Consult a professional bike fitter for a comprehensive analysis and adjustment of your cleat position.
- Consider using shims or wedges to correct any anatomical discrepancies that may affect your pedal stroke.
- Experiment with different cleat positions to find the optimal setup for your individual needs.
- Regularly reassess your cleat position as your body and riding style may change over time.
Evaluating and fine-tuning your cleat position is an ongoing process that requires attention and experimentation. By observing knee alignment and tracking, adjusting the fore-aft position, and addressing any alignment or discomfort issues, you can ensure a more comfortable and efficient cycling experience.
Testing And Making Further Adjustments
Once you have successfully installed your Crank Brothers Cleats, the next step is to test and make further adjustments to ensure optimal performance and comfort. It’s important to remember that cleat placement is a personal preference and can vary from person to person. By taking the time to test and make adjustments, you can fine-tune your cleat position to achieve the best possible cycling experience. In this section, we will explore how to evaluate cleat placement, identify areas for improvement, and iteratively adjust the cleat position.
Going for a Short Ride to Evaluate Cleat Placement
Before making any further adjustments, it’s recommended to go for a short test ride to evaluate your cleat placement. During this ride, pay attention to how your feet feel and if there are any areas of discomfort or pressure points. It’s essential to have a well-aligned pedal stroke and balanced foot position on the pedals for efficient power transfer and to prevent any undue stress on your joints.
While riding, make mental notes of any potential issues or areas of improvement. Are you experiencing any hotspots or numbness? Do you notice any knee pain or discomfort? These observations will help guide you in making necessary adjustments.
Identifying Areas for Improvement and Fine-tuning
After your short test ride, it’s time to identify any areas for improvement and fine-tune your cleat position. Here are a few key factors to consider:
- Alignment: Check if your cleats are aligned straight with the center of your feet. Misaligned cleats can lead to improper foot mechanics and potential discomfort. If needed, adjust the position horizontally to ensure proper alignment.
- Cleat angle: Evaluate the angle at which your cleats are positioned. A slight inward or outward angle can significantly impact your pedal stroke and overall comfort. Gradually adjust the angle to find the optimal position that feels natural and supports your natural biomechanics.
- Fore-aft position: The fore-aft position of your cleats is crucial for efficient power transfer. Pay attention to your foot position in relation to the pedal axle. A position that is too far forward or backward can lead to decreased power or stress on certain muscle groups. Fine-tune this position by making gradual adjustments and testing it on subsequent rides.
Iteratively Adjusting Cleat Position to Achieve Optimal Performance
Remember, achieving the optimal cleat position is an iterative process that may require several adjustments. It’s important to make one change at a time and test it on subsequent rides to gauge its effect. By taking a systematic approach and listening to your body’s feedback, you will gradually dial in the perfect cleat placement that suits your individual riding style and biomechanics.
Keep in mind that each adjustment may require repeated testing and evaluation. Be patient and allow yourself time to adapt to each change before moving on to the next adjustment. The goal is to achieve a cleat position that maximizes your power, efficiency, and comfort on the bike.
Frequently Asked Questions Of How To Install Crank Brothers Cleats
How To Install Crank Brothers Pedals?
To install Crank Brothers pedals, follow these steps: 1. Start with a clean pedal thread on the crankarm. 2. Apply a small amount of grease to the threads. 3. Align the pedal with the crankarm, ensuring it threads in smoothly.
4. Use a pedal wrench or Allen key to tighten the pedal securely. 5. Repeat the process for the other pedal.
How Do You Clip In Crank Brothers?
To clip in Crank Brothers pedals, align the cleat with the pedal and engage by pressing down until you hear a click. Make sure the cleat is securely locked in before riding. Clip out by twisting your heel outward. Practice in a safe environment before hitting the road.
What Is The Torque On The Crank Brothers Cleat Bolt?
The torque on the Crank Brothers cleat bolt should be accurately set according to the manufacturer’s recommendation for that specific model. Proper torque ensures optimal performance and prevents damage.
How Do You Attach A Cleat To A Pedal?
To attach a cleat to a pedal, first align the holes on the sole of your shoe with the holes on the cleat. Then, use a screwdriver to fasten the included screws securely into the holes on the pedal. Ensure the cleat is tightened properly for a secure and comfortable fit.
Conclusion
Installing Crank Brothers Cleats doesn’t have to be a daunting task. By following these simple steps, you can ensure a smooth and hassle-free installation process. Remember to choose the appropriate tools and double-check your work to guarantee a secure fit.
With the right technique and a little patience, you’ll be ready to hit the road with confidence. Happy cycling!
