To install car vinyl wrap, thoroughly clean the car surface and measure the vinyl wrap to fit before carefully applying it, smoothing out any air bubbles as you go. Car vinyl wrap is a great way to change the appearance of your vehicle, adding a unique and personalized touch.
Whether you want a different color or pattern, or simply want to protect the original paint, vinyl wrap can be a cost-effective solution. However, installing car vinyl wrap requires careful preparation and attention to detail. We will guide you through the steps to install car vinyl wrap, from cleaning the surface to applying and smoothing out the vinyl wrap.
By following these steps, you can achieve a professional-looking installation that will enhance the appearance of your car.
Preparing The Car Surface
Preparing the car surface
Before applying a vinyl wrap to your car, it is essential to properly prepare the surface. This step is crucial to ensure a smooth and long-lasting installation. By following the necessary steps to clean the car and remove any necessary parts, you can create an ideal foundation for your vinyl wrap.
<h3> Cleaning the Car: Remove any dirt or debris from the surface </h3>
One of the first steps in preparing your car’s surface for a vinyl wrap installation is to thoroughly clean it. This will ensure that no dirt, debris, or contaminants interfere with the adhesive and bonding process. Here’s how you can effectively clean your car:
- Start by rinsing the car with water to remove loose dirt and debris.
- Use a mild car wash soap or vinyl wrap cleaner to clean the surface. Avoid using harsh chemicals or abrasive cleaners that can damage the paint or clear coat.
- Gently scrub the surface with a clean microfiber cloth or sponge, paying close attention to areas where dirt tends to accumulate, such as the lower panels and wheel arches.
- Rinse the car thoroughly to remove any residue from the cleaning solution.
- Dry the car using a soft, lint-free cloth or a blower to prevent water spots.
<h3> Removing Parts: Take off any necessary parts for easier access </h3>
Depending on the type of vinyl wrap installation you are planning, you may need to remove certain parts of your car for easier access to the surface. Here are some common parts that you might need to remove:
| Part | Reason for Removal |
|---|---|
| Side mirrors | Allows for seamless wrapping around the mirror housing without any visible edges or overlap. |
| Door handles | Ensures a cleaner look and ensures no air bubbles or creases are formed around the door handles. |
| Emblems and badges | Prevents any raised edges or uneven surfaces on the vinyl wrap and gives a smoother finish. |
| Trim pieces | Provides better access to the edges and corners, allowing for a neat and seamless installation. |
Remember to take pictures or mark the placement of these parts before removal to ensure proper reinstallation later on. Additionally, store the removed parts in a safe place to prevent any damage or misplacement.
Measuring And Cutting The Vinyl Wrap
One of the key steps in installing a car vinyl wrap is measuring and cutting the wrap to fit your vehicle perfectly. This ensures a smooth installation process and a professional-looking finish. In this section, we will discuss the two important steps involved in this process: measuring the car and preparing the wrap. Let’s dive in!
Measuring the Car: Determine the amount of vinyl wrap needed
The first step in installing a car vinyl wrap is measuring your vehicle to determine the amount of wrap needed. This is crucial as it allows you to estimate the budget and avoid running out of material midway through the installation. To measure your car accurately, follow these steps:
- Start by cleaning your vehicle thoroughly to ensure precise measurements and remove any dirt or debris that may affect the accuracy.
- Use a tape measure to measure the dimensions of your car, including the length, width, and height. Begin with the large panels such as the hood, roof, and doors.
- Take detailed measurements of curved or intricate areas, such as the bumpers or side mirrors. These areas may require additional wrap material to allow for maneuvering and stretching during installation.
- Make note of any additional parts or accessories you wish to wrap, such as spoilers or trim pieces, as they will require extra vinyl.
- Calculate the total area by multiplying the length and width of each panel, then add up all the individual measurements to get the overall square footage.
Once you have determined the total amount of vinyl wrap required, it’s always a good idea to add a little extra to account for any mistakes or unforeseen circumstances. Remember, it’s better to have too much material than not enough.
Preparing the Wrap: Cut the vinyl wrap into manageable
sections
After measuring your car, it’s time to prepare the vinyl wrap by cutting it into manageable sections. This step makes the installation process easier and allows for better control while handling the material. Follow these tips to ensure a smooth cutting process:
- Start by unrolling the vinyl wrap and laying it flat on a clean surface. This will prevent it from sticking together or getting damaged during cutting.
- Using a sharp utility knife or a vinyl wrap cutting tool, cut the wrap into sections based on the measurements you took earlier. Make sure each section is slightly bigger than the panel it will be applied to; you can always trim off the excess later.
- If you have complex panels or curved areas, consider cutting the wrap into smaller, more manageable pieces. This will allow for better maneuverability and easier installation.
- Label each cut section with a marker or masking tape to keep track of the different pieces and their corresponding locations on your vehicle.
By dividing the vinyl wrap into smaller sections and labeling them, you can work systematically and methodically during the installation process. This not only ensures accuracy but also reduces the chances of confusion or misplacement.
Remember, cutting the vinyl wrap is a critical step that sets the foundation for a successful installation. Take your time, measure accurately, and cut precisely to achieve the best results.
Applying The Vinyl Wrap
Once you have prepared your car and cut the vinyl wrap to size, it’s time to apply it. This is a crucial step in the installation process, as it determines the final look and durability of the wrap. Follow these steps to ensure a smooth and professional application of the vinyl wrap.
Starting at the Top: Begin applying the vinyl wrap at the highest point
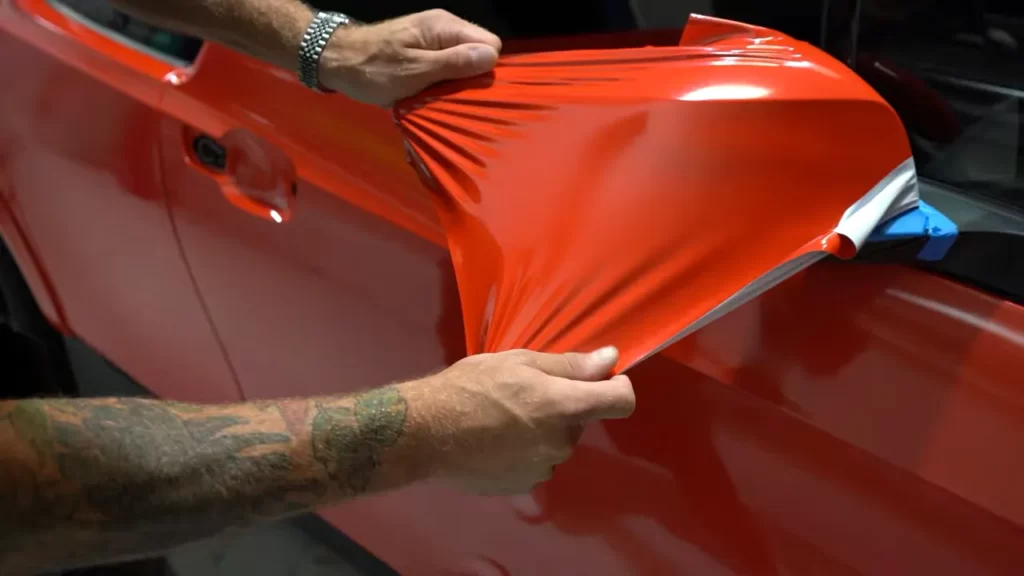
When it comes to applying the vinyl wrap, it’s best to start at the top of your vehicle. This allows you to work your way down and eliminate any air bubbles or wrinkles as you go. Begin by peeling off a small portion of the backing paper from the wrap, being careful not to touch the adhesive side. Position the exposed edge at the desired starting point on the top of your car and gently press it down.
Using Heat: Utilize a heat gun or hairdryer to mold the wrap around curves
Molding the vinyl wrap around curves can be a challenging task, but with the right tools, it becomes much easier. To ensure a seamless application, use a heat gun or hairdryer to warm up the vinyl wrap before applying it to curved areas of your vehicle. This softens the material and makes it more pliable, allowing it to conform to the shape of your car. Take your time and use the heat source in a sweeping motion, gradually working the vinyl wrap around the curves.
Smooth Application: Ensure a smooth and even application of the vinyl wrap
When applying the vinyl wrap, it’s important to achieve a smooth and even finish. This not only enhances the overall appearance of your vehicle but also prevents any lifting or peeling of the wrap over time. To achieve a smooth application, start by using a squeegee or your hands to press the vinyl wrap firmly onto the surface of your car. Work from the center outwards, using overlapping strokes to remove any air bubbles and ensure a tight bond between the wrap and the vehicle.
Additionally, be mindful of any seams or edges in the vinyl wrap and make sure they are properly aligned and secure. Trim any excess material using a sharp blade for a neat and professional look. Investing time and effort into achieving a smooth application will pay off in the long run, as it ensures the durability and longevity of your car vinyl wrap.
Stretching And Wrapping The Vinyl
When installing a car vinyl wrap, stretching and wrapping the vinyl correctly is crucial for achieving a smooth and professional-looking finish. In this section, we will discuss the techniques for stretching the vinyl wrap around curved surfaces and how to properly wrap it around edges and corners.
Stretching Techniques: Stretch the vinyl wrap to fit around curved surfaces
To achieve a seamless appearance on curved surfaces, it is important to properly stretch the vinyl wrap. Here are a few techniques you can use:
- Heat Gun: Start by applying heat to the vinyl using a heat gun. This will make the material more pliable and easier to stretch. Be cautious not to overheat the vinyl, as it can cause damage.
- Slow and Steady Pull: Once the vinyl is heated, gently pull it in the direction of the curve. Apply consistent pressure to stretch the material gradually. Avoid pulling too hard, as it can lead to uneven stretching or even tearing of the vinyl.
- Overlap Technique: For tighter curves, you may need to use the overlap technique. This involves cutting small slits on the vinyl’s backing paper to allow for easier stretching and conforming to the curve. Be sure to make small cuts and avoid cutting all the way through the vinyl.
Proper Wrapping: Wrap the vinyl tightly around edges and corners
Once you have stretched the vinyl wrap smoothly around curved surfaces, it’s time to wrap it securely around edges and corners. Ensuring a tight wrap will prevent the vinyl from peeling or lifting over time. Here’s how you can achieve proper wrapping:
- Trimming Excess Vinyl: Before wrapping the vinyl, trim any excess material that may hinder the wrapping process. This will ensure a neater and cleaner appearance.
- Starting Point: Begin wrapping from a strategic starting point, such as the middle of an edge or corner. This will allow you to evenly distribute the tension and avoid any visible seams or wrinkles.
- Applying Pressure: Use a squeegee or a similar tool to apply firm and even pressure while wrapping. This will help the vinyl adhere properly and eliminate any air bubbles.
- Stretching and Tucking: When wrapping around corners, gently stretch the vinyl in the direction of the corner. Use a tucking technique to fold the excess material neatly, ensuring a smooth and tight finish.
- Heat for Adhesion: Finally, apply heat using the heat gun to activate the adhesive and improve adhesion around edges and corners. This will help the vinyl conform to the surface and reduce the risk of lifting.
By following these stretching and wrapping techniques, you can achieve a professional-looking car vinyl wrap installation. Take your time and be patient, as precision is key for a flawless finish.
Trimming And Finishing Touches
Once you have successfully applied the car vinyl wrap, it’s time to focus on the trimming and finishing touches. This step is crucial to ensure a professional and seamless installation. In this section, we will discuss how to trim excess vinyl, manage edges and seams, and give your vehicle a final cleaning.
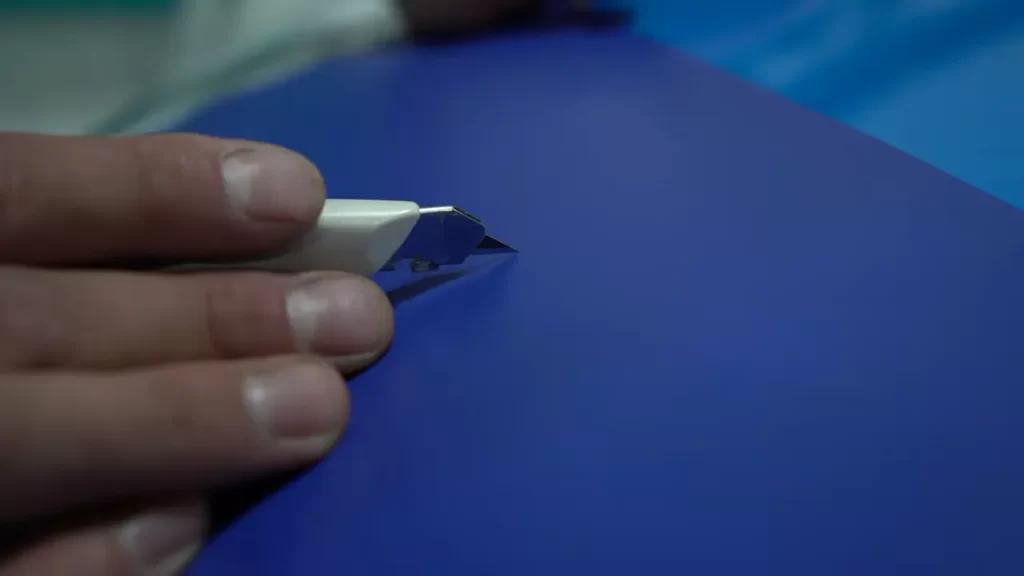
Trimming Excess Vinyl: Cut off any excess vinyl using a sharp knife
After wrapping your vehicle with vinyl, it is common to have some excess material that needs to be trimmed. This excess vinyl can cause unwanted bulges or wrinkles if left untrimmed, compromising the overall appearance of your wrap. Make sure you have a sharp knife or a wrap-specific trimming tool to carefully cut away the excess.
Before you start trimming, **double-check** the areas where the excess vinyl is present. Look for areas such as around the door handles, trim, and corners. Take your time and **work methodically**, ensuring a clean and seamless cut that aligns with the edges of your vehicle.
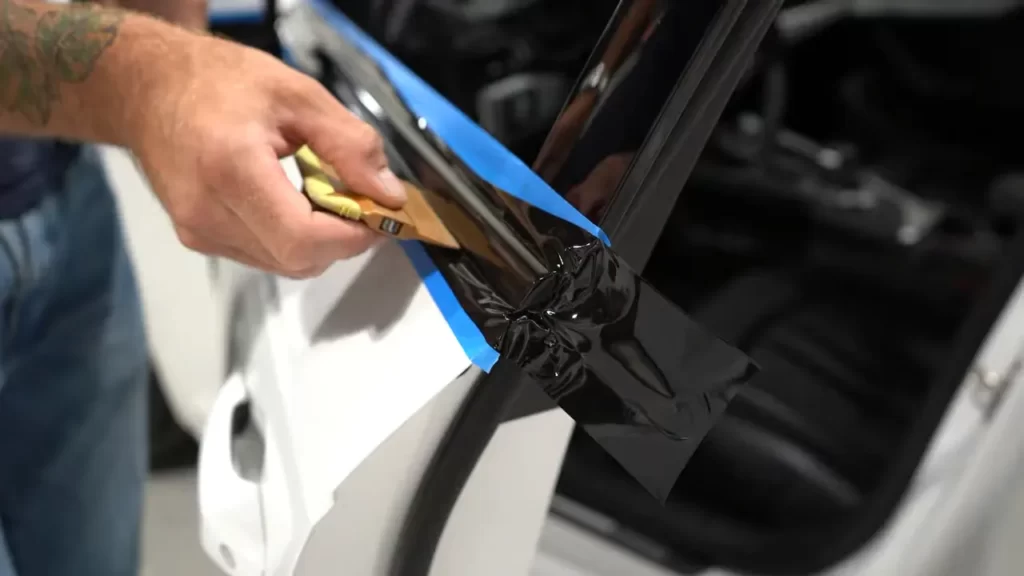
Edges and Seams: Tuck and secure the vinyl wrap along edges and seams
Managing the edges and seams of your car vinyl wrap is crucial to achieve a professional and seamless finish. To ensure longevity and prevent lifting or peeling, it is essential to tuck and secure the vinyl wrap along all edges and seams.
Start by applying gentle pressure with your finger, **working from the middle towards the edges**, to create a smooth and secure bond. If needed, use a heat gun or hairdryer on a low setting to soften the vinyl and make it more pliable, especially around curved edges or complex shapes.
Once you’ve secured the vinyl wrap along the edges and seams, **inspect** the area to ensure there are no visible air bubbles or imperfections. **Smooth out any wrinkles** or lift any corners that may have not adhered properly.
Final Cleaning: Remove any remaining residue and clean the vinyl surface
Before completing the installation, it’s important to give your vinyl-wrapped car a final cleaning to remove any remaining residue and ensure a pristine appearance.
Start by using a mild soap or vinyl-specific cleaner to gently wipe down the entire surface of the wrap. **Avoid using harsh chemicals or abrasive materials**, as they can damage the vinyl or affect its adhesive properties.
After rinsing off the soap with clean water, carefully dry the wrap with a soft lint-free cloth or allow it to air dry. Pay extra attention to areas where water may accumulate, such as around the edges and seams, to prevent any moisture from being trapped underneath the wrap.
By following these trimming and finishing techniques, you can effectively complete the installation of your car vinyl wrap, ensuring a professional and flawless result that will turn heads on the road.
Maintaining And Caring For The Vinyl Wrap
Maintaining and caring for your car vinyl wrap is essential in order to keep it looking its best and extend its lifespan. Regular cleaning, avoiding harsh chemicals, and protecting it from sun damage are key aspects of proper vinyl wrap maintenance. In this article, we will delve into these areas and provide you with practical tips to ensure that your vinyl wrap stays in pristine condition.
Regular Cleaning: Clean the vinyl wrap to keep it looking its best
Cleaning your car vinyl wrap on a regular basis is crucial for maintaining its appearance and preventing the buildup of dirt and grime. Here are some essential steps to follow:
- Start by rinsing off the wrap with a hose to remove loose dirt and debris.
- Fill a bucket with warm water and add a small amount of mild soap or vinyl wrap cleaner.
- Use a soft sponge or microfiber cloth to gently wash the surface of the vinyl wrap. Avoid using abrasive materials or rough brushes, as they can cause scratches.
- Rinse off the soap thoroughly with clean water.
- Dry the vinyl wrap with a clean, lint-free cloth or allow it to air dry.
Avoiding Harsh Chemicals: Use gentle cleaning products on the vinyl wrap
Using harsh chemicals or abrasive cleaning products can damage the vinyl wrap and cause it to fade or peel. It is important to choose gentle cleaning products specifically designed for vinyl wraps. Here are a few tips to keep in mind:
- Avoid using strong solvents, such as gasoline or alcohol, as they can damage the vinyl.
- Read the label of any cleaning products you use to ensure they are safe for vinyl surfaces.
- Test the cleaning product on a small, inconspicuous area of the vinyl wrap before applying it to the entire surface.
- Use a soft cloth or sponge to apply the cleaning product and gently wipe away any dirt or grime.
Protecting from Sun Damage: Use UV protectant to prevent fading
The sun’s harmful UV rays can cause the vinyl wrap to fade and deteriorate over time. To protect your car vinyl wrap from sun damage, follow these steps:
- Use a UV protectant specifically formulated for vinyl surfaces.
- Apply the UV protectant evenly to the entire surface of the vinyl wrap.
- Make sure to reapply the UV protectant regularly, especially after washing or in prolonged exposure to the sun.
By following these maintenance tips, you can ensure that your car vinyl wrap remains vibrant and in excellent condition for years to come. Regular cleaning, avoiding harsh chemicals, and using a UV protectant are all essential steps in preserving the beauty and longevity of your vinyl wrap.
Troubleshooting And Common Issues
Installing a car vinyl wrap can give your vehicle a fresh new look, but sometimes issues can arise during the installation process. Understanding how to troubleshoot and address common problems will ensure that the finished result is seamless and professional. In this section, we will discuss some of the most common issues that arise when installing a car vinyl wrap and provide practical solutions to overcome them.
Bubbles and Wrinkles: How to remove bubbles and smooth out wrinkles
Bubbles and wrinkles can occur when applying a vinyl wrap to your car’s surface. These imperfections can be unsightly and may affect the overall appearance of the wrap. Here are some steps to remove bubbles and smooth out wrinkles:
- Step 1: Start by identifying the bubbles or wrinkles in the vinyl wrap. It may help to work on one section at a time.
- Step 2: Gently lift the vinyl wrap around the affected area using a heat gun or hairdryer on low heat. The heat will make the vinyl more pliable and easier to work with.
- Step 3: Once the vinyl is warmed up, use a squeegee or a credit card wrapped in a soft cloth to push out the air or smooth out the wrinkles. Start from the center of the bubble or wrinkle and work your way towards the edges.
- Step 4: If necessary, apply more heat to the vinyl wrap and continue to smooth out any remaining bubbles or wrinkles. Take your time and be patient to achieve the best results.
By following these steps, you can effectively remove bubbles and smooth out wrinkles in your car vinyl wrap, leaving behind a flawless finish.
Rips and Tears: Repairing any damage to the vinyl wrap
Despite being a durable material, vinyl wraps can sometimes sustain rips and tears, especially in high-stress areas or during the installation process. If you notice any damage on your vinyl wrap, here’s how you can repair it:
- Step 1: Clean the area around the rip or tear with a mild detergent and water solution. This will ensure that the surface is free from any dirt or debris.
- Step 2: Using a heat gun or hairdryer on low heat, warm up the damaged area. This will make the vinyl more pliable and allow for easier manipulation.
- Step 3: Carefully realign the edges of the rip or tear, ensuring they fit snugly together.
- Step 4: Apply a vinyl repair adhesive specifically designed for car wraps along the edges of the repair area. Press down firmly to ensure proper adhesion.
- Step 5: Once the adhesive has dried, use a squeegee or credit card wrapped in a soft cloth to smooth out the repaired area, ensuring it blends seamlessly with the rest of the wrap.
Following these steps will help you restore the integrity of your vinyl wrap by effectively repairing any rips or tears that may have occurred.
Adhesive Issues: Dealing with problems related to the vinyl wrap’s adhesive
Adhesive problems can occur with car vinyl wraps, leading to lifting or peeling of the wrap. If you encounter adhesive issues, follow these steps to address the problem:
- Step 1: Identify the areas where the vinyl wrap is lifting or peeling.
- Step 2: Clean the affected areas thoroughly with a mild detergent and water solution to remove any dirt or residue.
- Step 3: Using a heat gun or hairdryer on low heat, warm up the lifting or peeling edges of the vinyl wrap.
- Step 4: Apply a high-quality adhesive specifically designed for car wraps to the back of the vinyl and the surface it will be adhered to.
- Step 5: Press down firmly on the affected areas, ensuring the vinyl wrap adheres securely to the surface. Use a squeegee or credit card wrapped in a soft cloth to remove any air bubbles or pockets.
By following these steps, you can effectively address any adhesive issues that may arise during the installation of your car vinyl wrap.
Frequently Asked Questions Of How To Install Car Vinyl Wrap
Is It Easy To Vinyl Wrap Your Own Car?
Yes, it is easy to vinyl wrap your own car. With the right tools and instructions, you can achieve professional-looking results. Just make sure to clean the surface properly, use a heat gun for better adhesion, and take your time to avoid bubbles or wrinkles.
Is Vinyl Wrap Hard To Install?
Vinyl wrap installation is not difficult. It can be successfully installed by following proper instructions and techniques. With a little practice and patience, you can easily apply vinyl wrap to your desired surface.
Do You Apply Vinyl Wrap Wet Or Dry?
Vinyl wrap is applied wet, using a water-based solution to help with positioning and smooth installation. The moisture allows for easier adjustments and reduces the chances of air bubbles or wrinkles.
What Is The Best Way To Apply Vinyl Wrap?
To apply vinyl wrap, follow these tips: 1. Clean the surface thoroughly. 2. Cut the vinyl slightly larger than the area to be wrapped. 3. Peel off the backing progressively while applying it evenly. 4. Smooth out any bubbles or creases with a squeegee.
5. Trim excess vinyl carefully for a neat finish.
Conclusion
Installing car vinyl wrap can be a cost-effective way to personalize your vehicle and protect its original paint job. By following the step-by-step guide in this blog post, you can DIY the installation process without any hassle. Remember to clean the surface thoroughly, measure and cut the wrap accurately, and use a heat gun to smooth out any bubbles or wrinkles.
With a little patience and attention to detail, you can achieve professional-looking results and turn heads on the road. So, why wait? Start transforming your car with vinyl wrap today!