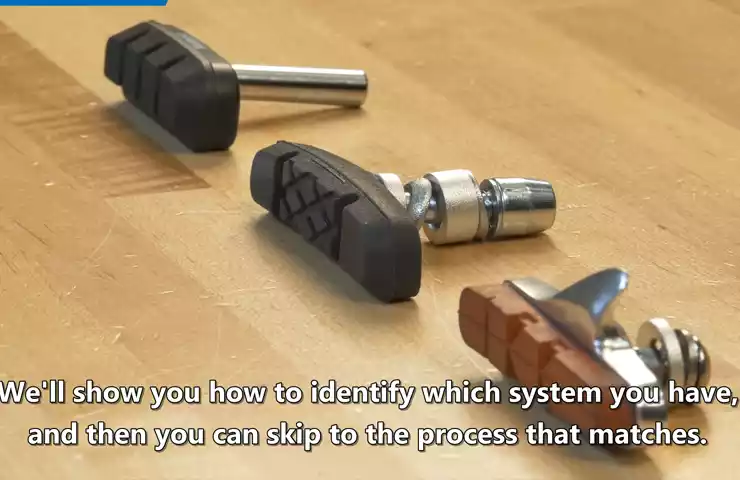
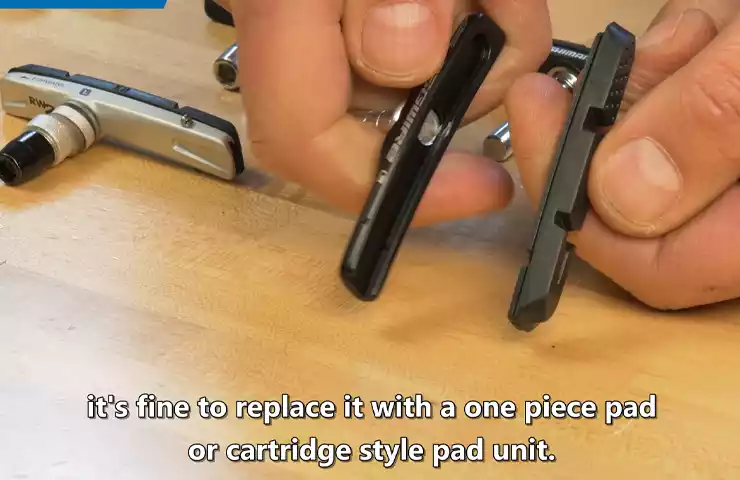
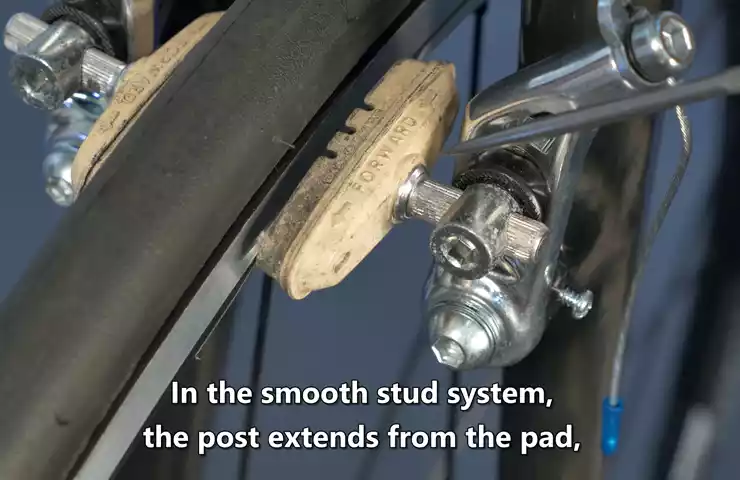
To install brake pads on a bike, carefully follow these steps: remove the wheel, take out the old brake pads, insert the new brake pads, and reattach the wheel.
Preparing For The Brake Pad Installation
Before you can install new brake pads on your bike, it’s important to prepare yourself and gather the necessary tools and materials. Additionally, inspecting the brake pads for any wear or damage is crucial to ensure your bike’s safety. In this section, we’ll guide you through the steps for preparing to install brake pads on your bike, starting with gathering the necessary tools and materials. Let’s get started!
Gather the necessary tools and materials:
To make the brake pad installation process smooth and hassle-free, it’s essential to have the right tools and materials at your disposal. Here’s a list of everything you’ll need:
| Tools | Materials |
| WrenchTorque wrenchAllen wrench setAdjustable pliersFlathead screwdriver | New brake padsIsopropyl alcoholClean rag or towel |
Make sure you have these tools and materials within reach before you begin the installation process. This will help you to work efficiently and complete the task without any interruptions.
Inspect the brake pads and identify any wear or damage:
Next, it’s important to inspect the brake pads on your bike and identify any signs of wear or damage. This step is crucial as worn or damaged brake pads can compromise your safety while cycling. Here’s what you need to do:
- Remove the wheel from the bike frame using the wrench, as this will give you better access to the brake pads.
- Take a close look at the brake pads. Look for any signs of wear, such as a thinning pad material or uneven surface.
- Inspect for any damage or cracks in the brake pads. If you notice any defects, it’s essential to replace the pads before proceeding with the installation.
- Check if the pads are evenly aligned and positioned correctly. Misaligned brake pads can cause poor braking performance, so it’s important to adjust them as needed.
- Finally, clean the brake pads using isopropyl alcohol and a clean rag or towel. This will remove any dirt or debris that might affect the brake’s performance.
By inspecting the brake pads thoroughly and addressing any issues beforehand, you’ll ensure a smooth and safe brake pad installation process. Now that you have gathered the necessary tools and materials and inspected the brake pads, you’re ready to move on to the next step: removing the old brake pads from your bike.
Understanding The Brake System
When it comes to biking, ensuring that your brake system is in top-notch condition is crucial. The bike’s brake system plays a vital role in your safety and control while riding. Before diving into the installation of new brake pads, it’s important to understand the brake system components and how they work together. This knowledge will not only help you install your new brake pads with confidence but also allow you to troubleshoot any issues that may arise down the road.
Explore the components of the brake system
Let’s take a closer look at the components that make up the brake system of your bike:
- Brake Levers: The brake levers act as the interface between you and the brake system. When you squeeze the brake levers, they put pressure on the brake cables, initiating the braking mechanism.
- Brake Cables: These cables transmit the force from the brake levers to the brake calipers. It’s essential to ensure that the brake cables are properly tensioned and free from any kinks or fraying to maintain optimal braking performance.
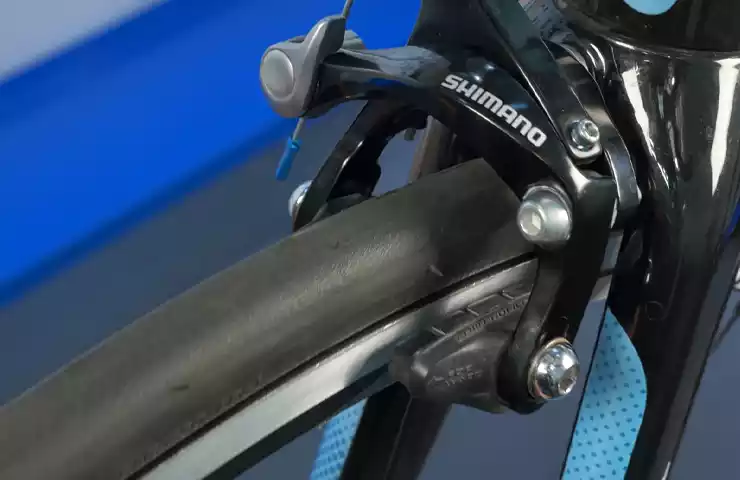
- Brake Calipers: The brake calipers are responsible for squeezing the brake pads against the wheel rim or rotor, creating friction that slows down or stops the bike. They can be either rim brakes or disc brakes, depending on the type of bike you have.
- Brake Pads: Brake pads are the replaceable components that make direct contact with the wheel rim or rotor. They are made from a composite material that provides the necessary friction for effective braking. Over time, brake pads wear down and need to be replaced to maintain optimal braking performance.
By familiarizing yourself with these components, you’ll have a better understanding of how each part plays a role in the overall functionality of the brake system.
Learn how brake pads contribute to braking performance

Now that you’re familiar with the different components of the brake system, let’s focus on brake pads and their importance in ensuring reliable braking performance.
Brake pads are designed to withstand high temperatures and provide consistent friction. They’re made from various materials, such as organic compounds or metallic compounds, each offering different levels of performance and durability.
| Organic Brake Pads | Metallic Brake Pads |
|---|---|
| Provide excellent initial bite | Offer superior heat dissipation |
| Quieter operation | Longer lifespan |
| Less aggressive on the wheel rims | Well-suited for extreme conditions and heavy riders |
To ensure each cycling adventure starts and ends safely, inspect your brake pads regularly for signs of wear. If the brake pads have reached the wear indicators or appear noticeably thin, it’s time to install a new set of brake pads. Upgrading to high-quality brake pads will not only enhance your braking performance but also provide a greater peace of mind on every ride.
With a solid understanding of the brake system and the role brake pads play, you’re now ready to install new brake pads on your bike. Follow our step-by-step guide for a hassle-free installation process that will have your bike stopping on a dime in no time!
Step-By-Step Brake Pad Installation Guide
Installing brake pads on your bike is an essential maintenance task that ensures your brakes function optimally. Follow this step-by-step guide to ensure a smooth and secure brake pad installation process.
Removing the old brake pads
To start, you’ll need to remove the old brake pads. Begin by loosening the brake caliper bolts, which hold the brake caliper in place.
Loosening the brake caliper bolts
Using a suitable Allen wrench or similar tool, gently loosen the brake caliper bolts. Take care not to completely remove them just yet, as they will serve as a guide during the installation process.
Taking out the worn brake pads
After loosening the bolts, carefully remove the worn brake pads from the brake caliper. Take note of their position and orientation for ease of installation later.
Cleaning the brake caliper and rotor
Before installing the new brake pads, it’s important to clean the brake caliper and rotor to ensure optimal performance. Using a suitable cleaning solution, apply it to a clean cloth or brush and gently clean the surfaces.
Ensuring proper cleanliness for optimal performance
Make sure to remove any dirt, debris, or residue from the brake caliper and rotor. This step is crucial to achieve optimal braking power and prevent any potential squeaking or rubbing noises.
Installing the new brake pads
Positioning the brake pads correctly is vital for proper functionality. Ensure that the new brake pads are inserted into the brake caliper in the correct orientation, aligning with the braking surface of the rotor.
Fastening the brake caliper bolts securely

Fasten the brake caliper bolts securely, using the Allen wrench or appropriate tool. Tighten them evenly and be careful not to overtighten, as this may cause damage to the brake caliper or bolts.
In conclusion, by following this step-by-step guide, you can successfully install new brake pads on your bike. Remember to clean the brake caliper and rotor before installation, position the new pads correctly, and securely fasten the brake caliper bolts. This meticulous approach will ensure dependable braking performance, keeping you safe on your bike rides.
Adjustments And Final Touches
After successfully installing the brake pads on your bike, it’s important to make the necessary adjustments and perform final touches to ensure optimal performance. This step will help you achieve smooth braking operation and maximize your safety on the road or trails.
Centering the brake caliper
One crucial adjustment you need to make is centering the brake caliper. To do this, follow the manufacturer’s guidelines provided for your specific bike model. Typically, you’ll need an Allen wrench to loosen the mounting bolts on the caliper. Once loosened, give the caliper a gentle push towards the center, aligning it with the bike frame. This step ensures that the brake pads make even contact with the rim or rotor. Tighten the mounting bolts securely after centering the caliper.
Aligning the caliper for proper brake pad contact
Next, you’ll want to align the caliper properly for optimal brake pad contact with the rim or rotor. To do this, apply the brakes halfway and observe the brake pads as they touch the rim or rotor. Look for any misalignment, such as one pad hitting before the other. If misalignment occurs, adjust the caliper position accordingly by gently pushing it to the desired position. Continue this adjustment until both brake pads make simultaneous contact with the rim or rotor when the brakes are applied.
Following manufacturer’s guidelines for adjustment
When it comes to adjusting the brake mechanism of your bike, it’s always wise to follow the manufacturer’s guidelines. Each bike model may have specific instructions for adjusting the brakes to achieve optimal performance. Refer to the user manual or online resources provided by the manufacturer for detailed information on adjustments and fine-tuning specific to your bike.
Testing the brake performance
Once you have completed the adjustments, it’s crucial to test the brake performance to ensure everything is working correctly. Before taking your bike out on the road or trails, conduct a quick brake test in a controlled environment. Find a safe area with minimal traffic or obstruction, and perform a series of brake tests at different speeds. Pay attention to the responsiveness, smoothness, and consistency of the brakes.
Ensuring smooth braking operation without any issues
To ensure smooth braking operation without any issues, regularly inspect your brakes for wear and tear. Check that the brake pads are wearing evenly and not excessively. Look for any signs of contamination or damage to the brake pads or the rim/rotor surface. If you notice any issues, such as noise, reduced braking power, or uneven contact, address them promptly by cleaning, adjusting, or replacing the components as necessary. Remember, proper adjustments and meticulous inspection of your bike’s brake system are vital for your safety. By following these steps and adhering to the manufacturer’s guidelines, you can enjoy a ride with confidence, knowing that your brakes are in optimal working condition.
Tips For Maintaining Brake Pads

Proper maintenance of your bike’s brake pads is essential for safe and effective braking. Regular inspection, cleaning, and lubrication are key steps to ensure your brake pads function optimally. In this section, we will explore these important tips in detail.
Regular inspection of brake pads for wear and tear
Regularly inspecting your bike’s brake pads is crucial to identify any signs of wear and tear. Over time, brake pads can become worn down and lose their effectiveness, compromising your ability to stop quickly and safely. To ensure your brake pads are in good condition, follow these steps:
- Start by visually inspecting the brake pads. Look for signs of uneven wear, excessive grooves, or any missing material. If any of these issues are detected, it is time to replace the brake pads.
- Measure the thickness of the brake pads using a caliper or a specialized tool designed for this purpose. Most brake pads come with a minimum thickness mark, indicating when they should be replaced. If the brake pads are nearing or below this mark, it is time for a replacement.
- Check for any contaminants like oil or dirt on the brake pads. These can impair the brake’s performance and should be cleaned off.
Cleaning and lubricating the brake system periodically
Cleaning and lubricating your bike’s brake system regularly will help prolong the life of your brake pads and maintain their performance. Follow these steps to keep your brake system in top condition:
- Start by removing the wheels to access the brake pads and calipers.
- Inspect the brake pads for any dirt or debris. If you find any, gently clean them with a soft brush or cloth. Avoid using harsh chemicals that could damage the brake pads.
- Next, apply a light lubricant to the brake caliper pivots and the brake pad mounting points. This will help ensure smooth operation and prevent squeaking or sticking.
- After applying the lubricant, wipe off any excess with a clean cloth to prevent dirt accumulation.
By following these maintenance tips, you can ensure your bike’s brake pads remain in excellent condition, providing reliable and safe braking for your rides.
Troubleshooting Common Brake Pad Installation Problems
Installing brake pads on a bike is an essential task for ensuring safe and efficient braking. However, like any mechanical process, it is not without its challenges. In this section, we will address some of the common problems that may arise during brake pad installation and provide troubleshooting tips to help you overcome them.
Uneven brake pad wear
One of the issues you may encounter is uneven brake pad wear, which can result in poor braking performance and reduced safety. Here are some possible causes and solutions:
- Improper alignment: Ensure that the brake pads are aligned symmetrically and centered with respect to the rim. Use a ruler or proper calipers to measure the distance from the rim to the brake pads on both sides. Adjust the position of the pads if necessary, allowing for equal and even contact.
- Contaminated pads: Brake pads can accumulate debris, oil, or dirt over time, leading to uneven wear. Clean the pads thoroughly using proper brake cleaner or rubbing alcohol. If the contamination is severe, consider replacing the pads entirely.
- Worn brake cables: Frayed or stretched brake cables can cause uneven pad wear. Check the condition of your brake cables and replace them if necessary.
Brake squealing or noise issues

Another common problem cyclists face after installing new brake pads is brake squealing or other noise issues. These can be frustrating, but fear not, as there are steps you can take to silence those annoying squeaks:
- Toe-in the brake pads: Ensure that the leading edge of the brake pad (the portion that contacts the rim first) is positioned slightly closer to the rim than the trailing edge. This toe-in alignment can help promote smooth and quiet braking.
- Check pad material compatibility: Different brake pad materials may interact with the rim surface differently, leading to noise. Verify that your brake pads are compatible with your rim type. If necessary, consider switching to a different pad material or selecting specific pads designed for quiet performance.
- Clean the rim: A dirty or greasy rim surface can contribute to brake noise. Regularly clean the rim with a soft cloth and mild soap to remove any contaminants that may interfere with smooth braking.
- Inspect and adjust the brake system: Ensure that the brake caliper and other associated components are properly aligned and adjusted. Loose or misaligned parts can contribute to noise issues. Refer to your bike’s owner manual for specific instructions on brake system maintenance and adjustment.
In conclusion, troubleshooting common brake pad installation problems may require some patience and attention to detail. By following the tips outlined above, you can address issues such as uneven pad wear and brake noise, ensuring optimal braking performance and a quiet ride. Remember to regularly inspect and maintain your brake system to keep it in top shape.
Frequently Asked Questions Of How To Install Brake Pads On A Bike
How Do You Put A Brake Pad Back On A Bike?
To put a brake pad back on a bike, start by loosening the brake caliper bolt. Slide the brake pad into the caliper, making sure it aligns properly with the rim. Tighten the bolt securely. Finally, check the brake’s function before riding the bike.
Is Changing Bike Brake Pads Easy?
Changing bike brake pads is a straightforward process that can be done easily. It requires a few simple steps: remove the old pads, clean the caliper, insert the new pads, and reassemble the caliper. With a little bit of patience and attention to detail, anyone can successfully replace their bike brake pads.
What Is The Correct Way To Install Brake Pads?
To install brake pads correctly, follow these steps: 1. Lift the vehicle and secure it with jack stands. 2. Remove the wheel and locate the brake caliper. 3. Use a wrench to loosen the caliper bolts and remove the old pads.
4. Install the new pads and tighten the caliper bolts. 5. Repeat the process for each brake pad.
Which Way Should Bike Brake Pads Face?
Bike brake pads should face the rim. Their contact surface should be flat against the rim for effective stopping.
Conclusion
Installing brake pads on a bike is an essential skill every cyclist should master. By following these step-by-step instructions, you can ensure your bike’s braking system is in top-notch condition. Remember to check your brake pads regularly for wear and tear, as they play a crucial role in your safety on the road.
With the right tools and a little practice, you’ll be able to confidently install brake pads and enjoy a smoother and safer ride. Keep pedaling!
