To install brake pads, follow these steps: first, lift the vehicle and remove the wheel; second, remove the caliper and old brake pads; third, compress the caliper piston; fourth, install the new brake pads and secure the caliper; fifth, repeat the process for the other brakes. Brake pads are an essential component of a vehicle’s braking system.
Over time, they wear down and need to be replaced to ensure optimal performance and safety. If you’re experiencing squeaking or grinding noises when you apply the brakes, it may be time to install new brake pads. While this task may seem daunting, with the right tools and knowledge, it can be done at home.
We will provide a step-by-step guide on how to install brake pads to help you maintain your vehicle’s braking efficiency. Keep reading to learn more about this straightforward DIY project that can save you time and money.
Getting Prepared
Before you begin the process of installing new brake pads, it’s important to get prepared and gather the necessary tools and materials. This will ensure a smooth and efficient installation process, saving you time and ensuring the safety of your vehicle.
Gather necessary tools and materials
Before you start replacing your brake pads, make sure you have the following tools and materials:
| Tools | Materials |
|---|---|
| Car jackLug wrenchSocket wrenchC-clampWire brush | New brake padsBrake greaseBrake cleanerAnti-seize compound |
Having these tools and materials at hand will not only make the installation process easier but also ensure that you have everything you need to complete the job.
Park the vehicle on a flat surface and engage the parking brake
Once you have gathered all the necessary tools and materials, it’s time to prepare your vehicle for the brake pad installation. Park your vehicle on a flat surface and engage the parking brake to secure it in place.
This step is crucial as it ensures that your vehicle remains immobile throughout the installation process, preventing any potential accidents or injuries.
By adhering to these preparatory steps, you are setting yourself up for success when it comes to installing new brake pads. Now that you are fully prepared, let’s move on to the next step of the installation process.
Removing The Old Brake Pads
Removing the old brake pads is an essential step when it comes to installing new ones. In this guide, we will walk you through the process of removing the brake pads, starting from locating the brake caliper and rotor to finally removing the old brake pads from the caliper.
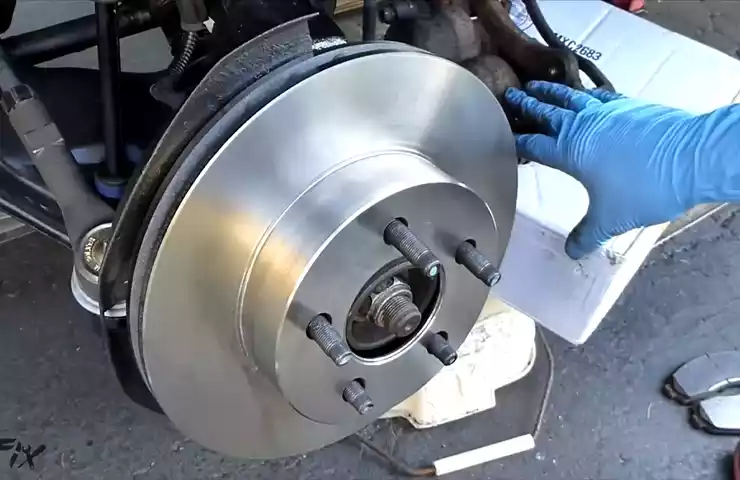
Locate the brake caliper and rotor
The first step in removing the old brake pads is to locate the brake caliper and rotor on your vehicle. The brake caliper is usually positioned directly over the rotor and is held in place by a set of bolts.
Secure the vehicle
Prior to starting any work, it’s important to securely position and protect the vehicle. Ensure that the parking brake is engaged and consider using wheel chocks to prevent any unexpected movement.
Remove the wheel
Next, using a lug wrench, loosen the lug nuts on the wheel where you’ll be working. Once loosened, use a jack to raise the vehicle off the ground slightly. Completely remove the lug nuts and carefully take off the wheel.
Loosen and remove the brake caliper bolts
Now that you have access to the brake caliper, locate and loosen the bolts that hold it in place. Using an appropriate wrench or socket, carefully loosen and remove these bolts. Keep them aside for later use.
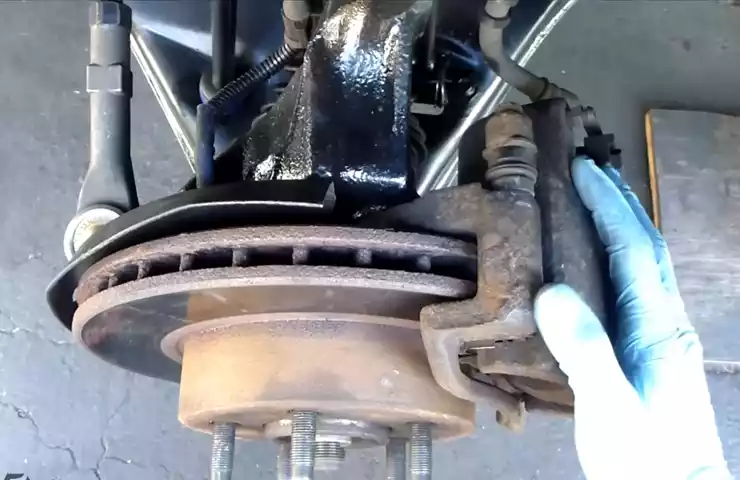
Slide the brake caliper off the rotor
With the caliper bolts removed, gently slide the brake caliper off the rotor. Be cautious not to damage the brake line connected to the caliper.
Remove the old brake pads from the caliper
Now, you can proceed to remove the old brake pads from the caliper. Depending on the design, they might be held in place by clips or pins. Carefully release any clips or pins and take out the old brake pads.
By following these steps, you’ve successfully removed the old brake pads. The next step is to properly install the new brake pads, so stay tuned for our upcoming guide on how to do that.
Installing The New Brake Pads
As an essential component of your vehicle’s braking system, the brake pads require regular maintenance and replacement to ensure optimal performance and safety. When it’s time to install new brake pads, it’s crucial to follow the correct procedure to ensure a proper fit and reliable stopping power. In this guide, we will walk you through each step of installing the new brake pads, from preparing them for installation to tightening the brake caliper bolts.
Prepare the new brake pads for installation
Before installing the new brake pads, it’s important to prepare them properly to ensure they fit securely in the caliper. Begin by inspecting the brake pads and confirming they match the specifications of your vehicle’s make and model. Once verified, remove any protective coverings or clips from the new pads.
Apply brake pad lubricant to the back of the new pads
To promote smooth operation and reduce noise, it is recommended to apply a thin layer of brake pad lubricant to the back of the new pads. This lubricant creates a barrier between the pads and the caliper, preventing unwanted vibrations and ensuring efficient braking performance. When applying the lubricant, be sure to cover the entire surface evenly.
Insert the new brake pads into the caliper
With the new brake pads properly prepared and lubricated, you can now insert them into the caliper. Position the pads so that the lining material is in contact with the rotor. Carefully align the pads and slide them into the caliper, making sure they are seated securely.
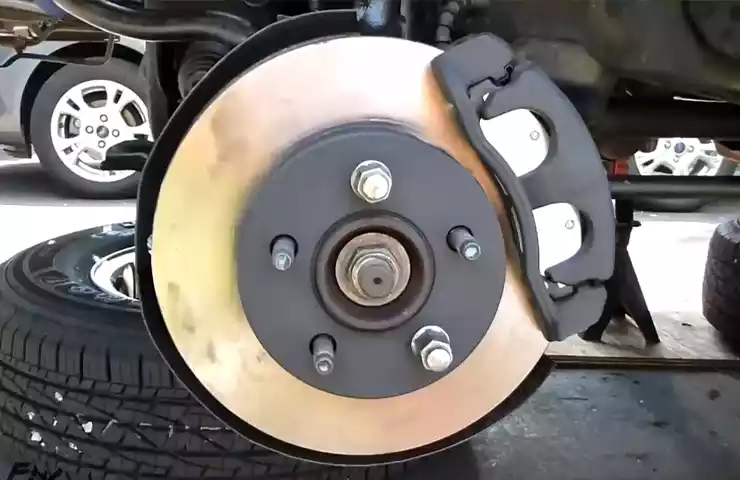
Place the brake caliper back onto the rotor
After inserting the new brake pads, it’s time to place the brake caliper back onto the rotor. Align the caliper with the mounting bracket and carefully guide it into position. Ensure that the caliper is centered over the rotor, with equal clearance on both sides.
Tighten the brake caliper bolts

To complete the installation, tighten the brake caliper bolts to secure the caliper in place. Using a properly sized wrench or socket, apply even pressure to each bolt, alternating between them until the desired tightness is achieved. Be careful not to overtighten the bolts, as this can lead to damage.
Following these steps will help you successfully install the new brake pads and ensure your vehicle’s braking system operates safely and effectively. Remember to exercise caution and consult your vehicle’s manual or a professional if you encounter any difficulties during the installation process.
Testing And Finishing Up
After successfully removing the old brake pads and installing the new ones, it is crucial to test the brakes to ensure proper installation. This step is vital for your safety as it allows you to identify any potential issues and ensure that your brakes are functioning correctly. To complete the installation process, follow the steps below:
Pump the Brake Pedal to Restore Pressure
Start by getting into the driver’s seat of your vehicle and firmly pressing the brake pedal several times. This action will help to restore hydraulic pressure in the braking system. Look out for any noticeable changes in pedal travel or resistance. A spongy or excessively soft pedal may indicate air trapped in the brake lines.
Reinstall the Wheel
With the brake pads in place, it’s time to put the wheel back on. Line up the wheel studs with the holes in the wheel, and carefully slide the wheel onto the hub. Make sure the wheel is seated properly, and then thread the lug nuts onto the studs. Tighten the lug nuts by hand to ensure they are snug.
Lower the Vehicle
Before testing the brakes, you need to lower the vehicle from the jack stands. Use a suitable lifting mechanism, such as a hydraulic jack, to lower the vehicle slowly and safely. Ensure that all four wheels are supporting the weight of the vehicle before removing the jack stands.
Test the Brakes to Ensure Proper Installation
Once the vehicle is safely on the ground, it’s time to test the brakes. Start the engine and apply light pressure to the brake pedal. Listen for any unusual noises, such as squealing or grinding, and pay attention to the responsiveness of the brakes. Repeat this process several times to ensure consistent functionality.
Repeat the Process for the Remaining Wheels
Now that you have completed the testing process for one wheel, it’s important to repeat the entire installation and testing process for the remaining wheels. Each wheel should have its brake pads replaced to ensure balanced brake performance across all axles. This will help maintain optimal braking efficiency and safety. Remember, properly installing and testing your brake pads is crucial for your safety on the road. Don’t rush through the process and take the time to ensure everything is done correctly. If you have any doubts or concerns, it’s always best to consult a professional mechanic to avoid any potential issues down the line.
Tips For Brake Pad Installation
Take Precautionary Measures When Working with Brake Components
Installing new brake pads is an important maintenance task that helps ensure your vehicle’s braking system operates effectively and safely. However, it’s crucial to take proper precautionary measures when working with brake components to minimize any potential risks. Here are a few key tips to consider:
- Wear appropriate protective gear: Always remember to wear safety goggles and gloves to protect your eyes and hands from any debris or chemicals that may be present during the installation process.
- Work in a well-ventilated area: Brake pads can release harmful fumes and dust particles during installation. Therefore, it’s essential to work in a well-ventilated area to prevent inhaling these substances.
- Use proper lifting equipment: When lifting your vehicle, make sure to use appropriate lifting equipment, such as a floor jack or hydraulic lift, to ensure stability and safety.
- Avoid excessive force: While removing or installing brake components, try to avoid using excessive force. This can help prevent any damage to the brake calipers or other related parts.
- Keep surfaces clean: Before installing new brake pads, it’s recommended to clean the brake calipers and rotor surfaces thoroughly to ensure proper contact and performance.
Follow the Vehicle Manufacturer’s Recommendations
Each vehicle model may have specific guidelines and recommendations provided by the manufacturer when it comes to brake pad installation. These recommendations take into account the vehicle’s specifications and the optimal brake performance. Here are a few aspects to consider:
- Brake pad type: Verify the correct type of brake pads to be installed, as there might be different types available, such as ceramic, semi-metallic, or organic brake pads.
- Tightening torque: Follow the manufacturer’s recommended torque specifications when tightening bolts or caliper guide pins to ensure proper fit and prevent any potential damage.
- Bedding-in process: Some vehicle manufacturers provide specific instructions for the bedding-in process. Following these recommendations helps to ensure optimal brake performance and longevity.
- Inspect other brake components: While replacing brake pads, it’s advisable to inspect other related brake components for wear or damage, such as rotors, calipers, or brake lines. Replace or repair any damaged parts accordingly.
Consider Seeking Professional Assistance If Unsure or Inexperienced
If you lack confidence or experience in brake pad installation, it’s always advisable to seek professional assistance. Professional mechanics have the expertise and knowledge to accurately install brake pads and ensure proper functioning. Here are a few reasons why professional assistance may be beneficial:
- Specialized tools and equipment: Professional mechanics have specialized tools and equipment specifically designed for efficient and safe brake pad installation.
- Proper diagnostics: Experienced mechanics can diagnose any underlying issues with your braking system that may go unnoticed by an untrained eye.
- Peace of mind: By having a professional perform the brake pad installation, you can have peace of mind knowing that the job was done correctly, reducing the risk of brake failures or complications in the future.
While installing brake pads can be done by DIY enthusiasts, it is essential to ensure the job is completed accurately and safely. By following the above tips and guidelines, you can have confidence in achieving a successful brake pad installation.
Frequently Asked Questions On How To Install Brake Pads
Is It Easy To Install Brake Pads Yourself?
Yes, installing brake pads yourself is relatively straightforward. Just follow the instructions provided by the manufacturer and ensure you have the necessary tools. However, if you’re unsure or lack experience, it’s best to seek professional help.
What Is The Correct Way To Install Brake Pads?
To install brake pads correctly, follow these steps: 1. Lift the car and remove the wheel. 2. Unbolt the caliper and remove the old pad. 3. Compress the caliper piston and insert the new pad. 4. Reattach the caliper, tighten bolts, and replace the wheel.
5. Repeat for other wheels.
Can You Just Replace Brake Pads?
Yes, you can just replace brake pads.
Do I Need To Bleed My Brakes When Changing Pads And Rotors?
Yes, bleeding your brakes is necessary when changing pads and rotors. This ensures proper functioning of the brake system by removing any trapped air that can affect brake performance. It is essential for safety and optimal braking.
Conclusion
Installing brake pads is an essential maintenance task that ensures optimal braking performance and safety on the road. By following the step-by-step guide provided in this blog post, you can successfully replace your old brake pads with new ones. Remember to gather the necessary tools, take precautionary measures, and seek professional assistance if needed.
With these tips, you’ll be able to confidently tackle brake pad installation and enjoy smooth and reliable braking in no time. Stay safe and happy driving!