To install a brake pad retaining clip, first, remove the old clip using pliers or a screwdriver. Then, align the new clip and push it into place until it is securely seated.
When it comes to maintaining your vehicle’s braking system, proper installation of the brake pad retaining clip is crucial. This clip ensures that the brake pads remain in position and function efficiently. We will guide you through the step-by-step process of installing a brake pad retaining clip.
By following these instructions carefully, you can rest assured knowing that your brake pads will stay securely in place, providing optimal braking performance and safety on the road. Let’s jump right in and learn how to install a brake pad retaining clip for a smooth and hassle-free maintenance experience.
Gather Necessary Tools And Materials
Before you begin the process of installing a brake pad retaining clip, it’s crucial to gather all the essential tools and materials. Having everything ready will save you time and prevent any interruptions during the installation process. Here is a list of the required tools and materials you’ll need:
List of required tools and materials
Make sure you have the following tools and materials before getting started:
- Brake pads retaining clips
- Brake pads
- Socket wrench
- Socket set
- Caliper piston tool
- Flathead screwdriver
- Wire brush
- Brake cleaner
- Grease
- Lug wrench
- Jack stands
- Hydraulic jack
- Protective gloves
- Safety glasses
Importance of having everything ready before starting the installation process
Having all the necessary tools and materials ready before starting the installation process is of utmost importance. It allows you to work efficiently without any unnecessary delays. This proactive approach ensures a smooth installation process and reduces the risk of errors or accidents. Additionally, having a well-organized setup helps you maintain focus throughout the installation, allowing for a more successful outcome.
By gathering and preparing all the required tools and materials, you save yourself the hassle of searching for missing items mid-installation. This not only wastes time but also disrupts your workflow and increases the chances of making mistakes. Moreover, it is crucial to have proper safety gear, such as protective gloves and safety glasses, to protect yourself during the process.
Remember, a well-prepared installation ensures optimal brake performance, longevity, and most importantly, safety. So take the time to gather everything you need before you begin.
Lift And Support The Vehicle Safely
Steps to ensure proper safety measures are taken
When it comes to installing a brake pad retaining clip, it is of utmost importance to prioritize safety. Not only does this ensure the well-being of the person performing the installation, but it also prevents potential damage to the vehicle. One crucial step is to lift and support the vehicle safely. Here are some steps to follow to ensure proper safety measures are taken:
- Choose a suitable location: Find a flat and stable surface where you can safely lift the vehicle. It is important to avoid any uneven or soft ground that could cause the vehicle to tip or sink. A concrete or asphalt surface, like a garage floor, is often the ideal location.
- Gather the necessary tools: Before proceeding, make sure you have all the tools required for the task. This may include a jack, jack stands, wheel chocks, and a lug wrench. Double-checking your equipment ensures a smooth and uninterrupted process.
- Engage the parking brake: To prevent the vehicle from rolling, engage the parking brake before lifting it. This adds an extra layer of security during the installation process and minimizes the risk of any accidents occurring.
- Place wheel chocks: Wheel chocks are crucial for preventing the vehicle from moving while it is lifted. Position them securely against the tires on the opposite side of the vehicle that you are working on. This will help to stabilize the vehicle and further enhance safety.
- Identify the recommended lifting points: Refer to your vehicle’s owner’s manual to identify the recommended lifting points. These are typically durable areas specifically designed to support the weight of the vehicle. Lifting from the wrong location can cause damage, so ensure you lift from the correct points.
- Use a hydraulic jack: A hydraulic jack is most commonly used to lift vehicles. Place the jack on the appropriate lifting point and slowly pump the handle to raise the vehicle. Only lift the vehicle until the tires are off the ground and never exceed the weight limit specified for the jack.
- Secure the vehicle with jack stands: Once the vehicle is lifted to the desired height, immediately position jack stands under the recommended lifting points. Slowly lower the vehicle onto the jack stands and double-check that they are securely in place. This adds an extra layer of safety and stability.
- Test the stability: Before working underneath the vehicle, gently shake it to ensure stability. If there is any wobbling or movement, readjust the jack stands or seek professional assistance. It is crucial to have a stable and secure vehicle before proceeding with the installation.
Importance of lifting the vehicle securely
Lifting the vehicle securely is of utmost importance when installing a brake pad retaining clip. Failing to do so can lead to accidents, injuries, and damage to the vehicle. Here are a few reasons why lifting the vehicle securely should never be overlooked:
- Prevents accidents: A securely lifted vehicle reduces the risk of accidents during the installation process. It ensures that the vehicle remains stable and does not collapse or shift unexpectedly.
- Protects the vehicle: Lifting the vehicle securely helps protect its structure and components from damage. Using the recommended lifting points and proper equipment prevents unnecessary stress or strain on sensitive parts.
- Enhances personal safety: By taking proper safety measures and lifting the vehicle securely, you minimize the chances of injury. This is especially important when working under the vehicle, as a secure lift reduces the risk of getting trapped or crushed.
- Promotes efficient installation: A securely lifted vehicle provides a stable working environment, making the installation process easier and more efficient. It allows you to focus on the task at hand without worrying about the vehicle’s stability.
Remember, when it comes to installing a brake pad retaining clip, safety should always be the top priority. By following the steps outlined above and ensuring a secure lift, you can carry out the installation with confidence and peace of mind.
Locate And Remove The Retaining Clip
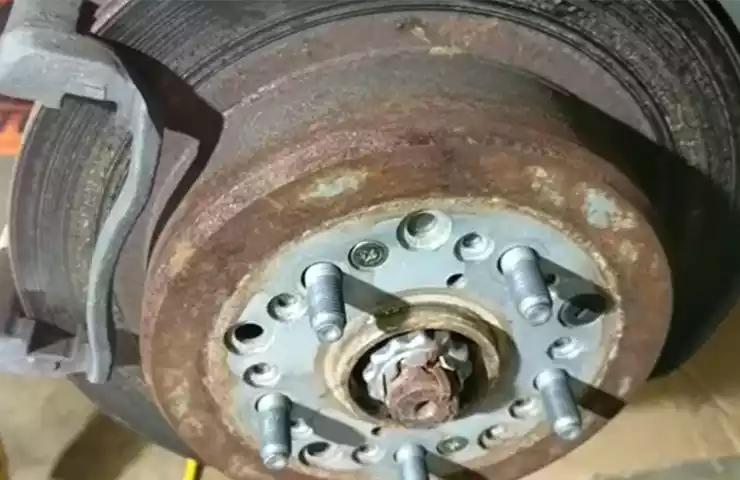
In order to install new brake pads on your vehicle, you will first need to locate and remove the retaining clip that holds the old brake pads in place. The retaining clip is an essential component of the braking system, as it prevents the brake pads from falling out or shifting during operation. Identifying and removing the retaining clip is a crucial step that must be done carefully and safely to ensure proper installation of the new brake pads.
Identifying the Retaining Clip in the Braking System
Before you can remove the retaining clip, it’s important to be able to identify it within the braking system. The retaining clip is typically a small, metal bracket that holds the brake pads securely in the caliper. It is located at the top or bottom of the caliper, depending on the specific type of braking system in your vehicle. In some cases, there may be multiple retaining clips holding the brake pads in place, so it’s important to visually inspect the caliper to locate all the clips.
Step-by-Step Guide on How to Remove the Clip Safely
Now that you have identified the retaining clip, it’s time to safely remove it. Follow these step-by-step instructions to ensure a smooth removal process:
- Begin by loosening the brake caliper bolts using a wrench or socket set. This will allow you to access the retaining clip more easily.
- Once the bolts are loosened, carefully slide the caliper away from the brake rotor, creating enough space to work with the retaining clip.
- Inspect the retaining clip and locate any retaining tabs or screws that may be holding it in place. Using the appropriate tools, such as pliers or a screwdriver, remove these retaining tabs or screws.
- With the tabs or screws removed, gently pry the retaining clip away from the caliper using a flathead screwdriver or a specialized retaining clip removal tool. Take care not to damage the caliper or the surrounding components.
- Once the retaining clip is fully detached, set it aside and carefully remove the old brake pads from the caliper. Be cautious not to twist or bend the brake lines or hoses in the process.
By following these steps, you can safely and effectively remove the retaining clip from your braking system. With the retaining clip removed, you can proceed with installing the new brake pads, ensuring proper alignment and securing them in place for optimal braking performance.
Clean And Inspect The Brake Caliper
Importance of cleaning and inspecting the caliper before installation
Before installing a brake pad retaining clip, it is crucial to thoroughly clean and inspect the brake caliper. The caliper plays a critical role in the braking system, ensuring that the brake pads are properly aligned and engaged when the brake pedal is pressed. Additionally, keeping the caliper clean can help to prevent corrosion and ensure optimal brake performance.
Step-by-step instructions on how to properly clean and inspect the caliper
- Start by gathering the necessary tools and materials, including a brake cleaner, lint-free cloth or shop towels, and a wire brush.
- Put on a pair of gloves to protect your hands from any chemicals or sharp edges.
- Use a brake cleaner to spray the caliper, paying close attention to any build-up of brake dust or debris. Be sure to follow the manufacturer’s instructions on the cleaner for proper usage.
- Allow the cleaner to penetrate for a few minutes, then use a lint-free cloth or shop towel to wipe away the loosened dirt and grime. This will help to ensure a clean surface for the installation.
- Inspect the caliper for any signs of damage or wear. Look for cracks, corrosion, or excessive wear that may affect its functionality. If any issues are found, it may be necessary to replace the caliper before proceeding with the installation.
- When inspecting the caliper, pay close attention to the brake pad retaining clips. Check for any signs of damage, such as broken or missing clips. These clips are essential for keeping the brake pads in place and should be replaced if damaged.
- If the caliper shows no signs of damage or wear, use a wire brush to lightly scrub any remaining residue or rust. This will help to ensure a smooth surface and maximize the longevity of the brake pad retaining clip.
- Once the caliper is clean and inspected, you can proceed with the installation of the brake pad retaining clip. Follow the manufacturer’s instructions for proper installation, and be sure to align the clip correctly to ensure a secure fit.
By taking the time to properly clean and inspect the brake caliper before installing a brake pad retaining clip, you can help to ensure optimal brake performance and extend the lifespan of your braking system. Regular maintenance and attention to detail are key to keeping your brakes in top condition, providing peace of mind and safety on the road.
Position The Brake Pad Retaining Clip
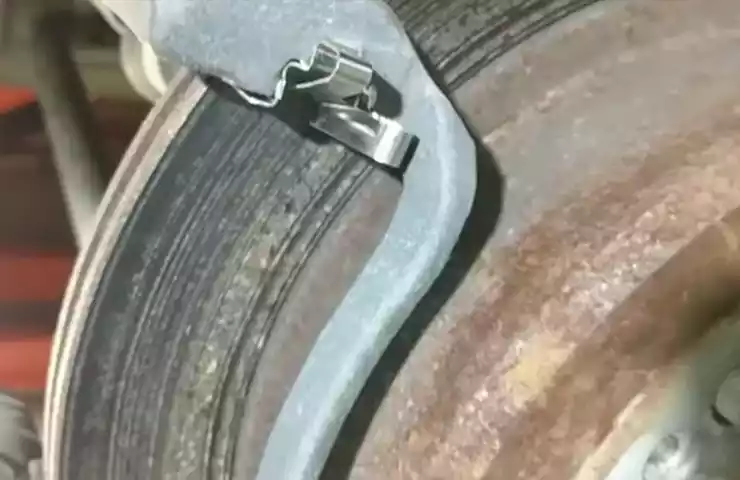
Understanding the proper positioning of the brake pad retaining clip is essential for a successful brake pad installation. The brake pad retaining clip is a small, metal piece that holds the brake pad in place within the brake caliper. It ensures that the brake pad stays in the correct position, allowing for optimal braking performance and safety.
Understanding the Proper Positioning of the Clip
Before we dive into the detailed instructions on how to position the clip correctly, let’s first understand the importance of proper positioning. The brake pad retaining clip should be aligned in a way that it provides even pressure distribution across the brake pad surface. This is crucial for effective braking and to prevent any potential rattling or noise issues. Incorrect positioning can lead to brake pad misalignment, reduced performance, and even safety hazards.
Detailed Instructions on How to Position the Clip Correctly
To position the brake pad retaining clip correctly, follow these step-by-step instructions:
- Start by removing the old brake pads from the caliper using a suitable tool, such as a brake pad spreader or a C-clamp. This will allow you to access the retaining clip.
- Inspect the retaining clip for any signs of damage or wear. If damaged or worn, it is recommended to replace the clip with a new one to ensure optimal performance.
- Align the retaining clip with the caliper bracket, ensuring that it sits flush against the bracket surface.
- Make sure that the retaining clip tabs are positioned correctly on the caliper bracket. These tabs should engage with the holes or notches on the bracket to secure the clip in place.
- Press firmly on the retaining clip to ensure proper engagement. It should fit snugly and not move or shift when pressure is applied.
- Once the clip is in position, you can proceed with installing the new brake pads. Make sure to align them correctly with the retaining clip, ensuring that they fit snugly and securely within the caliper.
- Double-check the positioning of the clip and brake pads before reassembling the caliper and tightening the fastening bolts. This final inspection will help ensure that everything is properly aligned and ready for use.
By following these instructions, you can position the brake pad retaining clip correctly, ensuring optimal performance and safety. Remember to always consult your vehicle’s manual or seek professional assistance if you are unsure about any step in the process. Proper installation and positioning of the brake pad retaining clip are essential for reliable braking and peace of mind on the road.
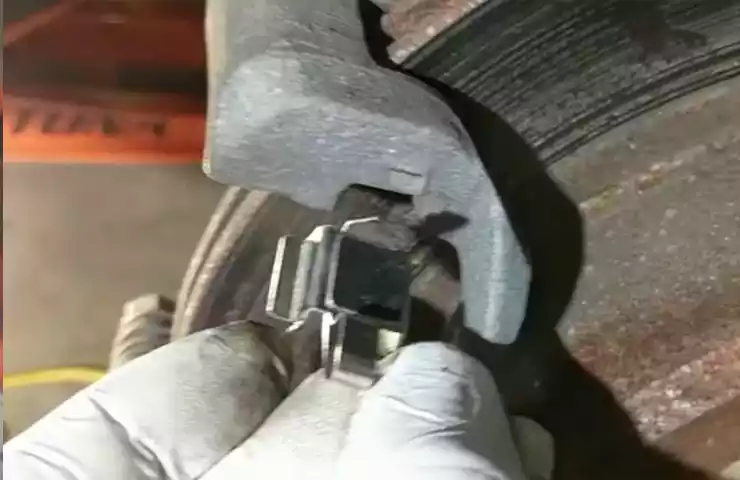
Secure The Retaining Clip In Place
Step-by-step guide on securely fastening the clip
Installing a brake pad retaining clip is an essential step in ensuring the safety and performance of your vehicle’s braking system. This small but crucial component holds the brake pads firmly in place, preventing them from shifting or rattling during operation. To properly secure the retaining clip, follow this step-by-step guide:
- Start by positioning the brake pad retaining clip onto the brake caliper bracket. Ensure that it aligns with the designated clip grooves, allowing for a snug fit.
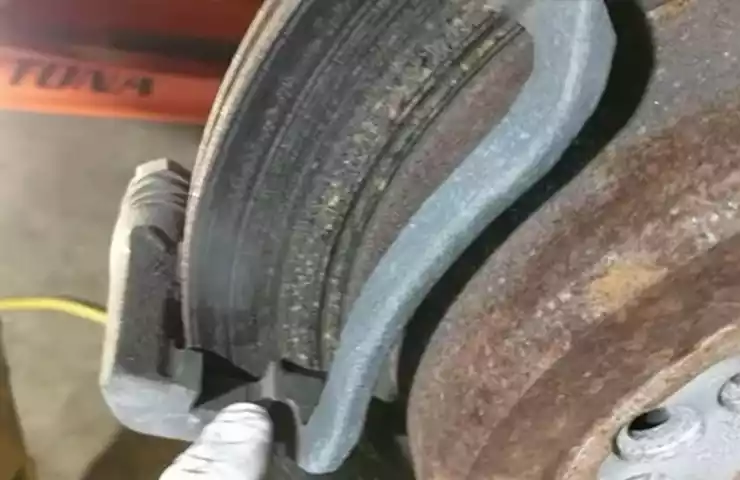
- Using a suitable tool, such as pliers or a screwdriver, press firmly against the retaining clip, ensuring it sits flush against the caliper bracket.
- Once the clip is aligned and in position, apply steady pressure to engage the retaining spring. This will ensure that the clip is securely fastened and will not come loose during braking.
- After fastening the clip, double-check its placement to verify that it is firmly in place. Give it a gentle tug to ensure it does not move or dislodge easily.
By following these steps, you can ensure that the brake pad retaining clip is securely fastened and provides the necessary stability for your brake pads.
Importance of ensuring the clip is tightly secured
Ensuring that the brake pad retaining clip is tightly secured is of utmost importance for several reasons:
- Safety: A loose or improperly fastened clip can lead to brake pad misalignment or rattling, compromising the effectiveness of your vehicle’s braking system. This can result in reduced stopping power and increase the risk of accidents.
- Brake Pad Longevity: A securely fastened clip keeps the brake pads stable during operation. This minimizes the risk of premature wear and tear, allowing them to last longer and provide optimal braking performance.
- Noise Reduction: Loose clips can lead to the brake pads vibrating or rattling against the caliper bracket, causing unwanted noise during braking. A tightly secured clip eliminates this issue, ensuring a quiet and smooth braking experience.
- Consistent Braking: With a properly secured retaining clip, the brake pads remain in their designated positions, promoting even distribution of braking force across the rotor. This helps maintain consistent and reliable braking performance.
By taking the time to secure the brake pad retaining clip tightly, you can maintain the safety and performance of your vehicle’s braking system, ensuring a smooth and worry-free driving experience.
Reinstall The Brake Pads
Step-by-step instructions on how to reinstall the brake pads
Properly reinstalling the brake pads is essential for maintaining the overall performance and safety of your vehicle’s braking system. After removing the old brake pads and replacing any necessary components, follow these step-by-step instructions to ensure a successful reinstallation:
- Clean the brake caliper: Before installing the new brake pads, it’s important to clean the brake caliper to remove any dirt or debris that may have accumulated. Use a brake cleaner and a clean cloth to thoroughly clean the caliper surfaces. This will help ensure proper contact between the new brake pads and the caliper.
- Apply anti-squeal compound: To reduce noise and vibration during braking, apply an anti-squeal compound to the backing plate of the new brake pads. This will help promote a quiet and smooth braking experience. Make sure to follow the manufacturer’s instructions for applying the compound.
- Insert the brake pads: Carefully insert the new brake pads into the caliper, making sure they align with the rotor. The pads should fit snugly and be positioned parallel to the rotor surface. Double-check that the pads are properly seated and secured in place.
- Reinstall the brake pad retaining clip: The brake pad retaining clip helps to keep the brake pads in position. Align the clip with the caliper and carefully slide it into place. Ensure that the clip is securely fastened and properly aligned to prevent any movement during braking.
- Reattach the caliper: Once the brake pads and retaining clip are properly installed, carefully reattach the brake caliper to the rotor. Make sure to align the caliper correctly and tighten all the bolts to the manufacturer’s recommended torque specification.
Proper alignment techniques for optimal performance
Properly aligning the brake pads is crucial for optimal performance and longevity. Here are some techniques to consider when reinstalling your brake pads:
- Even pressure distribution: Ensure that the brake pads make even contact with the rotor. Uneven pressure distribution can result in poor braking performance and premature wear. Check that the pads sit flush against the rotor and adjust as necessary.
- Correct pad-to-rotor clearance: It’s important to maintain the correct pad-to-rotor clearance to prevent any potential issues such as dragging or excessive noise. Make sure the pads are not too close to the rotor, as this can lead to overheating and decreased braking efficiency.
- Smooth operation: As you reinstall the brake pads, pay attention to how smoothly they move within the caliper. Any sticking or restricted movement can cause uneven wear and diminished performance. If necessary, clean and lubricate the caliper guide pins to ensure smooth operation.
By following these step-by-step instructions and employing proper alignment techniques, you can reinstall your brake pads with confidence. Remember to always refer to your vehicle’s specific repair manual for detailed instructions and torque specifications to ensure a safe and successful brake pad installation.
Conduct A Final Inspection
The Importance of Inspecting the Entire Braking System
Before finishing the installation process of your brake pad retaining clip, it is crucial to conduct a final inspection of the entire braking system. This step is highly important as it ensures the safety and effectiveness of your brakes. By thoroughly examining the braking system, you can identify any potential issues or damage that may lead to brake failure or reduced performance.
Things to Check for Before Finishing the Installation Process
When conducting the final inspection of your braking system, there are several key things to check for before considering the installation process complete:
- Brake Pad Condition: Take a close look at the brake pads to ensure they are in good condition and show no signs of excessive wear or damage. If the brake pads appear worn out or damaged, it is essential to replace them before installing the retaining clip.
- Brake Rotor Surface: Inspect the brake rotor surface for any signs of warping, scoring, or deep grooves. A damaged brake rotor can significantly affect brake performance. If the rotor is damaged, replace it before proceeding with the retaining clip installation.
- Caliper Operation: Check the caliper operation to ensure it moves freely and smoothly. A stuck or dragging caliper can lead to uneven brake pad wear and reduced braking efficiency. If the caliper is not functioning correctly, address the issue before installing the brake pad retaining clip.
- Brake Fluid Level: Verify the brake fluid level in the master cylinder reservoir. Low brake fluid levels can indicate a leak or other underlying issues. If the brake fluid is low, investigate the cause and resolve it before finalizing the retaining clip installation.
- Brake Line Integrity: Inspect the brake lines for any signs of damage, corrosion, or leaks. Damaged brake lines can compromise the entire braking system’s performance and safety. If any issues are found, repair or replace the brake lines accordingly.
- Hardware Tightness: Ensure that all bolts, screws, and nuts related to the brake system are properly tightened. Loose hardware can cause vibrations, noises, or even lead to brake assembly disintegration.
While conducting this final inspection, remember that a well-maintained braking system is crucial for safe and efficient vehicle operation. Paying attention to these crucial areas will contribute to the overall reliability and performance of your brakes, providing you with peace of mind on the road.
Test The Brake Pedal For Proper Functionality
Before completing the installation of the brake pad retaining clip, it is essential to test the brake pedal for proper functionality. This step ensures that your brakes are in optimal condition and ready to perform effectively on the road. Testing the brake pedal will provide you with the confidence and peace of mind that your vehicle’s brakes are operating as they should. Follow this step-by-step guide on how to test brake pedal functionality:
Step-by-step guide on how to test brake pedal functionality
- Locate a safe and open space to perform the brake pedal test. An empty parking lot or a quiet street would be ideal.
- Start the engine and allow it to run for a few minutes to reach the operating temperature.
- With the engine running, press the brake pedal firmly and pay attention to how it feels. It should offer resistance and not sink to the floor. If the pedal feels soft or spongy, it could indicate air in the brake lines or a potential brake fluid leak.
- Continue to hold the brake pedal down firmly for about 15 seconds. Observe if the pedal remains in the same position or slowly sinks towards the floor. A sinking pedal could indicate a brake fluid leak or a problem with the master cylinder.
- While still holding the pedal down, shift the vehicle into drive or first gear (for manual transmission). Slowly release the brake pedal and pay attention to how the vehicle responds. It should come to a smooth and controlled stop without any excessive pulling to one side.
- Repeat the above steps while shifting the vehicle into reverse gear and observing the performance of the brakes.
By performing these tests, you can ensure that your brake pedal is functioning correctly and that your brakes are in good working order. Proper brake performance is of utmost importance for the safety of yourself, your passengers, and others on the road.
- Safe stopping: Brakes that are in good working order allow you to come to a complete stop quickly and safely, reducing the risk of collisions.
- Control and maneuverability: Well-functioning brakes give you better control over your vehicle and allow you to maneuver smoothly in various driving conditions.
- Preventive maintenance: Regularly testing and maintaining your brakes can help identify any potential issues early on, preventing more significant problems and costly repairs.
- Peace of mind: Knowing that your brakes are functioning correctly provides you with peace of mind, allowing you to focus on the road ahead.
Ensuring proper brake performance should be a top priority for every vehicle owner. By following the step-by-step guide to test your brake pedal’s functionality, you can ensure your brakes are in optimal condition and ready to keep you safe on the road.
Conduct A Test Drive
After successfully installing a brake pad retaining clip, it is crucial to conduct a test drive to ensure proper brake function. A test drive allows you to evaluate the effectiveness of the newly installed brake pad retaining clip and ensure that your vehicle’s braking system is working optimally. This step-by-step guide will outline the necessary precautions to take during a test drive and highlight the significance of this procedure.
Steps to take during a test drive to ensure proper brake function:
- Start by driving at a low speed in a safe and empty area. This will allow you to gradually apply the brakes and gauge their responsiveness.
- Test the brakes by applying light pressure first. Notice if there are any unusual noises, vibrations, or irregularities during the braking process.
- Gradually increase your speed and apply the brakes with firmer pressure. Observe whether the vehicle comes to a smooth and controlled stop.
- Pay attention to how the brake pedal feels. It should provide reasonable resistance and not feel spongy or too hard to press. If you notice any abnormalities, such as a soft or unresponsive pedal, further inspection may be required.
- Test the brakes in different scenarios, such as braking on uneven surfaces or during a turning maneuver. This will help identify any potential issues that may not be apparent under normal driving conditions.
- Lastly, be attentive to any warning signs or indications of brake problems, such as brake warning lights on the dashboard or strange smells. If you notice anything out of the ordinary, it is advisable to stop the vehicle immediately and seek professional assistance.
The significance of a test drive after installation:
A test drive after installing a brake pad retaining clip is crucial for several reasons. Firstly, it allows you to ensure that the installation was carried out correctly, with the clip securely in place. Secondly, it provides an opportunity to confirm that the braking system is functioning as intended, preventing potential accidents or mishaps on the road.
By conducting a thorough test drive, you can identify any issues related to the brake pad retaining clip installation, such as loose or misaligned clips. Additionally, it allows you to detect other potential brake system problems that may have gone unnoticed during the installation process, such as worn-out brake pads or damaged rotors.
Remember, the effectiveness of your brakes is vital for your safety and that of other road users. A test drive after brake pad retaining clip installation ensures that your vehicle’s braking system is reliable and working optimally. If you encounter any doubts or concerns during the test drive, it is imperative to consult a professional mechanic for further inspection and necessary repairs.
Common Issues And Solutions
Installing a brake pad retaining clip is a crucial step in maintaining the proper functioning of your vehicle’s braking system. However, like any other car maintenance task, it is not uncommon to encounter a few issues along the way. In this section, we will discuss the common problems that may arise during the installation process and provide you with some troubleshooting tips to help you solve them effectively.
List of Common Problems That May Arise During Installation:
During the installation of a brake pad retaining clip, you may come across the following issues:
- Difficulty in removing the old retaining clip
- Improper alignment of the new clip
- Inability to secure the clip in place
- Noise or vibration after installation
Now, let us take a closer look at each problem and provide you with some suggestions on how to troubleshoot and solve them.
Tips on How to Troubleshoot and Solve These Issues:
- Difficulty in removing the old retaining clip: If you are having trouble removing the old retaining clip, you can try using a pair of pliers or a flat-head screwdriver to gently pry it off. Be cautious not to damage the brake pad or other components.
- Improper alignment of the new clip: When installing the new retaining clip, ensure that it is aligned correctly with the brake pad. You can use a mirror or flashlight to get a better view if necessary. Additionally, refer to the manufacturer’s instructions or consult a professional if you are uncertain about the proper alignment.
- Inability to secure the clip in place: If the clip does not securely fit into its designated slot, it may be due to excessive dirt, rust, or debris. Clean the area thoroughly and try again. If the problem persists, you may need to replace the clip with a new one that fits properly.
- Noise or vibration after installation: If you notice noise or vibration after installing the retaining clip, it could indicate that the clip is not seated correctly or there is an issue with the brake pad itself. Double-check the alignment and ensure that all components are tightly secured. If the problem persists, it is recommended to consult a professional mechanic to diagnose and address the issue.
By following these troubleshooting tips and solutions, you can overcome the common issues that may arise while installing a brake pad retaining clip. Remember, proper installation is essential to maintain the efficiency and safety of your vehicle’s braking system.
Seek Professional Help If Necessary
Discussing situations where professional assistance may be required
While it is entirely possible for most car owners to install brake pad retaining clips on their own, there may be certain situations where seeking professional help becomes necessary. It is crucial to know when to reach out to a trained mechanic or technician to ensure a smooth and hassle-free installation process.
One situation where professional assistance may be required is when dealing with complex brake systems or specialized vehicles. Some high-performance or luxury cars have intricate brake systems that may require advanced knowledge and techniques for proper installation. If you are unsure about the specifications of your vehicle or lack experience working on such systems, it is best to seek professional help to avoid any potential damage or improper installation.
Another factor to consider is the availability of proper tools and equipment. While basic brake pad retaining clip installation can be done with common hand tools, certain vehicles may require specialized tools to perform the installation correctly. Professional mechanics are equipped with a wide variety of tools specifically designed for different makes and models, ensuring a precise and efficient installation process.
Importance of knowing when to seek professional help during the installation
Knowing when to seek professional help during the installation of brake pad retaining clips is essential for several reasons. Firstly, it helps to prevent any potential damage to your vehicle. Brake systems are crucial for safety on the road, and any mistakes during installation can lead to braking issues, reduced performance, or even accidents. By reaching out to a professional, you can ensure that the installation is done correctly, minimizing the risk of any problems.
Additionally, seeking professional assistance guarantees a higher level of expertise and experience. Trained mechanics have extensive knowledge of brake systems and are familiar with the nuances of different vehicle models. They have hands-on experience dealing with brake pad retaining clips and can quickly identify and address any potential issues during the installation process.
Lastly, professional help can save you time and effort. Installing brake pad retaining clips can be a time-consuming task, especially if you are unfamiliar with the process. By allowing a professional to handle the installation, you can focus on other important matters in your life while ensuring that your vehicle is in the hands of experts who can complete the job efficiently.
Remember, seeking professional help may come at an additional cost, but it offers peace of mind and ensures optimal results in the installation of brake pad retaining clips. If you are unsure about any aspect of the installation process or lack the necessary experience and tools, it is always better to consult with a professional mechanic to avoid any potential complications.
Frequently Asked Questions On How To Install Brake Pad Retaining Clip
Are Brake Pad Retainer Clips Necessary?
Yes, brake pad retainer clips are necessary. They help to ensure that the brake pads stay in place and function properly. Without them, the brake pads could shift or even fall out, leading to decreased braking performance and potential safety hazards.
What Are The Clips On The Back Of Brake Pads For?
The clips on the back of brake pads are used to hold the pads securely in place. They minimize noise and vibration, preventing the pads from shifting or rattling during braking. These clips improve brake performance and ensure a smooth and efficient braking experience.
What Are Brake Pad Retainer Clips?
Brake pad retainer clips are metal components used in car braking systems to hold brake pads in place. They prevent the pads from shifting or vibrating during braking, ensuring a consistent and effective braking performance. These clips are essential for maintaining proper alignment and reducing noise and vibrations.
What Is The Spring Clip On Brake Pads?
The spring clip on brake pads is a small metal component. It is designed to hold the brake pad in place, ensuring proper alignment and preventing it from rattling or shifting during use. The spring clip provides stability and improves braking performance.
Conclusion
Installing a brake pad retaining clip is essential for the proper functioning of your vehicle’s brake system. By following the step-by-step instructions provided in this blog post, you can easily and effectively install the brake pad retaining clip yourself. It is a simple yet crucial process that ensures the safety of both you and your vehicle.
Don’t wait any longer – equip yourself with the knowledge and tools to properly install a brake pad retaining clip today. Ensure the smooth operation of your brakes and enjoy a safe driving experience.