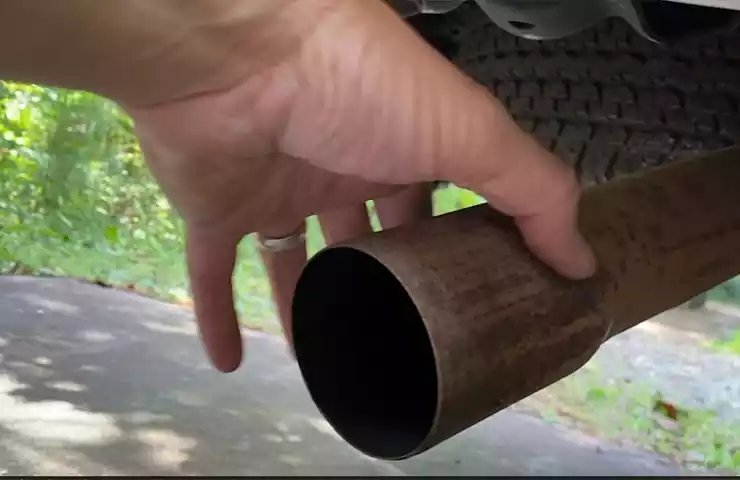
To install bolt-on exhaust tips, first, remove the old exhaust tip by loosening the bolts and sliding it off the tailpipe. Then, slide the new exhaust tip over the tailpipe and align the bolt holes.
Finally, secure the new exhaust tip in place by tightening the bolts. Installing bolt-on exhaust tips is a simple process that can enhance the appearance and sound of your vehicle’s exhaust system. When it comes to upgrading your vehicle’s exhaust system, adding bolt-on exhaust tips is a popular choice.
Whether you want a more aggressive look or a deeper exhaust note, these tips can be a great option. We will guide you through the steps to install bolt-on exhaust tips. By following these instructions, you can easily transform the appearance and sound of your vehicle’s exhaust system without the need for professional help. So, let’s dive in and learn how to install bolt-on exhaust tips with ease.
Choosing The Right Size Bolt On Exhaust Tips
Installing bolt on exhaust tips is a simple yet effective way to enhance the appearance of your vehicle’s exhaust system. However, selecting the correct size for your bolt on exhaust tips is crucial in ensuring a proper fit and optimal performance. In this article, we will discuss the importance of selecting the correct size and guide you on how to measure your current exhaust tip diameter.
The importance of selecting the correct size
Choosing the right size bolt on exhaust tips is essential for several reasons. Firstly, an improper fit can lead to leakage, which can result in reduced performance and increased noise. Secondly, a mismatched size can affect the overall aesthetics of your exhaust system, potentially detracting from the visual appeal you are aiming for. Lastly, choosing the correct size ensures a hassle-free installation process, saving you time and effort.
Measuring your current exhaust tip diameter
Before you can select the right size bolt on exhaust tips, you need to measure the diameter of your current exhaust tips. Follow these simple steps to get an accurate measurement:
- Park your vehicle on a flat surface and engage the parking brake to ensure stability.
- Locate the exhaust tips at the rear of your vehicle.
- Using a tape measure or a caliper, measure the outer diameter of the existing exhaust tips. Ensure that you are measuring the widest part of the tip.
- Record the measurement in either inches or millimeters.
Once you have obtained the measurement, you can now proceed to select the appropriate size for your bolt on exhaust tips. It is important to choose a size that matches your current exhaust tip diameter as closely as possible to ensure a seamless fit. If you are unsure or in between sizes, it is recommended to consult with a professional or refer to the manufacturer’s specifications for guidance.
Installing bolt on exhaust tips with the correct size will not only enhance the look of your vehicle but also contribute to the overall performance of your exhaust system. Take the time to measure your current exhaust tip diameter accurately, and you’ll be well on your way to a successful installation.
Tools And Equipment Needed For Installation
Installing bolt-on exhaust tips can be a fun and rewarding project that can give your vehicle a stylish and customized appearance. However, before you get started, it’s important to gather all the necessary tools and equipment to ensure a smooth installation process. In this section, we will provide a comprehensive list of required tools and equipment, as well as some helpful tips for gathering everything you need before starting.
List of required tools and equipment
- Socket wrench set
- Adjustable wrench
- Hex keys or Allen wrench set
- Level
- Tape measure
- Marker or pencil
- Protective gloves
- Safety glasses
- Vehicle lift or jack stands
- Wheel chocks
- Cleaning supplies (degreaser, rags, etc.)
- Bolt-on exhaust tips
- Installation instructions (if provided)
Tips for gathering all necessary items before starting

Gathering all the necessary items before starting the installation process is essential for a smooth and hassle-free experience. Here are some tips to help you ensure that you have everything you need:
- Read the installation instructions: Before gathering your tools and equipment, take a few minutes to read through the installation instructions provided with your bolt-on exhaust tips. The instructions may list additional tools or materials that are specific to your vehicle or exhaust system.
- Check your tool inventory: Go through your tool collection to confirm that you have all the required tools listed above. If you’re missing any, consider borrowing or purchasing them before starting the installation.
- Inspect and clean your exhaust system: Before installing the new exhaust tips, it’s a good idea to inspect and clean your existing exhaust system. This will help ensure a proper fit and enhance the overall appearance of your vehicle. Use a degreaser and clean rags to remove any dirt, grease, or rust that may be present.
- Prepare your workspace: Clear your workspace of any clutter and ensure that you have enough room to move around comfortably. If you’re using a vehicle lift or jack stands, make sure they are securely in place before getting started. Place wheel chocks to prevent any accidental movement of the vehicle.
- Double-check your measurements: If your bolt-on exhaust tips require precise measurements, use a tape measure and level to ensure accurate placement. Mark the desired location with a marker or pencil before proceeding with the installation.
- Wear protective gear: Safety should always be a top priority when working on your vehicle. Wear protective gloves to protect your hands from any sharp edges or hot surfaces. Additionally, wear safety glasses to protect your eyes from any debris or particles that may be present during the installation process.
Step-By-Step Guide To Installing Bolt On Exhaust Tips
If you’re looking to give your vehicle a sleek and stylish upgrade, installing bolt on exhaust tips is a quick and easy way to do so. In this step-by-step guide, we’ll walk you through the process of installing bolt on exhaust tips. By following these simple instructions, you’ll be able to give your car that eye-catching finishing touch in no time!
Removing the old exhaust tip
The first step in installing bolt on exhaust tips is removing the old exhaust tip. Start by locating the clamps that secure the old tip in place. Using a wrench or pliers, loosen and remove the clamps, allowing you to slide off the old exhaust tip. Keep these clamps handy as they will be reused during the installation of the new bolt on exhaust tip.
Preparing the new bolt on exhaust tip for installation
Once the old exhaust tip is removed, it’s time to prepare the new bolt on exhaust tip for installation. Take a moment to inspect the new tip for any imperfections or damage. Ensure that the mounting holes on the new tip align with the existing holes on your vehicle’s exhaust pipe. If necessary, make any adjustments or modifications to ensure a proper fit.
Attaching the new exhaust tip using bolts
With the new tip prepared, it’s time to attach it to your vehicle’s exhaust pipe. Place the new tip over the end of the exhaust pipe, aligning the mounting holes. Insert the bolts through the mounting holes, making sure they pass through the corresponding holes on the exhaust pipe. Secure the bolts with the clamps that were removed earlier, tightening them to ensure a snug fit.
Tightening the bolts securely
Before you can hit the road with your newly installed bolt on exhaust tip, it’s important to ensure that the bolts are securely tightened. Using a wrench or pliers, tighten each bolt until they are firmly in place. Be careful not to overtighten, as this can cause damage to the tip or the exhaust pipe. Once the bolts are securely tightened, give the exhaust tip a final inspection to ensure it is properly aligned and secure.
Tips For Proper Alignment And Positioning

When it comes to installing bolt-on exhaust tips, proper alignment and positioning are crucial for both aesthetic appeal and functionality. Ensuring that the exhaust tip is aligned with the exhaust pipe will not only enhance the overall look of your vehicle but also optimize its performance. In this section, we will provide you with valuable tips to achieve the perfect alignment and positioning for your bolt-on exhaust tips.
Ensuring the Exhaust Tip is Aligned with the Exhaust Pipe
To achieve optimal alignment, follow these steps:
- Start by cleaning the exhaust pipe thoroughly. Use a damp cloth or mild detergent to remove any dirt or grease.
- Place the bolt-on exhaust tip near the exhaust pipe, ensuring that it aligns perfectly.
- Once aligned, mark the position of the exhaust tip using a masking tape. This will serve as a reference point during the installation process.
- Apply a small amount of high-temperature silicone adhesive to the inside of the exhaust tip to prevent it from slipping or shifting.
- Carefully slide the exhaust tip onto the exhaust pipe, making sure it fits snugly and aligns with the previously marked position.
Proper Positioning for Aesthetic Appeal and Functionality
To achieve both aesthetic appeal and functionality, consider the following positioning tips:
- Position the exhaust tip in a way that it follows the natural lines of the vehicle’s rear bumper. This will create a harmonious and visually appealing look.
- Make sure there is enough clearance between the exhaust tip and any surrounding body panels or components. This will prevent potential damage or rattling noises.
- Consider the angle of the exhaust tip and adjust it to your preference. Angling it slightly downward can create a sportier look, while a horizontal position may result in a more sleek and sophisticated appearance.
By adhering to these tips, you can achieve a proper alignment and positioning for your bolt-on exhaust tips. Remember to always consult the manufacturer’s instructions for specific guidance on your particular exhaust system. Now that you are equipped with the knowledge, go ahead and enhance your vehicle’s performance and style with perfectly aligned and positioned bolt-on exhaust tips.
Proper Maintenance And Care For Bolt On Exhaust Tips
Installing bolt on exhaust tips is a great way to enhance the appearance and performance of your vehicle’s exhaust system. However, it is important to properly maintain and care for these tips to ensure they stay in top condition for years to come. In this section, we will discuss two crucial aspects of maintaining bolt on exhaust tips: cleaning and polishing regularly and protecting them from rust and corrosion.
Cleaning and polishing the tips regularly
To keep your bolt on exhaust tips looking shiny and clean, it is essential to clean them on a regular basis. Regular cleaning removes dirt, grime, and other contaminants from the surface, preventing them from accumulating and potentially causing damage.
Here are some steps to follow when cleaning your bolt on exhaust tips:
- Start by rinsing the tips with water to remove any loose debris.
- Apply a specialized exhaust tip cleaner or a mixture of mild soap and water to the surface of the tips.
- Gently scrub the tips using a soft-bristle brush or sponge, making sure to reach all areas.
- Rinse the tips thoroughly with water to remove the cleaning solution.
- Use a clean microfiber cloth to dry the tips completely.
Furthermore, polishing the tips regularly helps to maintain their shine and prevent the buildup of stains and discoloration. You can use a specialized metal polish or chrome polish for this purpose. Apply a small amount of polish to a soft cloth and gently buff the tips in circular motions until they regain their luster. Remember to follow the manufacturer’s instructions for the specific polish you are using.
Protecting the tips from rust and corrosion

Rust and corrosion can significantly diminish the appearance and performance of your bolt on exhaust tips. To prevent this, it is important to take proactive measures to protect them. Here are some tips:
- Apply a high-quality heat-resistant paint or coating to the surface of the tips. This creates a protective barrier against moisture and corrosive elements.
- Regularly inspect the tips for any signs of damage or rust. If you notice any chips or scratches in the paint or coating, touch them up immediately.
- Consider using exhaust tip covers or guards, especially if you frequently drive in harsh weather conditions or off-road environments. These accessories provide an extra layer of protection against debris and moisture.
- Regularly wash your vehicle, paying special attention to the exhaust tips. This removes any contaminants that may contribute to rust and corrosion.
- Lastly, avoid using abrasive or corrosive cleaning agents on the tips, as they can cause damage. Stick to mild soap, water, and specialized exhaust tip cleaners.
By following these maintenance and care tips, you can ensure that your bolt on exhaust tips remain in pristine condition, enhancing both the aesthetics and performance of your vehicle.
Frequently Asked Questions (Faqs)
When it comes to installing bolt on exhaust tips, you might have a few questions in mind. To help clear your doubts and provide expert guidance, we have compiled a list of the most common queries about installing bolt on exhaust tips.
<h3>Common queries about installing bolt on exhaust tips</h3>
- <h4>Can I install bolt on exhaust tips without professional help?</h4>Yes, installing bolt on exhaust tips is a relatively straightforward process that you can easily do on your own. In most cases, it requires basic tools and a little bit of patience. We will guide you through the steps to make it even simpler.
- <h4>What tools do I need for installing bolt on exhaust tips?</h4>The tools required for installing bolt on exhaust tips are minimal. You would typically need a wrench or a socket set, depending on the size of the bolts and clamps. It’s a good idea to have some penetrating oil handy to make the removal of old exhaust tips easier.
- <h4>Do I need to make any modifications to my exhaust system?</h4>No, bolt on exhaust tips are designed to be compatible with your existing exhaust system without the need for any modifications. They are designed to fit securely onto the tailpipe without requiring welding or cutting.
- <h4>What are the benefits of installing bolt on exhaust tips?</h4>Installing bolt on exhaust tips can enhance the appearance of your vehicle’s exhaust system. They are available in various styles and finishes, allowing you to customize the look to your preference. Additionally, they can provide a slight improvement in exhaust flow, resulting in a deeper and more aggressive exhaust note.
- <h4>How do I measure for the correct size of bolt on exhaust tips?</h4>To determine the correct size of bolt on exhaust tips, you would need to measure the outer diameter of your vehicle’s tailpipe. It’s important to measure the outer diameter accurately, as a larger or smaller exhaust tip may not fit properly. Using a caliper or a measuring tape, measure the outer circumference of the tailpipe and refer to the manufacturer’s sizing guide to select the appropriate size.
<h3>Expert answers and guidance</h3>
Now that we’ve answered the common queries, let’s provide expert answers and guidance to help you through the process of installing bolt on exhaust tips.
Firstly, it’s crucial to ensure that you have the correct size of bolt on exhaust tips for your vehicle. Measure the outer diameter of your tailpipe accurately and refer to the manufacturer’s sizing guide to choose the right size.

Next, gather the necessary tools, including a wrench or socket set, penetrating oil, and possibly a rubber mallet for gentle tapping if needed.
Prior to installation, **clean the tailpipe thoroughly**. Use a mild detergent and a soft cloth or sponge to remove any dirt, grime, or rust. A clean surface will ensure a better fit for the new exhaust tips.
The next step is to **apply penetrating oil** to the bolts and clamps that hold the existing exhaust tips in place. This will help loosen any rust or corrosion and make the removal process easier. Let the penetrating oil sit for a few minutes before attempting to loosen the bolts.
Now, you can **remove the old exhaust tips** by loosening and removing the bolts and clamps. If they are stubborn, you can gently tap with a rubber mallet to loosen them further. Once the old tips are removed, clean the tailpipe and the surrounding area again.
**Position the new bolt on exhaust tips** on the tailpipe and align them properly. Hand-tighten the bolts and clamps initially, making sure they are secure but not overtightened. Double-check the alignment before proceeding.
Finally, **tighten the bolts** using the appropriate wrench or socket set. Make sure not to overtighten, as it may damage the exhaust system or cause leaks. Once tightened, check the alignment and make any necessary adjustments before giving the exhaust system a final clean to remove any fingerprints or smudges.
Following these steps, you can easily install bolt on exhaust tips to enhance the appearance and sound of your vehicle’s exhaust system without the need for professional help. Enjoy the new and improved look and feel of your ride!
Frequently Asked Questions For How To Install Bolt On Exhaust Tips
What Do Bolt On Exhaust Tips Do?
Bolt-on exhaust tips enhance the appearance of your vehicle’s exhaust system. They are attached to the existing exhaust pipe to give a sportier or more aggressive look. They do not significantly impact the performance or sound of the exhaust, but they provide a quick and easy way to customize the look of your car.
Does A Bolt On Exhaust Tip Change The Sound?
Yes, a bolt-on exhaust tip can change the sound of your vehicle. The different designs and materials of the exhaust tip can alter the tone and volume of the exhaust note, giving it a deeper or more aggressive sound.
Do Screw On Exhaust Tips Work?
Yes, screw-on exhaust tips work. They are easy to install and can enhance the appearance of your vehicle’s exhaust system. These tips can also slightly alter the sound and airflow, giving a subtle change to your vehicle’s performance.
How Do You Install Aftermarket Exhaust Tips?
To install aftermarket exhaust tips, follow these steps: 1. Measure the diameter of your existing exhaust pipe. 2. Choose a compatible aftermarket exhaust tip. 3. Clean the area around the exhaust pipe. 4. Slide the new tip onto the pipe and secure it with clamps or screws.
5. Double-check the alignment and tighten any loose fittings. Enjoy your cool new exhaust look!
Conclusion
Installing bolt-on exhaust tips is a simple and affordable way to enhance the aesthetics and performance of your vehicle. By following the step-by-step guide provided in this blog post, you can easily have a customized exhaust system that not only looks great but also delivers an improved exhaust flow.
Remember to choose the right size and style of exhaust tip to suit your vehicle and personal preferences. With these tips in hand, you can confidently embark on this DIY project and enjoy the benefits it brings. Happy installation!
