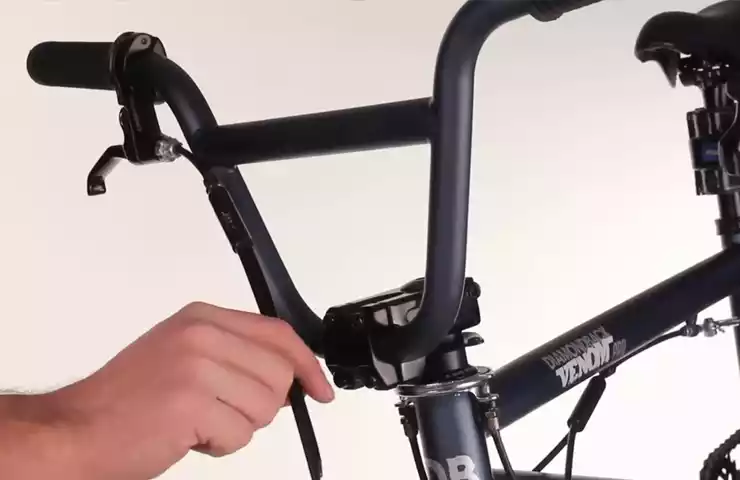
To install BMX brakes, first, loosen the brake cable bolt and slide the brake lever onto the handlebars. Then, attach the brake arms to the fork or frame and adjust the position.
Finally, tighten the brake cable, align the brake pads, and test the brakes before riding. Introducing brakes to your BMX bike can greatly improve your control and safety while riding. Whether you’re a beginner or a seasoned rider, installing BMX brakes is a relatively simple process that can be done at home with a few basic tools.
In this guide, we will walk you through the step-by-step instructions to install BMX brakes on your bike effectively. So, let’s dive in and get your bike ready for smoother stops and better maneuverability.
Gathering The Necessary Tools And Equipment
Before you can start installing BMX brakes, it’s important to gather all the necessary tools and equipment. Having everything prepared beforehand will make the installation process smoother and more efficient. Here are the key items you’ll need:
Bike stand or workbench
A bike stand or workbench is essential for stabilizing your BMX bike while you work on it. This will prevent the bike from tipping over and provide a comfortable height for you to perform the brake installation. If you don’t have a bike stand, you can use a sturdy workbench or find an alternative way to secure your bike in place.
Allen wrench set
An Allen wrench set is an integral part of any bike brake installation. These hexagonal wrenches come in various sizes and are essential for loosening and tightening bolts. Make sure you have a set that includes the sizes needed for your specific brake system.
Brake pads
Brake pads are a crucial component of your BMX brake system as they provide the necessary friction to stop your bike. Ensure you have the appropriate brake pads for your BMX bike, considering factors such as the type of brakes you are installing, the riding conditions, and your personal preferences. If you are unsure, consult with a bike professional to make the right choice.
Brake lever and cable
The brake lever and cable connect your brake caliper to the handlebars, allowing you to control the braking action. When choosing a brake lever and cable, consider factors such as durability, ease of installation, and compatibility with your brake system. It’s essential to select components that are specific to your BMX bike model to ensure optimal performance.
Brake caliper
The brake caliper is the mechanical device responsible for squeezing the brake pads against the rim of the wheel, creating friction and slowing down your bike. Ensure you have a brake caliper that is compatible with your BMX bike’s frame and fork. Pay attention to details such as mounting style (center pull, side pull, or disc), reach, and compatibility with your brake pads.
By gathering all the necessary tools and equipment mentioned above, you’ll be well-prepared to install your BMX brakes efficiently and safely. The next step is to move on to the actual installation process, which we’ll cover in the following sections. Stay tuned!
Removing The Old Brakes
Removing the Old Brakes In order to install new brakes on your BMX bike, it is crucial to first remove the old brake components. This process can be broken down into three main steps: loosening the brake caliper bolts, removing the brake cable from the lever, and finally, removing the old brake pads. Loosening the brake caliper bolts To begin, loosen the brake caliper bolts that hold the brake assembly in place. These bolts are typically located on the front and rear of the brake caliper. Using an appropriate sized Allen wrench, turn each bolt counterclockwise to loosen them. Be sure not to remove the bolts completely at this stage; just enough to allow the brake caliper to slide off the bike. Removing the brake cable from the lever Next, it’s time to detach the brake cable from the lever. This is a relatively simple process, but it may vary slightly depending on the type of brake lever you have. Start by locating the bolt that secures the brake cable to the lever. Using an Allen wrench or a box wrench, loosen the bolt in a counterclockwise motion until the brake cable becomes loose. With the cable now free, you can easily slide it out of the lever. Removing the old brake pads With the brake caliper and cable detached, it’s time to remove the old brake pads. Take a close look at the brake caliper and locate the brake pad retaining pins or bolts. Depending on the design of your brakes, you may need to use a specific tool to remove these pins or bolts. Once removed, carefully slide the old brake pads out of the caliper. Take note of their original position for reference when installing the new brake pads. In brief, the process of removing old brakes involves loosening the brake caliper bolts, removing the brake cable from the lever, and removing the old brake pads. By following these steps, you can successfully remove the old brake components and make way for installing new brakes on your BMX bike.
Installing The New Brakes
Installing the new brakes on your BMX bike is an essential step in ensuring optimal stopping power and control. In this guide, we’ll walk you through the process of installing the new brakes, from preparing the brake pads to testing for proper operation. Whether you’re a seasoned BMX rider or new to the sport, following these steps will help you get your brakes set up and ready for action. Let’s dive in!
Preparing the new brake pads
Before installing the new brakes, it’s important to prepare the brake pads to ensure optimal performance. Follow these steps:
- Inspect the brake pads for any signs of wear or damage.
- If necessary, replace the old brake pads with new ones that are compatible with your BMX bike.
- Align the brake pads so that they make contact with the braking surface evenly.
- Tighten the pad holders to secure the brake pads in place.
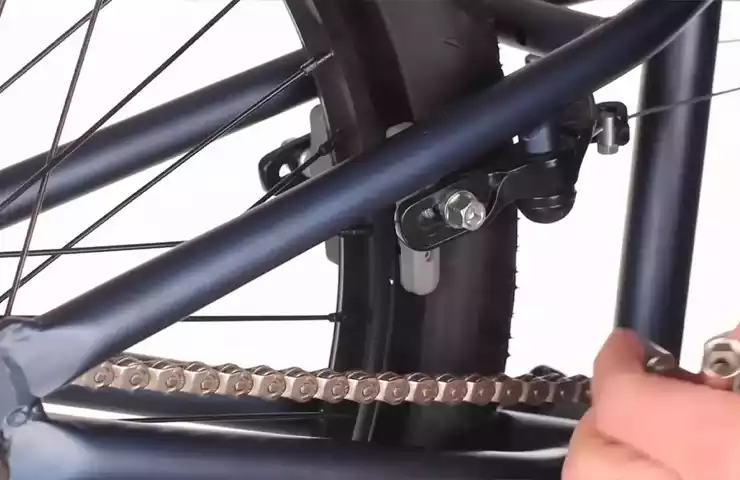
Positioning the brake caliper
Properly positioning the brake caliper is crucial for effective braking. Follow these steps:
- Locate the mounting points on your BMX frame where the brake caliper will attach.
- Align the brake caliper with the mounting points, making sure it sits straight and centered.
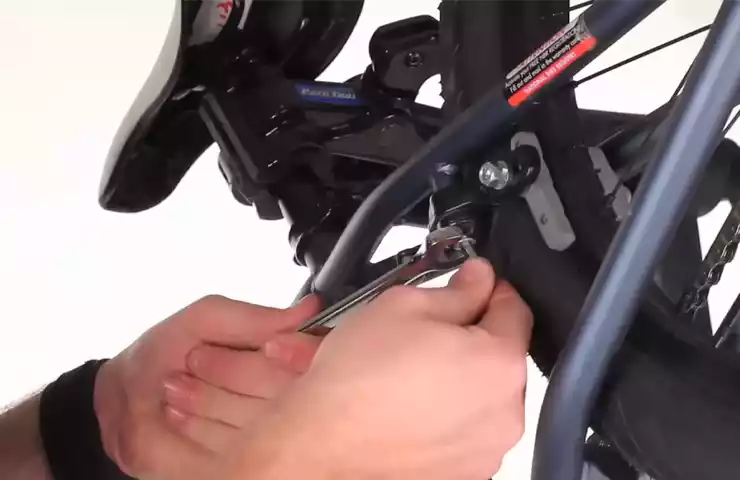
- Using a wrench or an Allen key, tighten the bolts to secure the brake caliper to the frame.
Attaching the brake caliper to the frame
Once the brake caliper is positioned correctly, it’s time to attach it to the frame. Follow these steps:
- Slide the brake caliper onto the mounting points, ensuring it is aligned properly with the brake pads.
- Tighten the bolts or screws to secure the brake caliper in place.
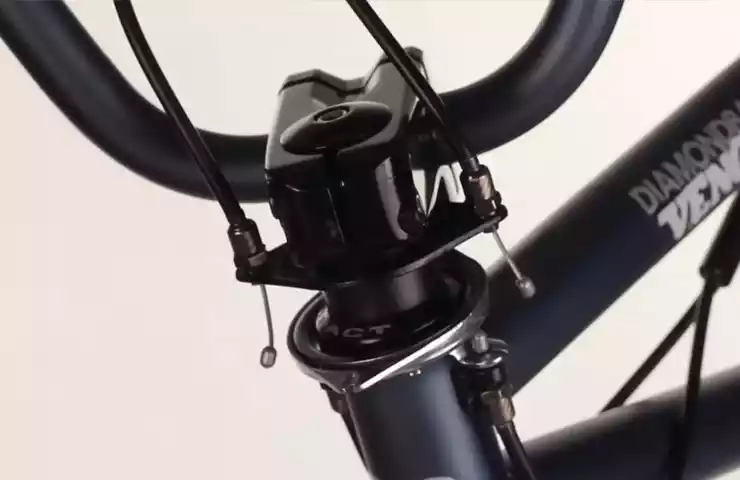
Attaching the brake cable to the lever
Connecting the brake cable to the lever is the next step in the installation process. Follow these steps:
- Route the brake cable through the cable housing.
- Insert the brake cable end into the lever barrel adjuster.
- Tighten the barrel adjuster to secure the brake cable in place.
Adjusting the brake tension
Properly adjusting the brake tension is important for optimal braking performance. Follow these steps:
- Locate the brake tension adjustment screw on the brake caliper.
- Turn the adjustment screw clockwise to increase the brake tension or counterclockwise to decrease it.
- Test the brake lever to ensure it engages and releases smoothly.
Testing the brakes for proper operation
Once you’ve completed the installation process, it’s crucial to test the brakes for proper operation. Follow these steps:
- Mount your BMX bike on a stable stand or ask a friend to hold it.
- Gently squeeze the brake lever to engage the brakes.
- Adjust the brake tension if necessary for optimal stopping power.
- Release the brake lever to ensure the brakes disengage fully.
- Repeat the process a few times to ensure consistent and reliable braking performance.
By following these steps and properly installing your new brakes, you’ll have a safer and more enjoyable riding experience on your BMX bike. Don’t forget to regularly inspect and maintain your brakes to ensure they remain in top condition. Happy riding!
Frequently Asked Questions On How To Install Bmx Brakes
How To Install Front Brakes On A Bmx?
To install front brakes on a BMX, follow these steps: 1. Start by removing the old brake components. 2. Install the brake caliper onto the front fork, aligning it properly. 3. Attach the brake lever onto the handlebars, using the provided clamp.
4. Connect the brake cable to both the lever and the caliper, adjusting the tension. 5. Test the brakes to ensure they are functioning correctly.
How Do You Fit Rear Brakes On A Bmx?
To fit rear brakes on a BMX, follow these steps: 1. Remove the old brake components. 2. Install the brake arms and connect the brake cable. 3. Adjust the brake pads to ensure proper alignment with the rim. 4. Test the brakes to ensure they are working correctly.
5. Fine-tune the brake adjustments as needed.
Do Bmx Brakes Go In Front Or Back?
BMX brakes can be installed both in the front and back of the bike. It depends on the rider’s preference and riding style. Some riders prefer having brakes in the front for better control, while others prefer having brakes in the back for tricks and stunts.
Can You Add Brakes To A Bmx?
Yes, you can add brakes to a BMX. Adding brakes allows you to control your speed and stop safely. It’s a common modification that many riders make to their BMX bikes.
Conclusion
To sum it up, installing BMX brakes may seem intimidating at first, but with the right tools and steps, it can be a straightforward process. By following this guide, you can ensure the safety and efficiency of your bike’s braking system.
Remember to always take your time, double-check your work, and seek professional help if needed. Safe riding and happy biking!