To install bike pegs, first, remove the axle nuts from the bike’s rear wheel. Then, insert the pegs into the axle, align them properly, and tighten the nuts securely.
Having bike pegs on your bicycle can open up a whole new world of tricks and stunts. These pegs, also known as stunt pegs or trick pegs, are attached to the axles of the bike’s rear wheel. They provide riders with additional support and stability, allowing them to perform various tricks and stunts.
Whether you’re a newbie looking to venture into the realm of freestyle BMX or an experienced rider looking to upgrade your tricks, installing bike pegs is an essential step. We’ll guide you through the process of installing bike pegs, ensuring that you can enjoy your bike to the fullest.
Understanding The Purpose Of Bike Pegs
Bike pegs are an essential accessory for any bike enthusiast looking to take their riding to the next level. By understanding the purpose of bike pegs, riders can unlock a world of opportunities for enhancing their biking experience and showcasing their skills. In this article, we will explore the various benefits of bike pegs, ranging from enhancing bike tricks and stunts to adding style and customization to your bike.
Enhancing bike tricks and stunts
Bike pegs play a crucial role in enhancing bike tricks and stunts. These small metal cylinders attach to the axles of the bike’s wheels, providing a stable platform for riders to perform a wide range of tricks and stunts. Whether you’re into grinds, stalls, or even flatland tricks, bike pegs give you the stability and control you need to execute these maneuvers with precision.
With bike pegs, you can take your riding to new heights. From grinding along rails and ledges to performing jaw-dropping aerial tricks, the possibilities are endless. These pegs offer a solid base for riders to balance and land their tricks, allowing them to push their limits and progress in their riding abilities.
Adding style and customization to your bike
In addition to their functional benefits, bike pegs also add a touch of style and customization to your bike. Available in various colors, materials, and designs, pegs allow you to personalize your ride and make a statement. Whether you prefer a sleek and minimalistic look or a vibrant and eye-catching aesthetic, there are pegs out there to suit your style.
Furthermore, bike pegs provide a perfect canvas for expressing your creativity. You can customize your pegs by adding decals, stickers, or even painting them to match your bike’s overall design. This level of customization allows you to stand out from the crowd and showcase your unique personality.
Installing bike pegs is a relatively straightforward process. To ensure a proper installation, it’s important to consider your bike’s specifications and compatibility. Make sure the pegs you choose are compatible with your bike’s axles and ensure a secure fit.
In conclusion, bike pegs are not just a functional accessory; they are a gateway to a world of endless possibilities. From enhancing bike tricks and stunts to adding style and customization, these small additions can make a significant impact on your biking experience. So why wait? Install bike pegs today and unlock your true riding potential!
Safety Considerations
When it comes to installing bike pegs, it is important to prioritize safety. Before you start the installation process, there are a few key factors to consider. By following these safety considerations, you can ensure a smooth and secure installation that will enhance your biking experience.
Selecting the right type of bike pegs
Before getting started, it is crucial to select the right type of bike pegs for your specific needs. There are various styles available, including steel or aluminum pegs, as well as different sizes and shapes. Take into account your riding style and the purpose of the pegs. If you plan on performing tricks and stunts, durable steel pegs may be the best choice. On the other hand, if you are looking for a lightweight option that allows for easy maneuverability, aluminum pegs may be more suitable.
Checking your bike’s compatibility with pegs
Not all bikes are compatible with pegs, so it is essential to check your bike’s compatibility before proceeding with the installation. One way to determine compatibility is by inspecting the axle on your bike’s rear wheel. Look for a threaded hole on the non-drive side of the axle, as this indicates that your bike is peg-ready. However, if there is no threaded hole, it means your bike is not designed to accommodate pegs. It is crucial to ensure compatibility to prevent any accidents or damage to your bike.
Wearing appropriate safety gear during installation
During the installation process, it is vital to wear appropriate safety gear to protect yourself from potential injuries. The following safety gear is recommended:
- A helmet: Protect your head from falls or accidents during the installation.
- Protective gloves: Ensure a secure grip while handling tools and parts.
- Safety goggles: Shield your eyes from any debris or flying particles.
By wearing this safety gear, you can minimize the risk of injuries and create a safer environment for the installation process.
In conclusion, by considering these safety measures, you can confidently install bike pegs on your bicycle. Select the right type of pegs, ensure compatibility with your bike, and don’t forget to wear the appropriate safety gear. With these precautions in place, you’ll be ready to enhance your biking experience with the addition of bike pegs.
Tools And Materials Needed
Before you start installing bike pegs, it’s important to gather all the necessary tools and materials. Having everything prepared will make the installation process smoother and ensure that your pegs are properly installed. Here are the essential tools and materials you’ll need:
Socket Wrench
A socket wrench is a versatile tool that will come in handy during the installation of bike pegs. This tool allows you to tighten and loosen nuts and bolts quickly and efficiently. When choosing a socket wrench for this task, look for one with the appropriate size socket to match your bike pegs.
Allen Wrench
An Allen wrench, also known as a hex key, is another crucial tool for installing bike pegs. This L-shaped wrench usually comes in a set with various sizes, allowing you to find the right fit for your bike. The Allen wrench will be used to secure the pegs onto the bike’s frame or axle, so having the correct size is crucial for a proper installation.
Bike Grease
Bike grease is an essential material to have on hand when installing bike pegs. Applying a thin layer of grease to the threads of the pegs and any other contact points will help prevent rust and ensure a smooth installation. Additionally, it will make future removal easier if needed.
Bike Pegs
Bike pegs themselves are, of course, necessary for this installation. These cylindrical attachments provide an additional platform for your feet on the bike, allowing you to perform tricks or maneuvers. Ensure that you have the appropriate size and style of pegs for your bike and riding preference.
Having these tools and materials ready before you begin the installation process will save you time and effort. Now that you’re equipped with everything you need, let’s move on to the actual installation of the bike pegs!
Preparing Your Bike
Before installing bike pegs, it is important to properly prepare your bike. This involves identifying the rear and front axle of your bike as well as removing the axle nuts. Let’s dive into each step in detail.
Identifying the rear and front axle of your bike
First things first, you need to determine which is the rear axle and which is the front axle of your bike. This can slightly vary depending on the bike model and design. However, in most cases, it is pretty straightforward to identify them. Here’s how:
- Locate the rear wheel of your bike. It is usually positioned towards the back end of your bike’s frame.
- Look for the axle that goes through the center of the rear wheel hub. This is the rear axle.
- Now, shift your attention towards the front wheel of your bike. It is positioned towards the front end of your bike’s frame.
- Similar to the rear axle, identify the axle that goes through the center of the front wheel hub. This is the front axle.
It is important to correctly identify the rear and front axles as bike pegs are typically installed on the rear axle for freestyle tricks and stunts.
Removing the axle nuts
Once you have identified the rear axle, you need to remove the axle nuts. The axle nuts secure the axle in place and prevent it from sliding out. Follow these steps to remove the axle nuts:
- Locate the axle nuts on both sides of the rear axle. These nuts are usually hexagonal or square-shaped.
- Use a suitable wrench or spanner to loosen the nuts. Turn them counterclockwise to unscrew them.
- Once the nuts are loose enough, you can easily slide them off the axle.
- Repeat the same process for the other side of the rear axle to completely remove both axle nuts.
Make sure to keep the nuts in a safe place as you will need them later when installing the pegs.
By following these steps to prepare your bike, you are now ready to proceed with the installation of bike pegs. Stay tuned for the next section of the blog post where we will guide you through the installation process.
Installing Rear Bike Pegs
Installing rear bike pegs can be a great way to add some style and functionality to your ride. Whether you’re a BMX enthusiast or just looking to try something new, pegs can provide extra support and help you perform tricks with ease. In this section, we will guide you through the steps of installing rear bike pegs.
Applying bike grease to the axle
Before you begin the installation process, it’s essential to prep your axle by applying a thin layer of bike grease. This step will ensure that the peg slides smoothly onto the axle and prevents any potential damage caused by friction.
Sliding the bike peg over the axle
Now that you’ve prepped the axle, it’s time to slide the bike peg over it. Position the peg so that it aligns with the axle, ensuring it sits flush against the frame of your bike. Apply gentle pressure and push the peg further onto the axle until you reach your desired position. Make sure that the peg is securely attached and doesn’t wobble or shift when pressure is applied.
Tightening the axle nut securely
Once the peg is in position, it’s crucial to tighten the axle nut securely. This step ensures that the peg remains firmly attached to your bike and won’t come loose during rides or tricks. Grab a wrench or an adjustable spanner and tighten the axle nut clockwise until it is securely fastened. Be careful not to overtighten, as this could potentially damage the axle or the peg itself.
By following these simple steps, you can easily install rear bike pegs and start enjoying the added benefits they provide. Remember to regularly check the tightness of the nuts to ensure the pegs remain secure, and always practice proper safety measures while riding or performing tricks.
Installing Front Bike Pegs
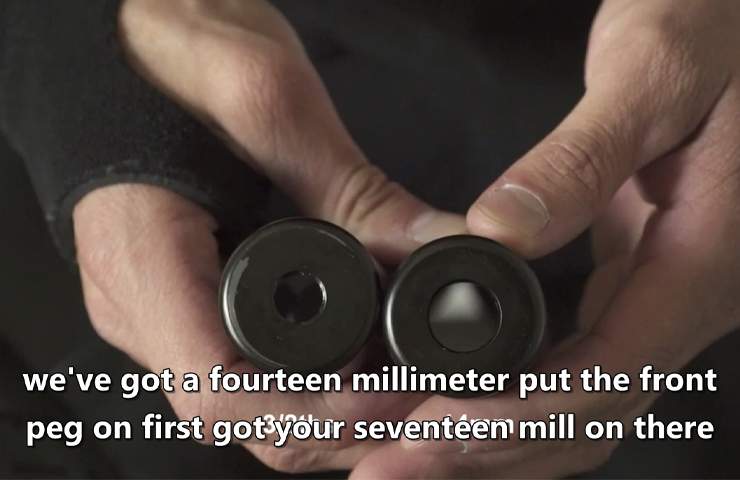
Installing front bike pegs allows you to perform cool tricks and stunts on your BMX or mountain bike. Whether you’re a novice or a seasoned rider, being able to effortlessly glide through the air is an exhilarating experience. This section will walk you through the step-by-step process of installing front bike pegs, ensuring that you can start practicing your new moves with confidence.
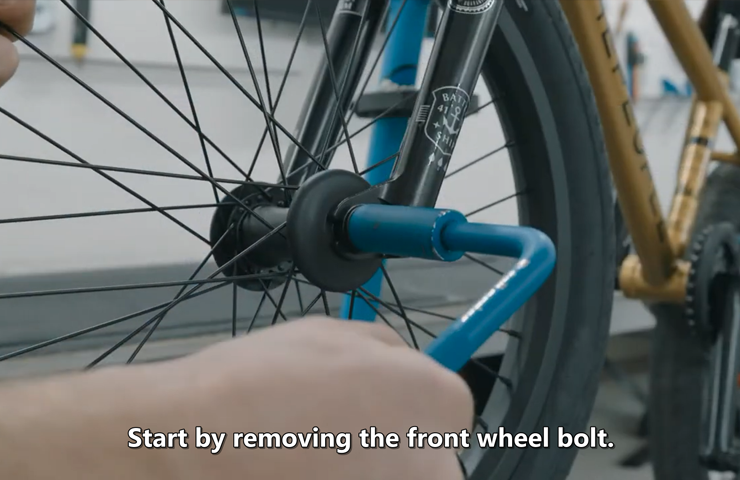
Removing the front wheel
The first step in installing front bike pegs is to remove the front wheel. To do this, follow these simple steps:
- Place the bike upside down, resting it on the handlebars and seat.
- Use a wrench to loosen the nuts or quick release mechanism on both sides of the front axle.
- Once the nuts or quick release mechanism is loosened, carefully slide the front wheel out of the fork dropout slots.
Applying bike grease to the front axle
After removing the front wheel, it’s important to apply bike grease to the front axle. This will help prevent rust and ensure smooth movement of the axle. Follow these steps to apply bike grease:
- Using a clean cloth, wipe off any dirt or debris from the front axle.
- Apply a small amount of bike grease to the axle, making sure to cover it evenly.
- Rotate the axle several times to ensure the grease is distributed thoroughly.
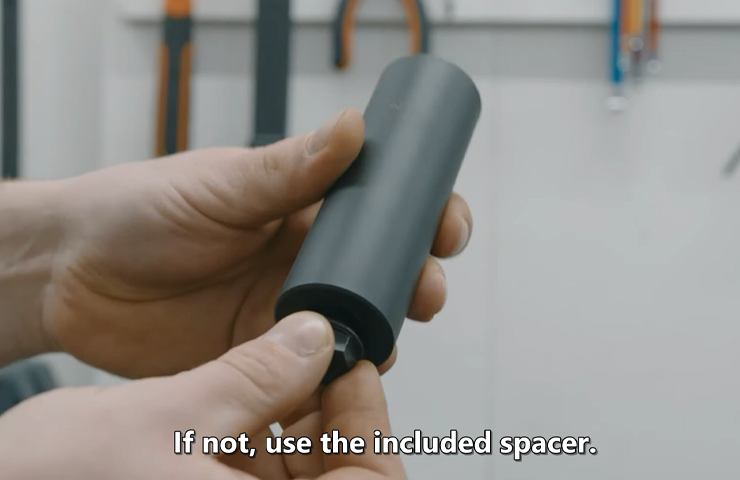
Sliding the bike peg over the axle
With the front axle greased, it’s time to slide the bike peg over the axle. Here’s how to do it:
- Insert one end of the bike peg into the opening of the axle.
- Push the bike peg gently but firmly onto the axle, ensuring that it is securely fitted.
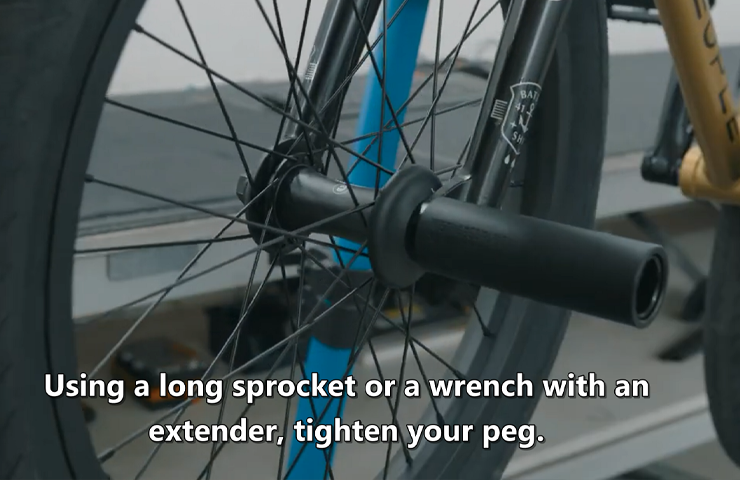
Reinstalling the front wheel securely
Once the bike peg is in place, it’s time to reinstall the front wheel securely. Follow these steps to ensure proper installation:
- Slide the front wheel back into the fork dropout slots, aligning the axle with the slots.
- Tighten the nuts or secure the quick release mechanism on both sides of the front axle with a wrench.
- Ensure that the front wheel is centered and secure by giving it a gentle tug to test for any looseness.
Once you have successfully installed the front bike pegs and reassembled the front wheel, you’re ready to hit the streets or the skatepark with your new skills. Remember to always wear protective gear and practice in a safe environment. Happy riding!
Ensuring Proper Installation
Checking the stability and alignment of the bike pegs
In order to ensure a proper installation of bike pegs, it is important to check their stability and alignment. Properly installed pegs will provide a safe and comfortable riding experience. Here are the steps to follow:
- Start by tightening the axle nut on the wheel where you plan to install the pegs. Use a wrench to secure it firmly.
- Next, hold the pegs securely and try to move them back and forth. This will help you identify any looseness or wobbling in the installation. If you feel any movement, the pegs may not be securely fastened.
- Inspect the alignment of the pegs with the wheel. They should be parallel to the ground and perpendicular to the axle. Misaligned pegs can be uncomfortable and may affect your balance while riding.
- In case you notice any stability or alignment issues, remove the pegs and reinstall them following the manufacturer’s instructions. It’s crucial to take the time to get this step right as a proper installation is crucial for safety and performance.
Testing the bike pegs by performing small tricks
Once you have ensured the stability and alignment of your bike pegs, the next step is to test them by performing small tricks. This will give you a better understanding of whether the pegs can withstand the pressures of your riding style. Here’s what you can do:
- Start with basic tricks such as bunny hops or manuals. These will allow you to gauge how well the pegs handle different forces and weight distributions.
- Pay attention to any noises or vibrations during the tricks. Unusual sounds or excessive shaking may indicate improper installation or loose fittings.
- Gradually progress to more advanced tricks, such as grinds or stalls, to further assess the durability of the pegs. These maneuvers put more stress on the pegs, simulating real-world riding conditions.
- After performing each trick, take a moment to inspect the pegs for any signs of damage or wear. Cracks, bends, or significant scratches should be addressed immediately to prevent accidents or further damage.
By thoroughly checking the stability and alignment of your bike pegs and testing them with small tricks, you can ensure a proper installation and enjoy a safer and more enjoyable riding experience.
Cleaning And Lubrication
Proper cleaning and lubrication of your bike pegs are essential to ensure smooth and safe rides. Over time, dirt and debris can accumulate on the pegs, causing friction and preventing them from functioning at their best. This can lead to issues such as jerky movements and reduced performance. To prevent such problems, it is important to regularly clean and lubricate your bike pegs. In this article, we will guide you through the process, step by step.
Removing dirt and debris from the pegs
The first step in cleaning your bike pegs is to remove any dirt and debris that may have accumulated on them. Riding can expose your pegs to various elements like mud, gravel, and dust, which can hinder their performance. Here’s how you can effectively remove the dirt and debris:
- Start by wiping down the pegs with a clean, dry cloth. This will help remove any loose dirt or dust that may be on the surface.
- Inspect the pegs for any dirt in hard-to-reach areas. Use a soft brush or an old toothbrush to gently scrub away any stubborn dirt or debris.
- Rinse the pegs with water. If your pegs are waterproof, you can rinse them with water to remove any remaining dirt or debris. Be sure to avoid using high-pressure water as it may damage the pegs.
- Dry the pegs thoroughly. After rinsing, make sure to dry the pegs completely before moving on to the next step. This will prevent any water from entering the moving parts and causing rust.
Applying lubrication to the moving parts
Once the pegs are clean and dry, it’s time to apply lubrication to the moving parts. This will help reduce friction and ensure smooth operation. Follow these simple steps to lubricate your bike pegs:
- Select a quality bike lubricant. There are various lubes available in the market specifically designed for bike components. Choose a lubricant that is suitable for the type of pegs you have.
- Apply a small amount of lubricant to the moving parts of the pegs. Focus on areas such as the axle, bearings, and any points where there is metal-on-metal contact. Be cautious not to over-lubricate as it can attract dirt and debris.
- Distribute the lubricant evenly. Gently rotate the pegs or move them back and forth to ensure the lubricant spreads across all the moving parts. This will help in better lubrication.
- Wipe off any excess lubricant. After applying the lubricant, use a clean cloth to remove any excess. This will prevent it from attracting dirt and making a mess.
By regularly cleaning and lubricating your bike pegs, you can extend their lifespan and maintain their performance. Remember to follow these steps at least once a month or more frequently if you ride in challenging conditions. Taking care of your bike pegs will not only improve your riding experience, but also enhance your safety on the road or trails.
Regular Inspections
Regular inspections are crucial to maintain the optimal performance of your bike pegs. By taking the time to thoroughly check for wear and tear and ensuring the tightness of the pegs on the axles, you can prevent any potential accidents or damage. In this section, we will discuss the importance of these inspections and provide you with a step-by-step guide on how to properly perform them.
Checking for wear and tear
One of the first things you should do during a regular inspection is to check for any signs of wear and tear on your bike pegs. This includes examining the pegs themselves, as well as the areas where they come into contact with the bike frame. Look out for any cracks, dents, or scratches that may compromise the strength and effectiveness of the pegs.
In addition, pay attention to the surface of the pegs. Inspect them for any significant signs of wear, such as excessive grooves or rough patches. These can indicate that the pegs have been subjected to a high level of stress or friction, and may need to be replaced to ensure optimal performance.
Ensuring tightness of the pegs on the axles
Another crucial aspect of regular inspections is ensuring the tightness of the pegs on the axles. Loose pegs can result in a wobbly ride, compromising your balance and control. To check the tightness, use a wrench to gently tighten the pegs onto the axles. Avoid overtightening, as this can damage the threads or strip them entirely.
Take note of any unusual resistance while tightening the pegs, as it may indicate a problem with the threads or the pegs themselves. If this is the case, it’s advisable to replace them to ensure a secure fit.
It’s worth mentioning that different types of bikes may have different attachment mechanisms for the pegs. Some may require a specific tool or technique to ensure proper tightness. Consult your bike manufacturer’s instructions or a professional bike mechanic for guidance, especially if you’re unsure about the correct technique for your bike model.
By regularly inspecting your bike pegs and addressing any issues promptly, you can ensure their longevity and safety. Remember, prevention is always better than cure when it comes to bike maintenance!
Replacing Bike Pegs
Knowing when it’s time to replace the pegs
Over time, bike pegs can become worn out or damaged due to regular use. Recognizing the signs that it’s time to replace your bike pegs is crucial to maintaining a smooth and safe riding experience. Here are a few indicators that you should keep an eye out for:
- Visible wear and tear: Inspect your bike pegs regularly for any visible signs of wear and tear, such as cracks, dents, or broken edges. If you notice these signs, it’s a clear indication that your pegs need to be replaced.
- Reduced grip: As you ride, the grip of your bike pegs can start to deteriorate. If you find that your feet are slipping off the pegs or they no longer provide enough traction, it’s time for a new set.
- Loose or wobbly pegs: If your pegs feel loose or wobbly when you stand on them, it’s a sign that they have become loose or worn out. This instability can compromise your balance and control while performing tricks or stunts.
Removing and installing new bike pegs
Now that you’ve identified the need to replace your bike pegs, let’s dive into the step-by-step process of removing the old ones and installing new pegs:
- Gather the necessary tools: Before you begin, make sure you have the right tools at hand, such as a wrench or Allen key, depending on the type of pegs you have.
- Secure your bike: Find a stable surface to secure your bike, such as a workbench or bike stand. This will make the removal process easier and more efficient.
- Remove the old pegs: Use the appropriate tool to loosen and remove the bolts or screws that attach the pegs to the axle. Gently slide the pegs off the axle once the fasteners have been removed.
- Clean the axle: Take a moment to clean the axle and remove any dirt or debris that may have accumulated. This will ensure a secure and stable connection when you install the new pegs.
- Install the new pegs: Place the new pegs onto the axle and align them properly. Insert the bolts or screws through the designated holes and tighten them securely using your wrench or Allen key.
- Test for stability: Once the new pegs are securely attached, give them a gentle tug to ensure they are stable and won’t come loose during rides. Double-check that the fasteners are tight enough to prevent any unexpected movement.
By following these steps, you’ll be able to confidently replace your bike pegs with ease. Remember, it’s essential to regularly inspect your pegs for signs of wear and replace them promptly to maintain optimal performance and safety.
Frequently Asked Questions For How To Install Bike Pegs
Can You Install Pegs On Any Bike?
Yes, pegs can be installed on most bikes depending on their frame and design. Ensure compatibility with your bike model and seek professional assistance for proper installation and optimal performance.
How Do You Put Pegs On A Mountain Bike?
To put pegs on a mountain bike, follow these steps: 1. Choose pegs that fit your bike’s axle diameter. 2. Remove the axle nuts or bolts. 3. Place the pegs onto the axle and tighten the nuts or bolts. 4.
Ensure the pegs are secure before riding. Enjoy your bike with new pegs!
Do Pegs Go On Front Or Back Of Bike?
Pegs are typically placed on the back of a bike.
Can You Put Pegs On A Road Bike?
Yes, you can put pegs on a road bike. However, it is important to consider the type of pegs designed specifically for road bikes to ensure proper fit and compatibility.
Conclusion
Installing bike pegs is a simple process that can greatly enhance your biking experience. By following the step-by-step instructions outlined in this guide, you can easily attach bike pegs to your bicycle. Remember to select pegs that are suitable for your bike’s axle size and ensure that they are secured tightly.
With bike pegs in place, you’ll be ready to perform tricks and stunts with confidence. Happy riding!