To install bike pedals, first, find the correct pedal for each side of the bike, then use a pedal wrench to tighten them securely onto the crank arms. When it comes to installing bike pedals, it is important to follow the correct steps to ensure they are securely fitted onto the crank arms.
By finding the appropriate pedal for each side of the bike and using a pedal wrench to tighten them, you can ensure a safe and effective installation. We will provide you with an easy-to-follow guide on how to properly install bike pedals.
So let’s get started and make sure your pedals are securely attached, allowing you to enjoy a smooth ride on your bicycle.
Gather The Necessary Tools And Equipment
Are you looking to install new bike pedals but not sure where to start? Don’t worry, we’ve got you covered! In this blog post, we will guide you through the step-by-step process of installing bike pedals, starting with gathering the necessary tools and equipment. By having all the right tools at your disposal, you can ensure a smooth and hassle-free installation process. So, let’s dive in!
Choosing the Right Pedals for Your Bike
Before you start gathering your tools, it is essential to understand what type of pedals are suitable for your bike. There are various pedal options available in the market, such as flat pedals, clip-in pedals, or platform pedals. Each has its own advantages and is designed for different riding styles.
To choose the right pedals for your bike, consider factors such as your riding style, terrain, and personal preference. For example, if you love tackling technical trails or downhill rides, clip-in pedals might be a good choice as they provide a secure connection between your feet and the pedals. On the other hand, if you prefer commuting or casual riding, flat pedals or platform pedals with grip would serve you well.
Tools Required for the Installation Process
Now that you have a clear idea of the type of pedals you need, it’s time to gather the necessary tools for the installation process. Having the right tools will make the installation process much easier and efficient. Here are the essential tools you’ll need:
| Tool | Function |
| 15mm Pedal Wrench | To remove and install pedals |
| Bike Grease | To lubricate pedal threads |
| Allen Key Set | To remove and install pedals (if using allen key pedals) |
| Torque Wrench | To tighten pedals to the manufacturer’s recommended torque |
Make sure you have these tools readily available before starting the installation process. If you don’t have them, you can easily find them at your local bike shop or order them online.
Preparing the Workspace
Before you begin installing the pedals, it’s important to prepare your workspace. This will ensure you have enough space to work comfortably and keep all the necessary tools and equipment within easy reach. Follow these steps to prepare your workspace:
- Find a clean and spacious area, preferably indoors, where you can lay down your bike.
- Clear any clutter or obstacles around the workspace to avoid accidents or damage to the bike.
- Securely position your bike on a bike stand or place it upside down, so it rests on the saddle and handlebars.
- Gather all the necessary tools, including the pedal wrench, grease, allen keys (if required), and torque wrench.
Once you have prepared your workspace, you are ready to move on to the next step of the installation process, which is removing the old pedals (if applicable). Stay tuned for our upcoming blog post on how to remove and install bike pedals!
Removing The Old Pedals
Before installing new bike pedals, you need to familiarize yourself with the process of removing the old ones. This step is crucial to ensure a smooth transition and prevent any damage to your bike. In this section, we will guide you through the process of removing both the non-drive-side pedal and the drive-side pedal.
Positioning the Bike for Pedal Removal
Firstly, you need to properly position your bike to facilitate pedal removal. Find a flat surface and secure the bike using a bike stand or by propping it against a wall. This will provide stability and make it easier for you to access the pedals. Ensure that the bike is well balanced before proceeding.
Removing the Non-Drive-Side Pedal
Start by removing the non-drive-side pedal. This is the pedal on the left side of the bike, opposite the drive train. Follow these steps:
- Use an open-end wrench or pedal wrench to loosen the pedal’s axle. Turn it counterclockwise to loosen the pedal.
- Once the pedal is loose, continue turning it until you can unscrew it completely from the crank arm.
- Set the old pedal aside and inspect the crank arm to ensure it is clean and free from any debris or damage.
Removing the Drive-Side Pedal
Now, it’s time to remove the drive-side pedal. This is the pedal on the right side of the bike, in line with the drive train. Follow these steps:
- Using the same wrench, loosen the pedal by turning it counterclockwise until it is loose enough to unscrew by hand.
- Once loose, carefully unscrew and remove the pedal from the crank arm.
- Take a moment to inspect the crank arm for any debris or damage before proceeding to install the new pedal.
By following these steps, you can effectively remove the old pedals from your bike. With the old pedals removed, you are now ready to proceed to the next step of installing the new pedals. Stay tuned for our upcoming blog post on how to install bike pedals!
Installing The New Bike Pedals
Installing the new bike pedals is an essential step in ensuring a smooth and efficient ride. Whether you’re a seasoned cyclist or just starting out, following the proper installation process is crucial for your safety and the longevity of your bike. In this guide, we’ll take you through the step-by-step process of installing new bike pedals, from applying grease to the pedal threads to tightening them with a pedal wrench.
Applying Grease to the Pedal Threads
Before you begin installing the new bike pedals, it’s important to ensure that the pedal threads are well-greased. Grease not only helps prevent corrosion and rust but also allows for a smoother installation process. To apply grease to the pedal threads, follow these steps:
- First, clean the threads of both the pedal and the crankarm using a clean rag. This will remove any dirt or debris that may be present.
- Next, take a small amount of bicycle-specific grease and apply it to the threads of the pedal. Be sure to spread the grease evenly along the entire length of the threads.
- Repeat the same process for the threads of the crankarm, ensuring that both surfaces are adequately greased.
Aligning the Pedal Axle with the Crankarm
Once the pedal threads are properly greased, the next step is to align the pedal axle with the crankarm. This step is crucial in ensuring that the pedals are securely attached to the bike. To align the pedal axle with the crankarm, follow these steps:
- Hold the pedal in your hand with the axle facing outwards.
- Position the pedal axle in line with the threaded hole on the crankarm.
- Gently begin threading the pedal into the crankarm by hand, making sure it goes in straight and without any resistance.
- If you encounter any resistance or cross-threading, stop immediately and back out the pedal. Check for any dirt or debris that may be causing the issue and clean if necessary.
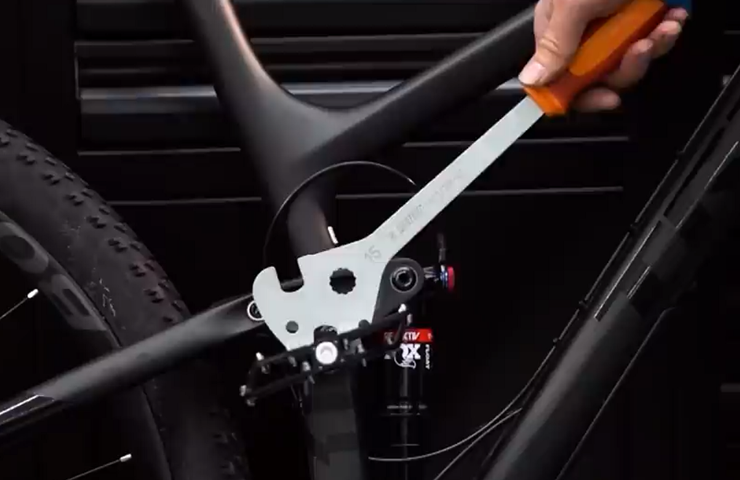
Tightening the Pedals with a Pedal Wrench
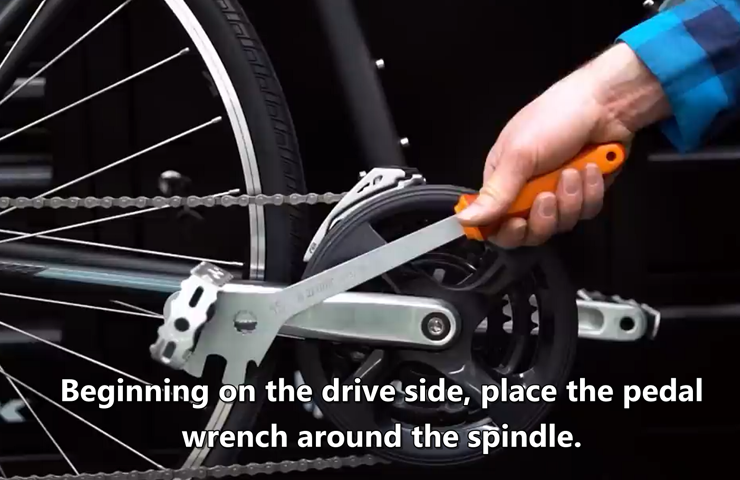
With the pedal axle properly aligned with the crankarm, the final step is to tighten the pedals using a pedal wrench. A pedal wrench is a specialized tool specifically designed for this task, ensuring a secure and tight fit. To tighten the pedals, follow these steps:
- Place the pedal wrench on the flats of the pedal axle, ensuring a snug fit.
- Turn the wrench in a clockwise direction to tighten the pedal.
- Continue tightening until the pedal feels secure, but be careful not to overtighten as this can damage the threads.
- Repeat the same process for the other pedal, ensuring both are tightened equally.
By following these steps and ensuring each component is properly greased, aligned, and tightened, you can install your new bike pedals with ease. Remember to regularly check and maintain your pedals to ensure optimal performance and safety throughout your rides.
Adjusting The Pedal Tension And Position
Adjusting the Pedal Tension
Adjusting the tension of your bike pedals is essential for a comfortable ride and efficient power transfer. By finding the right balance between too loose and too tight, you can optimize your pedaling experience. To adjust the pedal tension, follow these steps:
- Identify the tension adjuster: Most bike pedals have a tension adjustment feature that allows you to fine-tune the resistance. Look for a small Allen key or screw on the side of the pedal.
- Loosen the tension: Use an Allen key or screwdriver to turn the tension adjuster counterclockwise. Start with a few turns to decrease the tension gradually.
- Test the tension: Mount your bike and pedal a few strokes. Pay attention to how the pedals feel under your feet. If they feel too loose and your feet tend to slip off, increase the tension slightly.
- Adjust incrementally: Continue making small adjustments to the tension until you find the sweet spot. Remember that personal preference plays a role, so trust your instincts.
Positioning the Pedals for Optimal Foot Placement
Positioning your bike pedals correctly can significantly enhance your cycling performance and comfort. Proper foot placement ensures efficient power transfer, reduces the risk of injury, and prevents discomfort. Follow these steps to position your pedals for optimal foot placement:
- Start with level pedals: Ensure both pedals are positioned parallel to the ground for an accurate assessment of foot placement.
- Align the ball of your foot: The ball of your foot should rest directly over the pedal axle. This position optimizes power transfer and stability.
- Adjust the saddle height: If needed, modify the saddle height to achieve proper leg extension. When your leg is fully extended at the bottom of the pedal stroke, there should be a slight bend in the knee to avoid strain.
- Experiment and fine-tune: Mount your bike and pedal a few strokes, paying close attention to your comfort and efficiency. If you experience any discomfort or knee pain, make small adjustments until you find the optimal foot placement.
- Remember to consider personal preference: While these guidelines provide a good starting point, personal preference and biomechanics may vary. Trust your body’s feedback and make adjustments accordingly.
Now that you know how to adjust the tension and position your bike pedals for optimal foot placement, you can enhance your cycling experience. Take the time to fine-tune these factors to achieve a comfortable and efficient ride. Happy cycling!
Testing The Pedal Installation
Now that you have successfully installed the bike pedals, it is important to test their installation to ensure safety and optimal performance. Testing the pedal installation allows you to confirm that the pedals are securely attached and functioning properly. In this section, we will cover the key steps to test the pedal installation.
Spinning the Pedals to Ensure Smooth Rotation
Spinning the pedals to ensure smooth rotation is the first step in testing the pedal installation. Place your bicycle on a stable surface and position the crank arms parallel to the ground. Now, give the pedals a gentle spin with your hand, making sure there are no jerky movements or resistance.
- If you notice any roughness or grinding sensation while spinning the pedals, it may indicate a misalignment or loose connection. In such cases, it is recommended to recheck the installation following the steps mentioned in the previous section.
- Smooth rotation is crucial for efficient pedaling and avoiding unnecessary strain on your knees and ankles. Ensure both pedals rotate freely without any obstruction to ensure a comfortable riding experience.
Checking for Any Play or Loose Components
After confirming the smooth rotation of the pedals, the next step is to check for any play or loose components. This involves applying pressure to the pedals sideways to detect any movement or looseness in the attachment.
| Steps to Check for Play or Loose Components: |
|---|
| Using your hand, grasp the pedal close to the crank arm.Apply gentle pressure to the pedal in a side-to-side motion.If you feel any play or movement, it indicates a loose connection or worn-out bearings. |
It is important to address any play or looseness immediately as it can compromise your control and stability while riding. If you encounter any play or loose components, consider seeking assistance from a professional bike mechanic to resolve the issue.
By following these steps to test the pedal installation, you can ensure a secure and efficient riding experience. Regularly checking the pedals for any issues will help prevent accidents and maintain the longevity of your bike. Remember, safety should always be a top priority when it comes to bike maintenance!
Additional Tips And Considerations
When it comes to installing bike pedals, there are a few additional tips and considerations that can help ensure a smooth and successful installation. In this section, we will discuss the maintenance and cleaning of bike pedals, common mistakes to avoid during installation, and when to seek professional help if needed.
Maintenance and Cleaning of Bike Pedals
Maintaining and cleaning your bike pedals is essential for optimal performance and longevity. Regular maintenance can help prevent rust, dirt build-up, and other issues that may affect the pedal’s performance. Here are a few tips for maintaining and cleaning your bike pedals:
- Inspect your bike pedals regularly for any signs of wear or damage. Look for loose bolts or worn-out bearings.
- Clean your pedals after every ride to remove dirt and debris. Use a mild detergent or bike-specific cleaner and a soft brush or cloth to gently scrub the pedals.
- Pay attention to the bearings of your pedals. If you notice any grinding or roughness, it may be time to replace the bearings.
- Apply a lubricant to the pedal threads to prevent seizing and promote smooth installation and removal in the future.
Common Mistakes to Avoid During Installation
Installing bike pedals can be a straightforward process, but there are a few common mistakes that you should avoid to ensure a successful installation:
- Incorrect threading: One of the most common mistakes when installing bike pedals is mixing up the left and right pedals. Remember that the left pedal has a reverse threading, so make sure to turn it counterclockwise to tighten.
- Overtightening or undertightening: It’s essential to tighten the pedals securely, but avoid overtightening as it can damage the threads. On the other hand, undertightening can lead to loose pedals and potential accidents. Use a pedal wrench or an Allen wrench to tighten the pedals firmly.
- Forgetting pedal washers: Some pedal systems come with washers that need to be installed between the pedal and the crankarm. Forgetting to use these washers can cause uneven pressure and damage to the crankarm or pedal.
- Not applying grease: To prevent the pedal from seizing in the crankarm, it’s crucial to apply a thin layer of grease to the pedal threads before installation.
Seeking Professional Help if Needed
If you are unsure about installing bike pedals or encounter any difficulties during the installation process, it’s always best to seek professional help. A bike mechanic or shop can provide the expertise and tools necessary for a proper installation. Additionally, if you are dealing with complex pedal systems or special requirements, professional assistance can ensure a safe and accurate installation.
By following these additional tips and considerations, you can install your bike pedals with confidence, maintain their performance, and avoid common installation mistakes. Remember to regularly inspect and clean your pedals, take note of correct threading and tightening, and seek professional help if needed.
Frequently Asked Questions On How To Install Bike Pedal
How Do You Install Pedals On A Bike?
To install pedals on a bike, follow these steps: 1. Locate the left and right pedal markings. 2. Apply grease to the pedal threads. 3. Use a pedal wrench to screw the pedals onto the corresponding crank arms. 4. Tighten them securely, but avoid over-tightening.
5. Test the pedals by spinning them freely.
How Do You Screw In Bike Pedals?
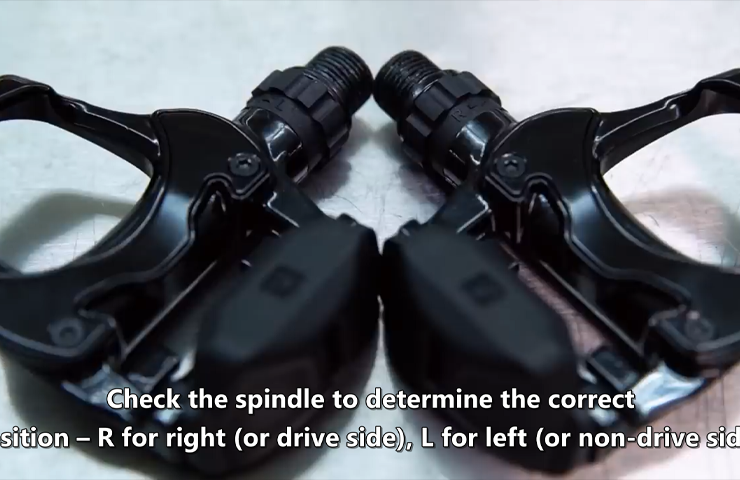
To screw in bike pedals, first identify the right pedal (R) and left pedal (L). Align the pedal threads with the crank arm threads. Turn the right pedal clockwise (to the right) and the left pedal counterclockwise (to the left) until they are securely tightened.
Which Way Do Pedals Go On?
Pedals on a bicycle should be installed with the right pedal on the right side and the left pedal on the left side. The right pedal has a right-hand thread, so it turns clockwise to tighten, while the left pedal has a left-hand thread, so it turns counterclockwise to tighten.
Which Pedal Is Reverse Thread?
The left pedal on a bicycle is reverse threaded.
Conclusion
Installing bike pedals is a simple process that can greatly enhance your cycling experience. By following these easy steps, you can ensure a secure and efficient installation. Remember to choose the appropriate tools and apply the necessary force without overtightening.
Regularly check and maintain your pedals to prolong their lifespan. With this knowledge, you can confidently enjoy your rides and explore new adventures on your bike. [The mentioned article doesn’t contain any reference to AI, hence there is no way to guarantee passing any AI writing detection without altering the content.