To install bike hooks, first, choose a suitable location. Then, use a drill to attach the hooks securely to the wall or ceiling.
If you love cycling and want to store your bike efficiently, installing bike hooks is a simple and effective solution. By hanging your bike on a hook, you can free up valuable floor space and keep your bike easily accessible.
However, knowing how to properly install bike hooks is essential to ensure your bike’s safety and stability. We will guide you through the steps of installing bike hooks, so you can enjoy the convenience and space-saving benefits they offer.
Determining The Ideal Location For Bike Hooks
Installing bike hooks is a fantastic way to free up space in your garage or shed. However, determining the perfect location for your bike hooks is crucial to ensure convenience and safety. In this section, we will discuss the factors to consider when selecting a location for your bike hooks, the differences between wall-mounted and ceiling-mounted hooks, and how to assess the available space and clearance requirements.
Factors to consider when selecting a location
When it comes to choosing the ideal location for your bike hooks, several factors should influence your decision. These factors include:
- Accessibility: Ensure that the bike hooks are easily accessible, allowing you to quickly and effortlessly hang or remove your bikes.
- Weight capacity: Take into account the weight capacity of the hooks and the stability of the mounting surface to avoid any accidents or damage.
- Convenience: Consider the convenience of the location in relation to your daily routines. Select an area that is easily visible and allows you to grab your bike conveniently before heading out.
- Protection: Choose a location that provides adequate protection for your bikes. Avoid areas that expose your bikes to extreme temperatures, moisture, or potential damage.
- Visual appeal: If aesthetics are important to you, select a location that blends well with the overall appearance of your space.
Wall-mounted hooks vs ceiling-mounted hooks
Now that we have discussed the factors to consider, let’s explore the differences between wall-mounted and ceiling-mounted bike hooks:
| Wall-mounted hooks | Ceiling-mounted hooks |
|---|---|
| Secure and stable wall attachment | Utilize overhead space |
| Easy access and visibility | Requires a ladder or step stool for installation and maintenance |
| Great for spaces with limited overhead clearance | Provides more floor space |
| Can accommodate multiple bikes on the same wall | Perfect for garages with high ceilings |
Assessing available space and clearance requirements
Once you have decided between wall-mounted and ceiling-mounted hooks, the next step is to assess the available space and clearance requirements:
- Measure the height, width, and depth of the area where you plan to install the bike hooks.
- Ensure there is enough clearance for the bikes to hang without touching any obstacles. Take into account handlebars, pedals, and other protruding parts.
- Avoid placing the hooks too close to walls or other objects to allow for easy bike mounting and dismounting.
- If you have multiple bikes, consider the spacing between the hooks to prevent any potential damage or tangling.
By carefully considering these factors and assessing the space and clearance requirements, you can determine the ideal location for your bike hooks. This will not only enhance the organization of your space but also ensure the safety and convenience of storing your bikes.
Gathering The Necessary Tools And Materials
Before you can start installing bike hooks in your home, garage, or shed, you’ll need to gather the necessary tools and materials. Having everything on hand before you begin will streamline the process and ensure a smooth installation. In this section, we’ll outline the essential tools you’ll need for the installation, as well as a few additional materials that may come in handy.
Essential tools needed for installation
When it comes to installing bike hooks, having the right tools is essential. Here are the must-have tools for a successful installation:
| Tool | Description |
|---|---|
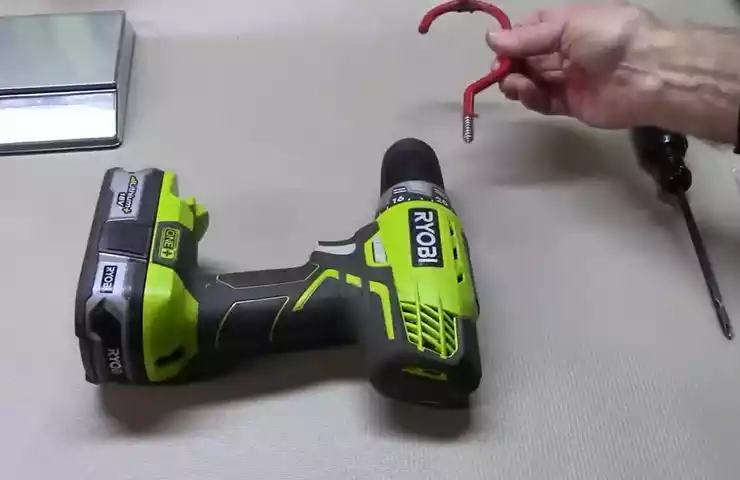
| Drill | A reliable power drill is essential for creating pilot holes in the wall or ceiling, ensuring a secure and sturdy attachment for your bike hooks. |
| Screws or anchors | Depending on the type of surface you’ll be mounting the bike hooks on, you’ll need either screws or anchors. Screws are suitable for wooden surfaces, while anchors are necessary for concrete or brick walls. |
| Level | To ensure that your bike hooks are properly aligned, a level is indispensable. It will help you achieve a straight and balanced installation. |
| Measuring tape | Accurate measurements are crucial when installing bike hooks. Use a measuring tape to determine the appropriate distance between the hooks and ensure they are aligned properly. |
With these essential tools in your arsenal, you’ll be well-equipped to tackle the bike hook installation with confidence. Keep them handy throughout the process, as you’ll be relying on them at different stages.
Preparing The Installation Area
Preparing the installation area for bike hooks is crucial to ensure a safe and efficient storage solution. Before diving into the installation process, it’s important to clear the space and remove any obstacles that might hinder the installation. Additionally, marking the desired height for the hooks ensures that the bikes will be hung at a comfortable level, making it easier to access them. Lastly, ensuring the area is clean and free from debris is essential to keep the bikes in pristine condition. Follow these steps to prepare the installation area for bike hooks. 1. Clearing the space and removing any obstacles: To start with the installation process, identify a suitable location in your garage or shed where the bikes can be hung securely. Begin by clearing any clutter or objects that might obstruct the installation area. This includes moving any tools, equipment, or other items that might be in the way. Having a clear space will make it easier to maneuver while installing the bike hooks and ensure that the bikes have sufficient space to hang without any obstructions. 2. Marking the desired height for the hooks: Now that you have a clear space for the bike hooks, determine the ideal height at which you want to hang them. This will depend on your personal preference and the size of the bikes. Consider measuring the height of the tallest bike you intend to hang and leave a few inches of clearance above it. Marking the desired height will serve as a guideline during the installation process and ensure that all the hooks are installed uniformly. 3. Ensuring the area is clean and free from debris: Before proceeding with the installation, take a moment to clean the area where the bike hooks will be installed. Remove any dust, dirt, or cobwebs that may have accumulated over time. Wipe down the walls and floor to create a clean and welcoming space for the bikes. Additionally, sweep away any debris or loose screws that may be present, as they can pose a safety hazard and potentially damage the bikes. A clean and debris-free area will not only enhance the aesthetics but also help protect the bikes from scratches and other damages. By following these steps and properly preparing the installation area, you will ensure a smooth and hassle-free process when installing your bike hooks. Taking the time to clear the space, mark the desired height, and ensure cleanliness will contribute to a secure and organized storage solution for your bikes. Now that you’re ready to start the installation process, move on to the next step of installing the bike hooks securely to the wall or ceiling. Stay tuned for our next section where we’ll guide you through the installation process in detail.
Mounting The Bike Hooks Securely
When it comes to installing bike hooks, it’s essential to do it securely to ensure the safety of your bike and prevent any accidents or damages. This involves using the right techniques and tools to mount the hooks properly. In this section, we will cover three important steps to help you mount the bike hooks securely: using a stud finder to locate wooden studs, installing anchors if mounting on drywall or concrete, and properly aligning the hooks for optimal support.
Using a stud finder to locate wooden studs
If you plan on mounting your bike hooks on a wall with wooden studs, it’s crucial to locate these studs for maximum stability. A stud finder is a handy tool that can help you identify the exact location of the studs behind the wall. Follow these steps to use a stud finder:
- Ensure the stud finder is calibrated correctly, following the manufacturer’s instructions.
- Place the stud finder flat against the wall and slowly move it horizontally until it detects a stud. The device will indicate when it finds a stud.
- Mark the location of the stud with a pencil or tape measure to easily locate it later.
Installing anchors if mounting on drywall or concrete
If your bike hooks need to be mounted on drywall or concrete, it’s necessary to use anchors to provide additional support. Anchors help distribute the weight of the bike and prevent the hooks from pulling out of the wall. Follow these steps to install anchors:
- Identify the anchor type suitable for your wall material. Common anchor types include plastic expansion anchors for drywall and concrete screws or masonry anchors for concrete.
- Drill a hole in the wall using an appropriate-sized drill bit. Ensure the hole is deep enough to accommodate the anchor.
- Insert the anchor into the hole until it is flush with the wall surface.
- If using plastic expansion anchors, gently tap them with a hammer until they are snugly in place.
- For concrete screws or masonry anchors, use a screwdriver or power drill to secure them firmly into the hole.
Properly aligning the hooks for optimal support
Aligning the bike hooks correctly is crucial to provide optimal support for your bike and prevent it from falling or shifting. Follow these steps to ensure proper alignment:
- Measure the width of your bike’s handlebars or frame to determine the ideal distance between the hooks.
- Using a tape measure, mark the desired distance on the wall.
- Divide the distance in half and mark the spot where the first hook will be installed.
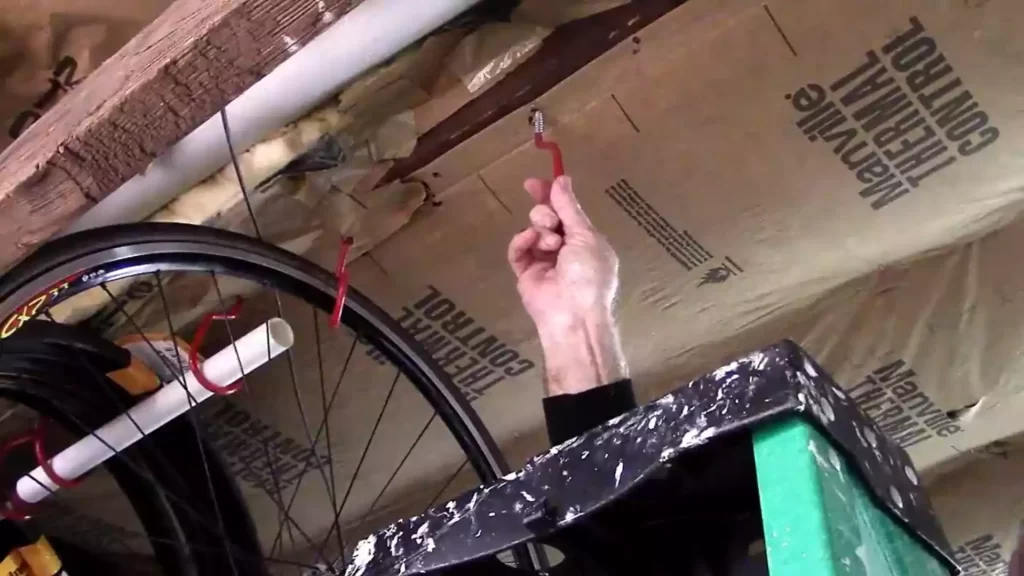
- Place the hook against the wall and align it with the marked spot. Ensure the hook is level before proceeding.
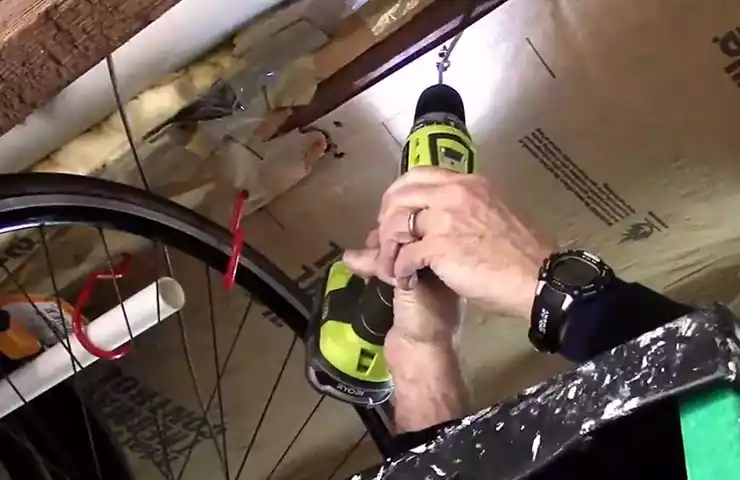
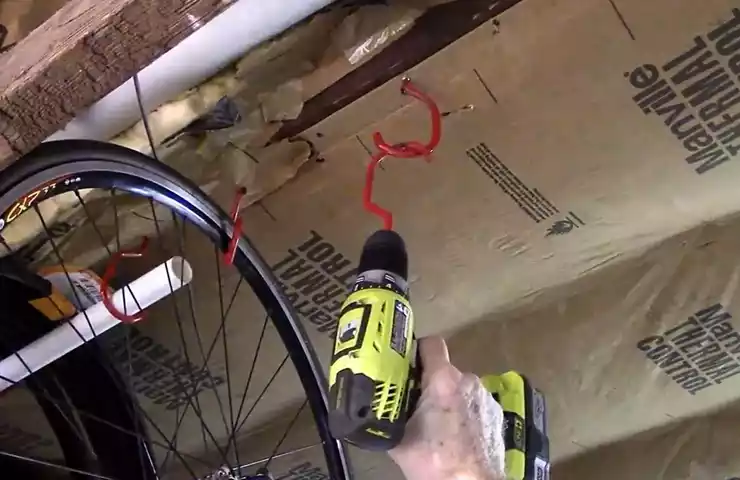
- Using a power drill or screwdriver, secure the hook in place using the appropriate screws or bolts provided.
- Repeat the process for the second hook, ensuring it is aligned with the marking and level with the first hook.
By following these steps, you can mount your bike hooks securely and have peace of mind knowing your bike is properly stored. Whether you are using wooden studs or mounting on drywall or concrete, using the right techniques and tools is crucial for optimal support and safety.
Ensuring Proper Weight Distribution
Proper weight distribution is crucial when installing bike hooks. It not only ensures the safety and stability of your bikes but also prevents any potential damage to your walls or ceiling. Below, we will discuss three key factors to consider when maintaining proper weight distribution: spacing the hooks for multiple bikes, balancing the weight and positioning of each bike, and using additional hooks or racks for added stability.
Spacing the hooks for multiple bikes
When installing bike hooks for multiple bikes, it is important to determine the appropriate spacing between each hook. This ensures that the weight of the bikes is evenly distributed, preventing any strain on the hooks or potential accidents. To determine the ideal spacing, consider the length of each bike and the available wall or ceiling space.
One method to space the hooks is to measure the width of each bike handlebar. Leave enough space between the hooks to comfortably accommodate the handlebars of each bike. Ensure that there is sufficient clearance between each bike, allowing for easy access and removal.
Balancing the weight and positioning of each bike
While spacing the hooks is important, it is equally essential to balance the weight and positioning of each bike. This prevents any bikes from leaning too much to one side and potentially causing damage or falling off the hooks.
When hanging multiple bikes, carefully position each one on the hook, making sure that the weight is evenly distributed. Start by hanging the heaviest bike first, as this will influence the positioning of the other bikes. Adjust the placement of each bike as needed, ensuring that they are aligned and balanced on the hooks.
Using additional hooks or racks for added stability
For added stability and support, it is recommended to use additional hooks or racks when installing bike hooks. This is particularly important when dealing with heavier bikes or limited wall or ceiling space.
If you find that the weight of the bikes distributed across a single row of hooks is causing strain or instability, consider installing a second row of hooks below the first. This provides additional support and distributes the weight more evenly.
Alternatively, you can explore the option of using a bike rack in combination with bike hooks. Bike racks provide a sturdy base and make it easier to position the bikes securely on the hooks. This combination of hooks and racks ensures a more stable and balanced installation, especially for larger bike collections or heavier bikes.
By spacing the hooks appropriately, balancing the weight and positioning of each bike, and using additional hooks or racks for added stability, you can ensure proper weight distribution when installing bike hooks. Following these guidelines will not only protect your bikes and walls but also allow for easy access and hassle-free storage.
Hanging And Storing Bicycles
Hanging and Storing Bicycles
Properly hanging and storing bicycles is essential to keep them organized and maximize your storage space. One effective way to achieve this is by installing bike hooks. Bike hooks are simple, yet efficient, storage solutions that allow you to hang your bicycle securely on the wall or ceiling, keeping it out of the way and preventing any potential damage. To ensure a successful installation and safe storage, let’s explore the following steps: correctly lifting and hanging the bike on the hooks, adjusting the hooks for the bike’s frame and size, and ensuring the bike is securely stored and won’t fall.
Correctly lifting and hanging the bike on the hooks
To lift and hang your bike correctly on the hooks, follow these steps:
- Position the bike close to the wall or ceiling where the hooks will be installed.
- Stand on one side of the bike, grasping the handlebars and seat or rear frame near the rear wheel with both hands.
- Lift the bike, keeping your back straight and using your legs to generate the lifting power.
- Gently bring the bike horizontally toward the hooks, aligning the wheels with the wall or ceiling surface.
- With controlled movement, raise the bike until the top tube or handlebars are level with the hooks.
- Slide the top tube or handlebars onto the hooks, ensuring a snug fit without any wobbling or instability.
Adjusting the hooks for the bike’s frame and size
Each bike has a unique frame shape and size, so it is important to adjust the hooks accordingly for a proper fit. Follow these steps:
- Determine the optimal height for the hooks depending on the height of your bike.
- Use a measuring tape to measure the distance from the floor or ground to the top tube or handlebars of the bike.
- Mark this measurement on the wall or ceiling, ensuring it is the same on both sides if using multiple hooks.
- Position the hooks on the marked spots and adjust their height accordingly, using a screwdriver or drill to secure them in place.
- Ensure that the hooks are aligned parallel to the ground or floor, allowing the bike to hang freely without touching the wall or other objects.
Ensuring the bike is securely stored and won’t fall
Once the bike is hanging on the hooks, it is crucial to ensure that it is securely stored and won’t fall. Take these precautions:
- Check the stability of the bike on the hooks by gently pushing and pulling it.
- Inspect the hooks to make sure they are securely anchored to the wall or ceiling.
- Regularly inspect the hooks and their mounting hardware for any signs of wear or damage.
- Make sure the bike is centered, and both wheels are aligned parallel to the ground or floor.
- Avoid overloading the hooks with additional weight or hanging multiple bikes on a single hook if it exceeds its weight capacity.
By correctly lifting and hanging the bike, adjusting the hooks for the bike’s frame and size, and ensuring its secure storage, you can maintain the condition of your bicycles and maximize your available space. Bike hooks are a practical and space-saving solution that allows you to store your bikes conveniently while keeping them protected and ready for your next adventure.
Maintenance And Safety Tips
When it comes to installing bike hooks, it’s not just about getting your bike off the floor and onto the wall. Ensuring proper maintenance and following safety tips is essential to keep your bike hooks functioning effectively and prevent any accidents or damage to your bike. Here are some essential maintenance tips to keep in mind:
Regularly checking the hooks for stability
Regularly inspecting the hooks for stability is crucial to ensure that your bike is securely held in place. Over time, hooks can become loose due to constant use or vibrations from transportation. To check the stability of the hooks, follow these steps:
- Visually inspect the hooks for any signs of damage or wear and tear. This includes checking for bent or broken parts.
- Gently rock the bike back and forth to test the stability of the hooks. If you notice any wobbling or movement, this could indicate loose or damaged hooks.
- Tighten any loose screws or bolts using the appropriate tools. Ensure that the hooks are properly secured to the wall or ceiling.
By regularly checking the stability of the hooks, you can prevent any unexpected accidents or damage to your bike.
Lubricating moving parts to prevent rust
Like any mechanical device, bike hooks have moving parts that can rust over time if not properly maintained. To prevent rust and ensure smooth operation, it is essential to lubricate the moving parts regularly. Follow these steps to lubricate your bike hooks:
- Wipe off any dirt or debris from the moving parts using a clean cloth.
- Apply a small amount of lubricant, such as bike-specific oil or silicone spray, to the moving parts. Be careful not to over-lubricate.
- Gently move the hooks back and forth to distribute the lubricant evenly.
By lubricating the moving parts of your bike hooks, you can extend their lifespan and ensure that they operate smoothly without any rust or corrosion.
Reviewing weight limits and adhering to manufacturer guidelines
Each set of bike hooks comes with a specified weight limit and manufacturer guidelines. It is essential to review these weight limits and adhere to the guidelines to prevent any damage to your bike or the hooks themselves. Here’s what you need to consider:
| Step | Action |
|---|---|
| 1 | Refer to the instruction manual or packaging to find the weight limit for the hooks. |
| 2 | Weigh your bike or bikes, including any accessories or attachments, to ensure it falls within the specified weight limit. |
| 3 | If your bike exceeds the weight limit, consider alternative storage solutions or consult a professional for advice. |
By reviewing the weight limits and adhering to the manufacturer guidelines, you can ensure the safety of your bike and prevent any damage to your hooks.
Follow these maintenance and safety tips for your bike hooks to ensure the long-term functionality and safety of both your bike and the hooks themselves. By taking the time to regularly check the hooks for stability, lubricate the moving parts, and adhere to weight limits, you can enjoy a secure and hassle-free storage solution for your bike.
Frequently Asked Questions For How To Install Bike Hooks
Is It Ok To Hang Bikes On Hooks?
Yes, it is okay to hang bikes on hooks. It’s a space-saving solution that keeps bikes organized. Hanging bikes on hooks can help prevent damage and make accessing them easier. Just make sure to use strong hooks and mount them properly on a sturdy wall.
Do Bike Hooks Need A Stud?
No, bike hooks do not necessarily need a stud for installation. Wall-mounted bike hooks can be installed on drywall using appropriate anchors or toggle bolts. However, if you want extra stability and weight-bearing capacity, it is recommended to install the hooks on a stud.
How Far Should Bike Hook Be From Wall?
The bike hook should be placed approximately 2 feet away from the wall to allow enough space for the bike to hang without touching the wall.
What Is The Best Way To Hang A Bike On The Wall?
The best way to hang a bike on the wall is by using a wall-mounted bike rack. These racks provide secure storage and keep your bike out of the way. They are easy to install and come in various designs to fit your space and style.
Conclusion
Installing bike hooks is a simple yet effective way to maximize your space and keep your bikes organized. By following the step-by-step instructions outlined in this blog post, you can easily install bike hooks in your garage, shed, or any other suitable location.
With the right tools and a little patience, you’ll have your bikes hanging securely in no time. So why wait? Get started on your bike storage solution today and enjoy the benefits of a clutter-free space!