To install a bike handlebar stem, first, loosen the stem clamp bolts using an Allen wrench. Then, align the stem with the front wheel and tighten the bolts securely.
Installing a bike handlebar stem is a straightforward process that requires a few simple steps. Whether you’re replacing an old stem or customizing your bike’s handlebars, this guide will walk you through the installation process. By following these instructions, you’ll be able to securely attach the stem and have a comfortable riding experience.
So let’s get started and learn how to install a bike handlebar stem.
Factors To Consider When Choosing A Handlebar Stem
Choosing the right handlebar stem is crucial for an enjoyable and comfortable cycling experience. The handlebar stem connects the handlebars to the bike’s steering tube, determining your riding position and overall control. To ensure you make the best choice, consider the following factors before installing a handlebar stem: length, rise, material, and clamp diameter.
Length
The length of the handlebar stem significantly affects your riding comfort, stability, and handling. It determines your reach to the handlebars and your body positioning on the bike. Shorter stems tend to provide a more responsive and maneuverable ride, suitable for aggressive riding styles and tight turns. On the other hand, longer stems offer a more stretched-out riding position, ideal for endurance and comfort.
Rise
The rise of a handlebar stem refers to its vertical angle or height in relation to the bike’s steering tube. It affects your riding posture and the height of the handlebars. A positive rise indicates that the handlebars will be higher than the stem, promoting a more upright riding position suitable for leisurely rides or riders seeking comfort. Conversely, a negative rise means the handlebars will sit lower than the stem, resulting in a more aerodynamic and aggressive riding stance.
Material
The material of the handlebar stem plays a role in its durability, weight, and vibration dampening properties. Common materials used include aluminum, carbon fiber, and steel. Aluminum stems are lightweight and affordable but may transmit more vibrations to the rider. Carbon fiber stems offer excellent vibration dampening and lightweight characteristics but tend to be more expensive. Steel stems provide a sturdy and durable option but are typically heavier than aluminum or carbon fiber.
Clamp Diameter
The clamp diameter refers to the diameter of the handlebar where it attaches to the stem. It is crucial to ensure the handlebar and stem have compatible clamp diameters to ensure a secure and safe connection. Common clamp diameters for handlebars are 25.4mm and 31.8mm, but there are other sizes available for specialized purposes. It is important to measure your handlebar’s clamp diameter accurately before purchasing a compatible stem.
Consider these four factors carefully when choosing a handlebar stem to optimize your ride and enhance your cycling experience. Finding the right combination of length, rise, material, and clamp diameter will allow you to achieve the ideal riding position and comfort level, ensuring an enjoyable time on your bike.
Measuring And Determining The Correct Stem Size
Taking Accurate Measurements
Before you can install a new handlebar stem on your bike, it’s crucial to accurately measure the dimensions to ensure a proper fit. Here’s a step-by-step guide on how to take accurate measurements:
- Start by loosening the bolts on your current stem using an appropriate wrench. Carefully remove the stem from the fork steerer tube.
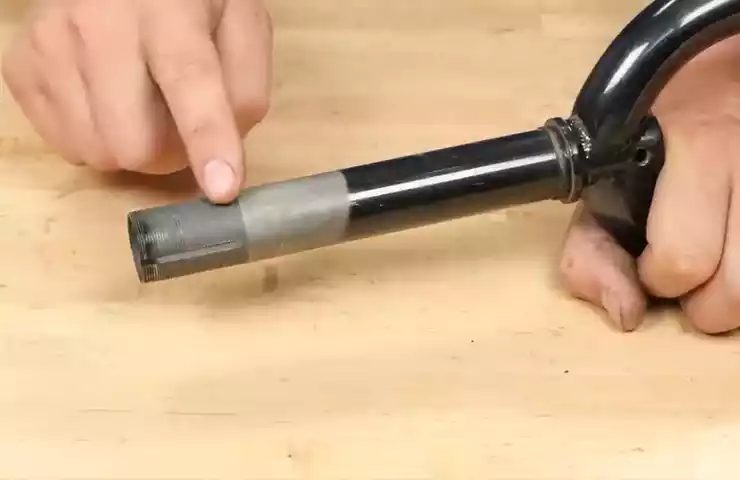
- Using a tape measure, measure the diameter of the fork steerer tube. It is usually one of the standard sizes: 1 1/8 inches or 1 1/4 inches. Make sure to take this measurement precisely to avoid any fitting issues later.
- Next, measure the length of the fork steerer tube. Place the tape measure at the top of the tube and extend it to the base, where the stem would typically go. Note down this measurement as it will be crucial in determining the optimal stem length.
- Measure the handlebar clamp diameter to ensure compatibility between the stem and handlebars. The most commonly used diameter for handlebars is 31.8mm, but double-check to be certain.
Calculating the Optimal Stem Size based on Measurements
Once you have accurate measurements, the next step is to calculate the optimal stem size for your bike. Use the following formula to determine the desired length:
Optimal Stem Length = Fork Steerer Tube Length – Stem Height – Handlebar Clamp Height
To make this calculation, you need to know the stem height and handlebar clamp height. The stem height can vary depending on the model and brand, so refer to the manufacturer’s specifications or measure it directly. The handlebar clamp height is typically around 40-45mm.
Let’s look at an example to demonstrate how to calculate the optimal stem size:
Example:
If your fork steerer tube length is 220mm, the stem height is 40mm, and the handlebar clamp height is 45mm, the optimal stem length would be:
220mm – 40mm – 45mm = 135mm
Therefore, for this particular bike, the optimal stem length would be 135mm.
By taking accurate measurements and calculating the optimal stem size based on these measurements, you can ensure a proper fit for your bike handlebar stem. This will not only enhance your riding experience but also contribute to better control and handling while on the road or trail.
Tips For Choosing The Perfect Stem
Considering riding style and preferences
When it comes to choosing the perfect bike handlebar stem, considering your riding style and preferences is crucial. The stem plays a significant role in determining your riding experience, as it affects your bike’s handling and overall comfort. Before making a choice, take the following factors into account:
- Riding position: Are you an aggressive rider who prefers a more aerodynamic position or a relaxed rider who prioritizes comfort?
- Handlebar height: Do you want a higher handlebar for a more upright position or a lower one for a more aggressive position?
- Stem length: Longer stems provide a more stretched-out position, while shorter stems offer quicker handling.
- Handlebar clamp diameter: Ensure that the stem you choose matches the diameter of your handlebars to ensure a proper fit.
Seeking advice from bike experts or professionals
Seeking advice from bike experts or professionals can be invaluable when selecting a handlebar stem. Bike shops or professional bike fitters have experience in fitting stems to various riders and are well-equipped to provide recommendations based on your specific needs. They can help you determine the ideal stem length, handlebar height, and style that works best for your body type, riding style, and goals.
Remember, everybody is different, and what works for one person may not work for another. By consulting with experts, you can leverage their knowledge and expertise to ensure you find the perfect stem for your bike.
Gathering The Necessary Tools And Equipment

Before you begin installing your bike handlebar stem, it’s important to gather all the necessary tools and equipment. This will ensure a smooth and hassle-free installation process. In this section, we will go over the required tools as well as some optional tools that can make the installation easier. Let’s get started!
Required Tools
Here are the essential tools you will need to install your bike handlebar stem:
- Allen Wrench Set: You’ll need a set of Allen wrenches to adjust the bolts on your handlebar stem. Different stem models may require different sizes, so it’s best to have a variety of sizes on hand.
- Torque Wrench: A torque wrench is necessary to ensure that you tighten the bolts on your stem to the correct specifications. This will help prevent over-tightening or under-tightening, both of which can lead to problems down the line.
- Grease: Applying a thin layer of grease to the bolts and the stem can help prevent rust and make the installation process smoother. Make sure to use a bike-specific grease for optimal results.
Optional Tools for Easier Installation
While not essential, the following tools can make the installation process easier and more convenient:
- Workstand: A workstand will hold your bike steady and at a comfortable height, making it easier to work on. This can be particularly helpful when installing a handlebar stem, as it requires some precision.
- Flathead Screwdriver: A flathead screwdriver can come in handy when removing or adjusting certain components on your bike, such as handlebar tape or cable housing.
- Extra Pair of Hands: Having someone to assist you during the installation process can make it easier to hold and align the various components involved. This is especially useful if you’re working with a heavier stem or are new to bike maintenance.
By gathering all the necessary tools and equipment, you’ll be well-prepared to tackle the installation of your bike handlebar stem. Having the right tools at your disposal not only makes the process smoother but also ensures that you can complete the installation correctly and safely. Once you have everything ready, it’s time to move on to the next steps of the installation process.
Removing The Existing Handlebar Stem
If you’re looking to upgrade your bike’s handlebar stem or simply need to replace a damaged one, removing the existing stem is the first step. This process requires a few basic tools and careful attention to detail. In this post, we will guide you through the process of removing the handlebar stem in a few easy steps.
Loosening the Bolts
The first step in removing the existing handlebar stem is to loosen the bolts that hold it in place. Start by locating the bolts on the top or front of the stem. Depending on your bike’s model, there may be one or two bolts. Use an appropriate sized Allen wrench or hex key to loosen the bolts by turning them counterclockwise. Apply firm but gentle pressure to ensure you don’t damage the bolts or strip them.
Detaching the Stem
Once the bolts are loosened, the next step is to detach the stem from the bike. Before proceeding, ensure the front wheel of your bike is secured properly to prevent any accidents. With the bolts loosened, you can now safely remove the stem. However, take note of the direction and alignment of the stem before completely removing it. This will make it easier to install the new stem later.
To detach the stem, firmly hold onto the handlebars and gently lift them while applying steady pressure in an upward direction. Wiggle the stem left or right if needed to loosen it from the fork’s steerer tube. The stem should slide off relatively easily. Remember to keep a firm grip on the handlebars to ensure the front wheel remains secure throughout the process.
Once the stem is detached, inspect it for any signs of damage or wear. This is also a good time to clean the stem and handlebar area thoroughly before installing the new stem. Use a clean cloth or mild soapy water to remove any dirt or grease that may have accumulated over time.
With the existing handlebar stem successfully removed, you are now ready to install the new stem. Refer to our upcoming blog post on how to install a bike handlebar stem for detailed instructions on this process.
Cleaning And Preparing The Handlebar And Fork
Before installing a new handlebar stem on your bike, it’s important to thoroughly clean and prepare both the handlebar and fork. This will ensure a smooth and secure installation, preventing any potential damage or accidents while riding. In this section, we will discuss the step-by-step process of cleaning and preparing the handlebar and fork.
Removing any dirt and debris
The first step in cleaning the handlebar and fork is to remove any dirt and debris that may have accumulated over time. To do this, follow these simple steps:
- Start by using a brush or cloth to gently remove any loose dirt or debris from the handlebar and fork.
- Next, fill a bucket or sink with warm soapy water and dip the brush or cloth into it.
- Gently scrub the handlebar and fork, paying special attention to any hard-to-reach areas.
- Rinse the handlebar and fork with clean water to remove any soap residue.
- Dry the handlebar and fork thoroughly with a clean cloth before proceeding to the next step.
Checking for any damages or wear
After cleaning the handlebar and fork, it’s important to inspect them for any damages or wear that may affect the installation of the new handlebar stem. Here’s how to do it:
- Inspect the handlebar for any cracks, dents, or signs of excessive wear. If you notice any damage, it’s crucial to replace the handlebar before proceeding.
- Next, examine the fork for any signs of damage or wear. Look for cracks, bends, or any other abnormalities that may compromise the installation.
- If you discover any issues with either the handlebar or fork, it’s recommended to consult a professional bike mechanic for further evaluation and repairs.
By thoroughly cleaning and preparing the handlebar and fork, you are ensuring a safe and effective installation of the bike handlebar stem. Taking the time to remove dirt and debris and check for any damages or wear will help prevent any unexpected problems while riding and prolong the life of your bike.
Placing The Handlebar Stem On The Fork
One of the essential steps in installing a bike handlebar stem is placing it securely on the fork. Proper alignment and positioning are crucial to ensure optimal functionality and safety. In this section, we will discuss how to align the stem with the fork and ensure that it is properly positioned.
Aligning the stem with the fork
Before you begin, make sure you have all the necessary tools and equipment handy. You will need an Allen wrench or a torque wrench, depending on the type of stem you have. Here’s a step-by-step guide to aligning the stem with the fork:
- Start by loosening the bolt(s) on the top of the stem to create some play.
- Slide the stem onto the fork, making sure the steerer tube is fully inserted into the stem.
- Align the stem with the front wheel, so that it is centered and facing straight ahead.
- Tighten the top bolt(s) just enough to hold the stem in place temporarily. This will allow you to make final adjustments.
Ensuring proper alignment and positioning
To ensure proper alignment and positioning of the handlebar stem, follow these steps:
- Stand in front of the bike and visually inspect the alignment of the stem with the front wheel. Make any necessary adjustments to ensure it is centered.
- Check the handlebar alignment, making sure it is straight and parallel to the front wheel. Adjust if needed.
- Inspect the stem height – it should be at a comfortable level for your riding style. You may need to raise or lower it by loosening the stem clamp bolts and adjusting the height accordingly.
- Tighten the stem bolts using the appropriate torque specification. Over-tightening can damage the components, while under-tightening can lead to instability.
Once you have followed these steps and ensured that the handlebar stem is properly aligned and positioned, you can move on to the next steps in installing your bike’s handlebars. With a securely placed stem, you can look forward to a comfortable and controlled riding experience.
Adjusting The Stem Angle And Height
Adjusting the stem angle and height of your bike handlebar is crucial for a comfortable and efficient riding experience. It not only impacts your bike’s handling but also affects your posture, comfort, and overall performance. By making the right adjustments, you can achieve a personalized fit that enhances your riding enjoyment. In this section, we will explore the steps to adjust the stem angle and height, ensuring that you find the perfect position for your needs.
Making adjustments based on personal preference and comfort
Personal preference plays a significant role when adjusting the stem angle and height of your bike handlebar. Some riders prefer a more aggressive, aerodynamic position, while others prioritize comfort over speed. Whatever your preference may be, it’s important to find a balance that suits your individual needs.
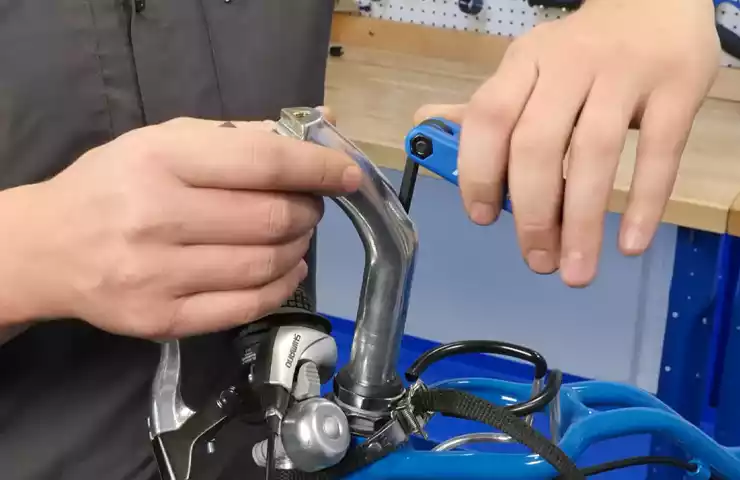
To adjust the stem angle, follow these steps:
- Loosen the bolts on the stem clamp using an Allen wrench.
- Gently rotate the handlebar to the desired angle.
- Tighten the bolts back up, ensuring that the handlebar is securely in place.
When adjusting the stem height, you have a few options to explore:
- If your stem allows for it, you can raise or lower it by loosening the bolts on the steerer tube clamp.
- Alternatively, you can choose to install a stem with a different rise to achieve the desired height adjustment.
It’s essential to test different stem angles and heights to find the most comfortable and efficient position for your body. Don’t be afraid to experiment and make small adjustments as needed.
Ensuring proper fit and riding position
Aside from personal preference, proper fit and riding position should also be considered when adjusting the stem angle and height. A well-fitted bike will provide better control, power transfer, and reduce the risk of injury.
To ensure a proper fit, consider the following guidelines:
- Keep your back straight and relaxed, with a slight bend in your elbows.
- Ensure your hands rest comfortably on the handlebar grips, allowing for easy access to the brakes and shifters.
- Your weight should be evenly distributed between the saddle and the handlebars.
- If you experience any discomfort or pain during your rides, re-evaluate your stem position and make necessary adjustments.
Remember, a bike that fits you well will provide a more enjoyable and efficient riding experience. Take the time to fine-tune the stem angle and height, and you’ll reap the benefits on your next ride.
Tightening The Bolts To Secure The Stem
In order to have a safe and comfortable riding experience, it is crucial to properly install your bike’s handlebar stem. Tightening the bolts to secure the stem is a critical step to ensure stability and prevent accidents. In this section, we will discuss the proper torque specifications and the importance of double-checking the tightness.
Proper Torque Specifications
When it comes to tightening the bolts on your bike’s handlebar stem, it is essential to adhere to the proper torque specifications. Torque refers to the force used to tighten the bolts to an exact level of tightness, ensuring the stem is securely fastened to the fork.
Here are the recommended torque specifications for common bike handlebar stem bolts:
| Bolt Type | Torque Specification |
|---|---|
| Top Cap Bolt | 5-8 Nm |
| Handlebar Clamp Bolts | 4-8 Nm |
| Stem Binder Bolt | 4-8 Nm |
It is crucial to refer to the specific torque recommendations provided by the manufacturer of your bike or stem, as they may vary depending on the materials used and the design of the stem.
Double-Checking the Tightness to Prevent Accidents
Once you have tightened the bolts to the specified torque, it is important to double-check the tightness to ensure there are no loose bolts that could compromise your safety while riding. Double-checking should be done before every ride and periodically during regular maintenance.
To double-check the tightness:
- Hold the front wheel between your knees to keep the handlebar steady.
- Try to twist the handlebar back and forth.
- If there is any movement or play, use an appropriate torque wrench to tighten the bolts gradually and evenly.
- Repeat the twisting test until there is no movement or play in the handlebar.
By following these steps and double-checking the tightness, you can significantly reduce the risk of accidents caused by loose handlebar stem bolts.
Checking For Proper Alignment And Fit
One of the most crucial steps in installing a bike handlebar stem is ensuring proper alignment and fit. This step ensures not only your comfort but also your safety while riding. In this section, we will discuss two important aspects related to the alignment and fit: ensuring the handlebar is parallel to the front wheel and ensuring the stem is securely attached to the fork.
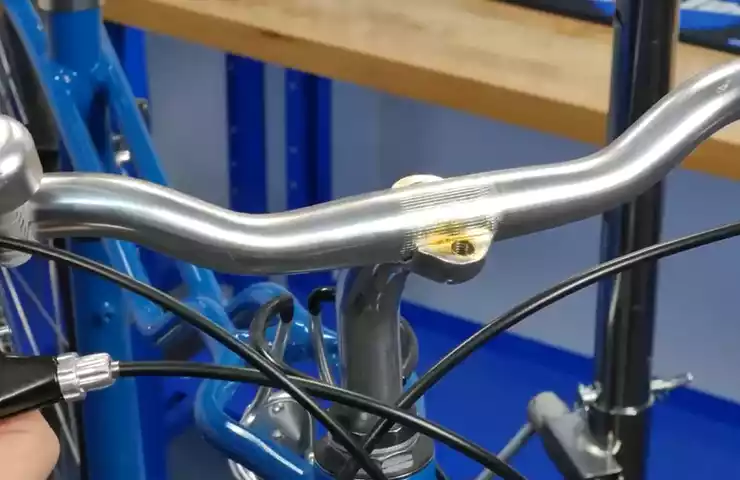
Ensuring the handlebar is parallel to the front wheel
Proper alignment of the handlebar is essential for a comfortable riding experience. To ensure that the handlebar is parallel to the front wheel, follow these steps:
- Place the bike on a level surface to obtain accurate measurements.
- Stand in front of the bike and position yourself so that you have a clear view of the handlebar and front wheel.
- Wipe any dirt or grease off the handlebar stem and front wheel forks for a clear line of sight.
- Align your eye level with the center of the handlebar and look straight ahead, parallel to the ground.
- Visually compare the handlebar alignment with the front wheel. If they appear parallel, proceed to the next step. If not, adjust the handlebar angle slightly until they visually align.
- Tighten the bolts on the handlebar stem to secure the position.
- Double-check the alignment by visually inspecting the handlebar and front wheel alignment once again.
Ensuring the stem is securely attached to the fork
The stem is responsible for connecting the handlebar to the fork. It is crucial to ensure that the stem is securely attached to the fork for a safe and stable ride. Follow these steps to ensure a proper fit:
- Examine the stem and fork for compatibility. The stem should have the appropriate clamp size to fit securely around the fork.
- Clean the fork tube and stem clamp area to remove any dirt or debris that can affect the fit.
- Slide the stem onto the fork tube, ensuring it is aligned with the desired handlebar position.
- Tighten the stem bolts in a crisscross pattern to ensure even pressure distribution. Refer to the manufacturer’s recommended torque specifications.
- Check the stem’s stability by applying gentle pressure from different angles. It should not move or shift if properly installed.
- For added security, tighten the stem bolts once again after the first few rides, as the components may settle slightly due to initial usage.
By following these steps, you can ensure that your bike handlebar stem is aligned properly and securely attached to the fork. This will result in a comfortable and safe riding experience, allowing you to enjoy your time on the road or trail to the fullest.
Fine-Tuning And Adjustments
When it comes to installing a bike handlebar stem, fine-tuning and making adjustments is crucial in order to achieve the optimal riding experience. In this section, we will discuss the steps involved in making small adjustments and ensuring that all bolts and components are tightened properly.
Making Small Adjustments for Optimal Riding Experience
Once you have installed the handlebar stem onto your bike, it’s time to fine-tune and make small adjustments to suit your personal preferences. These adjustments can greatly impact your riding experience, improving comfort and control. Here are some key steps to follow:
- Start by positioning yourself in the riding posture that you find most comfortable. This will typically involve sitting on the bike with your hands on the handlebars.
- Observe the alignment of the handlebars with your shoulders. Ideally, your handlebars should be parallel to your shoulders, promoting stability and reducing strain on your muscles.
- If needed, adjust the angle of the handlebar stem using an Allen wrench. Loosen the bolts securing the stem and rotate it slightly until the handlebars align with your shoulders.
- Next, evaluate the height of the handlebars. The general rule of thumb is to have the handlebars at a level slightly below your saddle height. This helps to maintain a comfortable riding position and distribute your weight evenly.
- To adjust the height, loosen the bolts on the stem and move it up or down accordingly. Make small adjustments and try riding the bike to see how it feels. Remember that the handlebars should be at a height where you can easily reach them without straining your back or shoulders.
Checking All Bolts and Components for Tightness
Before you embark on your cycling adventures, it is essential to ensure that all bolts and components related to the handlebar stem are properly tightened. Loose bolts can result in a compromised riding experience and potential safety hazards. Follow these steps:
- Inspect the bolts on the handlebar stem, top cap, and headset cap. Ensure that they are all tightened securely, but be cautious not to overtighten, as this can damage the components.
- Use the appropriate tool, such as a torque wrench or Allen wrench, to tighten the bolts to the recommended torque specifications. Consult your bike’s manual or the manufacturer’s guidelines for the specific torque values.
- Once you have tightened all the bolts, give the handlebars a gentle shake to check for any movement or looseness. If you detect any, recheck the bolts and tighten them further if necessary.
In conclusion, fine-tuning and making adjustments to your bike’s handlebar stem can greatly enhance your riding experience. By ensuring proper alignment, height, and tightness of bolts, you will be able to ride comfortably and confidently. Take the time to make these adjustments and enjoy the benefits of a well-fitted handlebar stem.
Test Ride And Evaluation
Taking the bike for a short ride to test the new stem is an essential step in ensuring that the installation was successful and that your bike is functioning optimally. A test ride allows you to evaluate the comfort, handling, and overall performance of the bike with the newly installed handlebar stem. This crucial step will give you the confidence you need to ride safely and enjoy your cycling experience. In this section, we will discuss how to properly test ride your bike and evaluate its performance.
Taking the bike for a short ride to test the new stem
Once the handlebar stem is securely installed on your bike, it’s time to take it for a test ride. Before hitting the road, make sure to perform a quick safety check to ensure that all other parts of your bike are in good working condition. Look out for any loose bolts, excessive wear on the tires, or abnormalities in the brakes.
Next, find a safe and relatively quiet road or trail to ride on. This will allow you to focus on the feel of the bike without distractions. Start with a short ride to get a sense of how the new handlebar stem affects the overall ride quality.
During the ride, pay attention to how the bike handles. Are you able to maintain control and stability? Does the bike feel responsive when turning or maneuvering? If the bike feels off or uncomfortable, adjustments may be necessary. Take note of any specific issues or concerns you experience during the ride.
Evaluating comfort, handling, and overall performance
After the test ride, it’s time to evaluate the comfort, handling, and overall performance of your bike with the new stem. Start by considering the comfort level. Does the new stem position allow for a natural and comfortable riding posture? Are your hands and wrists in a comfortable position on the handlebars? Keep in mind that the right handlebar position can reduce strain on your body and enhance your riding experience.
Next, assess the handling of the bike. Does the new stem improve your bike’s maneuverability? Do you feel more in control when navigating through tight corners or uneven terrain? Pay attention to any changes in how the bike responds to your inputs and how it feels during different riding conditions.
Finally, evaluate the overall performance of your bike with the new stem. Has it improved the bike’s performance in any noticeable way? Are you able to ride more efficiently or with less effort? Consider any positive changes you experience and compare them to your expectations before the installation.
In conclusion, the test ride and evaluation phase is a crucial step after installing a new handlebar stem. It allows you to ensure that the installation was successful and that your bike is performing optimally. By taking the bike for a short ride and evaluating its comfort, handling, and overall performance, you can make any necessary adjustments and ride with confidence.
Frequently Asked Questions Of How To Install Bike Handlebar Stem
How Do You Put A Bike Stem On A Bike?
To put a bike stem on a bike, follow these steps: 1. Align the stem with the fork steerer tube. 2. Tighten the stem bolts evenly with a hex wrench. 3. Adjust the stem angle as desired. 4. Make sure the stem is securely fitted.
5. Double-check all connections before riding the bike.
How Do You Put Handlebars On A Stem?
To put handlebars on a stem, follow these steps: 1. Place the handlebars into the stem clamp. 2. Align the handlebars so they are straight and level. 3. Tighten the bolts on the stem to secure the handlebars in place. 4.
Test the handlebars by gently turning them to ensure they are secure. 5. Adjust the position of the handlebars as desired for comfort.
How Do You Replace A Handlebar Stem On A Bike?
To replace a handlebar stem on a bike, follow these steps: 1) Loosen the bolts securing the stem to the steerer tube. 2) Slide the stem up and off the tube. 3) Place the new stem onto the tube and tighten the bolts.
4) Ensure the stem is aligned with the front wheel.
Should Bike Stem Be Up Or Down?
To determine whether the bike stem should be up or down, it depends on your comfort and riding style. Some riders prefer the stem to be higher for a more upright position, while others prefer it lower for a more aggressive stance.
Ultimately, it’s a personal preference that you can adjust to suit your needs.
Conclusion
Installing a bike handlebar stem is a relatively easy process that can greatly improve your riding experience. By following the step-by-step instructions outlined in this blog post, you can ensure a secure and stable connection between your handlebars and your bike’s frame.
Remember to double-check all bolts and adjustments before taking your bike out for a ride. Enjoy the comfort and control that a properly installed handlebar stem provides! Happy cycling!