To install a bicycle fork, align the steerer tube with the head tube and insert the fork into the frame. A well-rounded Bicycle forks play a crucial role in the overall performance and functionality of a bike.
Whether you’re a professional cyclist or a casual rider, understanding how to install a bicycle fork is essential. This process ensures proper alignment and stability, allowing for smooth rides and maneuverability. By following a few simple steps, you can confidently install a bicycle fork and enjoy a safe and enjoyable biking experience.
We will guide you through the process of correctly installing a bicycle fork, providing you with all the necessary information to ensure a successful installation. So, let’s dive in and explore the steps involved in installing a bicycle fork!
Choosing The Right Bicycle Fork
When it comes to optimizing your biking experience, choosing the right bicycle fork is crucial. The fork not only determines the overall performance and handling of your bike but also plays a significant role in absorbing shock and maintaining stability. With various options available in the market, it’s important to consider several factors before making a decision. In this article, we will explore the key factors to consider when selecting a bicycle fork, different types of forks available in the market, and the suitability of suspension types for your needs.
Factors to consider when selecting a bicycle fork
When selecting a bicycle fork, it’s essential to consider these factors:
- Wheel Size: The first factor to consider is the compatibility of the fork with your wheel size. Different forks are designed for specific wheel sizes like 26-inch, 27.5-inch, or 29-inch. Ensure you choose a fork that matches your bike’s wheel dimensions for optimal performance.
- Frame Compatibility: The compatibility of the fork with your bike frame is another crucial consideration. There are various types of frames, including straight steerer, tapered steerer, and thru-axles. Ensure the fork you choose is compatible with your bike’s frame to ensure a proper fit and functionality.
- Material: The material of the fork influences its weight, stiffness, and durability. Common materials used for forks include carbon fiber, aluminum, and steel. Carbon fiber forks are lightweight and offer excellent shock absorption, whereas aluminum and steel forks provide more durability and strength.
- Type of Riding: Consider the type of riding you primarily engage in. Are you an avid mountain biker tackling rough terrains? Or do you prefer road biking on smooth surfaces? Different types of forks are specifically designed for different terrains and riding styles, so choose one that suits your specific needs.
Exploring different types of bicycle forks available in the market
Now, let’s explore the different types of bicycle forks available in the market:
| Fork Type | Description |
|---|---|
| Rigid Forks | Rigid forks do not have any suspension and are suitable for road biking or riding on smooth surfaces. They offer efficient power transfer and lightweight design, making them ideal for speed-focused riders. |
| Hardtail Forks | Hardtail forks have a front suspension but no rear suspension. They are commonly used in mountain biking and provide enhanced comfort and control on rough terrains. |
| Full Suspension Forks | Full suspension forks come with both front and rear suspensions, providing maximum shock absorption and stability on challenging terrains. They are preferred by downhill riders and those who frequently encounter bumpy surfaces. |
Understanding the suspension types and their suitability for your needs
When it comes to forks with suspensions, there are primarily two types:
- Coil Suspension: Coil suspension forks use a metal coil spring to absorb shocks. They offer excellent responsiveness and are suitable for riders seeking optimal performance and control.
- Air Suspension: Air suspension forks use compressed air to absorb impacts. They offer a more adjustable ride experience, allowing riders to fine-tune the fork’s performance according to their preferences.
Choosing between coil suspension and air suspension depends on your personal preference, riding style, and the terrain you frequently encounter. If you prefer a highly customizable ride experience and better weight control, air suspension might be the ideal choice. On the other hand, if you prioritize a more robust suspension system and affordability, coil suspension is worth considering.
By considering these factors and understanding the different types of bicycle forks and suspension options available in the market, you can make an informed decision and choose the right bicycle fork that enhances your biking experience.
Preparing For The Installation
Before installing a new bicycle fork, it is important to properly prepare for the process. This involves gathering the necessary tools and ensuring the bicycle is in the appropriate position for fork installation. Additionally, removing the front wheel and loosening the headset are crucial steps that need to be followed. Let’s take a closer look at each of these steps to ensure a smooth installation.
Gathering the necessary tools for the installation process
Before starting the installation process, it is essential to gather all the tools you will need. Having the right tools on hand will not only make the installation easier but also ensure that you don’t encounter any unexpected setbacks or delays. Here are the tools you will need:
- Allen wrench set
- Adjustable wrench
- Headset wrench
- Grease
- Torque wrench
Having these tools readily available will allow you to confidently tackle the installation process.
Ensuring the bicycle is in the appropriate position for fork installation
Before you start working on the fork installation, it is important to position your bicycle correctly. This will provide you with optimal access and make the process easier. To do this, you should:
- Find a flat, stable surface to work on.
- Flip the bicycle upside down, resting it securely on its handlebars and seat.
- Use a stable support, such as a bicycle repair stand, to hold the bicycle in place during the installation process.
By following these steps, you will ensure a stable and accessible position for working on the bicycle fork installation.
Removing the front wheel and loosening the headset
When it comes to installing a new bicycle fork, you will first need to remove the front wheel and loosen the headset. Here’s how:
- Start by loosening the front wheel axle nuts or quick-release skewer, depending on your bicycle’s setup. Use an adjustable wrench or the appropriate tool to do this.
- Once the front wheel is loosened, remove it from the fork dropouts.
- Next, locate the headset on the bike’s steerer tube, just above the fork.
- Using a headset wrench, loosen the headset bolt, allowing the fork to move freely inside the head tube.
By following these steps, you will have successfully removed the front wheel and loosened the headset, setting the stage for the installation of your new bicycle fork.
Now that you have gathered the necessary tools, ensured the bicycle is in the appropriate position, and removed the front wheel while loosening the headset, you are ready to move on to the next step of the installation process. In our next blog post, we will cover the step-by-step procedure for installing the new bicycle fork.
Step 1: Removing The Old Fork
Before installing a new bicycle fork, it’s important to properly remove the old one. This step-by-step guide will walk you through the process, starting with detaching the brake components from the old fork.
Detaching the brake components from the old fork
To begin, you’ll need to remove the brakes from your old fork. This can be done by following these simple steps:
- Locate the brake caliper bolts on the front of the fork.
- Using a suitable sized Allen wrench, loosen the bolts by turning them counterclockwise. Once loose, remove the bolts entirely.
- Gently pull the brake caliper away from the fork, allowing the brake pads to separate from the rim.
- Take care not to pull too forcefully, as this can damage the brake cable or housing.
- Once the brake calipers are detached, carefully set them aside in a safe place.
Loosening and removing the stem and handlebars
After removing the brake components, the next step is to loosen and remove the stem and handlebars. Follow these steps to complete this task smoothly:
- Locate the stem on the front of the bike, where it attaches to the fork steerer tube.
- Using an Allen wrench or an appropriate tool, locate the bolt that secures the stem in place.
- Turn the bolt counterclockwise to loosen it, but do not remove it entirely just yet.
- Once the bolt is loose, gently tap the top of the bolt with a soft mallet or rubber hammer.
- This should loosen the stem from the fork steerer tube.
- Now, you can remove the bolt and lift the stem and handlebars away from the fork.
- Set the stem and handlebars aside, making sure they are not in the way during further steps.
Removing the crown race and headset from the old fork
The final step in removing the old fork involves removing the crown race and headset. Follow these steps carefully:
- Locate the crown race at the bottom of the fork steerer tube, just above the wheel.
- Using a crown race removal tool, carefully slide it between the crown race and the fork steerer tube.
- Apply gentle pressure to pry the crown race off the fork steerer tube.
- Once the crown race is removed, proceed to remove the headset.
- Loosen the headset cone and locknut located on the top of the fork steerer tube.
- Unthread the headset by turning it counterclockwise until it is no longer connected to the fork.
- With the crown race and headset removed, you have successfully completed the first step of removing the old fork.
Now that you have successfully removed the old fork, you are ready to move on to the next steps in the bicycle fork installation process. Stay tuned for our upcoming blog post on Step 2: Preparing the New Fork!
Step 2: Preparing The New Fork
Once you have safely removed the old fork, it’s time to prepare the new one for installation. This step involves transferring necessary components from the old fork to the new fork, installing the crown race on the new fork, and lubricating the new fork and headset components to ensure a smooth and seamless ride. Follow these instructions to complete this crucial step:
Transferring necessary components from the old fork to the new fork
Before installing the new fork, you need to transfer some components from the old fork to ensure proper functionality. Here’s a step-by-step guide:
- Remove the crown race: Start by removing the crown race from the old fork. This can usually be done with a crown race removal tool. Carefully insert the tool and gently tap it to loosen the crown race. Once it’s loose, you can easily slide it off.
- Inspect the components: Take a moment to inspect the components you removed. Look for any signs of wear or damage, such as cracks or excessive wear. If any components are damaged, it’s best to replace them before proceeding.
- Transfer the crown race: Once you have inspected the components and ensured they are in good condition, it’s time to transfer the crown race to the new fork. Clean the crown race and apply a thin layer of grease to the inside of the new fork’s crown. Carefully slide the crown race onto the new fork and make sure it fits snugly.
- Transfer other necessary components: In addition to the crown race, you may need to transfer other components such as spacers, headset bearings, or any additional hardware from the old fork to the new one. Take your time to carefully remove these components from the old fork and attach them securely to the new fork. Remember to clean and lubricate as necessary.
Installing the crown race on the new fork
Now that you have transferred the crown race to the new fork, it’s time to install it properly. Follow these steps:
- Clean the new fork: Before proceeding with the installation, make sure the new fork is clean and free from any dirt or debris. Use a clean cloth or a degreaser to remove any residue that may be present.
- Apply grease: Apply a thin layer of grease to the inside of the new fork’s crown. This will help reduce friction and ensure smooth movement of the crown race.
- Slide the crown race: Carefully slide the crown race onto the new fork’s steerer tube. Ensure it is seated properly and aligned with the fork’s crown.
- Secure the crown race: Once the crown race is in place, use a crown race installation tool or a soft mallet to gently tap it down until it is fully seated. Make sure it is snug and secure.
Lubricating the new fork and headset components
To guarantee optimal performance and longevity, lubricating the new fork and headset components is essential. Here’s how to do it:
- Clean the components: Before applying any lubricant, ensure that all the headset components and the new fork are clean and free from any dirt or residue. Use a clean cloth to wipe them down if necessary.
- Apply grease: Apply a small amount of grease to the headset bearings. This will help reduce friction and ensure smooth movement.
- Lubricate the fork: Take some bike-specific lubricant and apply a thin layer to the stanchions and seals of the new fork. This will promote smooth and responsive suspension action while protecting against wear and tear.
- Reassemble the headset: Once everything is lubricated, carefully reassemble the headset components, ensuring that they fit snugly together. Pay close attention to any spacers or washers that may be involved in the assembly.
With these steps completed, your new fork is now prepared for installation. As you move forward, remember to double-check all the components, tighten everything properly, and follow the manufacturer’s instructions for your specific fork. By taking the time to prepare your new fork correctly, you are setting yourself up for a smoother and more enjoyable riding experience.
Step 3: Installing The New Fork
Once you have removed the old fork from your bicycle, it’s time to install the new one. This step-by-step guide will walk you through the process of inserting the new fork into your bike’s head tube, adjusting the headset bearings for proper fit and function, and finally tightening the stem and handlebars onto the new fork.
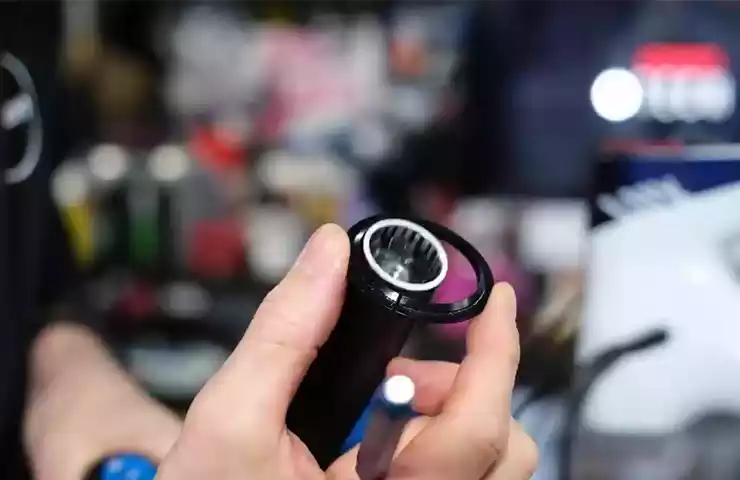
Inserting the new fork into the bike’s head tube
The first step in installing the new fork is to carefully insert it into the bike’s head tube. Make sure the fork is aligned properly with the tube, ensuring that the steerer tube of the fork is facing towards the front of the bike. Slowly slide the fork into the head tube until it is fully inserted. Take your time to ensure a snug fit, but be gentle to avoid damaging the fork or the bike frame.
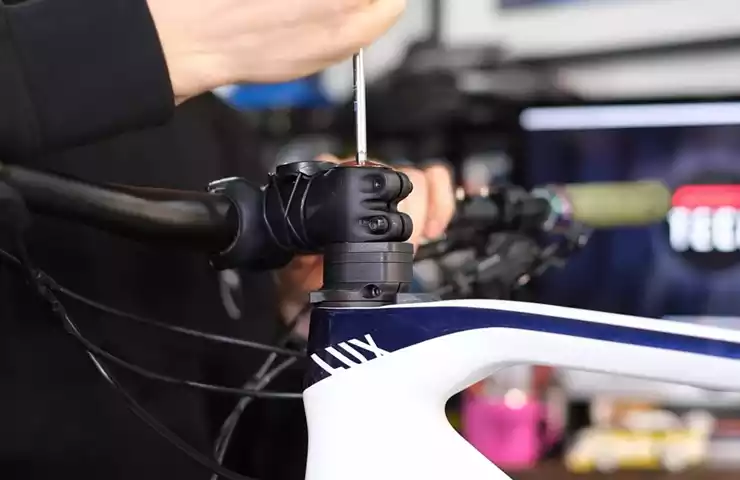
Adjusting the headset bearings for proper fit and function
With the new fork inserted, it’s crucial to adjust the headset bearings for a proper fit and smooth functioning. This adjustment ensures that there is no excess play or binding in the steering of your bike. Start by loosening the top cap of the headset using the appropriate tool. Then, tighten the headset bolt until the headset bearings are snug. Check the smoothness of the steering by turning the handlebars from left to right, making any necessary adjustments until it feels smooth and without any resistance.
Tightening the stem and handlebars onto the new fork

Once the headset bearings are properly adjusted, it’s time to secure the stem and handlebars onto the new fork. Begin by aligning the stem with the front wheel and tightening the stem bolts evenly. Gradually tighten these bolts in a diagonal pattern to ensure equal pressure and prevent any damage to the fork. Once the stem is secure, adjust the handlebars to your desired position and tighten the handlebar clamp bolts accordingly. Double-check that both the stem and handlebars are firmly in place before proceeding.
Step 4: Reattaching Brake Components
Installing the front brake onto the new fork
To complete the installation of your bicycle fork, it is important to reattach the brake components. Step 4 involves installing the front brake onto the new fork. Follow the instructions below to ensure a proper and secure attachment.
To begin, gather the necessary tools and components, including the front brake assembly, which consists of a brake caliper, brake pads, and a brake cable. Ensure that the brake components are clean and free from any dirt or debris before proceeding.
- Start by positioning the brake caliper onto the designated mounting points on the new fork. Make sure that the caliper is aligned properly and securely attached. Use the appropriate bolts and washers to fasten the caliper securely in place.
- Next, insert the brake pads into the caliper. Ensure that they are properly aligned with the rim of the wheel and are making even contact with the braking surface. Adjust the position of the pads if necessary to achieve optimal braking performance.
Adjusting the brake pads and aligning the caliper
Proper alignment and adjustment of the brake pads and caliper are crucial for optimal braking performance and safety. Follow the steps below to ensure that your brakes are working effectively.
- Check the alignment of the caliper by examining the gap between the brake pads and the rim. Ideally, the gaps should be equal on both sides. If needed, use a 5mm Allen key to loosen the mounting bolts and adjust the caliper position until the gaps are even.
- Once the caliper is properly aligned, assess the position of the brake pads. They should be aligned with the rim and have the appropriate toe-in, which means the leading edge of the pads should contact the rim slightly before the trailing edge. This helps improve braking performance and reduces noise. Adjust the position of the pads as needed.
- To achieve proper toe-in, loosen the pad mounting bolts and position each pad accordingly. Once the desired toe-in is achieved, tighten the bolts to secure the pads in place.
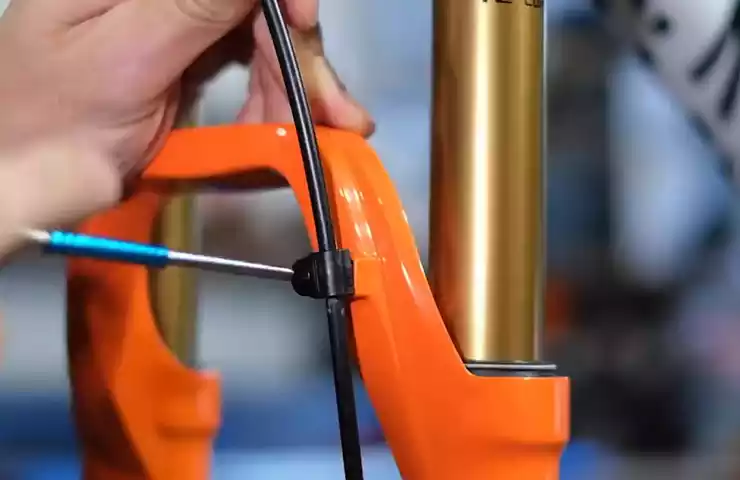
Connecting the brake cable to the brake lever
After installing the front brake components and adjusting their positions, the final step is connecting the brake cable to the brake lever. Follow the instructions below to ensure a secure connection.
- Start by inserting the brake cable into the designated port on the brake lever. Ensure that the cable end is properly seated and fully engaged.
- With the cable inserted, tighten the cable anchor bolt on the brake lever using a 5mm Allen key. This will secure the cable in place and prevent any slippage during braking.
- Once the cable is securely attached, check its tension. It should have a sufficient amount of tension to engage the brakes effectively without excessive play. If needed, adjust the cable tension using barrel adjusters located near the brake lever or caliper.
By following these steps, you can successfully reattach the brake components during the installation of your bicycle fork. Ensuring that the front brake is properly installed, adjusted, and connected is essential for a safe and efficient riding experience.
Step 5: Testing And Final Adjustments
Once you have completed the installation of the bicycle fork, it is essential to perform thorough testing and make any necessary adjustments to ensure optimal performance. This step will help ensure that your bike is safe, stable, and ready for the road ahead.
Checking the alignment and function of the front wheel
The first thing you want to do is visually inspect the alignment of the front wheel. Make sure it is centered between the fork blades and that there is equal distance on both sides. To check this, stand directly in front of the bike and compare the gap between the tire and fork blades on each side.
Next, spin the front wheel and observe if it rotates smoothly without any wobbling or rubbing against the fork blades. Any irregularities in wheel alignment or spinning may indicate a problem with the fork installation. If you notice any issues, it is crucial to re-check the tightening of the wheel axle and adjust as necessary.
Testing the responsiveness of the headset and fork
The headset and fork play a vital role in how your bike handles and steers. To test their responsiveness, stand beside your bike and hold onto the handlebars. With your other hand, apply the front brake and gently rock the bike back and forth. Observe how smoothly the fork and headset allow the handlebars to rotate.
If you feel any stiffness, grinding noises, or excessive play in the headset, this may indicate a problem. It is essential to inspect and adjust the headset bearings and fork assembly to ensure smooth operation and responsive steering.
Making any necessary adjustments for optimal performance
After testing the alignment of the front wheel and the responsiveness of the headset and fork, you may need to make some adjustments for optimal performance. Here are a few key areas to consider:
- Check the tightness of the handlebar stem. Ensure it is securely tightened, but not overly tight, as this can restrict steering ability.
- Inspect the position of the brake pads. They should make smooth contact with the rim of the wheel, ensuring efficient braking power.
- Verify that the fork and headset are securely attached to the frame of the bike. Loose connections can cause instability and compromise safety.
By conducting a thorough inspection and making any necessary adjustments, you can be confident in the proper installation and functionality of your bicycle fork. This will enhance your riding experience and promote safety on the road.
Frequently Asked Questions For How To Install Bicycle Fork
Which Way Does A Bike Fork Go?
The bike fork should face forward, with the curved part called the crown facing the front wheel.
How Do You Fit A New Suspension Fork?
To fit a new suspension fork, follow these steps: 1. Remove the old fork by loosening the bolts and disconnecting the brake caliper. 2. Install the new fork by aligning the dropouts with the wheel axle and tightening the bolts securely.
3. Reattach the brake caliper, making sure it is properly aligned. 4. Adjust the suspension settings to your preference. 5. Test the fork to ensure it is functioning properly.
How Do You Change Front Forks On A Bike?
To change the front forks on a bike, follow these steps: 1. Loosen the bolts holding the front wheel in place. 2. Remove the wheel, then unscrew the cap on top of the fork. 3. Slide out the old forks and replace with the new ones.
4. Screw the cap back on, then reinstall the front wheel and tighten the bolts. 5. Test the bike to ensure the forks are secure and working properly.
What Holds A Bike Fork In Place?
A bike fork is held in place by the headset, which consists of bearings and a crown race. The bearings are pressed into the head tube of the bike frame, and the crown race is attached to the fork’s steerer tube.
This setup allows the fork to rotate smoothly and securely.
Conclusion
Installing a bicycle fork is a crucial task that requires careful attention and knowledge. By following the step-by-step guide outlined in this blog post, you can ensure a successful installation process. Remember to gather the necessary tools, consult the manufacturer’s instructions, and take your time.
With proper installation, you can enjoy a smoother and more comfortable ride on your bicycle. Happy cycling!