To install auto window tint, clean the window thoroughly and measure the tint film to fit the window size accurately. Auto window tinting is a popular practice among car owners to enhance privacy, reduce heat, and protect the interior from harmful UV rays.
However, installing auto window tint requires precision and careful attention to detail. In this guide, we will walk you through the step-by-step process of how to install auto window tint. From cleaning the window surface to measuring and cutting the tint film accurately, we will provide you with all the necessary information to successfully install auto window tint.
So, let’s get started and transform your car’s windows with this simple yet effective upgrade.
Factors To Consider When Selecting Tint Film
Installing auto window tint is a popular choice among car owners looking to enhance privacy, reduce heat, and protect against harmful UV rays. However, selecting the right tint film for your car can be a daunting task. With various options available in the market, it’s essential to consider certain factors to ensure you make an informed decision. Here are three crucial factors to consider when selecting tint film for your car:
UV Protection
One of the primary reasons car owners opt for window tinting is to protect themselves and their passengers from harmful UV rays. UV rays can not only cause sunburn but also contribute to the aging of the skin and increase the risk of skin cancer. Therefore, it’s crucial to select a tint film that provides excellent UV protection. Look for films that offer a high Ultraviolet Protection Factor (UPF), preferably UPF 50+. These films can effectively block more than 98% of harmful UV rays, providing you with peace of mind and protection during your rides.
Privacy Level
Privacy is another significant consideration when selecting tint film for your car windows. Different individuals have varying preferences for the level of privacy they desire. If you value your privacy and want to keep prying eyes away, consider opting for a film with a higher Visible Light Transmission (VLT) percentage. A lower VLT indicates a darker film, providing increased privacy. However, keep in mind that each state has specific regulations regarding the darkness of tinting allowed on car windows. Ensure you check these regulations to avoid any legal repercussions.
Legal Requirements
Speaking of legal standards, it’s crucial to consider the legal requirements for window tinting in your area. Window tinting laws vary from state to state, and it’s essential to adhere to these regulations to avoid fines or legal consequences. Familiarize yourself with the specific maximum visible light transmission percentage permitted in your location for the front, rear, and side windows. Additionally, certain tint films may be prohibited due to their reflective properties or colors. Ensure you select a tint film that complies with the legal requirements to enjoy the benefits of window tinting without any issues.
Options For Window Tint Application
When it comes to applying auto window tint, there are several options to consider that can have a significant impact on the final result. Whether you choose to go with a DIY approach or hire a professional, opt for pre-cut or bulk tint film, or decide on different tint shades, each decision plays a role in achieving the desired outcome. In this article, we will explore these options in detail to help you make an informed decision for your window tint installation.
DIY or Professional Installation
If you’re handy and enjoy taking on home improvement projects, a DIY window tint installation may seem like an enticing option. However, it’s important to consider the complexity of the task and your level of expertise. Applying window tint requires precision and attention to detail to avoid unsightly bubbles, creases, and peeling edges.
On the other hand, professional installation offers several advantages. Skilled technicians have the expertise and experience necessary to achieve a flawless installation. They also have access to professional-grade tools and materials, ensuring a long-lasting result. Additionally, many professional installers offer warranties to provide peace of mind.
Pre-cut or Bulk Tint Film
When it comes to choosing the right tint film for your car, you have the option of pre-cut or bulk tint film. Pre-cut tint film is specifically designed to fit the windows of your vehicle, making the installation process easier and more precise. It eliminates the need for cutting the film to size, saving you time and reducing the risk of mistakes.
On the other hand, bulk tint film allows for more customization and flexibility. With bulk film, you have the freedom to measure and cut the film to fit any window size or shape, including those with unique angles or curves. If you have experience in window tint installation or prefer a more customized look, bulk tint film may be the right choice for you.
Different Tint Shades
The shade of window tint you choose can have a significant impact on the appearance and functionality of your car’s windows. There are various tint shades available, ranging from light to dark. The shade you select will determine the level of privacy, heat reduction, and glare reduction provided by the tint. It’s essential to consider local laws and regulations regarding tint darkness to ensure compliance.
Lighter tint shades, such as 50% or 70%, offer a subtle tint that maintains visibility and allows more natural light into the vehicle. These shades are commonly used for front windows to comply with regulations and provide a minimal level of heat and glare reduction.
On the other hand, darker tint shades, like 20% or 5%, offer enhanced privacy, heat reduction, and glare reduction. These shades are often used for rear windows and provide a sleek and stylish appearance.
Ultimately, the tint shade you choose should align with your preferences and needs.
In Conclusion
When it comes to installing auto window tint, considering the options for application is crucial. Whether you decide to undertake a DIY installation or hire a professional, choose pre-cut or bulk tint film, or opt for different tint shades, each decision can impact the final look and performance of your tint. By weighing the pros and cons of each option and staying informed, you can ensure a successful window tint installation that meets your expectations.
Recommended Tools And Materials
Before starting the installation process, it’s important to gather all the necessary tools and materials. Equipping yourself with the right tools will ensure a smooth and successful installation of your auto window tint. The following tools are highly recommended:
Window Film
The most essential component of installing auto window tint is the window film itself. Make sure to choose high-quality window film that suits your needs. Consider factors such as shade, UV protection, and heat rejection when selecting your window film. Investing in a good quality film will result in a long-lasting and visually appealing tint.
Spray Bottle with Soapy Water
A spray bottle filled with soapy water mixture is an indispensable tool for the installation process. This mixture will act as a lubricant and help in positioning the window film correctly on the glass surface. The soapy water will also prevent any premature adhesion, giving you enough time to adjust the film before it dries.
Squeegee
A squeegee is another crucial tool for installing auto window tint. It is used to remove air bubbles and excess water trapped between the film and the glass. Opt for a squeegee with a felt edge to prevent scratching the film during the installation process. The squeegee will ensure a smooth and professional-looking finish.
Utility Knife
Having a utility knife handy is essential for trimming the window film to the desired size and shape. Make sure to use a sharp and precise utility knife to avoid any jagged or uneven cuts. This tool will allow you to achieve a neat and clean appearance once the installation is complete.
Heat Gun or Hair Dryer
Either a heat gun or a hair dryer can be used during the installation process to activate the adhesive on the window film. This step helps the film adhere to the glass more effectively. The heat gun or hair dryer can also be used to eliminate any minor wrinkles or imperfections in the film, resulting in a professional-looking finish. Make sure to use the heat gun or hair dryer on a low heat setting to prevent damage to the film.
By acquiring these essential tools and materials, your auto window tint installation process will be much easier and yield excellent results. Ensure that you have everything ready before you begin, as this will save you time and frustration during the installation process.
Pre-Tint Cleaning Process
Pre-Tint Cleaning Process
Before installing auto window tint, it is crucial to properly clean the windows to ensure a flawless finish. The pre-tint cleaning process involves washing the windows, removing dirt and debris, and ensuring a dry surface. Each step plays a vital role in achieving an optimal result.
Washing the Windows
Start by washing the windows with a mild automotive glass cleaner. Avoid using harsh chemicals or abrasive materials that could damage the glass. Gently scrub the surface using a clean sponge or microfiber cloth, focusing on any areas with stubborn dirt or grime. Rinse the windows thoroughly with water and dry them using a lint-free cloth.
Removing Dirt and Debris
Take the time to remove any dirt and debris from the window surfaces. Use a soft bristle brush or compressed air to dislodge any loose particles that may be trapped in the corners or edges. Ensure that all dirt, dust, and debris are completely removed as they can interfere with the tint adhesion.
Ensuring a Dry Surface
Before proceeding with the installation, it is essential to ensure that the windows are completely dry. Any moisture left on the surface can lead to bubbling and imperfect adhesion of the tint film. Use a clean, lint-free cloth to thoroughly dry the windows, paying attention to the corners and edges where water may be trapped.
By following these simple steps in the pre-tint cleaning process, you are setting a solid foundation for a successful auto window tint installation. Remember to execute each step carefully and patiently, as attention to detail is key. Now that the windows are clean and dry, you are ready to move on to the next stage of the installation process.
Removing Existing Tint (If Applicable)
Removing existing tint is an essential step when installing auto window tint. Whether you’re replacing old tint or dealing with a damaged film, it’s important to ensure a clean surface for a successful installation. In this section, we will discuss two methods for removing existing tint: using an ammonia solution or a razor blade. We will also cover the proper techniques and safety precautions to follow during the process. Additionally, we’ll discuss how to clean any residue left behind to prepare the windows for the installation of new tint.
Using Ammonia Solution or Razor Blade
If you have decided to remove your existing tint, there are two common methods you can choose from: using an ammonia solution or a razor blade. Each method has its benefits, so it’s important to choose the one that suits your situation.
Ammonia Solution
To remove tint using an ammonia solution, you will need:
- Ammonia-based cleaning solution
- Spray bottle
- Plastic scraper
- Clean cloth or paper towels
Follow these steps to remove the tint using an ammonia solution:
- Ensure the vehicle is parked in a well-ventilated area, as the fumes from the ammonia solution can be strong.
- Spray the ammonia solution generously onto the tinted windows.
- Cover the windows with plastic wrap and let it sit for around an hour. The ammonia solution will help soften the adhesive, making it easier to remove.
- After an hour, remove the plastic wrap and start peeling off the tint from one corner using a plastic scraper. Be careful not to scratch the glass surface.
- If you encounter any stubborn areas, apply more ammonia solution and let it sit for a few more minutes. Then, gently scrape it off.
- Once the tint is completely removed, wipe down the windows using a clean cloth or paper towels to remove any residue.
Razor Blade
Using a razor blade to remove tint requires caution to prevent scratching the glass surface. Before you begin, gather these tools:
- Razor blade
- Spray bottle filled with soapy water
- Plastic scraper
- Clean cloth or paper towels
Here’s the step-by-step process for removing tint using a razor blade:
- Ensure the vehicle is parked in a well-lit area, as visibility is crucial for avoiding scratches.
- Spray the soapy water onto the tinted windows to make it easier to slide the razor blade across the surface.
- Starting from a corner, carefully slide the razor blade under the edge of the tint film at a sharp angle.
- Gently lift the film using the blade, ensuring it stays flush against the glass to minimize scratching.
- If you encounter any stubborn sections, apply more soapy water and use the plastic scraper to aid in the removal process, making sure to be extra careful.
- Once the tint is removed, clean any adhesive residue using a clean cloth or paper towels dampened with soapy water.
Proper Technique and Safety Precautions
When removing tint, it’s important to follow the proper technique and take safety precautions to protect yourself and the vehicle:
- Work in a well-ventilated area to avoid inhaling fumes.
- Wear safety gloves to protect your hands from chemicals and prevent cuts when using a razor blade.
- Use a plastic scraper or razor blade carefully to avoid damaging the glass surface.
- Avoid applying excessive force when removing the tint to prevent glass breakage.
- Dispose of the removed tint and any adhesive residue properly according to local regulations.
Cleaning the Residue
After removing the tint, you may notice some residue left behind on the windows. To clean the residue effectively, follow these steps:
- Dampen a clean cloth or paper towel with a commercial adhesive remover or rubbing alcohol.
- Gently rub the cloth or towel on the residue in circular motions until it is completely dissolved.
- After removing the residue, clean the windows again with soapy water to remove any remaining cleaner or alcohol.
- Dry the windows thoroughly with a clean cloth to ensure a streak-free finish.
By following these steps, you can efficiently remove the existing tint from your auto windows and prepare them for the installation of new tint.
Ensuring Proper Temperature And Environment
Installing auto window tint requires careful consideration of temperature and environment to achieve the best results. Here are some essential factors to keep in mind when preparing for the installation process:
Temperature Considerations
The temperature plays a crucial role in the window tint installation process. Extreme heat or cold can interfere with the adhesive properties of the tint film, making it difficult to achieve a seamless and long-lasting application. Ideally, the temperature range should be between 60°F and 90°F (16°C and 32°C) for optimal results. This ensures that the adhesive sets properly and the tint film adheres smoothly to the window surface.
Ideal Indoor Space for Installation
When it comes to installing auto window tint, choosing the right environment is vital to eliminate potential obstacles and ensure a successful application. An indoor space provides greater control over temperature, minimizing the impact of external factors. Consider setting up a clean and well-ventilated area that allows for easy movement around the vehicle. It’s also advisable to work in an area with minimal exposure to sunlight, as direct sunlight can compromise the tinting process.
Avoiding Wind and Dust
Wind and dust are the enemies of a smooth and flawless window tint installation. Even the tiniest particles can leave imperfections under the tint film, resulting in an unsatisfactory finish. To tackle this challenge, choose an indoor space or ensure that outdoor conditions are calm and free from debris. If you opt for an outdoor location, do your best to shield the area from gusts of wind and cover the surrounding surfaces to prevent dust from settling on the windows.
In summary, maintaining the right temperature, choosing an ideal indoor space, and avoiding wind and dust are essential considerations for a successful auto window tint installation. By following these guidelines, you can achieve a professional result that enhances your vehicle’s aesthetics while providing the desired level of privacy and sun protection.
Measuring And Cutting The Tint Film
When it comes to installing auto window tint, one of the most crucial steps is measuring and cutting the tint film to the right size. This ensures a precise fit and a professional-looking finish. In this section, we will guide you through the process of measuring the windows, cutting the tint film to size, and allowing extra margin for trimming.
Measuring the Windows
The first step in installing auto window tint is accurately measuring the windows of your vehicle. This will depend on the type of car you have and the specific windows you want to tint. To measure the windows, follow these simple steps:
- Start by cleaning the window thoroughly to remove any dirt or dust particles that could affect the accuracy of your measurements.
- Use a measuring tape to measure the height and width of each window you plan to tint. Measure from edge to edge, making sure to account for any curves or angles.
- Record your measurements carefully, noting down the height and width of each window separately.
By accurately measuring your windows, you will be able to cut the tint film to the perfect size, ensuring a seamless fit.
Cutting the Tint Film to Size
Once you have measured your windows, it’s time to cut the tint film to the right size. Follow these steps to ensure a precise cut:
- Before cutting the tint film, make sure you have a clean and flat surface to work on. A cutting mat or a glass surface would be ideal.
- Roll out the tint film and place it on the cutting surface. Smooth out any wrinkles or bubbles to ensure an even surface.
- Using your measurements, mark the dimensions on the tint film using a non-permanent marker or a piece of tape.
- Using a sharp utility knife or a tint film cutting tool, carefully cut along the marked lines. Take your time to ensure straight and clean cuts.
Remember, accuracy is key when cutting the tint film, as it will determine how well it fits on your windows. Take your time and double-check your measurements before making any cuts.
Allowing Extra Margin for Trimming
When cutting the tint film, it’s always a good idea to leave some extra margin for trimming. This allows you to make any necessary adjustments and ensures that the film covers the entire window surface. Follow these guidelines when allowing extra margin:
- For straight-edged windows, leave an extra 1/4 inch to 1/2 inch margin on all sides of the tint film.
- For curved or angled windows, leave a slightly larger margin to account for the shape of the window.
This extra margin will give you some flexibility during the installation process and will allow for a cleaner, more professional result. Remember, it’s always better to have a little extra film to trim off than to end up with a piece that’s too small to cover the entire window.
By following these steps and guidelines, you’ll be well on your way to successfully measuring and cutting the tint film for your auto windows. Remember to take your time, measure accurately, and use the right tools for the job. With a bit of patience and precision, you can achieve a professional-looking window tint installation.
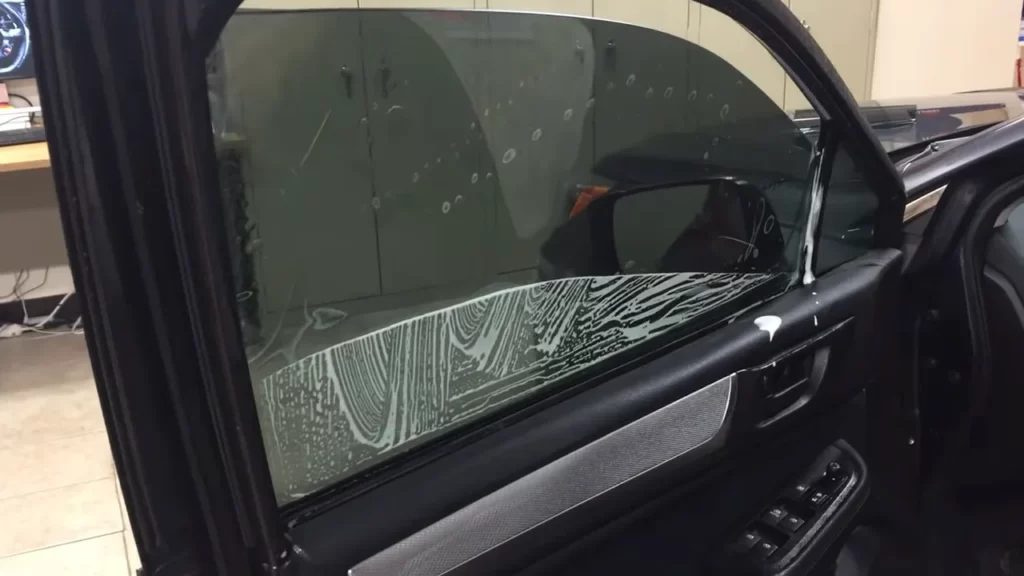
Applying The Tint Film
Applying the tint film is a crucial step in installing auto window tint. This process requires attention to detail and proper technique to ensure a smooth and professional-looking finish. In this section, we will explore the preparatory steps for installing the tint film, the wet and dry methods of application, and the proper technique to achieve the best results.
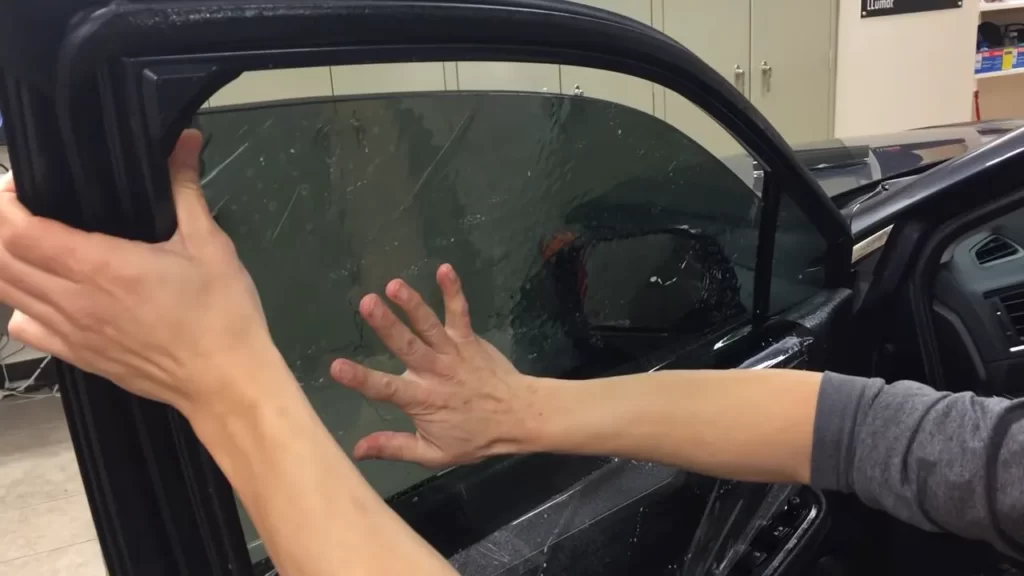
Preparing the Tint Film for Installation
Before you begin applying the tint film to your car windows, it is essential to properly prepare the film. Follow these steps:
- Clean the windows thoroughly to remove any dust, dirt, or debris. This will help the tint film adhere smoothly and prevent any bubbles or imperfections.
- Measure and cut the tint film to the size of each window. It’s important to leave some extra film on each side to allow for adjustments during installation.
- Peel off the protective liner from the tint film, exposing the adhesive side that will stick to the window. Be careful not to touch the adhesive surface to avoid leaving any fingerprints or smudges.
Wet Method vs Dry Method
There are two main methods for applying tint film: the wet method and the dry method. Each method has its advantages and disadvantages, so let’s take a closer look.
| Wet Method | Dry Method |
|---|---|
| The wet method involves using a solution of water and soap to wet the window and film during installation. This prevents the film from sticking too quickly, allowing you to adjust its position and remove any air bubbles. | The dry method, on the other hand, does not involve any additional liquid. The tint film is directly applied to the dry window surface. This method is preferred by some installers due to its quicker drying time. |
| The wet method is generally recommended for beginners or those who are not as experienced with window tint installation. The additional moisture helps with the flexibility of the film and provides more room for error correction. | The dry method may require more experience and precision during installation, as there is no room for error once the film comes into contact with the window. |
Proper Application Technique
Regardless of the method you choose, following the proper application technique is crucial for a seamless and professional-looking tint job. Here are some tips to keep in mind:
- Start from the top of the window and work your way down, smoothing out the film as you go along.
- Use a squeegee or a soft cloth to press the film against the window, removing any air bubbles or wrinkles.
- Trim any excess film using a sharp blade or knife, ensuring a clean and neat appearance.
- Allow the film to dry and cure according to the manufacturer’s instructions before rolling the windows up or down.
- Regularly clean and maintain the tinted windows to prolong their lifespan and maintain their appearance.
By following these steps and techniques, you can successfully install auto window tint that enhances the privacy, style, and comfort of your vehicle while providing protection from harmful UV rays. Remember to practice patience and precision for the best results!
Removing Bubbles And Wrinkles
Once you have installed auto window tint, you may notice the appearance of air bubbles or wrinkles. These imperfections can be quite frustrating, but don’t worry – they can be easily fixed with some simple techniques. In this section, we will explore three effective methods for removing bubbles and wrinkles: squeegeeing out air bubbles, using a heat gun to remove wrinkles, and the importance of patience and persistence for achieving the best results.
Squeegeeing Out Air Bubbles
The first step in getting rid of those pesky air bubbles is squeegeeing. This method involves using a squeegee tool to push the air bubbles towards the edges of the tinted window, where they can be released. Here’s how you can do it:
- Start from the center: Begin by placing the squeegee at the center of the bubble.
- Apply pressure: Use firm, even pressure to push the bubble towards the edge of the window.
- Work your way outwards: Gradually move the squeegee towards the edges of the tinted window, continuing to exert pressure on the bubble as you go.
- Release the air: As the bubble reaches the edge, gently lift the tint away from the window to release the trapped air. Be careful not to damage the tint while doing this.
- Repeat if necessary: If there are multiple bubbles, repeat the process until all the air bubbles are removed.
Remember, it’s essential to take your time and be gentle when squeegeeing out air bubbles to avoid damaging the window tint.
Using a Heat Gun to Remove Wrinkles
Wrinkles can also be a common issue when installing auto window tint. Luckily, a heat gun can come to the rescue and help smooth out those unsightly wrinkles. Here’s how you can use a heat gun to remove wrinkles:
- Set the heat gun to a low temperature: Before starting, ensure that the heat gun is set to a low heat setting. High temperatures can damage the tint.
- Hold the heat gun at a safe distance: Keep the heat gun at least six inches away from the window tint to prevent overheating.
- Apply heat to the wrinkled area: Gently wave the heat gun over the wrinkled area of the window tint. The heat will soften the tint, allowing it to relax and smooth out.
- Smooth out the wrinkles: While the tint is warm, use your hand or a soft cloth to smooth out the wrinkles. Apply gentle pressure and work from the center of the wrinkle towards the edges.
- Repeat if necessary: If the wrinkles persist, repeat the process until the window tint appears smooth and wrinkle-free.
Note that it’s important to exercise caution when using a heat gun. High temperatures or holding the heat gun too close to the tint can cause damage, so always work with a low heat setting and maintain a safe distance.
Patience and Persistence for Best Results
It’s important to remember that achieving perfect results when installing auto window tint takes time, patience, and persistence. Here are some key points to keep in mind:
- Work in a controlled environment: Choose a location with minimal dust and dirt to ensure a clean installation.
- Use a clean, lint-free cloth: Always keep a lint-free cloth handy to remove any dirt or debris that may interfere with the installation.
- Take breaks if needed: Installing window tint can be a time-consuming task. If you feel tired or frustrated, take short breaks to regroup and maintain focus.
- Practice makes perfect: Don’t be discouraged if your first attempt doesn’t yield flawless results. With practice, you’ll develop better techniques and achieve better outcomes.
By following these tips and techniques, you can effectively remove bubbles and wrinkles, ensuring a smooth and professional-looking auto window tint installation.
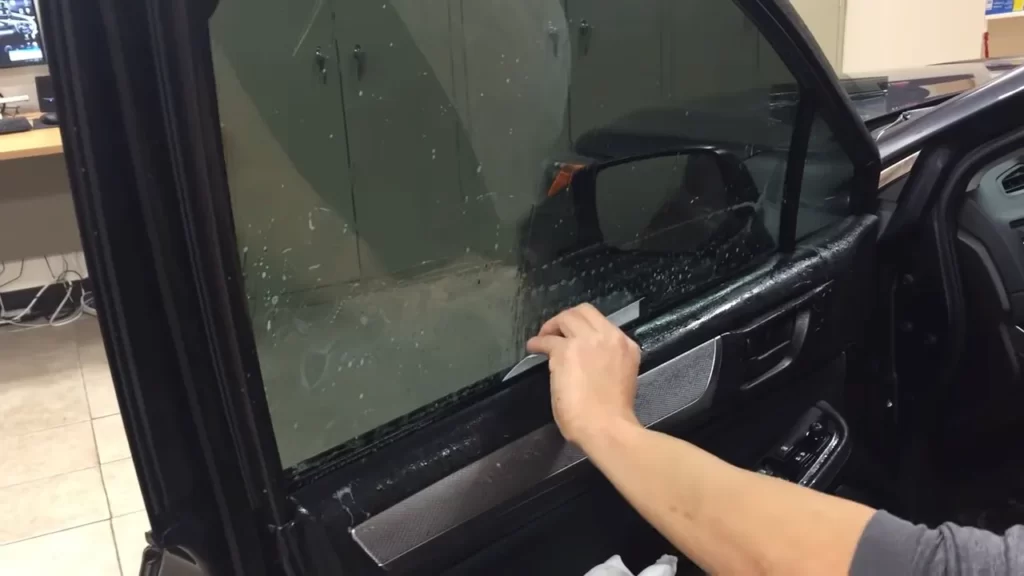
Trimming Excess Film
Once you have successfully applied the auto window tint to your car windows, it’s time to trim the excess film for a clean and professional finish. Trimming the edges is an important step in the installation process as it helps to ensure that the tint fits perfectly and does not obstruct your view. However, it is essential to approach this task with caution and precision to avoid any scratches or damages to the film or the window itself.
Carefully Trimming the Edges
To start, gather a clean and sharp utility knife or an X-Acto knife. Make sure the blade is new or in good condition for clean cuts. Begin by gently lifting the edge of the excess film with your fingers or a razor blade. Slowly and steadily, guide the knife along the edge of the window, cutting off the excess film. Take your time and use light pressure to avoid any accidental slip-ups that could damage the tint or your window glass.
If you encounter any areas where the film is wrinkled or bunched up, make a small relief cut with the knife to release the tension. Then, go back and trim off the excess film, blending it seamlessly with the window edge. This will help ensure a clean and professional appearance.
Avoiding Scratches and Damages
When trimming the excess film, it is crucial to protect both the film and the window glass from scratches or damages. To prevent accidental scratches, consider using a piece of cardboard or a plastic trim tool as a guide. Place the guide along the edge of the window and slide the knife against it, allowing the blade to trim the film without directly touching the glass. This technique helps minimize the risk of scratching the window.
Additionally, keep your work area and tools clean. Any dust particles or debris on the knife or window surface can lead to scratches. Before starting the trimming process, wipe down the window and ensure your knife is free from any dirt. This simple precaution can go a long way in preserving the integrity of the film and preventing any unwanted damage.
Remember, patience and precision are the keys to successfully trimming the excess film. Take your time, follow the steps mentioned above, and you’ll achieve a professional and flawless auto window tint installation.
Drying And Curing Process
Properly drying and curing the window tint is a critical step in the installation process. This ensures the adhesive bonds properly and the tint stays in place, creating a long-lasting result. Following the right steps can help you achieve professional-looking windows and avoid any issues down the line.
Allowing Sufficient Time for Drying
After the window tint has been applied, it’s crucial to allow sufficient time for it to dry. This typically takes around two to four days, depending on the weather conditions and type of tint used. It’s essential not to rush this process, as premature exposure to moisture or extreme temperatures can lead to bubbling, peeling, or even the tint not adhering to the glass properly. Patience is definitely key here.
Avoiding Rolling Down Windows
During the drying period, it’s vital to avoid rolling down the windows. Doing so can disturb the film and cause it to shift or peel away from the edges. It’s recommended to keep the windows closed for at least 48 to 72 hours, allowing the adhesive to fully bond with the glass. Additionally, avoid using any window cleaners or rolling down the windows even after the drying period, as this can also affect the tint’s longevity.
Cleaning with Non-Ammonia Solution
Once the tint has fully dried and cured, you may eventually need to clean your windows. It’s essential to use a non-ammonia-based cleaning solution, as ammonia can degrade the adhesive and cause the tint to deteriorate over time. Instead, opt for a gentle, non-abrasive cleaner that is specifically formulated for window tints. This will help maintain the clarity and integrity of the tint, ensuring it lasts for years to come.
In conclusion, following the proper drying and curing process is essential to achieve a high-quality window tint installation. Allowing sufficient time for drying, avoiding rolling down the windows, and choosing the right cleaning solution are simple yet crucial steps that will help you enjoy the benefits of tinted windows for a long time. By investing a little extra time and care during the installation process, you can ensure a professional finish and a flawless result.
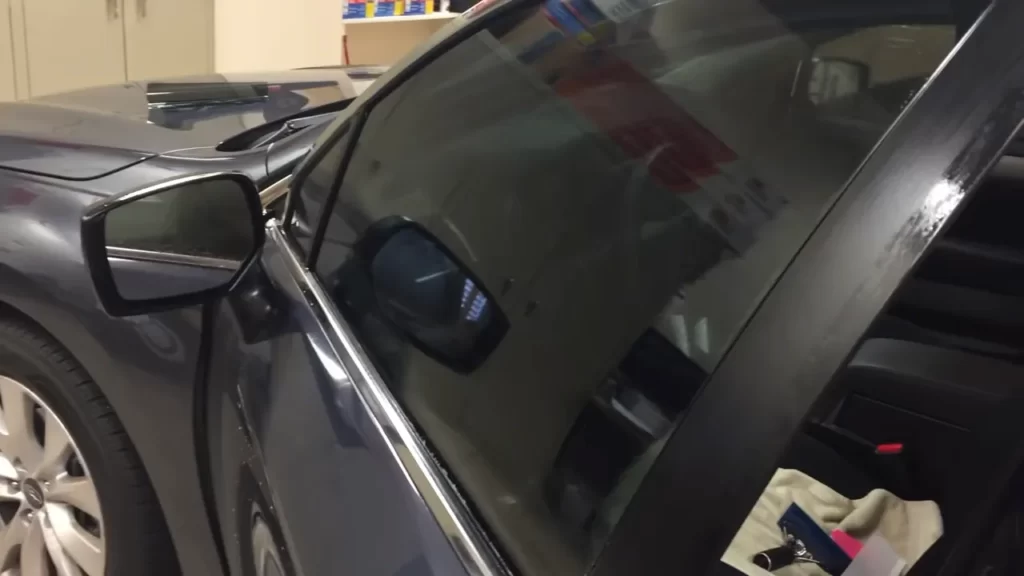
Final Inspection And Maintenance Tips
Once you have successfully installed auto window tint, it’s important to conduct a thorough final inspection to ensure everything looks perfect. Additionally, proper maintenance is crucial for the longevity of your tint. In this section, we will discuss essential steps for checking imperfections, touching up edges and corners, and maintaining the tint for maximum durability.
Checking for Imperfections
Before considering your auto window tint installation complete, it’s vital to inspect for any imperfections. Imperfections may include bubbles, creases, or visible debris trapped under the film. These impairments not only compromise the aesthetic appeal but also affect the performance and lifespan of the tint.
To check for imperfections, follow these steps:
- Start by examining each window carefully.
- Look for any bubbles or creases in the film.
- If you notice any imperfections, use a heat gun or hairdryer on a low setting to gently heat the area.
- While applying heat, use a credit card or squeegee wrapped in a microfiber cloth to smooth out the bubbles or creases.
- Repeat this process until the film is smooth and free of imperfections.
Touching Up Edges and Corners
The edges and corners of your auto window tint may be susceptible to peeling or lifting over time. To ensure a clean and professional finish, it’s important to touch up any loose or lifted edges.
Here’s how to effectively touch up edges and corners:
- Inspect all edges and corners of the tinted window.
- If you notice any loose or lifted edges, apply a small amount of high-quality adhesive specifically designed for auto window tint.
- Use a cotton swab or a small brush to apply the adhesive along the edges and corners.
- Press down firmly on the tint to secure it in place.
- Allow the adhesive to dry completely before touching or cleaning the window.
Maintaining the Tint for Longevity
Proper maintenance is essential for preserving the quality and longevity of your auto window tint. By following a few simple steps, you can ensure the tint remains in excellent condition for years to come.
Consider the following maintenance tips:
- Clean the tinted windows regularly using a non-ammonia-based cleaner and a microfiber cloth.
- Avoid using abrasive materials or harsh chemicals that may damage the film.
- When drying the windows, gently blot the surface instead of rubbing vigorously.
- Avoid rolling down the windows for at least a week after installation to allow the tint to cure properly.
- During extreme weather conditions, such as severe heat or cold, park your vehicle in shaded areas or garages to minimize potential damage to the tint.
By following these maintenance tips, you can extend the lifespan of your auto window tint and keep it looking as good as new.
Frequently Asked Questions Of How To Install Auto Window Tint
Does Window Tint Need Glue?
Yes, window tint requires glue for proper installation. The glue helps the tint adhere to the window surface, providing a long-lasting and secure application.
How Do You Install Window Tint?
To install window tint, clean the windows thoroughly with a mixture of water and soap. Measure and cut the tint film slightly larger than the window. Peel off the backing and apply the film, smoothing out any air bubbles. Trim any excess film, and let it dry for at least 48 hours before rolling the windows up or down.
How Do You Install Window Tint At Home?
To install window tint at home, follow these steps: Prepare the window by cleaning it thoroughly. Cut the tint film to fit the window size. Spray soapy water onto the glass and apply the film, smoothing out any air bubbles.
Trim the excess film, and let it dry for 48 hours.
What Is The Easiest Window Tint To Install?
The easiest window tint to install is typically a self-adhesive film. It can be applied without professional help, saving time and money.
Conclusion
Installing auto window tint can be a challenging task, but with the right tools and knowledge, it can be easily accomplished. By following the step-by-step instructions provided in this guide, you can ensure a successful installation. Remember to thoroughly clean the windows, measure and cut the tint film accurately, and use proper techniques for smooth application.
With a little patience and practice, you’ll be able to enjoy the benefits of auto window tinting while giving your vehicle a stylish and sleek look. Happy tinting!