To install anti-rattle clips on brake pads, follow these steps: remove the brake pads, clean the caliper and bracket, apply brake lubricant, position the anti-rattle clips, and reinstall the brake pads. This article provides a step-by-step guide on how to properly install anti-rattle clips on brake pads to reduce noise and vibrations.
Whether you’re a DIY enthusiast or a professional mechanic, ensuring the brake pads are securely in place is crucial for optimal brake performance. By following the instructions provided, you can easily install anti-rattle clips and enjoy a smoother, quieter ride.
Understanding Anti Rattle Clips
When it comes to brake pads, maintaining a quiet and smooth ride is crucial. One component that plays a significant role in reducing noise and vibration is the anti rattle clip. In this article, we will take a closer look at what anti rattle clips are, why they are important for brake pads, and how they function in reducing noise and vibration.
What are Anti Rattle Clips?
Anti rattle clips, also known as brake pad clips or brake hardware clips, are small metal clips that are typically fitted onto the brake caliper assembly. Their primary purpose is to keep the brake pads securely in place and prevent them from rattling or vibrating during braking.
These clips are usually made of stainless steel or other high-quality materials that can withstand the heat and pressure generated during braking. They are designed to fit snugly onto the brake pad’s mounting ears or the caliper bracket, ensuring that the pads remain firmly secured.
Why are they important for brake pads?
Anti rattle clips are crucial for brake pads because they provide several key benefits:
- Reduced noise: One of the primary functions of anti rattle clips is to reduce noise. Without these clips, the brake pads can easily vibrate or rattle against the caliper brackets, leading to annoying squeaking or grinding noises. Anti rattle clips dampen vibrations and keep the pads in place, resulting in a quieter ride.
- Improved braking performance: By eliminating excessive movement and vibrations, anti rattle clips help to maintain consistent contact between the brake pads and the rotors. This ensures smooth and effective braking, enhancing overall performance and safety.
- Extended brake pad life: Excessive movement and vibrations can cause uneven wear on brake pads, leading to premature wear and reduced lifespan. Anti rattle clips help to distribute pressure evenly across the pads, promoting uniform wear and extending their longevity.
How do they function in reducing noise and vibration?
Anti rattle clips work by exerting a spring-like force on the brake pads, holding them securely against the caliper brackets or mounting ears. This prevents any excessive movement or play that can lead to noise and vibration during braking.
These clips absorb and dampen vibrations, acting as a buffer between the brake pads and the caliper brackets. By doing so, they significantly reduce the chances of squeaking, vibrating, and rattling noises commonly associated with brake pads.
Additionally, the tight fit of the anti rattle clips ensures that the brake pads remain in the proper position, maximizing their contact with the rotors. This promotes optimal braking performance and minimizes the risk of uneven wear on the pads.
Overall, anti rattle clips are simple yet effective components that play a vital role in maintaining a quiet and smooth braking experience. They are an essential part of any brake pad installation or replacement, ensuring optimal performance, longevity, and comfort for your vehicle.
Preparing For Installation
Before you can install anti-rattle clips on your brake pads, there are a few important steps you need to take to ensure a smooth and successful installation. This section will guide you through gathering the necessary tools and materials, as well as inspecting the brake pad assembly and removing any old clips if necessary. By following these steps, you’ll be well-prepared and ready to tackle the installation process.
Gathering the necessary tools and materials
Before you start the installation process, it’s important to make sure you have all the necessary tools and materials on hand. This will save you time and prevent any unnecessary interruptions during the installation. Here are the tools and materials you’ll need:
- Anti-rattle clips (make sure they are compatible with your specific brake pad model)
- Brake pads
- Brake cleaner
- Caliper piston tool
- Torque wrench
- Socket set
- Retaining clips
- Wire brush
By gathering all of these items before you begin, you’ll have everything you need at your fingertips and won’t need to pause the installation to search for missing tools or materials.
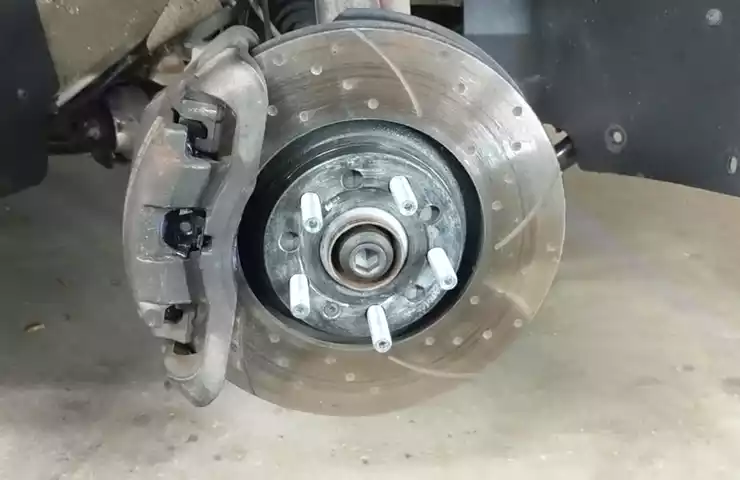
Inspecting the brake pad assembly
Once you have your tools and materials ready, it’s crucial to inspect the brake pad assembly before proceeding with the installation. This step ensures that everything is in good condition and that there are no additional repairs or replacements needed. Here’s how to inspect the brake pad assembly:
- Remove the wheel to gain access to the brake pad assembly
- Examine the brake pads for any signs of uneven wear, damage, or excessive corrosion
- Check the caliper for any signs of leakage or damage
- Inspect the hardware and retaining clips to ensure they are not worn or damaged
- Use a wire brush and brake cleaner to remove any dirt or debris from the brake pad assembly
- If you notice any issues during the inspection, such as worn brake pads or damaged hardware, it’s important to address them before continuing with the installation
By thoroughly inspecting the brake pad assembly beforehand, you can identify any potential issues that may affect the performance of your new anti-rattle clips. It’s always better to address these issues early on to prevent further problems down the road.
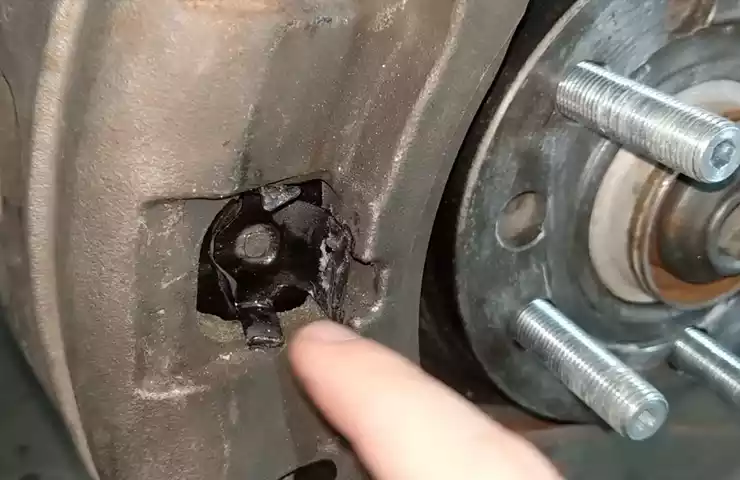
Removing the old clips (if applicable)
In some cases, you may need to remove old anti-rattle clips before installing new ones. This step is necessary if the old clips are worn, damaged, or no longer effective in reducing brake pad noise. Here’s how to remove the old clips:
- Use a suitable tool, such as pliers or a flathead screwdriver, to gently pry the old clips away from the caliper or brake pad
- Be careful not to damage the caliper or brake pad while removing the clips
- Once the old clips are removed, use a wire brush and brake cleaner to clean the area
It’s crucial to remove the old clips properly to ensure a clean and smooth installation of the new anti-rattle clips. By following these steps, you’ll be ready to move on to the next phase of the installation process.
Step-By-Step Installation Process
Proper installation of anti-rattle clips on your brake pads is essential for maintaining optimum performance and reducing noise. In this step-by-step guide, we will walk you through the process, ensuring that each clip is positioned correctly, attached securely, and aligned properly with the caliper and rotor. By following these steps, you can not only ensure noise reduction but also experience improved brake pad performance.

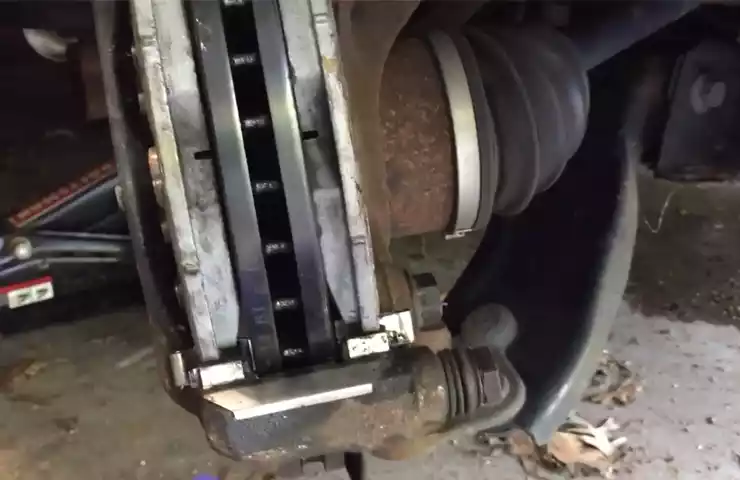
Positioning the clips correctly
The first step in installing anti-rattle clips on your brake pads is to position them correctly. Each clip should be placed on the top and bottom of the brake pad, with the angled edge facing towards the brake rotor. This positioning allows the clip to effectively reduce any rattling or vibration that may occur during braking.
Attaching the clips securely to the brake pads
Once the clips are positioned correctly, it is crucial to attach them securely to the brake pads. This ensures that the clips stay in place and function optimally. Using a pair of pliers, gently press the clips onto the brake pad ears until they are snugly secured. Be cautious not to squeeze too tightly, as this can result in damage to the brake pad surface.
Ensuring proper alignment with the caliper and rotor
After attaching the clips to the brake pads, it is important to check their alignment with the caliper and rotor. The clips should sit flush against the brake pad and smoothly align with the caliper. To make sure they are properly aligned, gently slide the brake pads into the caliper, ensuring they fit snugly without any interference or misalignment.
Testing for noise reduction and improved performance
Once the anti-rattle clips are securely attached and aligned, it is time to test their effectiveness. Take the vehicle for a short drive and pay attention to any noise reduction during braking. Additionally, observe if the brake pads perform better in terms of stopping power and pedal feel. If there is still excessive noise or insufficient performance, double-check the positioning and attachment of the clips.
By following this step-by-step installation process, you can install anti-rattle clips on your brake pads with ease, ensuring a noise-free and improved braking experience. Remember to always prioritize proper positioning, secure attachment, and alignment with the caliper and rotor. With these measures in place, you can enjoy optimized performance and a quieter ride.
Troubleshooting And Tips
When it comes to installing brake pads, ensuring the proper installation of anti-rattle clips is crucial for a quiet and smooth braking experience. These clips play a vital role in keeping the brake pads secure and preventing any noise or vibrations. In this section, we will discuss some common mistakes to avoid during installation, adjusting the clips for optimal fit, and additional measures to further reduce brake noise.
Common installation mistakes to avoid
During the installation process, it’s important to be aware of some common mistakes that can occur. By avoiding these pitfalls, you can ensure a proper fit and functionality of the anti-rattle clips:
- Incomplete removal of old clips: Before installing the new anti-rattle clips, it’s important to thoroughly remove any remnants of the old clips. Failure to do so can result in improper fit and potential noise issues.
- Incorrect clip orientation: Each anti-rattle clip usually comes with a specific orientation. It’s essential to ensure that the clips are positioned correctly according to the manufacturer’s instructions. Installing them incorrectly can cause interference with brake calipers and lead to noise problems.
- Over-tightening or under-tightening the clips: Striking the right balance when tightening the anti-rattle clips is crucial. Over-tightening can cause unnecessary pressure on the brake pads, while under-tightening can lead to excessive movement and noise. Be sure to follow the recommended torque specifications provided by the manufacturer.
- Mixing up left and right side clips: Anti-rattle clips are usually designed for specific sides, such as left and right. Ensure that the correct clip is installed on the corresponding side to maintain proper alignment and prevent noise issues.
Adjusting the clips for optimal fit
Once you have successfully installed the anti-rattle clips, it’s important to check their fit and make necessary adjustments to optimize their performance:
- Ensure proper alignment: Verify that the clips are aligned correctly with the brake pad housing and caliper bracket. This alignment is crucial for preventing any contact or interference that can result in noise.
- Check for proper clearance: Inspect the clearance between the clips, brake pads, and rotors. It’s important to have adequate space to allow for the necessary movement without any rubbing or grinding.
- Test for noise: After adjusting the clips, conduct a thorough road test to determine if any noise is present during braking. If noise persists, additional measures may need to be taken to reduce brake noise.
Additional measures to reduce brake noise
If you encounter persistent brake noise issues even after installing the anti-rattle clips and adjusting them, consider implementing some additional measures to further reduce the noise:
- Brake pad treatment: Applying a brake pad anti-squeal compound or brake lubricant can help reduce friction and noise between the brake pads and clips.
- Proper rotor maintenance: It’s essential to maintain clean and smooth rotors. Any uneven surfaces, such as rust or grooves, can contribute to brake noise. Regularly inspect and resurface or replace the rotors as needed.
- Quality brake pads: Investing in high-quality brake pads can make a significant difference in reducing noise. Opt for pads that are specifically designed to minimize noise and vibrations.
- Professional inspection: If all else fails, it’s recommended to consult a professional mechanic who can thoroughly inspect the brake system for any underlying issues or recommend further solutions.
By being mindful of these troubleshooting tips and taking necessary precautions, you can ensure a successful installation of anti-rattle clips on brake pads, resulting in a quiet and smooth braking experience.
Maintenance And Longevity
Proper maintenance of brake pads and their components is essential for ensuring their longevity and optimal performance. One crucial aspect of brake pad maintenance is the installation and regular inspection of anti-rattle clips. These small but significant clips play a vital role in reducing noise and vibration from the brake pads.
Regular inspection and cleaning of the clips
To maintain the performance of the anti-rattle clips, it is important to inspect them regularly. Over time, dirt, debris, and brake dust can accumulate on the clips, affecting their functionality. To ensure proper functioning, follow these steps:
- Start by lifting the vehicle and removing the wheels to gain access to the brake pads and clips.
- Inspect the clips for any signs of wear, damage, or corrosion. Replace any clips that are worn-out or damaged.
- Using a brush or compressed air, clean the clips and remove any debris or brake dust that may have accumulated on them.
- Apply a thin layer of high-temperature brake lubricant to the clips to ensure smooth movement.
- Reinstall the clips carefully, making sure they fit snugly against the brake pads.
- Repeat this inspection and cleaning process regularly to maintain the effectiveness of the anti-rattle clips.
Replacing worn-out or damaged clips
Over time, anti-rattle clips may become worn-out or damaged due to the harsh conditions they endure. It is important to replace these clips promptly to avoid brake noise, vibrations, and potential brake pad damage. Here’s how to replace worn-out or damaged clips:
- Identify the worn-out or damaged anti-rattle clip by closely inspecting the brake pads.
- Using a flathead screwdriver or a suitable tool, carefully remove the old clip from the brake pad.
- Ensure that the replacement clip matches the original specifications and fits correctly.
- Insert the new clip into the designated slot on the brake pad, applying slight pressure to secure it in place.
- Double-check that the clip is properly aligned and seated to prevent any potential issues.
- Repeat this process for any other worn-out or damaged clips.
Extending the lifespan of brake pads with proper clip maintenance
By maintaining the anti-rattle clips properly, you can significantly extend the lifespan of your brake pads. Here are some additional tips to ensure the longevity of brake pads:
- Perform regular brake pad inspections to check for wear and thickness.
- Keep an eye out for any signs of brake pad damage, such as uneven wear or scoring.
- Invest in high-quality brake pads that are suitable for your vehicle’s make and model.
- Follow proper braking techniques, avoiding excessive sudden braking that can put unnecessary strain on the brake pads.
- Ensure that the brake calipers and rotors are in good condition and properly aligned.
- Adhere to the recommended brake pad replacement intervals provided by your vehicle manufacturer.
By following these maintenance guidelines, you can help prolong the lifespan of your brake pads and ensure optimal braking performance and safety on the road.
Frequently Asked Questions On How To Install Anti Rattle Clips On Brake Pads
Are Brake Pad Anti Rattle Clips Necessary?
Yes, brake pad anti rattle clips are necessary. They prevent the brake pads from vibrating and rattling, providing a quieter and smoother ride. They also help to ensure proper alignment and prevent premature wear.
How Do You Put Clips On New Brake Pads?
To put clips on new brake pads, follow these steps: 1. Remove the old clips from the caliper. 2. Clean the caliper and clip area. 3. Align the new clips with the caliper holes. 4. Push the clips into place using firm pressure.
5. Ensure the clips are securely seated before installing the new brake pads.
What Happens If You Don’T Install Brake Pad Clips?
Brake pad clips help secure the brake pads in place, preventing noise and vibrations. If not installed, the brake pads can shift and cause uneven wear, reduced braking performance, and potential damage to the braking system. It is essential to install brake pad clips for optimal safety and performance.
What Are The Little Black Clips For Brake Pads?
Little black clips for brake pads are designed to hold the pads in place, preventing them from rattling or shifting. These clips help ensure proper alignment and reduce noise during braking. They are essential components that contribute to the overall performance and safety of the braking system.
Conclusion
Correctly installing anti rattle clips on your brake pads is essential for ensuring smooth braking performance and reducing noise. By following the step-by-step guide provided in this blog post, you can easily and effectively install these clips yourself. Remember to thoroughly clean and inspect your brake components before reassembling, and always prioritize your safety by double-checking your work.