To install an ignition coil, first, disconnect the negative terminal of the battery. Then, locate the ignition coil and remove the old one by disconnecting the wire harness and bolts.
An ignition coil plays a crucial role in the functioning of a vehicle’s ignition system by converting low voltage from the battery into high voltage electricity required to spark the spark plugs. Over time, ignition coils can wear out or malfunction, leading to engine performance issues.
If your vehicle is experiencing misfires, rough idling, or difficulty starting, it may be time to replace the ignition coil. In this guide, we will explain how to install a new ignition coil to ensure your vehicle runs smoothly and efficiently. Just follow these simple steps to complete the process and get your vehicle back on the road in no time.
Understanding The Ignition Coil: Function And Importance
The ignition coil plays a crucial role in the ignition system of a vehicle. It is responsible for converting the low voltage from the battery into a high voltage necessary to spark the spark plugs. Without the ignition coil, the spark plugs would not be able to ignite the air-fuel mixture in the combustion chamber, resulting in a vehicle that won’t start.
How the ignition coil works
The ignition coil works on the principle of electromagnetic induction. It consists of a primary winding and a secondary winding. The primary winding is connected to the battery’s low voltage circuit, and when the ignition switch is turned on, a small current flows through this winding. This current creates a magnetic field around the winding.
The primary winding is wrapped around a metal core, typically made of iron or steel, which helps to concentrate the magnetic field. When the ignition switch is opened, the current flow through the primary winding is quickly interrupted. This sudden interruption causes the magnetic field to collapse, inducing a high voltage in the secondary winding.
The secondary winding has many more turns than the primary winding, which further increases the voltage. The high voltage is then sent to the distributor, which distributes the spark to each spark plug in the correct firing order.
The role of the ignition coil in the ignition system
The ignition coil is an essential component of the ignition system in a vehicle. Its primary role is to transform the low voltage from the battery into a high voltage required to generate a spark at the spark plugs. This spark ignites the air-fuel mixture in the combustion chamber, allowing the engine to start and run smoothly.
Without a functioning ignition coil, the engine may misfire, experience poor fuel economy, or even fail to start. Therefore, it’s essential to ensure that the ignition coil is working correctly and replace it promptly if it becomes faulty.
Why a faulty ignition coil needs replacement
A faulty ignition coil can cause numerous issues in a vehicle. When an ignition coil fails, it can lead to a weak or inconsistent spark, resulting in engine misfires, rough idle, and decreased fuel efficiency. Additionally, a faulty ignition coil can also cause the engine to stall or prevent it from starting altogether.
Replacing a faulty ignition coil is crucial to maintain the overall performance and reliability of the vehicle. Ignoring a faulty ignition coil can lead to further damage to the ignition system and other engine components, resulting in costly repairs.
Regular maintenance and inspection of the ignition coil can help identify any issues early on and prevent them from escalating. If you notice any symptoms of a failing ignition coil, such as difficulty starting the engine or reduced engine performance, it’s advisable to have the ignition coil replaced by a professional as soon as possible.
Preparation: Gather The Necessary Tools And Materials
Before diving into the installation process of an ignition coil, it is vital to gather all the necessary tools and materials. This will ensure a smooth and convenient installation experience, saving you time and potential frustrations. Below, we have outlined the tools required for the installation, discussed the different types of ignition coils and their compatibility, and highlighted the safety precautions you should take before starting the installation process.
Tools required for the installation
Here is a list of essential tools you will need to successfully install an ignition coil:
| Tool | Description |
|---|---|
| Screwdriver | A flathead or Phillips screwdriver will be required to remove any screws or bolts securing the old ignition coil. |
| Socket wrench set | This set will come in handy when removing any nuts or bolts holding the ignition coil in place. |
| Pliers | Pliers are useful for tasks such as disconnecting electrical connectors or removing wire harnesses. |
| Electrical tape | Electrical tape is essential for insulation and securing wire connections. |
| Clean cloth | A clean cloth will help you wipe away any dirt or debris around the ignition coil area. |
Types of ignition coils and their compatibility
Before proceeding with the installation, it is crucial to understand the types of ignition coils available and their compatibility with your vehicle. There are typically three types of ignition coils:
- Conventional ignition coils: These coils are widely used in older vehicles and require an external ignition module to function properly.
- Distributorless ignition coils (DIS): Found in many modern vehicles, these coils are compact and integrate the ignition control module within them.
- Coil-on-plug ignition coils (COP): These coils are becoming increasingly popular in newer vehicles as they provide individual ignition coils for each spark plug, resulting in enhanced efficiency and performance.
To ensure compatibility, consult your vehicle’s owner manual or seek advice from a trusted mechanic or automotive specialist. They can guide you in selecting the right type of ignition coil for your specific vehicle make and model.
Safety precautions before starting the installation process
Prior to starting the installation, it is crucial to take necessary safety precautions to protect yourself and your vehicle. Follow these steps:
- Disconnect the negative terminal of your vehicle’s battery to avoid accidental electric shocks.
- Allow the engine to cool down completely before beginning the installation process to prevent any burns or injuries.
- Wear protective gloves and safety goggles to safeguard yourself against any potential hazards.
- Ensure you are working in a well-ventilated area to avoid inhaling any harmful fumes.
By adhering to these safety precautions, you can minimize the risk of accidents and ensure a safe installation process.
Steps To Install An Ignition Coil
When it comes to maintaining your vehicle’s ignition system, installing an ignition coil is a crucial step. The ignition coil is responsible for converting the low voltage from the battery into a high-voltage spark that ignites the fuel in the combustion chamber. If your ignition coil is faulty, it can lead to engine misfires, poor fuel efficiency, and even difficulty starting your vehicle. To ensure your engine performs at its best, follow these simple steps to install an ignition coil. Before you begin the installation process, it’s essential to disconnect the battery to avoid any electrical mishaps. Start by locating the battery in your vehicle’s engine compartment. Use a wrench or socket to loosen and remove the negative (-) terminal. This will prevent any power from reaching the ignition system while you work on installing the new coil. Next, you’ll need to locate the ignition coil within your vehicle’s engine compartment. The exact location may vary depending on your car’s make and model, but most ignition coils are found near the engine’s cylinder head. Refer to your vehicle’s owner’s manual or consult an online resource to identify the specific location of the ignition coil for your vehicle. Once you’ve located the ignition coil, it’s time to remove the old one. Start by disconnecting any electrical connections that are attached to the coil. This may include wires, clips, or connectors. Use a wrench or socket to loosen and remove any mounting bolts or brackets that secure the coil in place. Carefully lift the old ignition coil out of its position, taking note of how it was oriented. With the old ignition coil removed, it’s time to install the new one. Start by placing the new coil in the same orientation as the old coil. Secure it in place using the mounting bolts or brackets and tighten them with a wrench or socket. Reconnect any electrical connections that were detached in the previous step. Ensure that all connections are secure and properly seated. Now that the new ignition coil is installed, it’s time to reconnect the battery. Begin by reattaching the negative (-) terminal to the battery and tightening it with a wrench or socket. This will restore power to the ignition system. Double-check all connections and ensure there are no loose wires or components. Once you’ve verified everything is secure, you’re ready to test your newly installed ignition coil. In conclusion, installing an ignition coil is a straightforward process that can greatly improve your vehicle’s engine performance. By following these steps and taking the necessary precautions, you can ensure a successful installation that will keep your engine running smoothly.
Step 1: Disconnect The Battery
Disconnecting the battery is an essential first step when installing an ignition coil. By disconnecting the battery, you ensure your safety and prevent any accidental electrical shocks or damage to your vehicle’s electrical system. In this step by step guide, we will walk you through the process of disconnecting the battery safely and efficiently.
Importance of Disconnecting the Battery before Starting
Before diving into the step-by-step instructions, it’s crucial to understand the importance of disconnecting the battery before starting the ignition coil installation process. Doing so serves two primary purposes: safety and prevention.
First and foremost, disconnecting the battery ensures your safety by eliminating the risk of electrical shocks. The ignition coil operates at high voltage, and even a slight mishap during the installation can result in a dangerous electric shock. By disconnecting the battery, you cut off the power supply and minimize any potential hazards.
Secondly, disconnecting the battery prevents any accidental damage to your vehicle’s electrical system. Ignition coils are sensitive components, and tampering with them while the battery is connected can lead to short circuits or improper functioning. By disconnecting the battery, you create a safeguard that shields your vehicle’s electrical system from harm.
Step-by-Step Instructions to Disconnect the Battery Safely
Follow these step-by-step instructions to safely disconnect the battery before starting the ignition coil installation:
- Gather the necessary tools: Before getting started, ensure you have the appropriate tools on hand. You will need a wrench or a socket set compatible with your vehicle’s battery terminal size and a pair of gloves for added safety.
- Put on protective gear: Make sure to wear protective gloves and goggles before starting to disconnect the battery.
- Locate the battery: In most vehicles, the battery is located either in the engine compartment or in the trunk. Consult your vehicle’s manual if you’re unsure about its exact location.
- Identify the negative terminal: Look for the negative terminal, usually marked with a minus (-) sign. It’s essential to disconnect the negative terminal first to prevent any accidental electrical discharge.
- Loosen the negative terminal connection: Use the wrench or socket set to loosen the bolt or nut securing the negative terminal. Turn it counterclockwise until it’s loose enough to remove.
- Disconnect the negative terminal: Gently lift the negative terminal connector away from the battery post and set it aside, ensuring it doesn’t come into contact with any metal parts.
- Repeat the process for the positive terminal: Once the negative terminal is disconnected, locate the positive terminal (marked with a plus (+) sign) and follow the same steps to loosen and disconnect it.
- Inspect the battery cables: With both terminals disconnected, take a moment to inspect the battery cables for any signs of damage or corrosion. Clean or replace the cables if necessary.
- Store the disconnected terminals safely: To prevent any accidental electrical contact, wrap each terminal with insulating material, such as electrical tape. Store them separately or secure them away from the battery.
Following these step-by-step instructions ensures you disconnect your vehicle’s battery safely, reducing the risk of accidents and electrical damage during the ignition coil installation process. Remember to always prioritize safety and take necessary precautions when working with the electrical components of your vehicle.
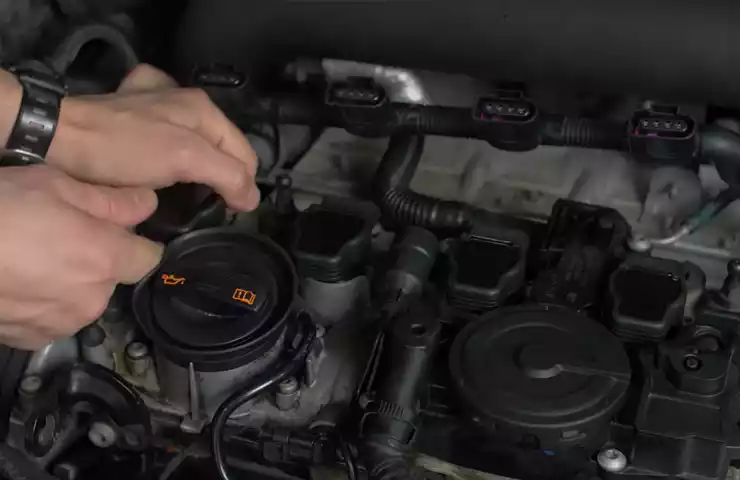
Step 2: Locate The Ignition Coil
In order to install an ignition coil properly, the first step is to locate its position within the engine compartment. The ignition coil can vary in location depending on the make and model of your vehicle. By identifying the ignition coil’s location, you can proceed with the installation process smoothly.
Identification of the ignition coil’s location in the engine compartment
The ignition coil is an essential component of the ignition system and is responsible for generating the high voltage needed to ignite the fuel-air mixture in the engine cylinders. To identify and locate the ignition coil in your vehicle’s engine compartment, follow these general guidelines: 1. Consult the owner’s manual: The owner’s manual is a valuable resource when it comes to finding specific information about your vehicle, including the location of the ignition coil. Look for a section or diagram that highlights the components in the engine compartment, or simply search for “ignition coil” in the index. 2. Follow the spark plug wires: The ignition coil is typically connected to the spark plugs via spark plug wires. These wires are usually thick and colorful, making them easier to identify. Trace these wires starting from the spark plugs, and they should lead you to the ignition coil. 3. Look for cylindrical or rectangular shapes: Ignition coils are often cylindrical or rectangular in shape, and they can be made of plastic or metal. Keep an eye out for such components in the engine compartment, especially in areas close to the spark plugs.
Tips for finding the ignition coil in different types of vehicles
Finding the ignition coil’s location can be a bit more challenging for certain types of vehicles. Here are some tips to help you locate the ignition coil in different scenarios:
| Vehicle Type | Tip for Locating Ignition Coil |
|---|---|
| Sedans and SUVs | The ignition coil is often positioned near the engine block, either on the top or side. Look for a plastic cover or housing that houses the coil. |
| Trucks and Vans | In larger vehicles, the ignition coil may be located on the inner fender, firewall, or even near the battery. Check these areas for the coil’s presence. |
| Sports Cars | Sports cars often have the ignition coil positioned near the intake manifold or throttle body. Focus your search in these areas. |
Remember, these are general tips, and the exact location of the ignition coil may vary depending on the specific model and year of your vehicle. It’s always recommended to consult the owner’s manual or seek professional assistance if you’re having trouble locating the ignition coil. Now that you’ve successfully identified the ignition coil’s location, you’re ready to move on to the next step of the installation process. Stay tuned for step 3 in our comprehensive guide on how to install an ignition coil.

Step 3: Remove The Old Ignition Coil
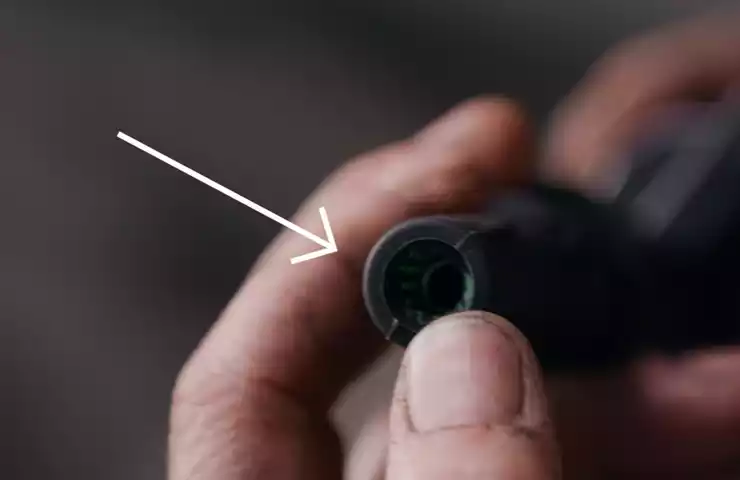
How to remove the electrical connectors
To remove the old ignition coil from your vehicle, you first need to disconnect the electrical connectors that are attached to it. Here are the steps to do it:
- Locate the electrical connectors on the old ignition coil. They are usually located on the top or side of the coil.
- Inspect the connectors for any locks or clips that might be holding them in place. If there are any, release them by pressing or pulling them.
- Once the locks or clips are released, gently pull the connectors away from the old ignition coil. Be careful not to pull too hard or yank on the wires, as this can cause damage.
- Repeat the process for all the electrical connectors attached to the old ignition coil.
- Once all the connectors are detached, set them aside in a safe place for later use.
Techniques to remove the coil mounting bolts
After disconnecting the electrical connectors, the next step is to remove the coil mounting bolts. Follow these techniques to remove the bolts safely:
- Identify the location of the coil mounting bolts. They are typically located on the sides or on top of the ignition coil.
- Using an appropriate sized wrench or socket, place it onto the bolt head.
- Apply steady pressure in a counterclockwise direction to loosen the bolts. If they are tight, you can use a penetrating oil to help loosen them.
- Once the bolts are loosened, continue rotating them counterclockwise until they are completely unscrewed.
- Set the bolts aside in a safe place, as they will need to be reused when installing the new ignition coil.
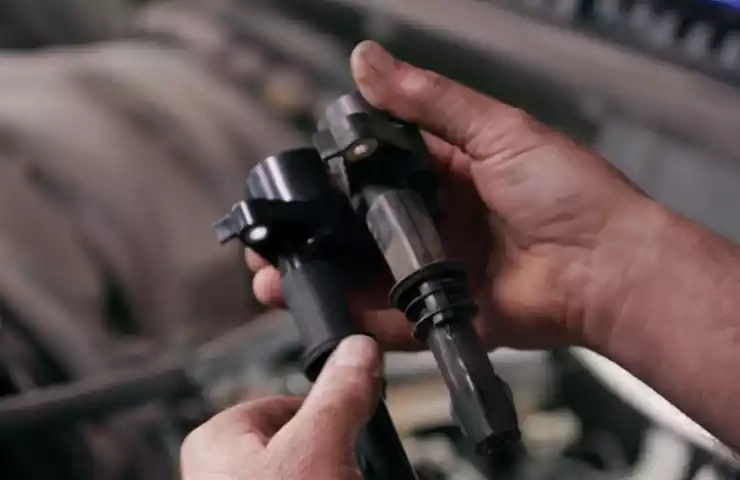
Instructions for removing the old ignition coil safely
Now that you have removed the electrical connectors and the coil mounting bolts, it’s time to safely remove the old ignition coil from your vehicle:
- Hold the old ignition coil firmly and lift it straight up. Be cautious not to twist or bend the coil during removal.
- If the old coil feels stuck, you can gently rock it back and forth while pulling upward to help loosen it.
- Once the old coil is loose, remove it from its position and set it aside.
Congratulations! You have successfully removed the old ignition coil from your vehicle. Make sure to handle the old coil with care and dispose of it properly. In the next step, we will guide you through the process of installing the new ignition coil. Stay tuned!
Step 4: Install The New Ignition Coil
Preparing the new ignition coil for installation
Before installing the new ignition coil, there are a few important steps you need to follow to ensure a successful installation. Follow these steps:
- Inspect the new ignition coil: Start by carefully examining the new ignition coil. Check for any physical damage or loose connections.
- Verify compatibility: Ensure that the new ignition coil is compatible with your vehicle’s make, model, and year. Refer to the manufacturer’s guidelines or consult an automotive expert if necessary.
- Read the instructions: Take the time to read and understand the specific installation instructions provided by the manufacturer. Different ignition coil models may have unique installation requirements.
Techniques to ensure proper installation
Proper installation of the ignition coil is crucial for its optimal functioning. Follow these techniques to ensure a smooth installation:
- Handle the ignition coil with care: Avoid dropping or mishandling the ignition coil, as it could result in damage that affects its performance.
- Use the right tools: Ensure that you have the necessary tools for installation, such as a socket wrench set or a screwdriver, depending on the mounting system.
- Align the ignition coil properly: Align the ignition coil with the mounting location to ensure a secure fit. Refer to the vehicle’s service manual for specific instructions on proper alignment.
- Connect the electrical connectors: Attach the electrical connectors to the ignition coil, ensuring a snug and secure connection. This will help prevent any loose connections that could lead to electrical issues.
Tips for securing the ignition coil to the mounting location
To secure the ignition coil to its mounting location, consider the following tips:
- Refer to the service manual: Consult your vehicle’s service manual for guidance on properly securing the ignition coil. Pay attention to any torque specifications or fastening procedures mentioned.
- Use thread-locking compound: To prevent the ignition coil from loosening over time due to vibrations, apply a small amount of thread-locking compound to the mounting bolts or screws.
- Check for proper fit: Make sure the ignition coil is securely fastened and does not wobble or move when installed. This will help prevent potential issues and ensure optimal performance.
Step 5: Reconnect The Battery
Once you have successfully installed the new ignition coil, it is crucial to reconnect the battery to ensure proper functionality of your vehicle. Reconnecting the battery is an important step that should not be overlooked, as it allows for the ignition coil to receive power and function effectively.
Importance of reconnecting the battery after installation
Reconnecting the battery after installing the new ignition coil is essential for several reasons:
- Power supply: The ignition coil requires power from the battery to generate the high voltage needed to ignite the air-fuel mixture in the engine’s combustion chamber. Without reconnecting the battery, the ignition coil will be unable to perform effectively, resulting in engine misfires or even failure to start.
- System synchronization: Reconnecting the battery helps to synchronize the vehicle’s electronic systems, ensuring that all components are properly functioning together. This synchronization is necessary to maintain the smooth operation of your vehicle.
- Resetting error codes: In some cases, disconnecting the battery during the ignition coil installation process may trigger error codes in the vehicle’s onboard computer. Reconnecting the battery allows these error codes to be cleared, preventing any potential issues or warning lights from appearing on the dashboard.
Step-by-step instructions to safely reconnect the battery
Follow these step-by-step instructions to safely reconnect the battery:
- Locate the battery: Depending on your vehicle, the battery is usually located under the hood or in the trunk. Take a moment to identify its exact location.
- Turn off the ignition: Before reconnecting the battery, make sure the ignition is turned off to prevent any electrical surges or potential hazards.
- Identify the battery terminals: The battery terminals are typically labeled as positive (+) and negative (-). The positive terminal is usually red and the negative terminal is black.
- Clean the terminals: Look for any corrosion or dirt on the battery terminals. If necessary, use a wire brush or a battery terminal cleaner to remove any buildup. Clean terminals ensure proper contact and prevent electrical resistance.
- Connect the positive terminal: Take the positive (+) battery cable and firmly attach it to the positive terminal of the battery. Ensure it is securely tightened to avoid any loose connections.
- Connect the negative terminal: Similarly, take the negative (-) battery cable and connect it to the negative terminal of the battery. Ensure a secure connection.
- Test the connection: Once the terminals are securely connected, gently give them a slight tug to ensure they are firmly attached. If they do not come loose, you have successfully reconnected the battery.
- Test the ignition: Finally, turn the ignition key to the accessory position (without starting the engine) to ensure that all electronic systems are functioning properly.
By following these steps, you can safely and effectively reconnect the battery after installing a new ignition coil. Remember, proper battery connection is crucial for the overall performance and functionality of your vehicle’s ignition system.
Testing The Ignition Coil After Installation
After successfully installing a new ignition coil in your vehicle, it’s crucial to test its functionality to ensure optimal performance. Testing the ignition coil after installation not only helps you identify any potential issues or malfunctions but also gives you peace of mind knowing that your vehicle is running smoothly. In this section, we will guide you through the process of testing the functionality of the new ignition coil, troubleshooting common issues that may arise during testing, and recognizing the signs of a properly functioning ignition coil.
How to test the functionality of the new ignition coil
To test the functionality of the newly installed ignition coil, follow these steps:
- Start by turning off the engine and disconnect the ignition coil from the electrical system. Refer to the vehicle’s manual for specific instructions on how to do this.
- Using a digital multimeter, set it to the ohms (Ω) setting. Measure the resistance between the primary terminals of the ignition coil (marked as positive and negative).
- A properly functioning ignition coil should have a resistance reading within the manufacturer’s specifications. Refer to the vehicle’s manual or the ignition coil’s documentation for the correct resistance value.
- If the resistance reading is significantly higher or lower than the specifications, it indicates a faulty ignition coil that needs to be replaced.
- If the resistance reading is within the recommended range, move on to testing the secondary terminals. Measure the resistance between the positive terminal and the high-voltage terminal.
- Again, compare the reading to the manufacturer’s specifications. If the resistance is out of range, the ignition coil needs to be replaced.
Troubleshooting common issues during testing
During the testing process, you may encounter the following common issues:
| Issue | Possible Cause | Solution |
|---|---|---|
| No resistance reading on primary terminals | Loose connections or damaged wiring | Check and secure all connections and repair any damaged wiring. |
| Resistance out of range on primary or secondary terminals | Faulty ignition coil | Replace the ignition coil with a new one that meets the manufacturer’s specifications. |
| Inconsistent resistance readings | Internal wiring issue or damaged ignition coil | Replace the ignition coil with a new one or consult a professional mechanic for further diagnosis. |
Signs of a properly functioning ignition coil
A properly functioning ignition coil exhibits the following signs:
- Consistent and smooth engine performance
- Reliable starting without any hesitation
- Strong and consistent spark from the spark plugs
- Improved fuel efficiency
- Stable idle speed
By testing the ignition coil after installation and acknowledging the signs of a properly functioning one, you can ensure the longevity and efficiency of your vehicle’s ignition system. Don’t overlook the importance of this step, as it can save you from potential issues in the long run.
Frequently Asked Questions On How To Install An Ignition Coil
Is An Ignition Coil Easy To Replace?
Yes, replacing an ignition coil is relatively easy. It can be done by following a few simple steps, making sure to disconnect the battery first. However, if you’re unsure or inexperienced, it’s best to consult a professional to ensure proper installation and prevent any damage.
Does It Matter Which Way An Ignition Coil Is Wired?
Yes, it does matter which way an ignition coil is wired. Proper wiring ensures efficient sparking and prevents damage. Incorrect wiring can lead to misfires, poor performance, and potential damage to the coil and other engine components. Follow the manufacturer’s instructions for correct wiring.
What Happens If You Hook Up An Ignition Coil Backwards?
Hooking up an ignition coil backwards can cause damage to the electrical system. It may result in a no-start condition or even damage to the coil itself. It is important to follow the correct wiring instructions to ensure proper operation and prevent any potential issues.
What Are The Symptoms Of A Bad Ignition Coil?
Symptoms of a bad ignition coil include: misfire, rough idle, reduced engine power, difficulty starting, reduced fuel efficiency.
Conclusion
Installing an ignition coil is a straightforward process that can greatly improve the performance of your vehicle. By following these step-by-step instructions, you can easily replace a faulty coil and restore smooth engine operation. Remember to prioritize safety and consult your vehicle’s user manual for specific instructions.