To install an exhaust tip, first, identify the diameter of your exhaust pipe, then choose a compatible tip with the same diameter. If you want to enhance the appearance of your vehicle’s exhaust system, installing an exhaust tip is a simple and effective solution.
An exhaust tip not only adds a stylish touch to your vehicle’s rear end, but it can also improve exhaust flow and create a deeper, more aggressive sound. Installing an exhaust tip is a straightforward process that requires only a few basic tools and can be done in a short amount of time.
We will guide you through the step-by-step instructions on how to install an exhaust tip easily and quickly.
Getting Started
Installing an exhaust tip is a great way to upgrade the look and sound of your vehicle’s exhaust system. Whether you’re a car enthusiast or just looking to add a touch of style, this simple DIY project can make a big difference. Before you get started, it’s important to gather the necessary tools and materials, choose the right exhaust tip for your vehicle, and ensure your safety by taking necessary precautions.
Gather the necessary tools and materials
Before you begin the installation process, it’s essential to have all the tools and materials you’ll need. Here’s a list of what you’ll typically need:
| Tools | Materials |
| Socket wrench setAdjustable wrenchAllen wrench setScrewdriver set | Exhaust tipClamps |
Choose the right exhaust tip for your vehicle
When it comes to choosing an exhaust tip, it’s important to consider the style, size, and compatibility with your vehicle. Here are a few factors to keep in mind:
- Style: Determine the design that matches your preferences and complements the overall look of your vehicle.
- Size: Measure the diameter of your vehicle’s existing exhaust pipe to ensure a proper fit for the new exhaust tip.
- Compatibility: Research and select an exhaust tip that is compatible with your vehicle’s make, model, and year.
Ensure your safety and take necessary precautions
Before you start the installation, it’s crucial to prioritize your safety and take necessary precautions. Here are a few steps to ensure a safe and successful installation:
- Wear protective gear: Put on gloves and safety glasses to protect yourself from any potential injuries.
- Work in a well-ventilated area: Perform the installation in an open space or a garage with proper ventilation to avoid inhaling harmful fumes.
- Disconnect the battery: To prevent any electrical mishaps, disconnect the negative terminal of your vehicle’s battery.
- Refer to the manufacturer’s instructions: Carefully read the installation instructions provided by the exhaust tip manufacturer to ensure you follow the correct procedure.
By gathering the necessary tools and materials, choosing the right exhaust tip, and taking the necessary precautions, you’ll be ready to begin the installation process with confidence. In the next section, we’ll walk you through the step-by-step instructions to help you install your exhaust tip like a pro.
Preparing Your Vehicle
Before you can install an exhaust tip, it’s essential to prepare your vehicle. This involves a few simple steps to ensure a smooth and successful installation. In this section, we’ll walk you through the necessary preparations, including parking your vehicle on a flat surface, locating the exhaust outlet, and cleaning it thoroughly.
Park your vehicle on a flat surface
Find a suitable location to park your vehicle before starting the installation process. Ensure it is on a flat surface, such as a driveway or parking lot. This will provide stability and make it easier to work on your exhaust system.
Locate the exhaust outlet
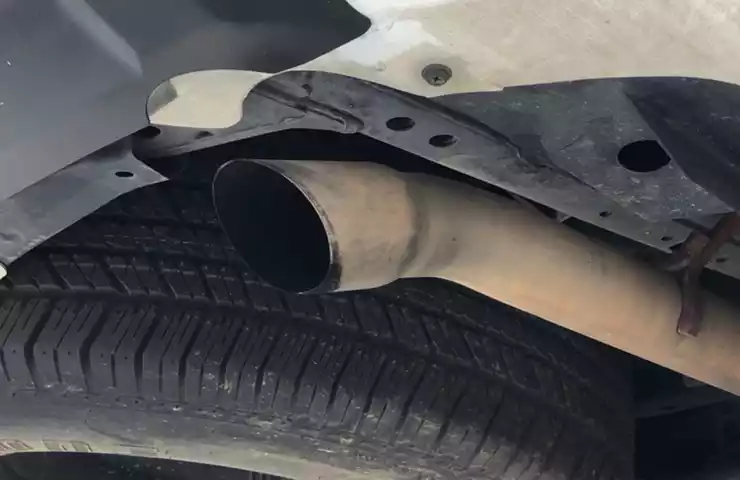
Take a moment to locate the exhaust outlet on your vehicle. This is typically located at the rear, underneath the bumper. The outlet might be a pipe or simply a hole in the bumper. Familiarize yourself with its position to proceed with the installation.
Clean the exhaust outlet thoroughly
Before attaching the new exhaust tip, it’s crucial to clean the exhaust outlet to ensure a secure fit. Use a rag or a brush to remove any dirt, dust, or debris that may have accumulated over time. Cleaning the outlet will not only help with the installation but also improve the overall appearance of your vehicle.
If your exhaust outlet is heavily soiled or corroded, you may consider using a mild cleaning solution or automotive cleaner to remove stubborn dirt or rust. Be sure to follow the instructions provided by the manufacturer of the cleaning product and rinse thoroughly.
Once you’ve cleaned the exhaust outlet, take a moment to inspect it for any signs of damage or loose parts. If you notice any issues, it’s best to address them before proceeding with the installation of the new exhaust tip.
By following these preparatory steps, you’ll be well on your way to successfully installing an exhaust tip on your vehicle. Next, we’ll guide you through the process of selecting the right tip and attaching it securely to your exhaust system.

Removing The Old Exhaust Tip
When it comes to installing a new exhaust tip on your vehicle, one of the first steps is removing the old exhaust tip. This process may seem daunting at first, but with the right tools and instructions, it can be a straightforward task. In this article, we will guide you through the process of removing the old exhaust tip, ensuring a smooth transition to the new one.
Determine the type of attachment
Before you begin, it’s essential to determine the type of attachment your old exhaust tip has. There are typically three main types:
- Clamp-On: This type of attachment is secured with a clamp that wraps around the exhaust pipe. It can be easily removed by loosening the clamp.
- Bolt-On: A bolt-on exhaust tip is attached to the exhaust system using bolts or screws. To remove it, you will need to locate and remove the bolts or screws.
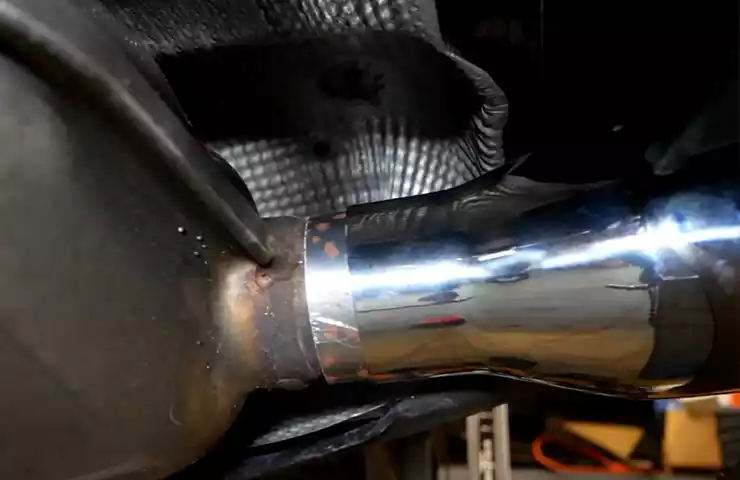
- Welded: In some cases, the exhaust tip may be welded directly onto the exhaust pipe. Removing a welded exhaust tip may require professional assistance or specialized tools.
Loosen and remove the old exhaust tip
Once you have identified the type of attachment, you can proceed with removing the old exhaust tip. Here’s a step-by-step guide:
- Begin by positioning yourself under the rear of your vehicle, taking necessary safety precautions such as using jack stands to secure the vehicle.
- If your exhaust tip is a clamp-on type, locate the clamp and use a socket wrench or a suitable tool to loosen and remove it. Depending on the design, you may need to adjust the position of the clamp to access the fastening mechanism easily.
- If your exhaust tip is a bolt-on type, identify the bolts or screws that secure it to the exhaust system. Use an appropriate wrench or socket to loosen and remove them, keeping track of any washers or other components.
- If you have a welded exhaust tip, it is recommended to seek professional assistance or use specialized tools to remove it. Welded exhaust tips require cutting or grinding to separate them from the exhaust pipe, and this process should be handled by an experienced individual to prevent damage.
- Once you have successfully removed the old exhaust tip, inspect the exhaust pipe for any debris or buildup. Clean the area if necessary, ensuring a clean surface for the installation of the new exhaust tip.
By following these steps, you should be able to remove the old exhaust tip from your vehicle without any hassle. Now that you have completed this phase of the installation process, you are ready to move on to the next step of installing your new exhaust tip.
Installing The New Exhaust Tip
Installing a new exhaust tip can really enhance the look and sound of your vehicle. Whether you’re replacing a worn-out tip or simply upgrading for a more aggressive appearance, the installation process is relatively straightforward. In this guide, we’ll walk you through the step-by-step process of installing a new exhaust tip on your vehicle’s outlet.
Position the new exhaust tip on the outlet
The first step in installing a new exhaust tip is to position it properly on the outlet. Start by identifying the outlet on your vehicle’s exhaust system. This is where the old tip will be removed and the new one will be attached. The outlet is typically located at the rear of the vehicle, near the muffler.
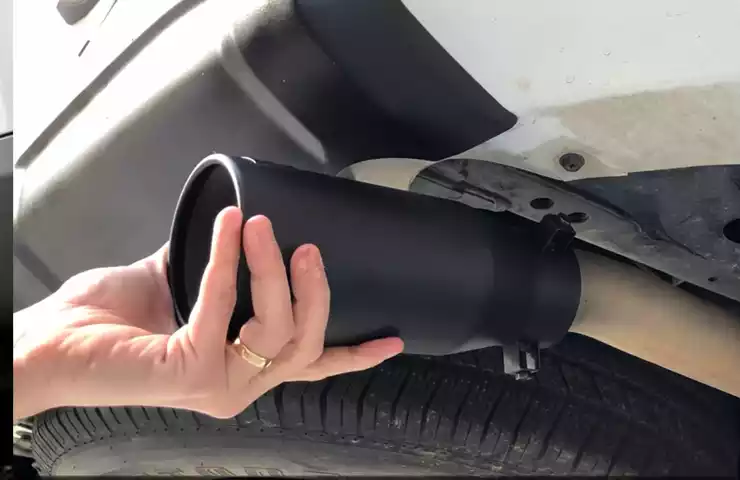
Once you’ve located the outlet, place the new exhaust tip over it, ensuring that it aligns properly. Pay attention to the orientation of the tip, making sure it is the correct fit for your vehicle. Some tips are designed to be universal, while others may be specific to certain makes and models.
Secure the exhaust tip in place
Once you’ve positioned the new exhaust tip on the outlet, it’s time to secure it in place. This can usually be done with clamps or screws, depending on the design of the tip. Check the manufacturer’s instructions for specific details on how to secure the tip.
If your tip is equipped with clamps, place them around the tip and tighten them until the tip is securely attached to the outlet. Be careful not to overtighten, as this can damage the tip or the exhaust system.
If your tip requires screws, use a screwdriver or a wrench to tighten them and ensure a secure fit. Again, be cautious not to overtighten the screws, as this can cause damage.
Adjust and align the exhaust tip
After securing the exhaust tip in place, it’s important to adjust and align it properly. Take a step back and carefully observe the tip from different angles to ensure that it is positioned straight and centered. This will not only give your vehicle a clean and professional look but also prevent any potential issues with exhaust flow.
If needed, make any adjustments by loosening the clamps or screws slightly and repositioning the tip. Once you’re satisfied with the alignment, tighten the clamps or screws to secure the tip in its final position.

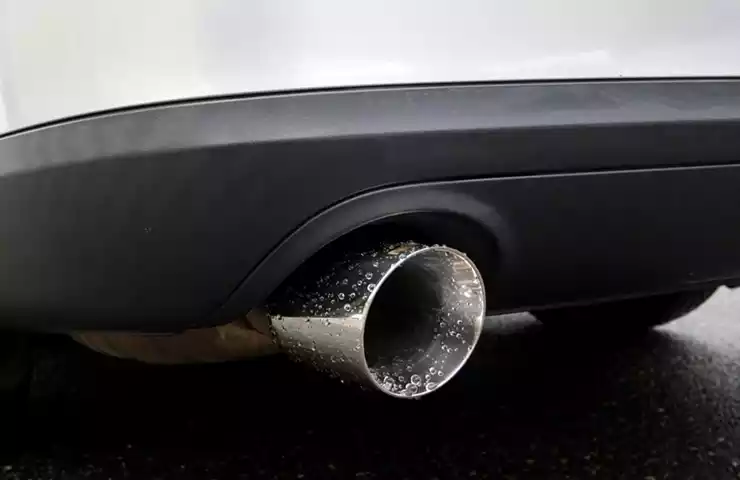
Now that you’ve successfully installed your new exhaust tip, take a moment to admire the improved aesthetics of your vehicle. Be sure to periodically check the tip for any signs of wear and tighten any loose clamps or screws as needed. Enjoy the enhanced look and sound of your vehicle, thanks to your DIY exhaust tip installation!
Ensuring A Secure And Professional Installation
When it comes to installing an exhaust tip, it’s important to ensure a secure and professional installation. This not only ensures the longevity of your new exhaust tip but also contributes to the overall appearance and functionality of your vehicle’s exhaust system. In this section, we’ll explore two crucial steps to guarantee a secure and professional installation – double-checking the tightness of all connections and testing for any leaks once the engine is started.
Double-check the tightness of all connections
Before considering the installation complete, it’s crucial to double-check the tightness of all connections. This step ensures that the exhaust tip is securely fastened to the exhaust pipe and prevents any potential leaks or loose fittings. Start by visually inspecting the connections for any obvious signs of looseness or gaps.
If necessary, use a wrench or pliers to tighten the bolt or clamp that secures the exhaust tip to the exhaust pipe.
Start the engine and check for any leaks
Once you have tightened all the connections, it’s time to start the engine and check for any leaks. With the engine running, carefully listen for any unusual noises, such as hissing or rattling, that may indicate a leak in the exhaust system.
Next, visually inspect the connections once again, looking for any signs of smoke or steam where the exhaust tip meets the exhaust pipe. If you notice any of these signs, it’s important to address the issue immediately to prevent further damage to your exhaust system.
Test the appearance and functionality of the new exhaust tip
In addition to ensuring the secure installation and leak-free operation, it’s essential to test the appearance and functionality of the new exhaust tip. Step back and take a good look at the installed exhaust tip, making sure it aligns properly and enhances the overall aesthetic appeal of your vehicle.
Functionality-wise, pay attention to the exhaust flow and sound. Observe whether there are any changes in the exhaust note or if the exhaust tip enhances the performance of your vehicle. If you’re satisfied with the appearance and functionality, you can be confident in the secure and professional installation of your new exhaust tip.
By following these steps, you can ensure a secure and professional installation of your new exhaust tip. Remember to double-check the tightness of all connections, start the engine and check for any leaks, and test the appearance and functionality of the new exhaust tip. With a secure and professional installation, you can enjoy the benefits of a well-designed and properly functioning exhaust system.

Tips And Tricks
When it comes to installing an exhaust tip, there are a few tips and tricks that can help you ensure a seamless and successful installation. From preventing corrosion to maintaining the longevity of your exhaust tip, these simple guidelines will make the process a breeze. Let’s dive into the details.
Apply anti-seize compound to prevent corrosion
To protect your exhaust tip from corrosion and ensure it stays in pristine condition for years to come, it is essential to apply an anti-seize compound during installation. This compound acts as a barrier between the exhaust tip and the elements, preventing rust and corrosion from forming.
Here’s a step-by-step guide on how to apply anti-seize compound:
- Clean the exhaust tip surface thoroughly using a degreaser or soapy water.
- Dry the surface completely to remove any moisture.
- Apply a small amount of anti-seize compound onto a clean cloth or brush.
- Evenly spread the compound onto the inner surface of the exhaust tip.
- Ensure that the compound is evenly distributed for optimal protection.
By taking this simple precaution, you can prevent unsightly corrosion and maintain the appearance of your exhaust tip over time.
Consider professional installation if unsure
While installing an exhaust tip can be a DIY project, it’s important to remember that every vehicle and exhaust system is different. If you’re unsure about the complexity of the installation or lack the necessary tools and expertise, it’s wise to consider professional installation.
A professional installer has the knowledge and experience to ensure a proper fit and secure installation. They can also provide additional services such as welding and customization, if desired. Investing in professional installation will not only save you time and effort but also give you peace of mind knowing that the job is done correctly.
Regularly clean and maintain the exhaust tip for longevity
Once you have successfully installed your exhaust tip, it’s essential to maintain it properly for longevity and optimal performance. Regular cleaning and maintenance will keep your exhaust tip looking its best and functioning effectively.
Here are some maintenance tips to follow:
- Clean the exhaust tip regularly with a mild detergent and water solution.
- Avoid using abrasive cleaners or brushes that could damage the surface.
- Inspect the exhaust tip for any signs of damage, such as cracks or loose fittings.
- Address any issues promptly to prevent further damage and ensure safe operation.
By incorporating these maintenance practices into your routine, you can extend the lifespan of your exhaust tip and keep it performing optimally for years to come.
Additional Considerations
When it comes to installing an exhaust tip, there are a few additional considerations that you should keep in mind. These factors can impact the overall performance and appearance of your vehicle’s exhaust system. In this section, we will discuss the legal requirements and restrictions, the different types and styles of exhaust tips, as well as address frequently asked questions about exhaust tip installation.
Legal Requirements and Restrictions
Before installing an exhaust tip, it is important to be aware of the legal requirements and restrictions in your area. Different regions have their own regulations regarding exhaust noise levels and emissions. It is crucial to ensure that the exhaust tip you choose complies with these regulations to avoid any legal issues or penalties.
Different Types and Styles of Exhaust Tips
Exhaust tips come in various types and styles, allowing you to customize the appearance of your vehicle’s exhaust system. Here are some popular options to consider:
- Single-walled: These tips have a single layer of metal and are typically more affordable.
- Double-walled: These tips feature an outer layer that surrounds an inner layer, offering a more robust and stylish design.
- Angle-cut: These tips have a slanted cut at the end, providing a clean and sharp look.
- Rolled-edge: These tips have a rolled lip at the end, giving a sophisticated and polished appearance.
- Black-coated: These tips are coated with a black finish, adding a sleek and aggressive touch to your vehicle.
Frequently Asked Questions about Exhaust Tip Installation

Here, we will address some commonly asked questions about installing an exhaust tip:
- Do exhaust tips affect performance? Exhaust tips primarily enhance the aesthetics of the vehicle and have minimal impact on performance. They do not significantly increase horsepower or improve fuel efficiency.
- Can I install an exhaust tip on any vehicle? In most cases, exhaust tips can be installed on any vehicle with an existing exhaust system. However, it is important to ensure compatibility and proper fitment before making a purchase.
- How do I install an exhaust tip? The installation process may vary depending on the specific vehicle and exhaust system. Generally, it involves removing the old exhaust tip and securely attaching the new one using clamps or welding.
- Do I need any special tools to install an exhaust tip? The tools required for installation may vary depending on the vehicle and exhaust system. Commonly used tools include wrenches, sockets, clamps, and cutting tools if necessary.
- How do I clean and maintain an exhaust tip? To keep your exhaust tip looking clean and shiny, regular cleaning is recommended. You can use mild soap, water, and a soft cloth or sponge to remove dirt and residue. Avoid using abrasive cleaners that could damage the tip’s finish.
By considering the legal requirements, exploring different types and styles of exhaust tips, and understanding the installation process, you can confidently choose and install an exhaust tip that suits your vehicle and personal preferences.
Frequently Asked Questions Of How To Install An Exhaust Tip
How Do You Screw In Exhaust Tip?
To screw in an exhaust tip, follow these steps: 1. Line up the tip with the end of the exhaust pipe. 2. Insert the tip into the pipe and twist it clockwise. 3. Tighten it securely until it is snug.
4. Ensure that the tip is properly aligned and centered. 5. Test the fit and make any necessary adjustments.
Are Exhaust Tips Easy To Fit?
Exhaust tips are easy to fit. They can be easily installed without any special tools or professional help. Simply align the tips with the exhaust pipes and secure them using clamps or screws. It’s a quick and simple process that can be done in a matter of minutes.
Will Exhaust Tips Change Sound?
Exhaust tips can slightly change the sound of your vehicle. By altering the shape, size, or material of the exhaust tip, you may notice a subtle difference in the tone or volume of the exhaust note. However, for a more significant sound change, modifying the entire exhaust system would be necessary.
Do You Have To Weld On Exhaust Tips?
No, you don’t have to weld on exhaust tips. Welding is not necessary for installing exhaust tips on your vehicle. There are other installation methods available that do not require welding.
Conclusion
Installing an exhaust tip is a simple yet impactful way to upgrade your vehicle’s appearance and sound. By following the step-by-step instructions outlined in this blog post, you can easily install an exhaust tip without the need for professional assistance.
Remember to take your time, gather the necessary tools, and ensure a secure fit for optimal results. Transform your car’s exhaust system and enjoy the enhanced performance and style it brings.
