To install an exhaust system, start by raising your vehicle and securing it with jack stands. Then, unbolt the old exhaust system from the headers or catalytic converter and remove it.
After that, assemble the new exhaust system and attach it to the headers or catalytic converter using the provided hardware. Finally, double-check all connections and tighten any loose bolts before lowering the vehicle. When it comes to upgrading your vehicle’s exhaust system, installation is a crucial step.
By following a few simple steps, you can easily replace your old exhaust system with a new one. We will guide you through the installation process, ensuring a smooth and trouble-free experience. So, let’s dive right in and learn how to install an exhaust system like a pro.
Understanding The Basics Of Exhaust Systems
If you are a car enthusiast or someone who wants to learn more about the inner workings of your vehicle, understanding the basics of an exhaust system is crucial. Whether you are planning to install a new exhaust system or simply want to have a better understanding of how it functions, this blog post will provide you with the necessary information. In this section, we will explore the components of an exhaust system and highlight the importance of ensuring it functions properly.
Components of an Exhaust System
An exhaust system is comprised of several key components that work together to control and direct the flow of exhaust gases from the engine out of the vehicle. These components include:
| Component | Description |
|---|---|
| Exhaust Manifold | The exhaust manifold collects exhaust gases from each cylinder and funnels them into a single pipe. |
| Catalytic Converter | The catalytic converter reduces harmful emissions by converting toxic gases into less harmful substances. |
| Muffler | The muffler reduces noise produced by the engine as the exhaust gases pass through it. |
| Resonator | The resonator further reduces noise and may also enhance exhaust flow. |
| Exhaust Pipe | The exhaust pipe carries the exhaust gases from the engine to the rear of the vehicle. |
Importance of a Properly Functioning Exhaust System
A properly functioning exhaust system is vital for several reasons. Let’s explore the importance of each below:
- Improved Engine Performance: A well-functioning exhaust system allows the engine to operate more efficiently, leading to improved overall performance.
- Reduced Harmful Emissions: The catalytic converter in the exhaust system helps to reduce the emission of harmful gases, promoting a cleaner environment.
- Noise Reduction: The muffler and resonator components of the exhaust system help to minimize engine noise, ensuring a quieter and more comfortable driving experience.
- Prevention of Engine Damage: An exhaust system that is not functioning properly can lead to backpressure, which can cause damage to the engine. Regular maintenance and timely repairs can help prevent such issues.
Understanding the basics of an exhaust system and the role each component plays allows you to make informed decisions when it comes to installation, maintenance, and repair. A properly functioning exhaust system not only enhances the performance of your vehicle but also contributes to a cleaner and quieter driving experience.
Preparing For Installation
Before installing an exhaust system, it’s important to gather the necessary tools and materials, consider safety precautions, and remove the old exhaust system. By following these steps, you can ensure a smooth and successful installation process.
Gathering the necessary tools and materials
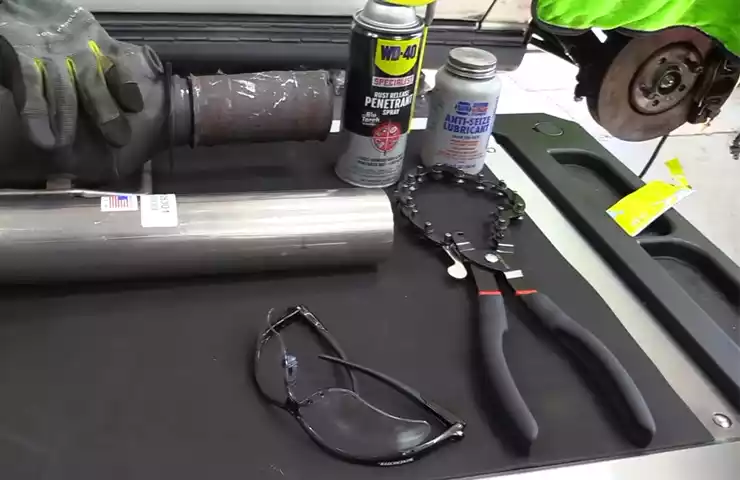
Gathering the right tools and materials is crucial for a successful exhaust system installation. Here’s a list of items you’ll need:
| Tools | Materials |
|---|---|
| Wrench setSocket setJack standsHydraulic jackExhaust hangersRubber insulatorsHanging bracketsGasketsExhaust clamps | New exhaust system |
Safety precautions to consider before starting the installation process
Prior to installing an exhaust system, it’s important to take certain safety precautions. These precautions will ensure your safety and the proper installation of the system. Here are some important safety measures to consider:
- Ensure the vehicle is parked on a level surface and the parking brake is engaged.
- Wear safety goggles and gloves to protect yourself from any potential injury.
- Allow the exhaust system to cool down completely before starting the installation process. Hot components can cause burns.
- Always work in a well-ventilated area to prevent inhaling harmful fumes.
- Use caution when working underneath the vehicle. Make sure to properly support the vehicle with jack stands and a hydraulic jack.
Removing the old exhaust system

Before installing a new exhaust system, the old one must be removed. Follow these steps to ensure a proper removal:
- Start by disconnecting the negative terminal of the vehicle’s battery to avoid any electrical accidents.
- Using a wrench or socket set, loosen and remove the bolts and clamps that connect the exhaust system components.
- Support the exhaust system with a hydraulic jack and remove the mounting brackets or hangers that hold it in place.
- Gently lower the old exhaust system down and remove it from underneath the vehicle.
By following these steps and taking the necessary precautions, you’ll be well-prepared to install a new exhaust system. Make sure to carefully read the manufacturer’s instructions that come with your new exhaust system for any specific installation details.
Step 1: Positioning The New Exhaust System
Installing a new exhaust system can not only enhance the performance of your vehicle but also give it a sleek and aggressive look. However, to ensure a successful installation, it is crucial to start with the right positioning of the exhaust system. This step-by-step guide will walk you through the process, ensuring a correct fitment and ideal placement for your new exhaust system.
Ensuring the correct fitment for your vehicle
Before diving into the installation process, it is vital to ensure that the new exhaust system is compatible with your specific vehicle make and model. The exhaust system can vary based on factors such as engine size, drive type, and even the year of manufacture. Here are a few key steps to follow to ensure the correct fitment:
- Research: Start by researching the compatibility of the exhaust system you intend to purchase. Check with the manufacturer’s website, forums, or seek advice from experts in the automotive community.
- Consult a mechanic: If you are unsure about the compatibility or installation process, it is always a good idea to consult a professional mechanic. They can provide valuable insight and ensure a seamless fitment.
- Measurements and specifications: Take accurate measurements of your vehicle’s existing exhaust system, including the pipe diameter and length. Compare these measurements with the specifications provided by the manufacturer to ensure a proper fit.
Determining the ideal positioning for the exhaust system
Once you have confirmed the compatibility, it’s time to determine the ideal positioning for your new exhaust system. Proper positioning is essential for both performance and aesthetics. Here are some key factors to consider:
- Clearances: Ensure that the exhaust system allows sufficient clearance from other components such as the chassis, suspension, and fuel lines. This will prevent any potential damage or interference with the system during regular use.
- Ground clearance: Take into account the ground clearance of your vehicle and ensure that the exhaust system does not hang too low, risking damage from speed bumps, rocky terrains, or other obstacles.
- Exhaust tip: The exhaust tip is a visible part of the system and can greatly impact the overall look of your vehicle. Consider the desired position and angle of the exhaust tip to achieve the desired aesthetic appeal.
Keep in mind that the positioning may vary based on the specific exhaust system you have chosen. Always refer to the manufacturer’s instructions for any specific requirements or recommendations.
Now that you have ensured the correct fitment and determined the ideal positioning for your new exhaust system, you are ready to proceed to the next step of the installation process. Stay tuned for our next blog post, where we will guide you through Step 2: Mounting the Exhaust System.
Step 2: Assembling The Exhaust System

Now that you have successfully removed the old exhaust system, it’s time to move on to the next step – assembling the new exhaust system. This step involves connecting the exhaust manifold to the exhaust pipe and attaching the muffler and tailpipe to the assembly. Follow the instructions below to ensure a proper and secure installation.
Connecting the Exhaust Manifold to the Exhaust Pipe
The first part of assembling your new exhaust system is to connect the exhaust manifold to the exhaust pipe. This connection is crucial for allowing the engine’s gases to flow smoothly from the engine cylinder to the exhaust system.
Follow these steps to connect the exhaust manifold to the exhaust pipe:
- Ensure that both the exhaust manifold and the exhaust pipe are clean and free from any debris or old gasket material.
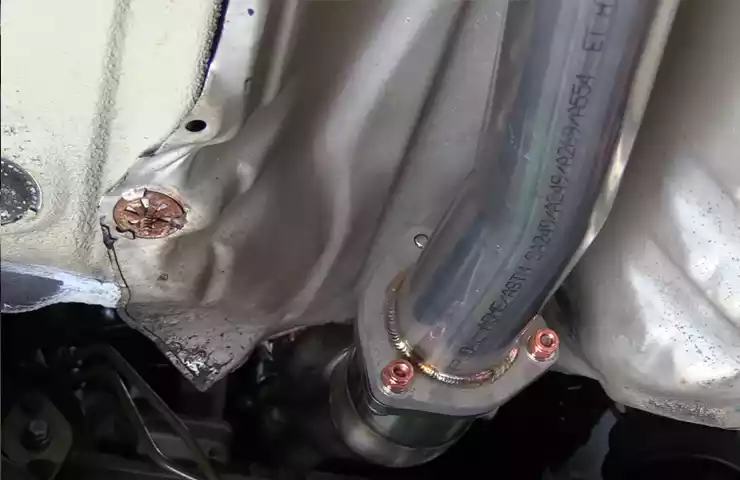
- Align the exhaust manifold flange with the exhaust pipe flange, ensuring that the bolt holes match up.
- Place a new exhaust manifold gasket between the flanges to create a tight seal.
- Insert the bolts through the bolt holes and tighten them using a wrench or socket set. Be sure to tighten the bolts evenly to avoid any leaks.
Attaching the Muffler and Tailpipe to the Assembly
Once the exhaust manifold and exhaust pipe are securely connected, it’s time to attach the muffler and tailpipe to the assembly. This step is crucial for reducing noise and directing the exhaust gases away from the vehicle.
Follow these steps to attach the muffler and tailpipe:
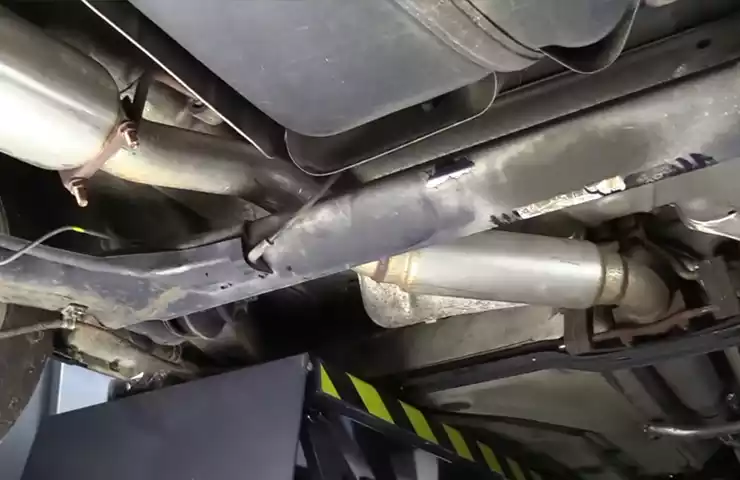
- Position the muffler in the desired location along the exhaust pipe assembly, ensuring that it aligns with the mounting brackets.
- Slide the muffler onto the exhaust pipe and tighten any clamps or bolts that secure it in place. Confirm that the muffler is centered and level.
- Once the muffler is securely attached, position the tailpipe in the appropriate location, aligning it with the muffler’s outlet.
- Connect the tailpipe to the muffler using clamps or bolts, tightening them to ensure a secure connection.
With the muffler and tailpipe properly attached to the exhaust assembly, you have successfully completed the second step of installing your new exhaust system. The next step involves adjusting and aligning the components to ensure optimal performance. Continue reading our blog series on ‘How to Install an Exhaust System’ to learn more.
Step 3: Installing The Exhaust System
Positioning and securing the exhaust system underneath the vehicle
Positioning and securing the exhaust system properly underneath your vehicle is a crucial step in the installation process. The exhaust system is responsible for channeling the gases produced by the engine out of the vehicle, so it’s important to ensure that it is securely in place. Follow these steps to position and secure the exhaust system:
- First, make sure that you have the necessary tools and equipment for the job, including jack stands and a wrench.
- Using the jack stands, raise your vehicle to a comfortable working height, ensuring that it is stable and secure.
- Examine the underside of your vehicle and locate the mounting points for the exhaust system. Depending on your vehicle, these mounting points may be metal hangers or brackets.
- Attach the hangers or brackets to the appropriate points on the exhaust system. Use the provided bolts or clamps to secure them tightly.
- With the help of a friend or using a jack, carefully position the exhaust system underneath the vehicle. Make sure that it is properly aligned with the mounting points.
- Once aligned, secure the exhaust system to the mounting points by tightening the bolts or clamps. Ensure that each connection is tight and secure to prevent any potential leaks or damage.
- Double-check that the exhaust system is centered and properly positioned. This will help prevent any interference with other vehicle components during operation.
Properly aligning the exhaust system with the hangers and brackets

Proper alignment of the exhaust system with the hangers and brackets is essential to ensure optimal performance and longevity. Follow these steps to align your exhaust system:
- Start by visually inspecting the hangers and brackets. Ensure that they are in good condition and properly aligned.
- If needed, adjust the position of the hangers and brackets to ensure that they are in line with the exhaust system. This can be done by loosening the bolts or clamps and making the necessary adjustments.
- Once the hangers and brackets are aligned, re-tighten the bolts or clamps to secure them in place.
- Next, guide the exhaust system into the hangers and brackets. Ensure that it sits snugly without any excessive movement.
- Use the provided bolts or clamps to secure the exhaust system to the hangers and brackets. Again, ensure that all connections are tight to prevent any potential issues.
- Check the alignment one final time by gently shaking the exhaust system. It should not move excessively or make any rattling noises.
By properly positioning and aligning the exhaust system with the hangers and brackets, you can ensure a secure and reliable installation. Take your time during this step to avoid any potential issues down the road.
Step 4: Connecting The Exhaust System To The Vehicle
Now that you have successfully installed the exhaust manifold and fitted the catalytic converter, it’s time to move on to the next crucial step – connecting the exhaust system to your vehicle. This step involves attaching the exhaust system to the exhaust manifold and securing the joints with clamps or bolts. Follow the steps below to ensure a secure and efficient connection.
Attaching the exhaust system to the exhaust manifold
To begin the process, align the exhaust system’s outlet flange with the corresponding flange on the exhaust manifold. Make sure the surfaces are clean and free from any debris or rust. Apply a thin layer of anti-seize compound to the studs on the exhaust manifold to prevent corrosion and facilitate future disassembly, as needed. Next, carefully slide the exhaust system onto the studs, ensuring that it fits snugly and correctly aligns with the outlet flange. It’s important to note that some exhaust systems may require slight adjustments or modifications to ensure a proper fit. Once the exhaust system is in position, hand-tighten the nuts on the studs to temporarily secure it. This will allow you to make any necessary adjustments before finalizing the connection.
Securing the joints with clamps or bolts
After attaching the exhaust system to the exhaust manifold, it’s crucial to secure the joints using clamps or bolts. The method of securing the joints may vary depending on the specific exhaust system you’re installing. For most systems, you’ll typically find that exhaust clamps are the preferred method. These clamps are designed to provide a tight and secure seal while allowing for slight movement and flexibility. Position the clamps over the joints and tighten them using a suitable tool such as a wrench or socket. Ensure that the clamps are tightened evenly and securely to prevent any leaks or vibrations. In cases where your exhaust system uses bolts instead of clamps, insert the bolts through the pre-drilled holes on the joints and exhaust system. Use the appropriate-sized wrench or socket to tighten the bolts securely. It’s essential to note that when securing the joints, you should follow the manufacturer’s instructions for torque specifications and tightening sequences to ensure a proper connection. This will prevent overtightening or undertightening, which could lead to exhaust leaks or damage to the exhaust system. By following these steps, you can confidently connect your new exhaust system to your vehicle. Remember to carefully align the exhaust system with the exhaust manifold and properly secure the joints using clamps or bolts. Taking the time to complete this step correctly will ensure optimal performance, reduce the risk of exhaust leaks, and provide a smooth and enjoyable driving experience.
Step 5: Double-Checking The Installation
Once you have successfully installed your exhaust system, it is crucial to perform a thorough inspection and ensure everything is in place. This step is essential to guarantee optimal performance and prevent any potential issues down the road. In this section, we will discuss key elements to consider during the inspection process, including inspecting for loose connections and leaks, as well as realigning and adjusting the exhaust system if necessary.
Inspecting for any loose connections or leaks
After completing the installation, it is crucial to inspect the exhaust system for any loose connections or potential leaks. Even a minor disconnect or leak can result in decreased performance, increased noise, or even damage to your vehicle. To conduct this inspection, follow the steps below:
- Visually examine all connections and joints in the exhaust system.
- Ensure that all clamps or brackets are tightly secured.
- Retighten any loose connections using the appropriate tools.
- If you notice any signs of a leak, such as soot buildup or escaping exhaust gases, address it immediately. This may require replacing gaskets or resealing connections.
Realigning and adjusting the exhaust system if necessary

While installing the exhaust system, it is essential to ensure proper alignment to avoid clearance issues, rattling noises, or exhaust interference with other components. If, during the inspection, you notice any misalignment or interference, follow these steps to fix the problem:
- Loosen any applicable clamps or brackets to provide necessary flexibility.
- Gently realign the exhaust system to achieve optimal clearance from surrounding components.
- Retighten the clamps or brackets, ensuring the system is securely in place.
- Start the engine and listen for any abnormal noises or vibrations.
- If any issues persist, double-check the alignment and make additional adjustments as needed.
By inspecting for loose connections, leaks, and realigning the exhaust system if necessary, you can be confident in the proper installation of your exhaust system. Taking the time to double-check your work ensures optimal performance and peace of mind, knowing you have completed the installation process with precision and attention to detail.
Final Tips And Recommendations
Installing an exhaust system can significantly improve the performance and sound of your vehicle. However, to ensure that your newly installed exhaust system continues to function optimally and stands the test of time, there are a few final tips and recommendations that you should keep in mind.
Guidelines for properly maintaining your newly installed exhaust system
Maintaining your exhaust system is crucial for its longevity and performance. Here are some guidelines to help you properly care for your newly installed exhaust system:
- Regularly inspect your exhaust system for any signs of damage, such as rust or leaks. Address any issues immediately to prevent further damage.
- Keep your exhaust system clean by washing it with a gentle soap and water solution. Avoid using abrasive cleaners or solvents that can damage the surface.
- After washing, ensure that your exhaust system is completely dry to prevent corrosion. You can use a microfiber cloth or compressed air to remove any moisture.
- Apply a high-quality exhaust system protector or sealant to help prevent rust and keep your system looking its best.
- Inspect and tighten the clamps and hangers regularly to ensure they are secure.
- Take care when driving over rough terrain or speed bumps to avoid any damage to the underside of your vehicle and the exhaust system.
Recommended products for cleaning and preserving the exhaust system
Using the right products can make a big difference in the maintenance and preservation of your exhaust system. Here are some recommended products to clean and preserve your exhaust system:
| Product | Description |
|---|---|
| Exhaust System Cleaner | A specialized cleaner designed to remove dirt, grime, and carbon deposits from the exhaust system. It helps restore the shine and improve the appearance of your exhaust system. |
| High-Temperature Paint | A heat-resistant paint that can be applied to the exhaust system to protect it from rust and corrosion. It also helps maintain its aesthetic appeal. |
| Exhaust System Sealant | A sealant formulated to provide additional protection against rust and leaks. It helps prolong the life of your exhaust system and ensures a tight seal. |
By following these maintenance guidelines and utilizing the recommended products, you can ensure that your newly installed exhaust system remains in excellent condition for years to come. Taking care of your exhaust system will not only preserve its performance but also add a touch of elegance to your vehicle.
Frequently Asked Questions For How To Install An Exhaust System
Is It Hard To Install A New Exhaust System?
Installing a new exhaust system may require some effort, but it is not overly difficult. With basic tools and mechanical knowledge, you can easily install it yourself. However, if you are uncertain, it is recommended to consult a professional for accurate installation.
What Is Needed To Install Exhaust System?
To install an exhaust system, you will need a few things: the exhaust system itself, appropriate tools (such as a wrench and jack stands), and some mechanical expertise. It is also important to follow the instructions provided by the manufacturer to ensure proper installation.
How Much Does It Cost To Install An Exhaust System?
The cost of installing an exhaust system varies depending on factors such as the make and model of the vehicle, the type of exhaust system, and the location of the installation. It is recommended to consult with a professional mechanic to get an accurate quote for your specific vehicle.
Can I Install A Cat Back Exhaust Myself?
Yes, you can install a cat back exhaust yourself.
Conclusion
In a nutshell, installing an exhaust system can greatly enhance your vehicle’s performance and efficiency. By following the steps outlined in this guide, you can easily tackle this project and enjoy the benefits of a properly functioning exhaust system. Remember to choose the right components, take proper safety precautions, and consult your vehicle’s manual for specific instructions.
Don’t hesitate to seek professional help if needed. With a little effort and care, you’ll have your new exhaust system up and running smoothly in no time. Happy installing!
