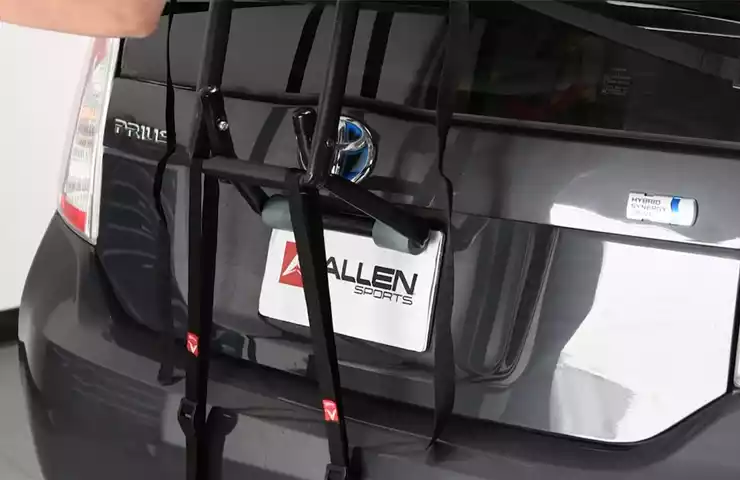
To install an Allen Bike Rack, first, position the rack on your vehicle’s trunk or hitch, then secure it with the provided straps or brackets. Align the rack according to the bike’s weight distribution and tighten all the straps to ensure a secure fit.
If you own a bike and need a convenient and secure way to transport it, an Allen Bike Rack is a popular choice. With its easy installation process, you can have your bike rack set up and ready to go in no time.
We will guide you through the step-by-step process of installing an Allen Bike Rack, whether it’s for your trunk or hitch. By following these simple instructions, you’ll be able to safely transport your bike to your next adventure hassle-free. So let’s get started and learn how to install an Allen Bike Rack.
Preparing For Installation
Are you excited to take your bike on an adventure but worried about how to transport it safely? Installing an Allen bike rack can provide the perfect solution, allowing you to carry your bike securely with ease. However, before you jump into the installation process, it’s crucial to prepare properly. In this section, we’ll guide you through the necessary steps to ensure a successful installation. First, let’s gather the tools and equipment you’ll need for the task.
Gathering the Necessary Tools and Equipment
Before starting the installation, gather the following tools and equipment:
| Tools | Equipment |
|---|---|
| Socket wrench setAdjustable wrenchPhillips screwdriverMeasuring tapeLevel | Allen bike rack (with included mounting hardware)Vehicle owner’s manualProtective glovesSafety glassesClean cloth |
Choosing the Right Location for the Bike Rack Installation
Once you have gathered all the necessary tools and equipment, it’s time to choose the right location for installing your Allen bike rack. Consider the following factors:
- Accessibility: Select a spot that allows easy access to the bike rack, ensuring convenient loading and unloading of your bike.
- Clearance: Ensure that the bike rack and your bike won’t interfere with any vehicle components, such as preventing the trunk from opening fully or obscuring taillights.
- Sturdy Mounting: Look for portions of your vehicle where the rack can be securely mounted, such as the trunk or hitch.
- Visibility: Ensure that the bike rack won’t obstruct your rearview or side mirrors, maintaining optimal visibility while driving.
- Protection: Choosing a location where the bike rack is less exposed to potential damage, such as avoiding places prone to collision or contact with other objects.
By considering these factors, you can choose an ideal location to install your Allen bike rack, allowing you to enjoy worry-free bike transportation on your journeys. Now that you have gathered the necessary tools and selected the right location, you’re ready to move on to the next step: the installation process.
Checking Compatibility
Before installing an Allen Bike Rack on your vehicle, it’s crucial to check the compatibility between the rack and your specific vehicle. Ensuring compatibility not only guarantees a secure fit but also prevents any damage to your vehicle or bikes during transportation.
Ensuring the Allen Bike Rack is Compatible with Your Vehicle
Before you proceed with installing the Allen Bike Rack, follow these steps to determine compatibility with your vehicle:
- Research the Vehicle Compatibility: Visit the official Allen website or refer to the product manual to check if the bike rack model is compatible with your vehicle. Allen provides a list of compatible vehicle makes and models for each bike rack they produce.
- Measure the Trunk or Hitch Size: Measure the width and height of your vehicle’s trunk or hitch to ensure it meets the bike rack’s requirements. Different Allen Bike Rack models have different size specifications for a secure and stable fit.
- Check Clearance and Weight Capacity: Verify the clearance between the bike rack and your vehicle’s body. Ensure there is sufficient space to prevent any contact or friction during installation and transportation. Additionally, make sure that the weight capacity of the rack can handle the total weight of your bikes.
- Consider Additional Accessories: If your vehicle has a rear-mounted spare tire or a spoiler, it may affect the compatibility of the Allen Bike Rack. In such cases, you might require additional accessories or modifications to ensure a proper fit.
Verifying the Capacity of the Bike Rack
After confirming compatibility with your vehicle, it’s important to verify the capacity of the Allen Bike Rack to ensure it can accommodate your specific needs:
- Count the Number of Bikes: Determine the number of bikes you plan to transport on the rack. Allen Bike Racks come in various models with different capacities, so choose one that can securely hold your bikes without exceeding its weight limit.
- Consider the Bike Types: Take into account the types of bikes you have. Different models might have features suitable for specific bike styles, such as road bikes, mountain bikes, or fat tire bikes. Ensure the bike rack has the necessary attachments or adjustable features to accommodate your bikes.
- Check for Locking Mechanisms: If security is a concern, verify if the Allen Bike Rack has integrated locking mechanisms. Some models offer additional security features like locking cables or hitch locks to deter theft and protect your bikes.
By thoroughly checking compatibility and verifying the capacity of the Allen Bike Rack, you can ensure a safe and hassle-free installation process, ultimately enabling you to transport your bikes with confidence on your next adventure.
Step-By-Step Installation Process
Installing an Allen Bike Rack onto your vehicle is a relatively simple process that can be done in a few easy steps. By following these instructions carefully, you will be ready to hit the road with your bikes securely attached to your vehicle.
Assessing the Bike Rack Components and Instructions
Before beginning the installation process, it’s important to first become familiar with the components of the Allen Bike Rack and read through the provided instructions. This will ensure that you have a clear understanding of how the different parts fit together and how to properly secure the rack onto your vehicle.
To correctly assess the bike rack components and instructions, follow the steps below:
- Unbox the Allen Bike Rack and lay out all the parts on a clean, flat surface.
- Refer to the instruction manual provided by Allen for a detailed breakdown of the components.
- Familiarize yourself with each part, including the main rack frame, arms, tie-down cradles, straps, and any additional accessories.
Assembling the Bike Rack
Once you have assessed the components and instructions, it’s time to assemble the bike rack. By following these steps, you will ensure that the rack is properly put together, ready to securely hold your bikes:
- Attach the arms of the bike rack to the main rack frame according to the provided instructions.
- Ensure that all screws and bolts are tightly secured, using the provided tools if necessary.
- Check that the tie-down cradles are securely attached to the arms and can hold the weight of your bikes.
- Confirm that any additional accessories, such as padding or reflectors, are properly installed on the bike rack.
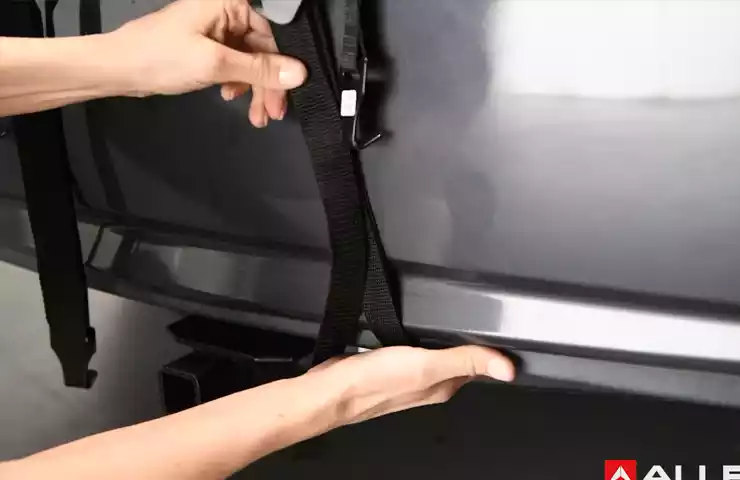
Mounting the Bike Rack onto the Vehicle
Once the bike rack is fully assembled, it’s time to mount it onto your vehicle. Follow these steps to ensure a secure installation:
- Select a suitable location on your vehicle where the bike rack can be attached securely.
- Place the bike rack onto the desired spot, ensuring that it is centered and level.
- Use the provided straps or fastening mechanisms to secure the bike rack onto your vehicle.
- Double-check that all straps are tightened properly and that the bike rack is firmly attached to your vehicle.
By following these step-by-step instructions, you can easily install an Allen Bike Rack onto your vehicle. Remember to always refer to the specific instructions provided with your particular bike rack model for any additional guidance or troubleshooting.
Securing The Bike Rack
Once you have successfully installed your Allen Bike Rack, the next step is to secure it properly. Securing the bike rack ensures that your bikes are safe and stable during transportation. In this section, we will explain the necessary steps to secure your Allen Bike Rack effectively.
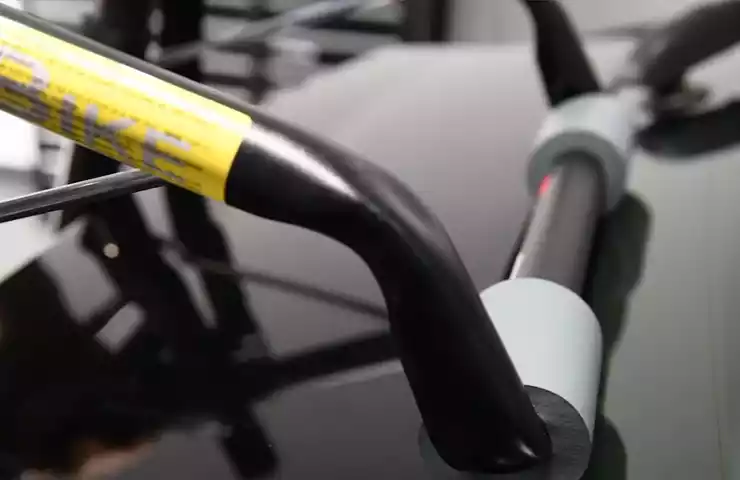
Adjusting and Locking the Rack Arms
The first step in securing your Allen Bike Rack is adjusting and locking the rack arms. The rack arms are designed to hold your bikes securely in place. Follow these steps to adjust and lock the rack arms:
- Identify the position of the rack arms that would best fit your bikes. Keep in mind the size and type of bikes you are transporting.
- Loosen the knobs or levers located on the rack arms to adjust their position.
- Position the rack arms to fit snugly against the bike frames.
- Tighten the knobs or levers to lock the rack arms securely in place.
Adjusting and locking the rack arms properly will ensure that your bikes stay in place without wobbling or shifting during transit.
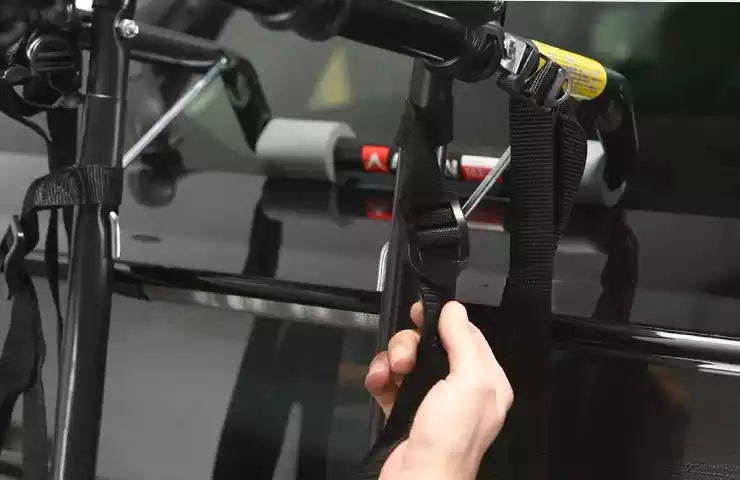
Attaching the Straps, Buckles, or Clamps to Stabilize the Rack
Another important step in securing your Allen Bike Rack is attaching the straps, buckles, or clamps to stabilize the rack. These additional attachments provide extra security and prevent the rack from shifting or coming loose. Follow these instructions to attach the necessary straps, buckles, or clamps:
- Locate the straps, buckles, or clamps that came with your Allen Bike Rack.
- Position the straps, buckles, or clamps around the trunk, hatchback, or trailer hitch, depending on the type of Allen Bike Rack you have.
- Securely fasten the straps, buckles, or clamps by tightening them until they are snug.
Attaching the straps, buckles, or clamps will provide additional stability and prevent any unnecessary movement of the bike rack.
In conclusion, securing your Allen Bike Rack is essential to ensure the safety and stability of your bikes during transportation. By adjusting and locking the rack arms correctly and attaching the necessary straps, buckles, or clamps, you can have peace of mind knowing that your bikes are secure and ready for the journey ahead.
Mounting Bikes Onto The Rack
One of the most critical steps in the installation process of an Allen Bike Rack is properly mounting the bikes onto the rack. Ensuring that the bikes are positioned and aligned correctly can prevent accidents or damage during transportation. Additionally, using security straps or ties can provide added stability to keep the bikes secure throughout the journey.
Positioning and Aligning the Bikes Correctly
Step 1: Prioritize Bike Placement
To begin, consider which bikes should be placed on the rack first. It is recommended to load the heaviest bikes closest to the vehicle to maintain stability and balance during transport. This arrangement will also help distribute the weight more evenly.
Step 2: Aligning the Frames
When positioning the bikes on the rack, make sure the frames are aligned parallel to the ground. Proper alignment will prevent the bikes from leaning or rubbing against each other, reducing the risk of scratches or damage. Adjust the wheel trays, arms, and cradles as needed to achieve the optimal alignment.
Using Security Straps or Ties for Added Stability
Step 1: Choosing the Right Straps or Ties
Investing in high-quality security straps or ties is essential to keep the bikes securely in place throughout the journey. Look for straps or ties that are sturdy, adjustable, and designed specifically for bike racks. Avoid using makeshift or flimsy alternatives, as they may not provide the required level of stability.
Step 2: Securing the Bikes
After positioning the bikes on the rack and aligning them correctly, it’s time to secure them with the straps or ties. Start by wrapping the straps around the frames or bike tubes, ensuring they are snug but not overly tight. Be cautious not to place excessive pressure on delicate parts or cables. Repeat this step for each bike on the rack.
In addition to the straps or ties, it is highly recommended to use additional accessories such as bungee cords or bike locks to further secure the bikes in place. These extra measures will provide peace of mind during transit, ensuring that the bikes remain stable and intact.
By following these steps and using proper positioning, alignment, and secure straps or ties, you can mount your bikes onto an Allen Bike Rack safely and securely. Remember, a well-mounted bike is essential for a smooth and worry-free cycling adventure!
Testing The Bike Rack Installation
Conducting a Visual Inspection of the Mounted Bikes and Rack
Before hitting the road, it is crucial to conduct a thorough visual inspection of the mounted bikes and rack. This step ensures that the installation process was done correctly and that your bikes are securely fastened to the rack. By taking a few minutes to visually check each bike and the overall stability of the rack, you can prevent any potential accidents or damage during transport.
Start by examining each bike individually. Look for any loose straps or buckles that may need tightening. Ensure that the bikes are evenly spaced and properly aligned on the rack. Check for any signs of movement or shifting that could indicate an insecure attachment.
Next, move on to inspecting the rack itself. Pay close attention to the connection points between the rack and your vehicle. Look for any signs of wear or damage, such as rust or cracks, that may compromise the rack’s stability. Make sure that all bolts and screws are securely tightened.
By conducting a visual inspection, you can identify any potential issues before hitting the road. This not only keeps your bikes safe but also ensures the safety of other drivers on the road.
Performing a Test Drive to Ensure Stability and Security
After conducting a thorough visual inspection, it’s time to put your installation to the test. However, before embarking on a long trip, it’s recommended to perform a test drive to ensure the stability and security of the bike rack.
Start by driving at a moderate speed on a smooth road. Pay attention to any unusual noises, vibrations, or movement coming from the bike rack. If you notice anything out of the ordinary, pull over and recheck the fastenings to ensure everything is secured tightly.
Make sure to take turns, accelerate, and brake gently to simulate real-world conditions. This will help you determine if the rack remains stable during different driving situations.
During the test drive, also be mindful of the clearance between the bottom of the rack and the ground. Ensure that the rack doesn’t scrape against speed bumps, curbs, or inclines.
Remember, safety is of utmost importance when transporting your bikes. By performing a test drive, you can gain peace of mind knowing that your bike rack installation is secure and reliable.
Troubleshooting And Maintenance
In order to ensure the longevity and optimal performance of your Allen Bike Rack, it is important to address any common issues that may arise during installation as well as maintain its cleanliness and functionality. By following some simple troubleshooting steps and practicing regular maintenance, you can keep your bike rack in top condition for years to come.
Addressing Common Issues during Installation
Installing the Allen Bike Rack may seem like a straightforward process, but sometimes problems can arise. Here are some common issues that you may encounter and how to address them:
- Improper fit: If you find that the bike rack is not fitting securely on your vehicle, double-check that you have followed the installation instructions correctly. Ensure that all straps and buckles are tightened and all knobs are properly adjusted. If the issue persists, consider contacting Allen Customer Support for further assistance.
- Stability concerns: If you notice that the bike rack wobbles or sways during use, make sure that you have properly secured your bikes on the rack. Double-check that the straps holding the bikes in place are tight and secure. If the issue persists, consider redistributing the weight of the bikes to better balance the load.
- Vehicle compatibility: It is crucial to ensure that your vehicle is compatible with the Allen Bike Rack. Consult the product manual or the Allen website for a comprehensive list of vehicles that are suitable for the particular rack model you have purchased. If your vehicle is not listed, it may not be compatible, and you should consider an alternative bike rack option.
Tips for Cleaning and Maintaining Your Allen Bike Rack
Regular cleaning and maintenance will not only help keep your bike rack looking good but also contribute to its longevity and functionality. Follow these tips to ensure your bike rack stays in optimal condition:
- Regular inspection: Take the time to visually inspect your bike rack to identify any signs of wear or damage. Look for loose straps, worn-out padding, or any missing parts. Promptly address any issues you encounter to prevent further damage and ensure the safety of your bikes.
- Cleaning: After each use, clean your bike rack to remove any dirt, debris, or road grime that may have accumulated. Use a mild soap and water solution along with a soft cloth or sponge to gently clean all parts of the rack. Avoid using harsh chemicals or abrasive materials that may damage the finish.
- Storage: When not in use, store your Allen Bike Rack in a dry and secure location. This will help prevent any rust or corrosion and protect the rack from unnecessary wear and tear.
- Lubrication: Periodically lubricate the moving parts of your bike rack to ensure smooth operation. Apply a small amount of bike-specific lubricant to hinges, pivots, and any other areas that may require lubrication. Be sure to wipe off any excess lubricant to prevent attracting dirt and debris.
By troubleshooting common issues during installation and implementing regular maintenance practices, you can extend the lifespan of your Allen Bike Rack and enjoy worry-free biking adventures. Taking good care of your bike rack not only ensures its optimal performance but also contributes to the safety and security of your bikes.
Frequently Asked Questions Of How To Install Allen Bike Rack
How To Install Allen Sports Bike Rack 102Db?
To install the Allen Sports Bike Rack 102DB, follow these steps: 1. Place the rack on the back of your vehicle. 2. Adjust the straps to secure the rack to the trunk or hatch. 3. Attach the upper and lower arms to the bike frame.
4. Use the included straps to further secure the bike to the rack. 5. Make sure the rack is stable before driving.
How Do I Attach A Bike Rack To My Car?
To attach a bike rack to your car, follow these steps: 1. Locate the rack’s mounting points on your vehicle. 2. Place the rack on the mounting points and ensure it’s secure. 3. Tighten the rack using the provided tools. 4.
Verify that the rack is stable by giving it a gentle shake. 5. Double-check that your bike is securely attached before hitting the road.
How To Install Allen Sports Bike Trailer?
To install the Allen Sports bike trailer, follow these steps: 1. Attach the trailer’s mount to the rear axle of your bike. 2. Ensure the safety strap is secured tightly around the bike frame. 3. Connect the trailer’s hitch to the mount and tighten the knob.
4. Make sure the trailer is level and secure before riding. 5. Double-check all connections before hitting the road.
How Do You Install An In Ground Bike Rack?
To install an in-ground bike rack: 1. Dig a hole at your preferred location. 2. Insert the rack in the hole. 3. Fill the hole with concrete, ensuring stability. 4. Allow the concrete to dry completely. 5. Finally, secure the bike rack to the ground using appropriate bolts or screws.
Conclusion
To sum up, installing the Allen Bike Rack is a straightforward process that can greatly enhance your cycling experience. By following the step-by-step instructions provided in this guide, you can easily attach and secure your bike to the rack. Whether you’re planning a weekend getaway or simply need a convenient way to transport your bike, the Allen Bike Rack is a reliable and practical choice.
Get ready to hit the road and enjoy hassle-free bike transportation with this user-friendly installation method.