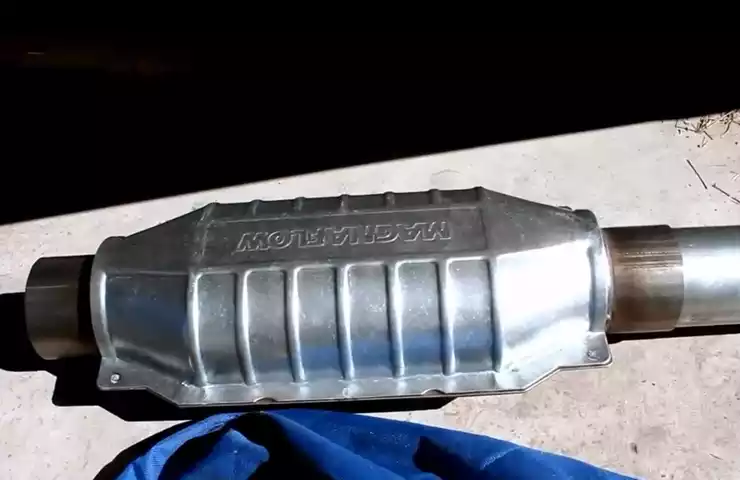
To install a universal catalytic converter, begin by locating the old catalytic converter and removing it. Then, fit the universal converter in place and secure it tightly using clamps or fasteners.
Finally, connect the exhaust pipes to the new converter and ensure all connections are sealed properly to prevent any leaks. This process can be completed with basic hand tools and may vary slightly depending on the vehicle make and model.
Consider consulting a professional mechanic or referring to a detailed installation guide for specific instructions tailored to your vehicle’s requirements. Catalytic converters play an essential role in reducing harmful emissions produced by internal combustion engines. They convert harmful gases, such as carbon monoxide, nitrogen oxides, and unburned hydrocarbons, into less harmful substances before they are released into the atmosphere. Over time, catalytic converters can become worn out or damaged, affecting engine performance and emissions. In such cases, it may be necessary to replace the catalytic converter. The following guide outlines the steps involved in installing a universal catalytic converter on your vehicle.
Factors To Consider
When it comes to installing a universal catalytic converter, there are several factors you need to consider. Making the right choices will not only ensure a successful installation but also optimize the performance of your vehicle. Below are three key factors that play a crucial role in the installation process:
Vehicle make and model
The first factor to consider is your vehicle’s make and model. Universal catalytic converters are designed to fit a wide range of vehicles, but it’s essential to check if the specific catalytic converter you plan to install is compatible with your vehicle. Different makes and models have varying exhaust pipe diameters and configurations, so it’s crucial to select a catalytic converter that matches your vehicle’s specifications.
Engine type
Another important consideration is the type of engine your vehicle has. Whether it’s a gasoline or diesel engine, the catalytic converter you choose must be suitable for your engine type. Gasoline engines generate different exhaust emissions than diesel engines, so the catalytic converter must be designed to handle the specific pollutants produced by your engine.
Emissions regulations
Emissions regulations vary from country to country and even between states or regions, and it’s vital to ensure that the universal catalytic converter you install complies with the applicable regulations. The catalytic converter should be certified and labeled as meeting the emission standards set by the regulatory bodies. Failure to comply with emissions regulations can result in fines or even legal consequences.
Compatibility with aftermarket exhaust systems
If you have an aftermarket exhaust system installed in your vehicle, it’s crucial to check the compatibility of the universal catalytic converter with the system. Aftermarket exhaust systems often have different dimensions and configurations compared to the stock exhaust, which can affect the fitment of the catalytic converter. Make sure to choose a catalytic converter that can seamlessly integrate with your aftermarket exhaust system, ensuring optimal performance and proper exhaust flow.
Gather Tools And Equipment
Gather Tools and Equipment
Before you begin the process of installing a universal catalytic converter, it’s crucial to gather all the necessary tools and equipment. Having everything in place will not only save you time but also ensure a smooth installation process. Here are the tools you’ll need:
Wrenches
- Socket Wrench Set: A set of socket wrenches in various sizes is essential for removing and installing nuts and bolts.
- Adjustable Wrench: An adjustable wrench allows you to work with different-sized fasteners.
Jack Stands
Jack stands provide stability and safety when working under your vehicle. It’s important to choose sturdy jack stands that can uphold the weight of your car. Here’s what you’ll need:
- Pair of Jack Stands: Make sure you choose jack stands with a weight capacity that exceeds the weight of your vehicle.
- Hydraulic Jack: A hydraulic jack enables you to raise and lower your vehicle for easy access to the catalytic converter.
Safety Goggles
When working on your vehicle, protecting your eyes should be a top priority. Safety goggles will shield your eyes from dust, debris, and any potential hazards. Consider the following:
- Impact-Resistant Safety Goggles: Look for goggles that provide impact resistance to safeguard your eyes from any flying debris.
- Anti-Fog Coating: Opting for safety goggles with an anti-fog coating will ensure clear vision throughout the installation process.
Gloves
Wearing gloves while working on your vehicle not only keeps your hands clean but also provides extra protection. Here are a few types of gloves to consider:
- Nitrile Gloves: Nitrile gloves offer resistance to chemicals and provide a secure grip.
- Heat-Resistant Gloves: If you’ll be working near a hot exhaust system, heat-resistant gloves are essential for protecting your hands against burns.
Consult Vehicle Manual
Location of Old Catalytic Converter
Before you begin the installation process of a universal catalytic converter, it is essential to locate the old catalytic converter in your vehicle. The exact placement may vary depending on the make and model of your car, and the way the exhaust system is designed. Therefore, consulting your vehicle’s manual is crucial to ensure you accurately identify the location.
The vehicle manual provides comprehensive information about various components and specific guidelines related to your car’s exhaust system. It will specify the exact location of the old catalytic converter, making it easier for you to proceed with the installation process. Remember, following the instructions in the manual will help you avoid any potential damage or mistakes during the replacement.
Special Instructions or Precautions
Installing a universal catalytic converter requires careful attention to detail and adherence to specific instructions or precautions. In order to ensure a successful installation and proper functionality of the converter, keep in mind the following:
- Wear protective gear: Always prioritize your safety. Make sure you wear protective gloves and goggles before handling any exhaust system components.
- Ensure engine is cool: Working on a cool engine reduces the risk of burns. Allow your vehicle to cool down completely before starting the installation process.
- Use appropriate tools: Gather the necessary tools and equipment as recommended in your vehicle manual. Using the correct tools will make the installation process smoother and prevent any potential damage to parts.
- Inspect the new catalytic converter: Before installation, carefully inspect the universal catalytic converter for any signs of damage or defects. If you notice any issues, it is advisable to contact the manufacturer for a replacement.
- Tighten connections properly: Ensure that all connections between the catalytic converter and the exhaust system are tightly secured. Loose connections can result in leaks or the converter becoming dislodged.
- Check for emissions regulations: It is important to verify that the universal catalytic converter you have chosen complies with the emissions regulations specific to your region. Failure to do so may lead to legal consequences or a failed inspection.
By following these special instructions and precautions, you can ensure a safe and effective installation of a universal catalytic converter in your vehicle. Remember, if you encounter any difficulties or uncertainties during the process, it is always wise to seek professional assistance or consult with a mechanic.
Elevate The Vehicle
Follow Safety Guidelines
Before you begin installing a universal catalytic converter, it is crucial to prioritize safety. Elevating the vehicle correctly ensures you have the necessary space to work comfortably. By following these safety guidelines, you can confidently proceed with the installation process:
Locate and Use Proper Lifting Points
Identifying the appropriate lifting points for your vehicle is vital to prevent any damage and ensure a secure lift. These lifting points are designed to bear the weight of the vehicle and keep you safe:
1. Refer to the owner’s manual: Your vehicle’s manual provides valuable information about lifting points and any precautions you need to take. Make sure to consult it before proceeding.
2. Visual inspection: Examine the underside of your vehicle for marked areas or sturdy metal sections. Generally, the front and rear chassis are ideal lifting points.
3. Use a hydraulic lift or jack stands: If you have access to a hydraulic lift, carefully position it under the designated lifting points. Alternatively, if you opt for jack stands, position them securely on the lifting points and ensure they are level and stable.
Remember, it’s important to never use unstable or improvised objects, such as wooden blocks, as lifting points. These can lead to accidents and unsafe working conditions.
By adhering to these safety guidelines and correctly elevating your vehicle, you can proceed confidently to the next steps of installing a universal catalytic converter.
Disconnect Exhaust System
Remove bolts and hangers
Disconnecting the exhaust system components is an essential step when installing a universal catalytic converter. It allows you to gain access to the old catalytic converter and replace it with the new one. To begin disconnecting the exhaust system, follow these steps:
- Step 1: Locate the bolts
- Step 2: Loosen the bolts
- Step 3: Remove hangers
- Step 4: Support the exhaust system
- Step 5: Carefully separate the components
Now that the exhaust system has been disconnected, you are one step closer to installing your universal catalytic converter. Remember to handle all components with care and take note of the location of each bolt and hanger for the reinstallation process.
Positioning The Converter
When it comes to installing a universal catalytic converter, positioning the converter correctly is crucial for optimal performance. In this section, we will guide you through the steps to align the converter with your exhaust system and ensure proper fit and clearance.
<h3>Align with exhaust system</h3>
The first step in positioning the universal catalytic converter is to align it with your exhaust system. To do this, you will need to identify the location where the old converter used to be installed. It is usually located between the exhaust manifold and the muffler, closer to the engine.
Once you have located the spot, make sure to remove any remnants of the old converter and clean the area thoroughly. This will ensure a smooth installation process and prevent any debris from obstructing the exhaust flow.
Next, take the universal catalytic converter and carefully align it with the exhaust system. Make sure that the inlet and outlet connections of the converter match the corresponding pipes in the exhaust system. A proper alignment will ensure that the exhaust gases flow smoothly through the converter, optimizing its performance.
<h3>Ensure proper fit and clearance</h3>
After aligning the converter with the exhaust system, it is crucial to ensure a proper fit and clearance. This ensures that the converter is secured in place and allows sufficient space for the exhaust gases to pass through without any obstructions.
Check the dimensions of the universal catalytic converter and compare them with the available space in your vehicle. It should fit snugly without any gaps or excessive movements. If necessary, use adjustable brackets or clamps to secure the converter firmly in place.
Pay attention to the clearance between the converter and other components in the vicinity, such as the chassis, fuel lines, or electrical wires. There should be enough distance to prevent any potential heat damage or contact that could compromise the performance of the converter or pose a safety risk.
In addition, ensure that the converter is not positioned too close to the ground, as it may be susceptible to damage from road debris or speed bumps. If needed, consider using a protective shield or relocating the converter slightly higher to enhance its durability.
With the converter aligned properly and securely fitted, you can proceed to the next steps of the installation process. Following these guidelines will help you position the universal catalytic converter accurately, ensuring optimal performance and longevity.
Securing The Converter
Securing the catalytic converter to your vehicle is a crucial step in the installation process. It ensures that the converter stays in place and performs its job effectively. Here are two methods you can use to secure the converter:
Use provided clamps or brackets
When installing a universal catalytic converter, manufacturers often include clamps or brackets to help secure the converter. These clamps or brackets are specifically designed to hold the converter in place and prevent any vibrations or movement while the vehicle is in motion.
To use the provided clamps, first, position the converter in the desired location and slide the clamp over the converter’s inlet or outlet. Then, tighten the clamp until it securely holds the converter in place. Make sure the clamp is not too tight, as it may cause damage to the converter or exhaust system.
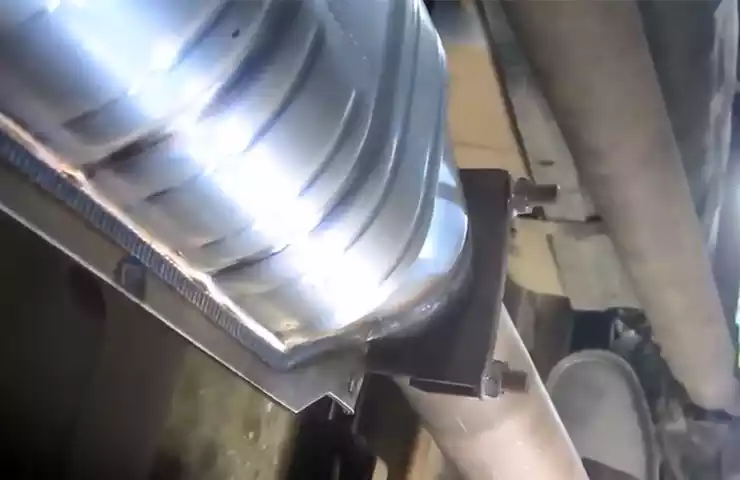
If the converter comes with brackets, attach them to the converter using the provided hardware. Once attached, position the converter in place and secure the brackets to the vehicle’s chassis or frame using bolts or screws. This method provides a more sturdy and durable connection, ensuring that the converter remains securely fastened.
Tighten bolts according to specifications

In addition to using clamps or brackets, another way to secure the catalytic converter is by tightening the bolts according to the manufacturer’s specifications. These specifications can usually be found in the installation manual or on the converter itself.
Start by placing the converter in position and aligning it with the exhaust system. Then, thread the bolts through the mounting flanges or brackets and into the corresponding holes on the converter. Use a wrench or socket set to tighten the bolts, making sure to follow the specified torque values.
By tightening the bolts correctly, you ensure that the converter is securely attached to the vehicle, minimizing the risk of any leaks or loose connections.
Aligning Exhaust Components
Carefully align exhaust pipes and connectors
Aligning exhaust components is a crucial step in installing a universal catalytic converter. Proper alignment ensures that the exhaust system functions optimally and reduces the risk of leaks or damage. Here are some important tips to help you align your exhaust pipes and connectors correctly:
- Start by gathering all the necessary tools, such as a jack stand, wrench, and exhaust clamps. Having everything ready beforehand will make the process smoother.
- Using a jack stand, lift the vehicle off the ground to gain better access to the exhaust system. Make sure the vehicle is secure and stable before working underneath it.
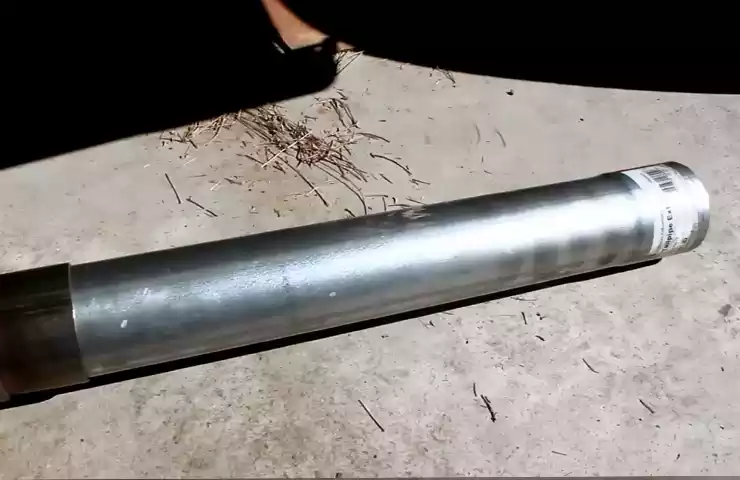
- Inspect the exhaust pipes and connectors for any damage or corrosion. Replace any worn-out or rusty parts before proceeding with the installation.
- Apply a thin layer of anti-seize lubricant to the pipe ends and connectors. This will make sliding the components together easier and prevent future rusting.
Once you have prepared the pipes and connectors, it’s time to align them properly:
- Start with the front end of the exhaust system. Align the pipe end with the corresponding flange or manifold, making sure they fit together snugly.
- Slide the exhaust pipe onto the flange or manifold, ensuring a tight connection. Use the appropriate size of exhaust clamps to secure the pipe in place.
- Repeat the same process for the remaining exhaust pipes and connectors. Align them carefully and ensure proper fit at each connection point.
To double-check for proper fit, follow these steps:
- Inspect each connection point visually to ensure that the pipes are aligned without any gaps or misalignment.
- Gently shake the pipes and connectors to ensure they are securely in place. If any parts feel loose, readjust and tighten them accordingly.
- Start the vehicle and check for any unusual noises or exhaust leaks. Pay attention to the connections you have just made, as they are the most prone to leaks if not properly aligned.
By carefully aligning your exhaust pipes and connectors, you can ensure a successful installation of a universal catalytic converter. Proper alignment not only improves the overall performance of your exhaust system but also minimizes the risk of future issues. Follow these steps diligently and enjoy the benefits of a properly installed catalytic converter!
Tighten Connections
Securely fasten bolts and hangers
Now that you have successfully mounted your universal catalytic converter, it is time to focus on tightening the connections to ensure a secure installation. This step is crucial in maintaining the integrity of your catalytic converter and optimizing its performance.
To begin, start by double-checking all the bolts and hangers that hold the catalytic converter in place. Use a wrench or socket set to firmly tighten each bolt, making sure they are secure and properly aligned. Tightening the connections will prevent any loose parts that could potentially cause vibrations or rattling noises.
It is essential to pay attention to the torque specifications provided by the manufacturer or vehicle’s manual. Over-tightening the bolts may damage the threads or even crack the flanges, while undertightening can result in loose connections and potential exhaust leaks.
Pro tip: A torque wrench can be a valuable tool in achieving the correct level of tightness for your specific vehicle. Refer to the torque specifications for your catalytic converter, and gradually tighten the bolts until reaching the recommended torque setting.
Verify no leaks or movement
Once all the connections are securely fastened, it is crucial to check for any signs of leaks or movement. A leaking catalytic converter can lead to reduced performance, increased emissions, and even potential damage to the vehicle’s engine.
Firstly, visually inspect the connections for any signs of exhaust leaks such as black soot, stains, or residue around the flanges, gaskets, or any other joint. If you notice any leaks, it is important to address them immediately to prevent further issues. In most cases, replacing the gaskets or resealing the joints will rectify the problem.
Additionally, start the engine and listen carefully for any unusual noises or rattling sounds that could indicate a loose connection. While the engine is running, inspect the entire exhaust system, including the joints and hangers, for any noticeable movement or excessive vibrations. Any movement or instability should be addressed promptly, as it could lead to further damage or premature wear of the catalytic converter.
Pro tip: To further ensure that all connections are secure and leak-free, you can use a spray bottle filled with a soapy water solution. Spray the solution on any suspicious areas while the engine is running. If you notice bubbles forming, it indicates the presence of a leak that requires immediate attention and rectification.
By taking the time to securely fasten bolts and hangers and verifying that there are no leaks or movement, you can confidently complete the installation of your universal catalytic converter. This meticulous approach will not only enhance the overall performance of your vehicle but also contribute to a cleaner and healthier environment.
Lowering The Vehicle
Lowering the vehicle is an important step when installing a universal catalytic converter. It is crucial to do this slowly and safely to avoid any damage to the vehicle or injury to oneself. This blog post will guide you through the process of removing jack stands and lowering the vehicle, so you can successfully install a universal catalytic converter.
Remove Jack Stands
Before you can lower the vehicle, you need to remove the jack stands. These stands are typically used to elevate the vehicle during the installation process and must be safely removed. Here is a step-by-step guide on how to remove jack stands:
- Step 1: Ensure that the vehicle is parked on a flat, level surface and engage the parking brake.
- Step 2: Locate the jack stands. These are usually placed under the vehicle’s frame or designated lifting points.
- Step 3: Position a hydraulic or mechanical jack beneath the vehicle, close to the jack stand.
- Step 4: Slowly and steadily raise the vehicle using the jack until it is high enough to remove the jack stand safely.
- Step 5: Place a jack stand near the hydraulic or mechanical jack, ensuring it is at the appropriate height to support the vehicle.
- Step 6: Carefully lower the vehicle onto the newly positioned jack stand and ensure it is securely resting on the stand.
- Step 7: Repeat steps 3 to 6 for each jack stand until all are safely removed.
Lower Vehicle Slowly and Safely
Once the jack stands are removed, it’s time to lower the vehicle. Follow these steps to lower the vehicle slowly and safely:
- Step 1: Double-check that all equipment used during the installation process has been properly stored away from the vehicle.
- Step 2: Prepare the hydraulic or mechanical jack for lowering the vehicle by positioning it securely and ensuring it is in good working condition.
- Step 3: Carefully release the hydraulic pressure or operate the mechanical jack to start lowering the vehicle.
- Step 4: Monitor the vehicle’s descent and ensure it is going down smoothly and evenly.
- Step 5: Keep a safe distance from the vehicle as it lowers and be alert for any deviations or problems that may arise.
- Step 6: Once the vehicle is resting on its wheels, assess the height and confirm that it is at a suitable level.
- Step 7: Remove the hydraulic or mechanical jack from underneath the vehicle and properly store it.
Lowering the vehicle safely is crucial to complete the installation of a universal catalytic converter. By following these step-by-step instructions, you can ensure a smooth and successful lowering process. Now that the vehicle is lowered, you can proceed with the next steps in installing the universal catalytic converter.
Visual Inspection
Before installing a universal catalytic converter, it is crucial to perform a thorough visual inspection to ensure everything is in working order. This inspection will help identify any potential issues and ensure a successful installation. In this section, we will guide you through the key aspects of the visual inspection process.
Ensure all connections are secure
The first step of the visual inspection is to check that all connections are secure. Begin by examining the exhaust system, paying close attention to the area where the catalytic converter will be installed. Look for any signs of looseness, corrosion, or damage in the pipes, flanges, or brackets. Ensure that all connections are tightly secured to prevent any leaks or vibrations.
Table 1: Components to check for secure connections
| Component | Check for Secure Connection |
|---|---|
| Pipes | Verify if securely attached |
| Flanges | Check for tight connections |
| Brackets | Ensure they are not loose or damaged |
Verify no damaged or loose components
Aside from checking the connections, it is crucial to inspect the components for any damage or looseness. This includes examining the catalytic converter itself, as well as other parts such as oxygen sensors, heat shields, and mounting brackets. Look out for signs of physical damage, rust, or deterioration that could affect the performance and longevity of the catalytic converter.
Table 2: Components to inspect for damage or looseness
| Component | Check for Damage or Looseness |
|---|---|
| Catalytic converter | Inspect for physical damage, rust, or deterioration |
| Oxygen sensors | Ensure they are intact and properly connected |
| Heat shields | Check for any cracks or loose fittings |
| Mounting brackets | Verify if they are securely attached |
By thoroughly inspecting the connections and components, you can identify any issues that may hinder the installation process or cause future complications. It is important to address any concerns before proceeding with the installation to ensure optimal performance and compliance with regulations. Take the time to conduct a visual inspection and make necessary repairs or replacements before continuing with the installation process.
Test Drive And Monitor
After installing a universal catalytic converter, it’s important to take your vehicle for a test drive and monitor its performance. This ensures that the installation has been done correctly and that your vehicle is running smoothly. In this section, we will discuss the steps you need to follow during the test drive and how to monitor the exhaust emissions.
Start the engine
The first step in the test drive process is to start the engine. Make sure the engine is warmed up before you begin, as this will give you more accurate readings. Once the engine is running, pay attention to any unusual sounds that may indicate a problem with the catalytic converter or any other part of the exhaust system.
Listen for any unusual sounds
While driving, listen carefully for any unusual sounds coming from the exhaust system. A functioning catalytic converter should not produce any rattling, hissing, or excessive noise. If you notice anything out of the ordinary, it’s important to address the issue as soon as possible to prevent further damage to your vehicle.
Monitor exhaust emissions
During the test drive, you should also monitor the exhaust emissions to ensure that the universal catalytic converter is functioning correctly. Here are a few things to keep in mind:
- Check for any smoke or excessive emissions coming from the tailpipe. This could indicate a problem with the catalytic converter or another component of the exhaust system.
- Pay attention to the color of the exhaust smoke. A normal exhaust should be relatively clear. If you notice black smoke, it may indicate a rich fuel mixture, while blue smoke could be a sign of burning oil.
- Observe the smell of the exhaust. If you detect a strong odor of fuel or a sulfur-like smell, it could indicate a problem with the catalytic converter.
By carefully monitoring these aspects during the test drive, you can identify any potential issues with the universal catalytic converter and seek professional assistance if necessary. Remember, regular maintenance and monitoring of your vehicle’s exhaust system are crucial for optimal performance and environmental impact.
Frequently Asked Questions Of How To Install A Universal Catalytic Converter
Can You Install A Universal Catalytic Converter?
Yes, you can install a universal catalytic converter.
Can I Replace My Catalytic Converter With A Universal Catalytic Converter?
Yes, you can replace your catalytic converter with a universal one. It is a cost-effective solution that fits a variety of vehicle makes and models. Just ensure that the universal catalytic converter you choose is compatible with your car’s engine and meets local emission regulations.
Do Universal Fit Catalytic Converters Work?
Yes, universal fit catalytic converters work efficiently. They are designed to fit a wide range of vehicles, allowing for easy installation. These converters effectively reduce harmful emissions, helping vehicles meet emission standards and promoting environmental safety.
Should I Use A Universal Catalytic Converter?
Yes, using a universal catalytic converter can be a suitable choice. It is designed to fit a wide range of vehicles, making it convenient and cost-effective. However, it is important to check if the specific converter meets legal requirements and fits your vehicle’s specifications for optimal performance.
Conclusion
To sum up, installing a universal catalytic converter is a straightforward process that can significantly improve the performance of your vehicle while minimizing emissions. By following the steps outlined in this guide, you can confidently undertake this task yourself, saving both time and money.
Remember to prioritize safety and consult the manufacturer’s instructions for your specific converter. As always, regular maintenance and inspections are crucial to ensure your vehicle’s optimal functioning. So, why wait? Start reaping the benefits of a universal catalytic converter today!