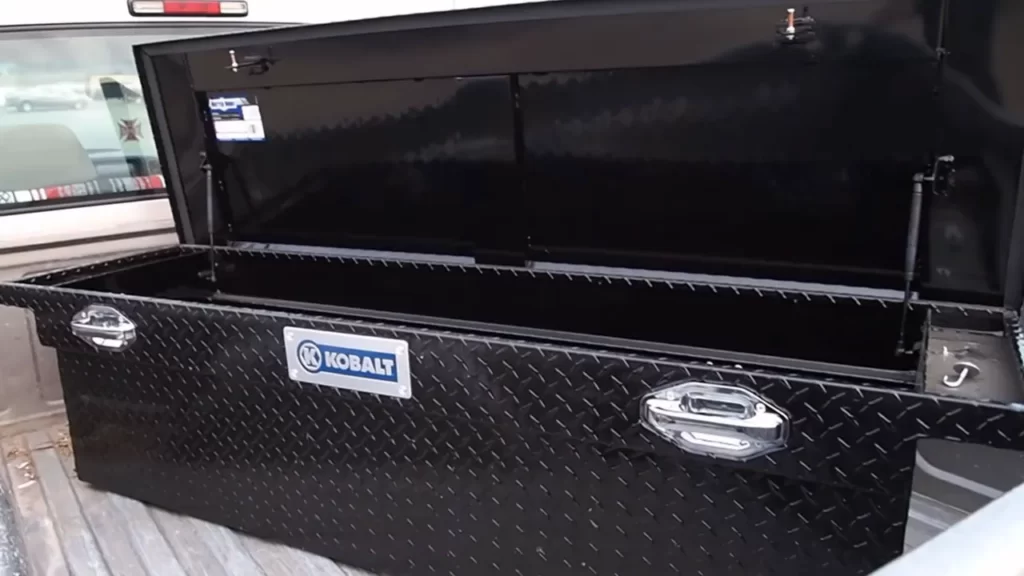
To install a truck tool box without drilling, ensure to get a no-drill installation kit that uses clamps or brackets to secure the box onto the truck bed. Installing a truck tool box can greatly enhance the functionality and convenience of your truck, providing a secure and organized storage space for your tools and equipment.
However, drilling holes into your truck bed can be a daunting task and may void any warranties. Luckily, there are alternative methods available that allow you to install a truck tool box without drilling. By using a no-drill installation kit, you can avoid the need for drilling while still ensuring a secure and stable attachment.
We will explore the steps and options for installing a truck tool box without the need for drilling, providing a hassle-free solution for your storage needs.
The Benefits Of Non-Drilling Installation Method
When it comes to installing a truck tool box, many truck owners may think that drilling into the truck bed is the only way to go. However, there are significant benefits to using a non-drilling installation method. In this article, we will explore these benefits and show you why opting for a non-drilling method is not only convenient but also beneficial for preserving your truck bed.
Preserve truck bed integrity
One of the biggest advantages of choosing a non-drilling installation method for your truck tool box is that it helps preserve the integrity of your truck bed. Unlike drilling, which can create permanent holes in the bed, a non-drilling method ensures that your truck bed remains intact and free from damage. This is especially important if you plan on using your truck bed for other purposes or if you are leasing the truck and need to return it in its original condition.
No permanent damage
With a non-drilling installation method, you can say goodbye to the worries of permanent damage to your truck bed. By utilizing mounting brackets or clamps designed specifically for this purpose, you can secure your tool box without leaving any permanent marks or holes. This means that you can easily remove the tool box if needed, without leaving a trace behind.
No need for power tools
Gone are the days of requiring power tools and extensive DIY skills to install a truck tool box. With a non-drilling installation method, you can enjoy the convenience of a simple and hassle-free setup process. No need to gather power tools or spend hours drilling into your truck bed. Instead, all you need are basic hand tools and the appropriate mounting brackets or clamps. This not only saves you time and effort but also makes the installation process accessible to anyone, regardless of their level of DIY experience.
Determining Truck Bed Material Type
When it comes to installing a truck tool box without drilling, determining the material type of your truck bed is an essential first step. This will help you choose the right method for installation, ensuring a secure and hassle-free process.
Steel vs. Aluminum
One of the primary factors to consider when determining your truck bed material type is whether it is made of steel or aluminum. Both materials have their advantages and it’s important to understand the differences before moving forward with the installation.
Understanding truck bed construction
The construction of your truck bed can vary depending on the make and model of your vehicle. It’s crucial to have a basic understanding of how your truck bed is built, as this will directly impact the installation process.
Steel truck beds are known for their durability and strength. They are commonly found in heavy-duty trucks and are able to withstand heavy loads and harsh conditions. However, steel beds are heavier compared to aluminum, which may affect your vehicle’s overall weight and fuel efficiency.
On the other hand, aluminum truck beds are lightweight and corrosion-resistant. They are commonly found in mid-size and light-duty trucks. While aluminum beds may not be as strong as steel, they are still able to handle moderate loads and provide excellent longevity.
Here’s a breakdown of the key differences between steel and aluminum truck beds:
| Material | Durability | Weight | Corrosion Resistance |
|---|---|---|---|
| Steel | High | Heavy | Lower |
| Aluminum | Moderate | Light | High |
Once you have determined whether your truck bed is made of steel or aluminum, you’ll be better equipped to install a truck tool box without drilling. Understanding the material type will help you choose the appropriate installation method that will ensure a secure and long-lasting attachment.
Measuring Truck Bed Dimensions For Proper Fit
Width Considerations
Before installing a truck tool box without drilling, it is crucial to measure the width of your truck bed to ensure a proper fit. The width of your truck bed will determine the maximum width of the tool box you can install. To measure the width of your truck bed, follow these simple steps:
- Clear out any debris or items from your truck bed.
- Place a measuring tape at one side of the bed, ensuring it is parallel to the bed rails.
- Extend the measuring tape across the truck bed to the opposite side, reading the measurement where the tape meets the other bed rail.
Make sure to take note of the width measurement, as this will guide you in selecting a tool box that fits your truck bed perfectly.
Length Considerations
Aside from the width, measuring the length of your truck bed is another crucial step in finding the right tool box without drilling. Follow these steps to measure the length accurately:
- Push the tailgate up and secure it in an upright position.
- Place your measuring tape at the front of the truck bed, up against the bulkhead.
- Extend the tape measure along the bed floor until you reach the closed tailgate.
- Take note of the measurement where the tape meets the tailgate.
Having the correct length measurement will help you choose a tool box that fits snugly within your truck bed, providing better organization and security.
Height Considerations
When it comes to height considerations, you need to ensure that the tool box you choose does not obstruct your rearview or compromise safety. To measure the height of your truck bed, follow these steps:
- Stand at the rear of the bed, looking inside.
- Place your measuring tape at the lowest point of the bed floor.
- Extend the tape vertically until you reach the top of the bed rails.
- Note the measurement at the top of the bed rails.
The height measurement will help you select a tool box that fits comfortably within the truck bed without obstructing your view or interfering with other components of your vehicle.
Evaluating Truck Bed Liners And Their Impact
When it comes to installing a truck tool box without drilling, it is important to evaluate your truck bed liner and understand how it can impact the installation process. Different types of bed liners have varying compatibility with non-drilling installation methods, and this can greatly impact your ability to securely and effectively install a tool box without drilling into your truck bed. In this section, we will explore the different types of bed liners and discuss their compatibility with non-drilling installation methods.
Different types of bed liners
There are several types of bed liners available on the market, each with its own advantages and disadvantages. Let’s take a closer look at some of the most common ones:
| Bed Liner Type | Description |
|---|---|
| Spray-on bed liner | A spray-on bed liner is a popular choice among truck owners due to its durability and ability to provide a custom fit. It is applied as a liquid coating which dries to form a protective layer. |
| Drop-in bed liner | A drop-in bed liner is made of molded plastic or rubber and is designed to fit the contours of your truck bed. It is easy to install and provides excellent protection against scratches and dents. |
| Rubber bed mat | A rubber bed mat is a simple and cost-effective solution for protecting your truck bed. It is easy to install, provides good traction, and prevents cargo from sliding around. |
Compatibility with non-drilling installation methods
When considering how to install a truck tool box without drilling, it is essential to understand the compatibility of your bed liner with non-drilling installation methods. Some bed liners, such as drop-in liners and rubber bed mats, are typically compatible with non-drilling installation methods. Their removable nature allows for the use of alternative installation methods, such as mounting brackets or clamps.
On the other hand, spray-on bed liners, which form a permanent protective coating, may not be as compatible with non-drilling installation. The permanent nature of these liners makes it difficult to attach a tool box without compromising the integrity of the coating.
It is important to note that compatibility can also vary depending on the specific brand and installation method. Therefore, it is recommended to consult the manufacturer’s guidelines and recommendations before proceeding with any installation method.
By understanding the different types of bed liners and their compatibility with non-drilling installation methods, you can make an informed decision on how to successfully install a truck tool box without drilling into your truck bed. Whether you have a drop-in liner, a spray-on liner, or a rubber bed mat, there are solutions available that will allow you to securely attach your tool box while preserving the integrity of your truck bed.
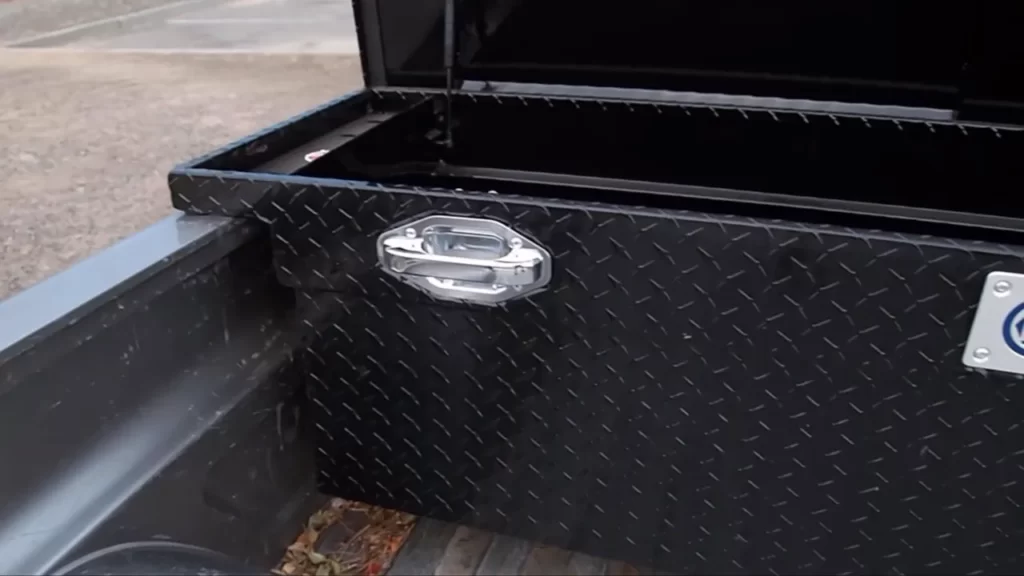
Utilizing Existing Anchor Points For Secure Installation
When it comes to installing a truck tool box without drilling, utilizing existing anchor points is a great option. Not only does it provide a secure installation, but it also eliminates the need for any permanent modifications to your truck. In this guide, we will walk you through the process of identifying existing bolts or screws on your truck and aligning the tool box with these anchor points for a hassle-free installation.
Identifying existing bolts or screws
The first step in installing a truck tool box without drilling is to identify the existing bolts or screws on your truck that can be used as anchor points. These are usually found on the bed rails or the tailgate. Take a close look at your truck and locate any bolts or screws that are sturdy and securely fastened to the truck body.
Here are a few areas where you can commonly find existing anchor points:
| Location | Anchor Points |
|---|---|
| Bed Rails | Bolts or screws that hold the bed rail caps or bed liner in place |
| Tailgate | Tailgate hinge bolts or screws |
| Frame | Frame bolts or screws that are accessible from the inside of the truck bed |
Remember, it is essential to choose anchor points that are solid and can withstand the weight and stress of the tool box.
Aligning the tool box with anchor points
Once you have identified the existing anchor points on your truck, the next step is to align the tool box with these points for a secure installation. Here’s a step-by-step process to help you:
- Measure the width of your truck bed and the width of the tool box to ensure a proper fit.
- Position the tool box on the truck bed, aligning it with the identified anchor points.
- Use a level to ensure that the tool box is sitting straight and aligned properly.
- Once you are satisfied with the alignment, use adjustable clamps or brackets to secure the tool box to the anchor points.
- Tighten the clamps or brackets until the tool box is firmly attached to the truck.
By aligning the tool box with the existing anchor points on your truck, you can ensure a secure installation without the need for drilling or making any permanent modifications.
With these steps, you can install a truck tool box without drilling and keep your truck organized while maintaining its structural integrity. Utilizing existing anchor points not only provides a secure installation but also allows for easy removal or repositioning of the tool box whenever needed. Follow these guidelines, and you’ll have your tool box installed in no time!
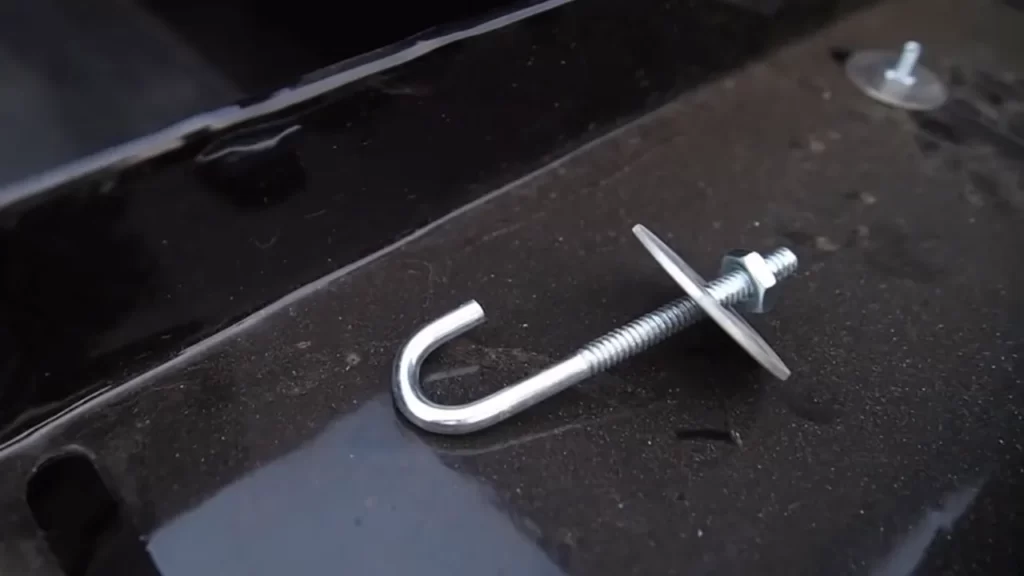
Utilizing Clamps And Mounting Brackets For Secure Attachment
When it comes to installing a truck tool box without drilling, one of the most effective methods is to utilize clamps and mounting brackets for a secure attachment. This not only eliminates the need for drilling holes into your truck bed, but also ensures that your tool box is safely and securely fastened in place. In this article, we will guide you through the process of selecting appropriate clamps or brackets and the step-by-step installation process.
Selecting appropriate clamps or brackets
Before you begin the installation process, it’s important to choose the right clamps or brackets that will provide a secure attachment for your truck tool box. Here are a few factors to consider when selecting the appropriate clamps or brackets:
- Size: Ensure that the clamps or brackets are suitable for the size and weight of your truck tool box.
- Material: Look for clamps or brackets made from durable materials such as stainless steel or heavy-duty aluminum to ensure long-lasting performance.
- Adjustability: Opt for clamps or brackets that offer adjustability to accommodate different truck bed widths and heights.
By taking these factors into consideration, you can choose clamps or brackets that are not only compatible with your truck tool box, but also provide a secure and reliable attachment.
Step-by-step installation process
Now that you have selected the appropriate clamps or brackets for your truck tool box, it’s time to proceed with the installation. Follow these step-by-step instructions to ensure a successful installation:
- Prepare the truck bed: Clean the truck bed surface where the tool box will be installed to ensure proper adhesion of the clamps or brackets.
- Position the clamps or brackets: Place the clamps or brackets on the truck bed in the desired location for the tool box installation. Make sure they are evenly spaced and positioned securely.
- Attach the clamps or brackets: Fasten the clamps or brackets to the truck bed using the provided hardware, ensuring that they are tightly secured. Make sure to follow the manufacturer’s instructions for proper installation.
- Test the attachment: After attaching the clamps or brackets, test the attachment by applying some pressure and shaking the tool box. Ensure that it is firmly attached and there is no movement or instability.
- Install the tool box: Finally, place the tool box onto the clamps or brackets and secure it in place. Ensure that it is properly aligned and fits snugly into the attachment.
With these simple steps, you can successfully install your truck tool box without the need for drilling, while still maintaining a secure attachment using clamps or brackets. It’s a convenient and practical solution that allows you to keep your tools organized and easily accessible, without any damage to your truck bed.
Using Adhesive Solutions For Temporary Or Light-Duty Installations
Understanding adhesive options
When it comes to installing a truck tool box without drilling, using adhesive solutions can be an excellent choice, especially for temporary or light-duty installations. Adhesive options provide a strong bond between the truck toolbox and the truck bed, allowing for a secure attachment without the need for drilling holes. In this section, we will discuss various adhesive options that you can consider for your installation needs.
Ensuring proper application and strength
Proper application of adhesive is crucial to ensure a secure bond between the truck toolbox and the truck bed. Before applying any adhesive, it is important to thoroughly clean and dry both surfaces to remove any dirt, grease, or debris. This will help promote better adhesion and prevent the adhesive from failing over time.
There are several adhesive options available for temporary or light-duty installations, including:
- Industrial strength double-sided foam tape: This type of tape is designed to provide a strong bond and is commonly used for mounting lightweight objects. It is important to use a high-quality foam tape that is specifically designed for outdoor use and is capable of withstanding the weight of the truck toolbox.
- Heavy-duty adhesive strips: These adhesive strips are typically made of a durable material that can hold up even in harsh weather conditions. They are easy to apply and provide a reliable bond for temporary installations.
- Hook and loop fasteners: Another option for temporary installations is hook and loop fasteners. These fasteners consist of hook and loop components that interlock when pressed together. They offer a secure attachment and can easily be removed when needed.
- Epoxy adhesive: Epoxy adhesive is a versatile option that can provide a strong and permanent bond. It is important to choose an epoxy adhesive that is specifically formulated for bonding metal surfaces and can withstand the vibrations and movement associated with a truck toolbox.
Before applying any adhesive, it is recommended to carefully read and follow the manufacturer’s instructions for proper application. This will ensure that you achieve the best possible bond strength and durability for your installation.
Preparing The Truck Bed And Tool Box
Before installing a truck tool box without drilling, it’s essential to properly prepare both the truck bed and the tool box. This ensures a secure and long-lasting installation that will keep your tools and equipment safe while you’re on the road.
Cleaning Surfaces
The first step in preparing the truck bed and tool box is to clean the surfaces. This removes any dirt, dust, or debris that could prevent a strong bond between the two. Here’s how to do it:
- Start by removing any items from the truck bed and the tool box.
- Using a stiff bristle brush or a broom, sweep away any loose dirt or debris from the truck bed. Pay special attention to the areas where the tool box will be installed.
- Next, use a damp cloth or sponge to wipe down the surfaces of both the truck bed and the tool box. This will remove any remaining dirt or grime, ensuring a clean surface for the installation.
- Allow the surfaces to dry completely before proceeding with the installation.
Removing Any Obstructions or Debris
In addition to cleaning the surfaces, it’s important to remove any obstructions or debris that could interfere with the installation. Here’s what you need to do:
- Inspect the truck bed and the tool box for any screws, bolts, or other fasteners that might be protruding. These can prevent a flush installation and compromise the security of the tool box.
- Carefully remove any obstructions using a wrench or pliers, making sure not to damage the truck bed or the tool box in the process.
- Similarly, look for any loose debris such as wood chips, rust flakes, or old adhesive remnants. These can create uneven surfaces and compromise the strength of the installation. Use a vacuum or a brush to remove them.
By thoroughly cleaning the surfaces and removing any obstructions or debris, you’re setting the stage for a successful installation of your truck tool box without drilling. With these steps completed, you can move on to the next stage of the installation process.
Securing The Tool Box Using Existing Anchor Points
Aligning the Tool Box and Anchor Points
Before securing the tool box using existing anchor points, it is crucial to align the tool box properly with the anchor points on your truck bed. This ensures a snug fit and prevents any movement or rattling during transportation.
To align the tool box and anchor points, follow these simple steps:
- Place the truck tool box on top of the truck bed, ensuring it is centered.
- Check the alignment from all sides and adjust the position if necessary.
- Make sure the tool box is parallel to the sides of the truck bed for a professional and neat appearance.
Tightening Bolts or Screws
To secure the tool box using existing anchor points, you will need to tighten bolts or screws. This step guarantees that the tool box remains firmly in place, even during bumpy rides.
Here’s how to tighten bolts or screws effectively:
- Locate the existing anchor points on your truck bed. These are typically found near the corners and sides.
- Refer to the manufacturer’s instructions to identify the specific size and type of bolts or screws required.
- Insert the bolts or screws into the anchor points. Make sure they are aligned correctly with the tool box holes.
- Using an appropriate wrench or screwdriver, begin tightening the bolts or screws.
- Start with the ones closest to the corners and gradually work your way towards the center.
- Ensure each bolt or screw is tightened securely but be cautious not to overtighten, as this may damage the tool box or the truck bed.
By following these steps, you can effectively secure your truck tool box without the need for drilling. It’s an efficient method that saves both time and effort while ensuring a secure and sturdy installation.
Installing The Tool Box With Clamps Or Mounting Brackets
When it comes to installing a truck tool box without drilling, one popular method is using clamps or mounting brackets. This allows you to securely attach the tool box to your truck bed without the need for permanent modifications. In this guide, we will walk you through the steps of attaching clamps or brackets to the tool box and securing it to the truck bed. Let’s get started!
Attaching clamps or brackets to the tool box
Attaching clamps or brackets to your tool box is a straightforward process. Many manufacturers provide clamps or brackets specifically designed for their tool boxes, making installation even easier. Follow these steps to attach the clamps or brackets:
- Step 1: Start by determining the placement of your tool box on the truck bed. Measure and mark the desired location.
- Step 2: Place the clamps or brackets on the underside of the tool box, aligning them with the marked spots.
- Step 3: Secure the clamps or brackets to the tool box using the provided screws or bolts. Make sure they are tightly fastened to ensure a secure fit.
- Step 4: Repeat the process for each clamp or bracket, ensuring they are evenly spaced for balanced support.
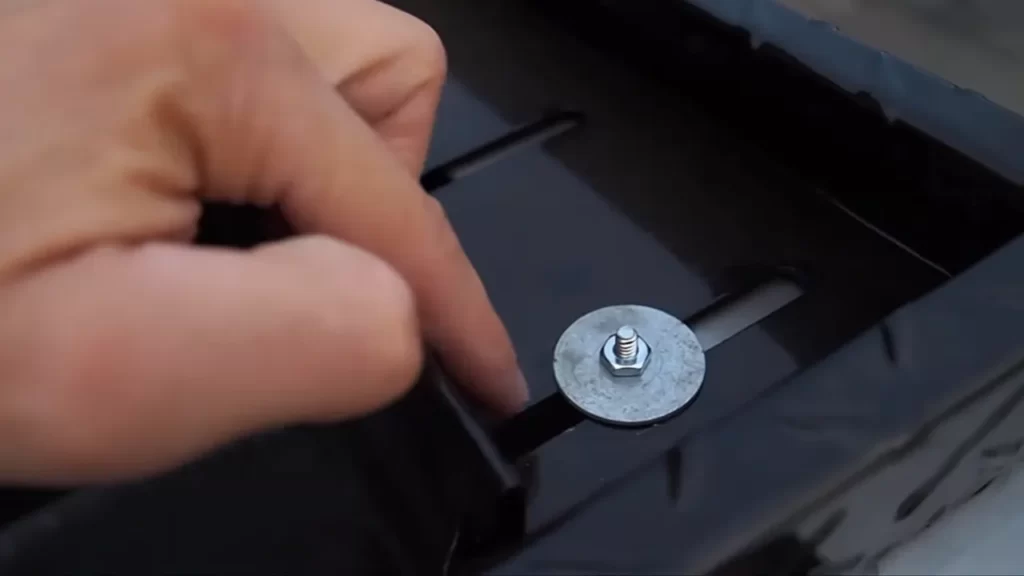
Securing the tool box to the truck bed
Once you have attached the clamps or brackets to your tool box, it’s time to secure the tool box to the truck bed. Follow these steps for a secure installation:
- Step 1: Place the tool box in the desired location on the truck bed, aligning it with the previously marked spots.
- Step 2: With the help of an assistant, hold the tool box in place while you tighten the clamps or brackets.
- Step 3: Use a wrench or socket set to tighten the screws or bolts on each clamp or bracket. Ensure that they are securely fastened to provide stability.
- Step 4: Once all the clamps or brackets are tightened, give the tool box a gentle shake to confirm it is properly secured.
By following these simple steps, you can install a truck tool box without drilling. Using clamps or mounting brackets offers a non-permanent yet secure solution for organizing and storing your tools while on the go. Enjoy the convenience and peace of mind knowing your tools are safely stored in your truck bed!
Applying Adhesive Solutions For Temporary
Installations
When it comes to installing a truck tool box without drilling, there are various adhesive solutions available that can provide a temporary yet reliable installation. This method is ideal for those who don’t want to drill holes into their truck bed, whether they have a leased vehicle or simply want the flexibility to remove the tool box in the future. One of the most effective ways to achieve this is by applying adhesive solutions to securely attach the tool box to the truck bed. In this guide, we’ll walk you through the steps of preparing the adhesive and applying it to the tool box and truck bed.
Preparing the adhesive
Before applying the adhesive, it’s important to prepare the surfaces of both the tool box and the truck bed to ensure maximum adhesion. Follow these steps:
- Clean the tool box and truck bed using a mild detergent or cleaner to remove any dirt, grease, or debris that may hinder the adhesive’s effectiveness.
- Dry both surfaces thoroughly with a clean cloth to ensure there’s no moisture left. Moisture can prevent the adhesive from bonding properly.
- If there are any existing adhesive residues, use an adhesive remover or rubbing alcohol to clean the areas.
- Apply a primer or adhesion promoter specifically designed for the type of adhesive you’ll be using. This will enhance the bonding strength between the tool box and the truck bed.
Applying the adhesive to the tool box and truck bed
Now that you’ve prepared the surfaces, it’s time to apply the adhesive. Follow these steps for a successful installation:
- Read and follow the manufacturer’s instructions for the adhesive. Different adhesives may have specific curing times and application methods.
- Apply the adhesive evenly to the contact area on the bottom of the tool box. Use a putty knife or a similar tool to spread the adhesive in a consistent layer.
- Place the tool box on the truck bed in the desired location. Ensure that it aligns with the truck bed’s contours and sits securely.
- Apply pressure to the tool box to create a strong bond between the adhesive and the truck bed. You can use clamps or weights to hold the tool box in place while the adhesive cures.
- Allow the adhesive to cure completely, following the recommended curing time provided by the manufacturer. This ensures a secure and long-lasting installation.
Ensuring Proper Weight Distribution In The Truck Bed
When it comes to installing a truck tool box without drilling, one of the crucial aspects to consider is ensuring proper weight distribution in the truck bed. Uneven weight distribution can affect the stability and performance of your vehicle, as well as impact your driving experience. To ensure a safe and balanced load, here are a few important factors to keep in mind:
Distributing weight evenly
The first step in achieving proper weight distribution is to distribute the weight evenly across the truck bed. This helps prevent excessive strain on one side of the vehicle, reducing the risk of accidents or damage. To distribute the weight evenly, follow these tips:
- Place heavy items towards the center of the truck bed.
- Avoid overloading one side of the bed while leaving the other side empty.
- Consider using dividers or cargo nets to secure smaller items and prevent them from shifting during transit.
Considering payload capacity
Another crucial factor to consider is your truck’s payload capacity. This refers to the maximum weight your truck can safely carry, including passengers, cargo, and additional accessories. Exceeding the payload capacity can lead to mechanical problems, decreased fuel efficiency, and compromised safety. To ensure you’re within the payload limits:
- Check your vehicle’s owner’s manual or consult the manufacturer’s website for the exact payload capacity.
- Weigh your truck with a full fuel tank and all occupants to get an accurate measurement.
- Monitor the weight of your cargo and ensure it does not exceed the payload capacity.
By adhering to these guidelines, you can distribute the weight properly and enjoy a safe and stable driving experience with your truck tool box. Prioritizing proper weight distribution will not only help protect your vehicle but also allow you to make the most efficient use of your truck’s capabilities.
Regular Maintenance And Inspections For Long-Lasting Installation
Regular maintenance and inspections are essential to ensure the long-lasting installation of your truck tool box without drilling. By following these simple steps, you can keep your toolbox securely in place and avoid any potential issues down the road.
Checking bolts, screws, and clamps regularly
One of the most important aspects of maintaining your truck tool box installation is to regularly check the condition of the bolts, screws, and clamps. Over time, these fasteners can loosen due to vibrations and constant usage. To prevent any mishaps on the road, inspect these components at regular intervals. Tighten any loose bolts and screws using appropriate tools to ensure a secure fit. Pay close attention to the clamps as well, making sure they are tightly secured and haven’t shifted out of place. By keeping these elements in check, you can maintain the stability of your truck tool box without drilling.
Addressing any issues promptly
Promptly addressing any issues that arise with your truck tool box is crucial to prevent further damage and secure your investment. If you notice any signs of wear, such as rust, corrosion, or damaged components, it’s important to take immediate action. Replace any worn-out or damaged bolts, screws, or clamps with suitable replacements. Additionally, addressing issues promptly can prevent any potential accidents on the road caused by a loose or unstable truck tool box. Regular inspections and timely repairs will go a long way in maintaining the integrity and functionality of your toolbox without drilling.
Exploring Alternative Installation Methods
Exploring Alternative Installation Methods When it comes to installing a truck tool box, drilling may not always be the most desirable option. Whether you don’t have access to the necessary tools or you simply want to avoid making permanent modifications to your truck, exploring alternative installation methods can be a great solution. In this article, we will delve into two popular methods that don’t require drilling: magnet-based installations and velcro straps and fasteners.
Magnet-based installations
If you’re looking for a quick and easy way to install a truck tool box without drilling, magnet-based installations offer a convenient solution. These installations utilize powerful magnets to securely attach the tool box to your truck’s bed. Here’s how you can go about it:
- Start by cleaning the surface area of your truck’s bed where you plan to install the tool box. Make sure it’s free of dirt, debris, and any other particles that could affect the magnetic grip.
- Position the magnetized adhesive strips on the bottom of the tool box. These strips typically come with strong adhesive backing, ensuring they remain securely attached to the box.
- Place the tool box on the cleaned surface of your truck’s bed, aligning it according to your desired position. The magnets will quickly attract and hold the box in place.
- Press down firmly on the tool box to enhance the grip of the magnets. This will help ensure stability and minimize the chances of the box shifting during transport.
It’s important to note that magnet-based installations are best suited for lightweight tool boxes and temporary usage. While these installations provide a secure attachment, they may not be suitable for heavy-duty tool boxes or for rough off-road conditions. Make sure to assess your specific needs and requirements before opting for this method.
Velcro straps and fasteners
Another alternative installation method that eliminates the need for drilling is the use of velcro straps and fasteners. This method offers versatility and allows for easy removal and repositioning of the tool box whenever required. Here’s how you can install a truck tool box using velcro straps and fasteners:
- Clean the surface area of your truck’s bed to ensure optimal adhesion.
- Attach one side of the velcro strap or fastener to the bottom of the tool box. Make sure it is securely fastened and aligned.
- Position the tool box on the cleaned surface of your truck’s bed, placing the other side of the velcro strap or fastener in the desired location.
- Press down firmly on the tool box to ensure a strong bond between the velcro strips or fasteners.
Velcro straps and fasteners provide an effective way to secure your tool box without the need for drilling. However, it’s important to consider the weight capacity and durability of the velcro straps or fasteners you choose. Ensure they are designed to withstand the weight and conditions to which you will subject your truck tool box.
By exploring alternative installation methods such as magnet-based installations and velcro straps and fasteners, you can install a truck tool box without drilling while still maintaining a secure attachment. Remember to always assess your specific needs and consider the weight and conditions for which your tool box will be used to determine which method is best for you.
Frequently Asked Questions On How To Install A Truck Tool Box Without Drilling
How Do You Mount A Truck Tool Box Without Drilling?
Mounting a truck tool box without drilling is possible. Use alternative methods like using clamps or brackets to secure the toolbox. Make sure to choose the right size and type of clamps or brackets that fit your toolbox and truck bed.
These methods provide a secure and non-permanent solution.
How Do You Anchor A Tool Box To A Truck Bed?
To anchor a tool box to a truck bed, secure it using clamps or mounting brackets. Place the toolbox in the desired position and line it up with the bed’s pre-drilled holes. Attach the clamps or brackets from the toolbox to the truck bed using screws or bolts.
How Do You Mount A Small Tool Box In A Truck Bed?
To mount a small tool box in a truck bed, start by measuring the bed and the toolbox to ensure a proper fit. Then, position the box where you want it to be mounted. Drill holes into the truck bed and the toolbox, aligning them with each other.
Finally, secure the toolbox by using bolts, washers, and nuts.
How Do You Secure A Toolbox In A Car?
Secure a toolbox in a car by following these steps: 1. Use bungee cords or straps to fasten it to the interior of the vehicle. 2. Install a toolbox mounting system for added stability. 3. Keep the toolbox in the trunk or cargo area to prevent it from sliding during transit.
4. Make sure the toolbox is locked to deter theft. 5. Consider using a toolbox security lock for added protection.
Conclusion
Installing a truck tool box without drilling can be a convenient and efficient way to secure your tools and equipment. By following the step-by-step methods outlined in this blog post, you can easily attach a tool box to your truck bed without causing any damage.
Whether you’re a professional tradesperson or an avid DIYer, this non-drilling installation approach will save you time and effort, while still providing a secure storage solution for your truck. So why wait? Get started today and enjoy the benefits of a truck tool box without the need for drilling.