To install a truck tool box, simply measure the width of your truck bed, position the box accordingly, and secure it with bolts using a wrench or socket set. Are you in need of a secure and organized solution for your tools while on the road?
Look no further, as installing a truck tool box is a straightforward process that can be done in no time. Whether you’re a professional tradesperson or an avid DIYer, having a reliable tool box in your truck bed ensures easy access to your equipment whenever you need it.
We will guide you through the simple steps required to install a truck tool box efficiently. So, let’s grab our wrenches and get started on this handy project.
Factors To Consider When Selecting A Truck Tool Box
Selecting the right truck tool box is crucial for every truck owner. Not only does it provide a secure storage solution for your tools and equipment, but it also enhances the functionality and organization of your truck bed. When choosing a truck tool box, there are several factors you need to consider to ensure you make the right decision. In this article, we will discuss three key factors: size and dimensions, material and construction, and locking mechanism. Let’s dive in!
Size and Dimensions
One of the first things you need to consider when selecting a truck tool box is the size and dimensions. The size of the tool box should be compatible with the size of your truck bed. Measure the width of your truck bed and choose a tool box that fits snugly without obstructing other features or accessories of your truck. Additionally, consider the depth and height of the tool box to ensure it provides ample storage space for your tools and equipment.
Material and Construction
The material and construction of the truck tool box play a vital role in its durability and longevity. Look for tool boxes made from high-quality materials such as aluminum or stainless steel. These materials are not only resistant to rust and corrosion but also lightweight, making them ideal for trucks. Furthermore, consider the construction of the tool box. Ensure it has reinforced corners and a sturdy lid that can withstand heavy loads and rough weather conditions.
Locking Mechanism
A reliable locking mechanism is essential to keep your tools safe and secure. When selecting a truck tool box, look for one with a robust locking system. This can include features such as dual locks, built-in lock cylinders, or even electronic locks. Consider the convenience and ease of use of the locking mechanism. It should be secure enough to deter theft but also convenient enough to allow quick access to your tools when needed.
Considering these factors when selecting a truck tool box will ensure you make a well-informed decision and find the perfect storage solution for your truck bed. Remember to keep the size and dimensions, material and construction, and locking mechanism in mind as you browse through the available options. Happy tool boxing!
Gathering The Necessary Tools And Supplies
Before you begin installing a truck tool box, it’s important to gather all the necessary tools and supplies. Having everything you need on hand will make the installation process smoother and more efficient. In this section, we will provide you with a detailed list of the tools and supplies you will require for the installation.
List of tools needed:
- Measuring Tape: A measuring tape will help you accurately measure the dimensions of your truck bed, ensuring that the tool box fits perfectly.
- Marker or Chalk: Use a marker or chalk to mark the areas where you will be drilling holes for the installation.
- Drill: A drill is essential for creating the necessary holes in your truck bed to secure the tool box.
- Drill Bits: Make sure to have a variety of drill bits available, as you may need different sizes depending on the type of hardware included with your tool box.
- Socket Set: A socket set will be necessary for tightening the bolts and screws during installation.
- Screwdriver: Depending on your truck tool box’s hardware, you may need a screwdriver to tighten or adjust certain components.
Supplies required for installation:
- Truck Tool Box: Ensure you have the appropriate truck tool box that fits your truck bed dimensions and suits your needs.
- Mounting Hardware: Check if your truck tool box comes with mounting hardware. If not, make sure to purchase the necessary bolts, screws, and washers separately.
- Sealant: Applying sealant around the edges of the tool box can help prevent water from entering and damaging your cargo.
- Rubber or Foam Padding: Adding rubber or foam padding between the tool box and the truck bed can prevent scratches and reduce vibrations while driving.
- Ratchet Straps (optional): Ratchet straps can provide additional security by tightening the tool box to the truck bed.
Gathering all the tools and supplies mentioned above will ensure you have everything you need before starting the installation process. With these essentials in hand, you’ll be well-prepared to install your truck tool box with ease and efficiency.
Ensuring Proper Fit
Installing a truck tool box is an essential step in maximizing the storage capacity of your vehicle. However, achieving a proper fit is crucial to ensure functionality and a seamless appearance. To ensure a perfect fit, follow these steps:
Measuring the truck bed
The first step is to accurately measure the dimensions of your truck bed. This will help you determine the appropriate size of the tool box that will fit snugly on your vehicle. You can use a tape measure to measure the length, width, and height of the bed. Make sure to measure the inside of the bed, as this will give you the most accurate measurements. Keep these measurements handy, as you will need them when selecting an appropriate tool box.
Checking for obstructions or obstacles
Before installing the tool box, it’s important to thoroughly inspect the truck bed for any obstructions or obstacles that could interfere with the installation process. This includes things like protruding wheel wells, tie-down hooks, or any other accessories that might impede a proper fit. Take note of these elements and consider them when positioning the tool box.
Determining the ideal placement
Once you have measured the truck bed and checked for any obstructions, you can now determine the ideal placement for the tool box. It’s important to find a location that provides easy access to the tool box while also ensuring that it doesn’t obstruct your rearview or limit the bed’s space usage. Consider the truck’s overall weight distribution and center of gravity when selecting the placement.
When positioning the tool box, take into account any specific requirements or recommendations provided by the manufacturer. This could include placing the box a certain distance from the cab or following specific guidelines for attaching the box securely to the bed.
By measuring the truck bed, checking for obstructions, and determining the ideal placement, you can ensure a proper fit for your truck tool box. Following these steps will not only enhance the functionality of your vehicle, but also provide a sleek and professional appearance. Learn more about installing a truck tool box by browsing our other helpful guides on truck accessories and modifications.
Removing Any Existing Tool Box Or Obstacles
Before installing a new truck tool box, it’s important to remove any previous tool box or obstacles from your truck bed. This will ensure a clean and secure fit for your new tool box. Here’s a step-by-step guide on how to get started:
Removing the previous truck tool box
If you already have a truck tool box installed, the first step is to remove it. Follow these simple steps to successfully remove the previous truck tool box:
- Clear out any items from inside the tool box.
- Inspect the tool box for any bolts or screws holding it in place.
- Using the appropriate tools, carefully unscrew or unfasten these bolts or screws.
- Once all the fasteners are removed, gently lift and slide the tool box out of the truck bed.
- Place the previous tool box aside, as you may need to uninstall it.
Clearing the truck bed of any debris or obstacles
With the previous tool box removed, it’s time to ensure your truck bed is clear of any debris or obstacles that could interfere with the installation of the new tool box. Follow these steps to get your truck bed ready:
- Inspect the truck bed for any loose items or debris, such as dirt, rocks, or leaves.
- Remove any loose items by hand or using a broom.
- If there are any fixed obstacles in the truck bed, such as tie-down brackets or bed liners, consult the owner’s manual or manufacturer’s instructions for proper removal.
- Once the truck bed is clear of debris and obstacles, use a cleaning solution or water and a cleaning brush to wash away any dirt or grime.
- Dry the truck bed thoroughly before proceeding with the installation.
By following these steps, you will have successfully removed any existing tool box or obstacles from your truck bed and ensured a clean surface for the installation of your new truck tool box.
Mounting The Truck Tool Box
Once you have chosen the perfect truck tool box for your needs, the next step is to mount it securely to your truck bed. Properly mounting your truck tool box is essential to ensure it stays in place and protects your tools and equipment effectively. Follow these steps to ensure a safe and secure installation:
Preparing the Mounting Brackets
To begin mounting your truck tool box, you will need to prepare the mounting brackets. Typically, truck tool boxes come with brackets or hardware specifically designed for this purpose. Ensure you have all the necessary hardware and tools before proceeding with the installation. It is important to read the manufacturer’s instructions carefully before starting.
Attaching the Brackets to the Truck Bed
Once you have prepared the mounting brackets, it’s time to attach them to your truck bed. Follow these steps to securely attach the brackets:
- Position the tool box in the desired location on your truck bed, ensuring optimal accessibility and clearance.
- Using a tape measure or ruler, carefully measure and mark the positions where the brackets will be mounted.
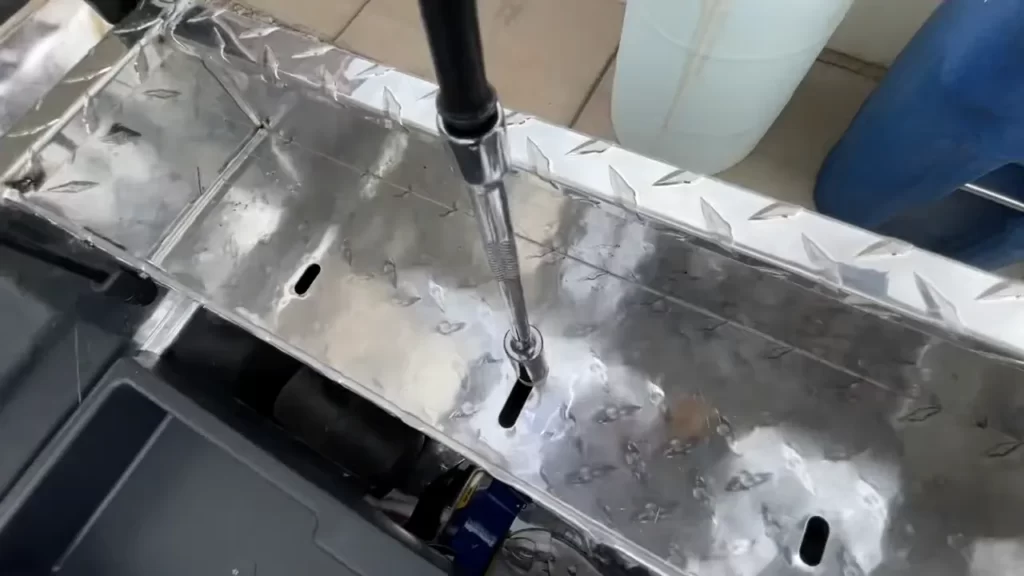
- Using a drill or screwdriver, make pilot holes at each marked position to ensure accurate and precise installation.
- Align the brackets with the pilot holes and secure them tightly using the provided hardware. Make sure to follow the manufacturer’s instructions for the specific type and size of screws or bolts required for your tool box.
- Double-check the alignment and stability of the brackets before proceeding.
By securely attaching the mounting brackets to your truck bed, you are now ready to complete the installation process and enjoy the benefits of your new truck tool box.
Securing The Truck Tool Box
Securing the truck tool box is a crucial step in the installation process to ensure the safety and stability of your tools. By following these steps, you can properly secure your truck tool box onto the mounting brackets and ensure a perfect fit:
Placing the tool box onto the mounting brackets
Before securing the truck tool box, start by placing it onto the mounting brackets of your truck bed. Ensure that the brackets are properly aligned with the holes on the underside of the tool box.
Aligning and adjusting the box for a perfect fit
Proper alignment and adjustment are essential for a snug fit. Make sure the tool box is centered and in line with the bed of the truck. To ensure a perfect fit, adjust the tool box as needed using the adjustable brackets or screws provided.
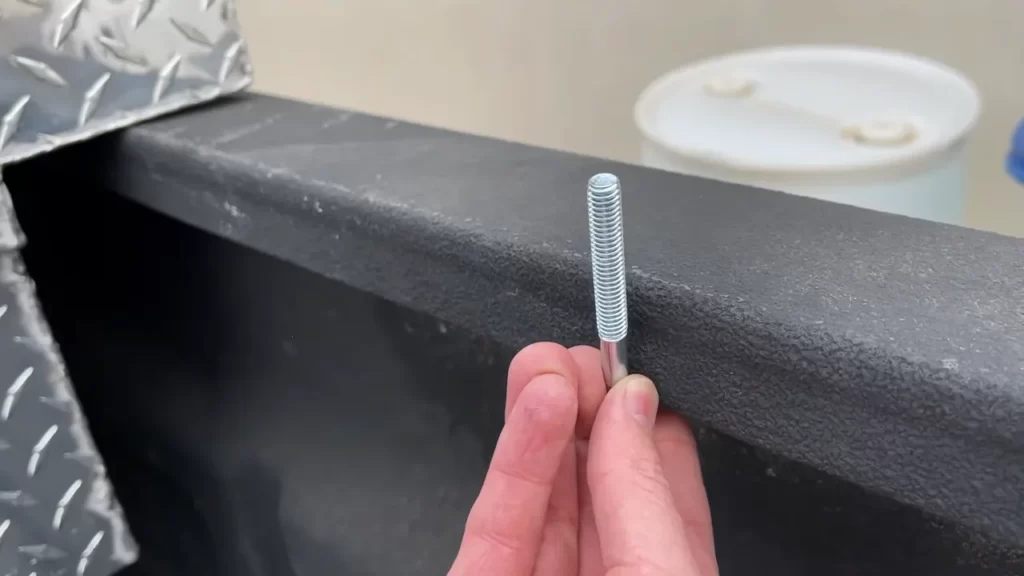
Securing the tool box with bolts or screws
Once the tool box is properly aligned, it’s time to secure it using bolts or screws. Refer to the manufacturer’s instructions for the recommended fastening method. Use the appropriate tools and hardware to securely attach the tool box to the mounting brackets.
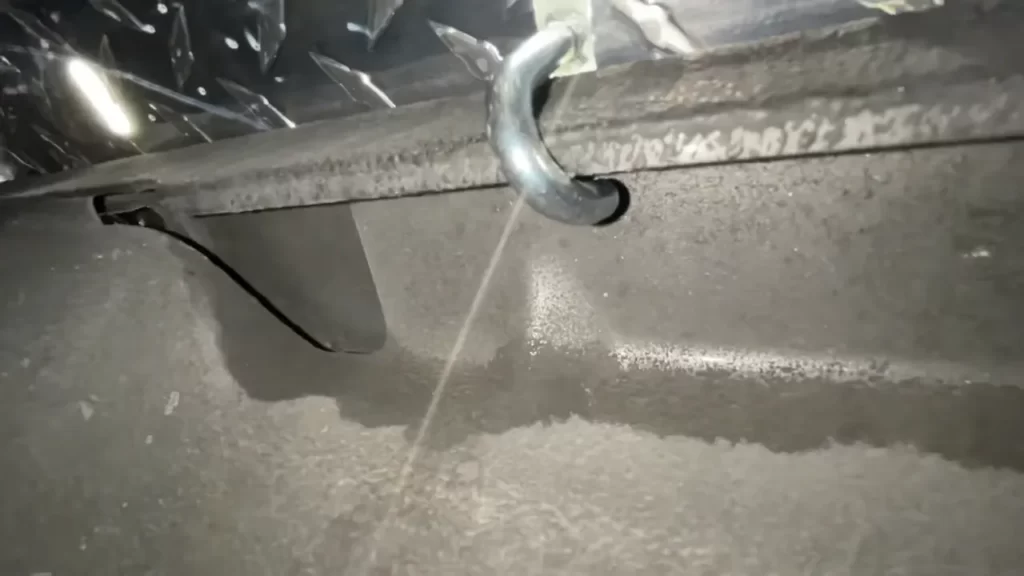
If you’re using bolts, place them through the holes in the mounting brackets and align them with the corresponding holes in the tool box. Tighten the bolts firmly but be careful not to overtighten, as it can damage the tool box or the truck bed.
If screws are recommended, insert them through the holes provided in the brackets and screw them tightly into the designated holes in the tool box. Ensure that each screw is secure and tightened properly.
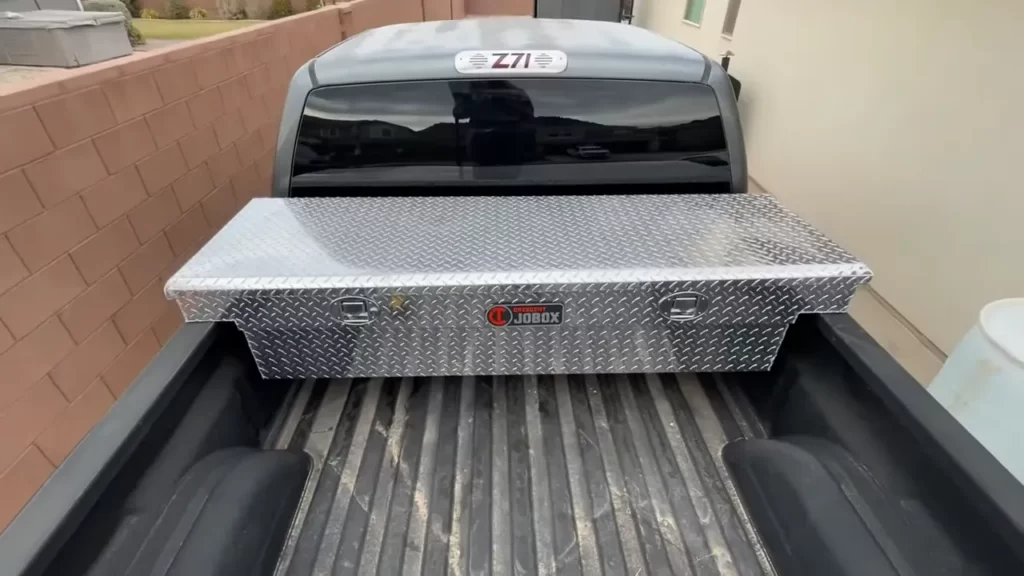
Once you have finished securing the truck tool box, give it a gentle shake or push to ensure it is stable. If there is any movement, adjust and tighten the fasteners until the box is securely in place.
Following these steps will help you securely install a truck tool box onto your vehicle, providing a safe and organized storage solution for your tools and equipment.
Testing The Tool Box For Stability
Checking for any movement or looseness
Before you start using your truck tool box, it is important to ensure that it is securely fastened and free from any loose parts that may cause it to move or shift during transit. To check for any movement or looseness, follow these steps:
- Open the truck tool box and inspect the mounting brackets or hardware that connect it to the truck bed. Look for any signs of wear or damage that could affect its stability.
- Gently shake the tool box from side to side and back and forth to test if there is any noticeable movement. Pay attention to any unusual sounds or vibrations that may indicate loose connections.
- If you detect any movement or looseness, it is crucial to address the issue before using the tool box. Failure to do so could lead to damage to your tools or even pose a safety risk while driving.
Making adjustments as necessary
If you find that your truck tool box has any movement or looseness, it is imperative to make the necessary adjustments to ensure its stability. Follow these steps to address the issue:
- Tighten any loose mounting brackets or hardware using the appropriate tools, such as a wrench or screwdriver. Make sure to secure all connections firmly without overtightening to avoid causing damage.
- If the mounting brackets or hardware are damaged beyond repair, it may be necessary to replace them. Consult the manufacturer’s instructions or contact the customer support for guidance on obtaining suitable replacement parts.
- Consider using additional support methods, such as foam padding or rubber gaskets, to stabilize the tool box further. These materials can help absorb shocks and reduce movement during transit.
By carefully inspecting your truck tool box for any movement or looseness and making the necessary adjustments, you can ensure its stability when in use and enhance the overall safety of your equipment. Now that you have checked and secured your tool box, you are ready to hit the road with confidence!
Weatherproofing And Maintenance Tips
When it comes to installing a truck tool box, it is important to not only focus on the installation process itself but also on ensuring its longevity. Weatherproofing and regular maintenance are essential in extending the lifespan of your tool box and protecting your valuable tools from the elements. In this section, we will discuss the key weatherproofing techniques and maintenance tips that will keep your truck tool box in optimal condition.
Applying Weatherproof Sealant or Coating
One of the most effective ways to weatherproof your truck tool box is by applying a high-quality sealant or coating. This creates a protective barrier against rain, snow, and other environmental elements that can cause rust, corrosion, and damage to your tools. Prior to applying the sealant or coating, make sure to thoroughly clean the surface of the tool box and remove any dirt, dust, or debris. Apply the sealant evenly using a paintbrush or roller, ensuring that all areas, including the corners and edges, are well-covered. Allow the sealant to dry completely before exposing the tool box to any moisture.
Regular Cleaning and Upkeep to Extend the Tool Box’s Lifespan
Regular cleaning and upkeep are crucial in maintaining the integrity of your truck tool box. Over time, dirt, grime, and other contaminants can accumulate on the surface, leading to deterioration and even potential damage. To prevent this, make it a habit to clean the tool box regularly, especially after exposure to harsh weather conditions or when it becomes visibly dirty. Use a non-abrasive cleaner and a soft cloth or sponge to remove any dirt or stains. For stubborn stains, you can use a mild detergent or a specific tool box cleaner recommended by the manufacturer. After cleaning, thoroughly dry the tool box to prevent moisture buildup and the risk of rust formation. Additionally, don’t forget to lubricate the hinges, locks, and any moving parts to ensure smooth operation and prevent them from seizing.
In addition to regular cleaning, it is essential to inspect your truck tool box periodically for any signs of damage or wear. Check for loose screws or bolts and tighten them if necessary. If you notice any dents, dings, or scratches, address them promptly by touching up the affected areas with a matching paint or protective coating. By taking these proactive measures, you can significantly extend the lifespan of your truck tool box and keep it looking and performing at its best.
Frequently Asked Questions For How To Install A Truck Tool Box
How Do You Bolt Down A Tool Box To A Truck Bed?
To bolt down a toolbox to a truck bed, follow these steps: 1. Position the toolbox in your desired location on the truck bed. 2. Mark the mounting hole locations on the truck bed and toolbox. 3. Drill corresponding holes in the truck bed and toolbox.
4. Secure the toolbox to the truck bed using bolts, washers, and nuts. 5. Tighten the bolts securely to ensure a tight fit.
How Do You Mount A Truck Tool Box Without Drilling?
Mounting a truck tool box without drilling is possible by using alternative methods. One option is to use clamps or brackets to secure the toolbox to the truck bed rails. Another method is to use adhesive or Velcro strips to attach the toolbox.
Additionally, some toolboxes come with a mounting kit that allows for installation without drilling.
How Do You Install A Truck Tool Box With Drilling?
To install a truck tool box with drilling, follow these steps: 1. Measure and mark the desired location on your truck bed 2. Use a drill to create holes in the marked spots 3. Position the tool box on the bed and align the holes 4.
Insert bolts through the holes and secure them tightly 5. Double-check the tool box for stability and make any necessary adjustments.
How Do You Secure A Tool Chest To A Truck Bed Without Drilling?
To secure a tool chest to a truck bed without drilling, you can use alternative methods like adhesive tapes, Velcro straps, or cargo control devices. Ensure the tool chest is tightly secured and won’t move during transportation.
Conclusion
In a nutshell, installing a truck tool box is a straightforward process that can immensely enhance your storage capabilities and overall functionality. By following the step-by-step instructions provided in this guide, you can seamlessly secure your toolbox to efficiently organize and protect your tools.
Remember to gather all the necessary tools beforehand and take your time to ensure a proper fit. With a little effort and patience, you’ll be well-equipped for any task that comes your way.