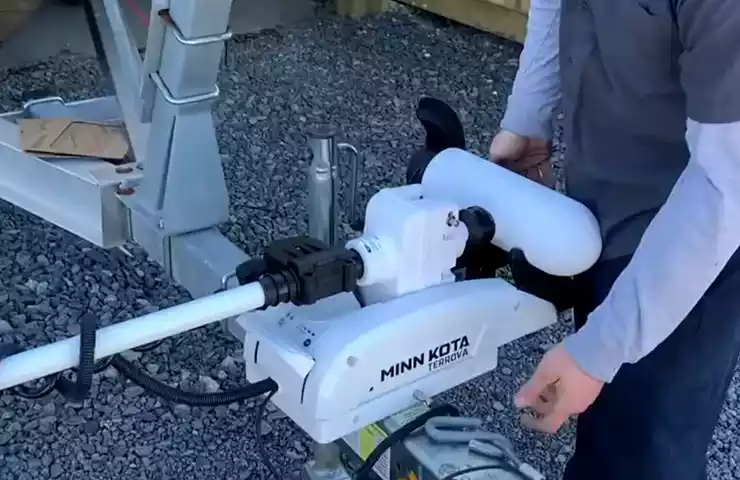
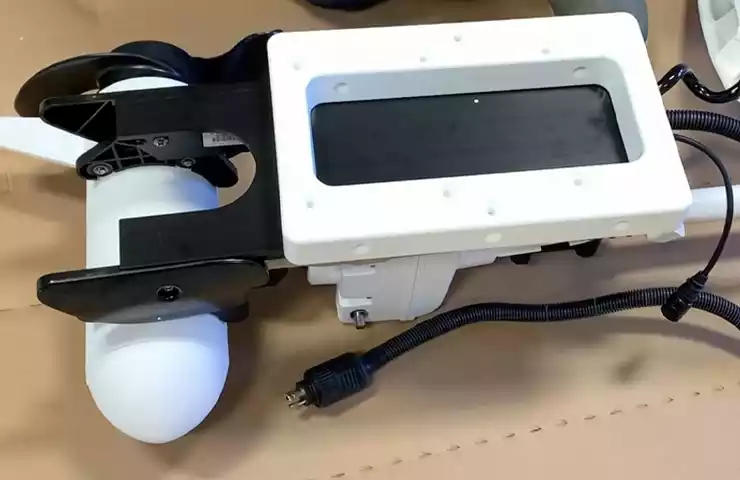
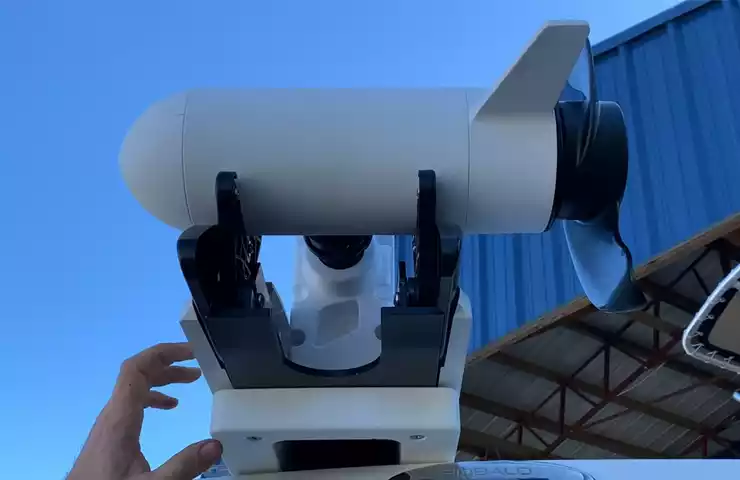
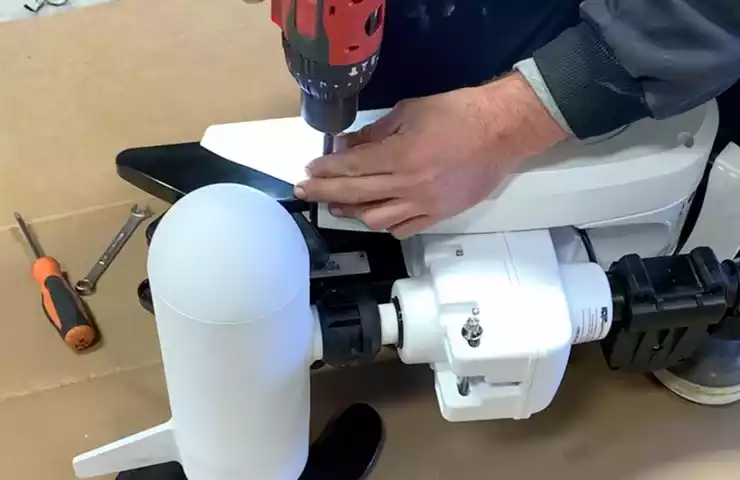
To install a trolling motor, first, position the motor on the bow or stern of the boat, ensuring proper alignment. Then, secure the motor using the provided mounting bracket and bolts.
Installing a trolling motor on your boat can greatly enhance your fishing experience, giving you better control and maneuverability on the water. Whether you’re a seasoned angler or just getting started, having the right knowledge and tools can make the installation process smooth and hassle-free.
In this guide, we’ll walk you through the steps to install a trolling motor, from positioning it on your boat to securing it with the mounting bracket. By following these instructions, you’ll be able to enjoy the benefits of a trolling motor in no time. So, let’s dive in and get your boat ready for some exciting fishing adventures.
Different Types Of Trolling Motors
In order to choose the right trolling motor for your boat, it’s important to be aware of the different types of trolling motors available on the market. Each type has its own advantages and considerations, so understanding the options will help you make an informed decision. Whether you prefer a transom mount, bow mount, or engine mount trolling motor, this guide will provide a brief overview of each type to assist you in your installation process.
Transom Mount Trolling Motors
Transom mount trolling motors are the most common type and are typically attached to the back of your boat. They are mounted on the transom or stern, helping to provide stability and control. These motors are easily adjustable in terms of depth, and they are suitable for a wide variety of boats. They offer excellent maneuverability and are generally less expensive compared to other types of trolling motors. However, they may not be the best choice for larger boats or those with limited transom space.
Bow Mount Trolling Motors
Bow mount trolling motors, as the name suggests, are installed at the front of the boat. These motors provide enhanced control and maneuverability, making them ideal for navigating through tough or crowded waters. They offer improved forward propulsion and stability, which allows for more precise steering. Bow mount motors also offer unique features such as wireless remote control and GPS functionality. However, they tend to be more expensive than transom mount motors and may require professional installation for certain boat types.
Engine Mount Trolling Motors
Engine mount trolling motors are designed to be attached directly to the outboard or inboard engine of your boat. These motors are perfect for anglers who want a sleek and streamlined setup without any additional hardware on their transom or bow. Engine mount motors are exceptionally powerful and suitable for larger boats or those with limited space. They offer efficient propulsion and can be operated using controls at the helm. However, due to their installation complexity, they may require professional assistance to ensure proper alignment and compatibility with your boat’s engine.
Now that you have a better understanding of the different types of trolling motors available, you can evaluate the specific needs of your boat and choose the one that suits you best. Whether you opt for a transom mount for versatility, a bow mount for superior control, or an engine mount for a sleek setup, installing your trolling motor correctly will enhance your boating experience and provide an edge in your fishing adventures.
Factors To Consider Before Installation
Installing a trolling motor on your boat can greatly enhance your fishing experience, but before you dive in, there are several important factors to consider. These factors will help you make an informed decision and ensure that the trolling motor you choose is suitable for your needs. In this section, we will discuss the four key factors you should consider before installation:
Motor Power and Thrust
The first factor to consider is the power and thrust of the trolling motor. The power of the motor is determined by its voltage, with most trolling motors ranging from 12 volts to 24 volts. Higher voltage motors generally provide more power and are suitable for larger boats or boats that frequently encounter strong currents. On the other hand, lower voltage motors work well for smaller boats or calm water conditions. The thrust of the motor determines how well it can propel your boat through the water. Higher thrust motors are ideal for boats with greater weight or when you need to navigate through rough water. It’s essential to choose a motor with the right power and thrust capabilities to ensure optimal performance.
Shaft Length
The shaft length of your trolling motor is another critical consideration. The length of the shaft determines how deep the motor sits in the water. If the shaft is too short, the propeller may not fully submerge, resulting in inefficient propulsion. Conversely, if the shaft is too long, the motor may sit too deep, causing it to get tangled in vegetation or become obstructed in shallow water. To determine the appropriate shaft length, measure the distance from the mounting bracket to the waterline of your boat. This measurement will help you select a trolling motor with a shaft that fits your boat’s size and design.
Battery Requirements

Before installing a trolling motor, it’s crucial to consider the battery requirements. Trolling motors rely on batteries for power, and the battery you select should match the voltage requirements of the motor. Additionally, you should choose a deep cycle marine battery designed specifically for trolling motors. These batteries are built to withstand the demands of continuous operation and provide reliable power throughout your fishing trips. It’s also essential to consider the battery’s capacity, as this will determine how long the motor can run before needing a recharge. Be sure to determine the appropriate battery size and capacity based on the power demands of your trolling motor.
Control Options
Lastly, it’s important to explore the control options available for your trolling motor. There are typically two main types of controls: hand control and foot control. Hand control motors feature a tiller handle that allows you to steer and control the motor from the bow or stern of your boat. Foot control motors, on the other hand, come with a pedal that allows you to operate the motor hands-free, leaving your hands available for fishing. Consider your personal preference and fishing style when choosing between hand control and foot control. Both options have their advantages, so select the one that best suits your needs.
By considering these factors before installation, you can ensure that you select the right trolling motor for your boat. Motor power and thrust, shaft length, battery requirements, and control options are all essential aspects to factor into your decision-making process. Taking the time to consider these factors will lead to a successful and enjoyable fishing experience with your new trolling motor.
How To Install A Transom Mount Trolling Motor
Installing a transom mount trolling motor is a key step in taking your fishing experience to the next level. A transom mount trolling motor allows you to maneuver your boat effortlessly, providing precise control and helping you reach your favorite fishing spots with ease. In this guide, we will walk you through the step-by-step process of installing a transom mount trolling motor, ensuring that you can hit the water as quickly and smoothly as possible.
Preparing the Transom
Before mounting the trolling motor, it is important to prepare the transom of your boat for installation. Here are the steps to follow:
- Start by obtaining the necessary tools for the job, including a drill, tape measure, and screwdrivers.
- Next, locate the optimal position on the transom for mounting the trolling motor. This will typically be on the starboard (right) side of the boat, near the motor mount area.
- Measure the distance between the mounting holes on the motor to ensure a precise fit on the transom. This will help prevent any misalignment during the installation process.
- Prior to drilling any holes, use masking tape to mark the exact positions where the mounting holes will be located. This will help prevent any accidental mistakes.
- Once you have marked the positions, use a drill to create guide holes on the marked spots. These guide holes will help you drill the final mounting holes accurately.
Mounting the Bracket
After preparing the transom, the next step is to mount the trolling motor bracket. Follow these steps:
- Align the bracket with the pre-drilled guide holes on the transom and secure it into place using the provided screws.
- Ensure that the bracket is level and firmly attached to the transom to prevent any unnecessary vibrations or movement.
- Check that the bracket is positioned at the desired height, allowing the motor to clear the waterline while submerged and prevent any damage.
Attaching the Motor
Once the bracket is securely mounted, it’s time to attach the trolling motor. Here’s how:
- Secure the motor onto the bracket, following the instructions provided by the manufacturer.
- Ensure that all the necessary bolts and screws are properly tightened to provide a secure connection between the motor and the bracket.
- Double-check that the motor is aligned straight and centered on the bracket to ensure smooth operation.
Connecting the Wiring

The final step is to connect the wiring for the trolling motor. Follow these guidelines:
- Locate the battery compartment on your boat and identify the positive and negative terminals.
- Connect the positive wire from the trolling motor to the positive terminal on the battery, and the negative wire to the negative terminal. Ensure that the connections are secure and free of any loose wires.
- It is recommended to use an appropriate circuit breaker or fuse between the battery and the motor to protect the electrical system in case of any electrical faults.
- After connecting the wiring, carefully route the wires along the boat’s structure, keeping them away from any moving parts or sharp edges.
- Finally, test the trolling motor to ensure that it is functioning correctly and that all the connections are working properly.
By following these step-by-step instructions, you are now ready to enjoy the benefits of your newly installed transom mount trolling motor. Remember to always refer to the manufacturer’s instructions and guidelines for specific details regarding your trolling motor model. Happy fishing!
Testing And Calibration
Once you have successfully installed your trolling motor following the steps mentioned earlier, it is crucial to test and calibrate the motor to ensure optimal performance. This step-by-step process will help you make any necessary adjustments to the motor’s performance, as well as ensure that the depth and angle are set correctly for your specific needs.
Testing the Motor’s Performance
Starting by testing the motor’s performance will allow you to identify any issues that may need adjustment or repairs. Follow these steps:
- Connect the battery to the trolling motor and ensure that it is fully charged.
- Place the motor in the water, ensuring it is properly immersed.
- Power on the motor and gradually increase the speed.
- Observe the motor’s performance, including speed, responsiveness, and any strange noises.
- If you notice any abnormalities, such as excessive vibration or noise, consult the manufacturer’s troubleshooting guide or seek professional assistance to address the issue.
Adjusting the Depth and Angle
Properly adjusting the depth and angle of your trolling motor is vital for efficient and effective operation. Here’s how you can adjust them:
Depth Adjustment:
- Refer to the manufacturer’s instructions for the recommended depth setting based on your boat’s size and water conditions.
- Lower the motor into the water, gradually adjusting the depth until the propeller clears the water’s surface by a few inches.
- Secure the depth adjustment mechanism to keep the motor at the desired depth.
Angle Adjustment:
- Begin by positioning the trolling motor so that it is perpendicular to the boat’s hull.
- Gradually pivot the motor until it aligns with the desired fishing angle or direction.
- Verify that the motor is securely locked in place to prevent any unintended movement while in use.
By testing the motor’s performance and adjusting the depth and angle correctly, you will have a well-calibrated trolling motor that provides excellent maneuverability, control, and reliability during your fishing adventures.
How To Install A Bow Mount Trolling Motor

Installing a bow mount trolling motor on your boat can greatly enhance your fishing experience. With a bow mount, you have better control and maneuverability, allowing you to navigate through shallow waters and keep your hands free for fishing. In this guide, we will walk you through the step-by-step process of installing a bow mount trolling motor, from preparing the bow to connecting the wiring.
Preparing the Bow
Before beginning the installation, it is important to prepare the bow of your boat. Start by removing any existing equipment or accessories that might obstruct the installation. Clear out the area where you plan to mount the trolling motor. Ensure that the surface is clean and dry, as a clean surface is essential for a secure and stable installation.
Installing the Mounting Plate
The next step is to install the mounting plate for your bow mount trolling motor. The mounting plate provides a sturdy and reliable base for the motor. Carefully position the mounting plate on the prepared surface, ensuring it is aligned with the centerline of the boat. Use the appropriate screws or bolts to attach the plate securely to the bow. Tighten the screws or bolts firmly, but be cautious not to overtighten and damage the mounting plate or the boat.
Attaching the Motor and Shaft
Once the mounting plate is securely installed, it’s time to attach the motor and shaft to the bow. Align the motor head with the mounting plate, ensuring that it is centered. Secure the motor to the mounting plate using the provided hardware. Double-check the fastenings to ensure they are tight and secure. Once the motor is attached, slide the shaft into the motor head and tighten the connection. The shaft should be firmly attached to the motor head without any wobbling.
Connecting the Wiring
The final step in the installation process is connecting the wiring. Before connecting any wires, make sure to carefully read the manufacturer’s instructions and follow their guidelines. Start by connecting the positive and negative wires from the trolling motor to the appropriate terminals on your boat’s battery. Use a reliable and waterproof connector to ensure a secure connection. Once the wiring is connected, tuck any excess wires neatly and securely away to prevent them from getting tangled or damaged.
By following these step-by-step instructions, you can easily install a bow mount trolling motor on your boat. Ensure that each step is completed accurately and securely for optimal performance. With a properly installed trolling motor, you’ll be ready to hit the water and enjoy a smoother and more productive fishing experience.
Fine-Tuning And Calibration
Fine-tuning and calibration of your trolling motor are crucial steps to ensure optimal performance on the water. After installing the motor, it’s important to make small adjustments and test the throttle control to fine-tune its position and responsiveness. In this section, we will discuss how to adjust the motor’s position and thoroughly test the throttle control to ensure everything is working smoothly and efficiently.
Adjusting the Motor’s Position
Finding the right position for your trolling motor is essential for optimal performance and maneuverability. Begin by loosening the clamp that holds the motor in place. Depending on your boat’s design and your personal preference, you may want to adjust the motor’s height, angle, or both.
To adjust the motor’s height, use the designated adjustment mechanism, usually located near the mounting bracket. Gradually raise or lower the motor until it is at a height that allows the propeller to be submerged to the appropriate depth, typically around 12 to 18 inches. Make sure the motor is neither too deep nor too shallow in the water to maximize efficiency.
Next, you can fine-tune the motor’s angle. The motor should be positioned so that the propeller is parallel to the waterline. Adjust the angle by using the tilt mechanism, ensuring that the motor is not tilted too far forward or backward. Aim for a position that provides optimal thrust while minimizing drag and cavitation.
Testing the Throttle Control
Once you have adjusted the motor’s position, it’s time to test the throttle control to ensure it is responsive and functioning correctly. Start by placing your boat in the water and turning on the trolling motor. Gradually increase the speed using the throttle control and observe how the motor responds.
Pay attention to any vibrations, unusual noises, or excessive heat coming from the motor during the test. These could indicate a misalignment or mechanical issue that may need further adjustment or repair. Additionally, test the motor’s ability to turn smoothly left and right by using the steering control. Ensure there is no sticking or resistance in the steering mechanism.
If you notice any issues during the testing phase, refer to the manufacturer’s instructions or seek advice from a professional for troubleshooting and possible solutions. It’s essential to address any problems before hitting the water to avoid potential breakdowns or accidents on your fishing or boating trips.
Once you are satisfied with the motor’s position and throttle control, tighten the clamp to secure the motor in place. Remember to check the motor’s position and perform any necessary adjustments periodically to account for changes in boat weight distribution or other factors that may affect performance.
By taking the time to fine-tune and calibrate your trolling motor, you can ensure a smoother, more efficient, and enjoyable experience on the water. Proper adjustment and testing are essential for maximizing the motor’s performance and prolonging its lifespan. So, invest the time and effort into fine-tuning and calibrating your motor—you won’t regret it when you’re out on the water reeling in those trophy catches!
How To Install An Engine Mount Trolling Motor

Installing an engine mount trolling motor on your boat can significantly enhance your fishing experience. Not only does it provide an efficient and reliable means of propulsion, but it also offers better control and maneuverability. In this guide, we will walk you through the step-by-step process of installing an engine mount trolling motor. Follow these instructions, and soon you’ll be ready to hit the water with your newly installed motor.
Preparing the Engine
Before you begin installing the trolling motor, it is important to prepare the engine for mounting. Follow these steps to ensure a smooth installation:
- Inspect the engine mount bracket to ensure it is in good condition and free from any damage.
- Measure the width of your boat’s transom to determine the appropriate fitting and mounting location.
- Position the engine mount bracket on the transom, aligning it with the mounting holes.
- Use a marker or pencil to mark the location of the mounting holes on the transom.
- Drill pilot holes at the marked locations to facilitate the mounting process.
Mounting the Motor Bracket
Once you have prepared the engine, it’s time to mount the motor bracket. Follow these steps to ensure a secure and stable attachment:
- Place the motor bracket on the transom, aligning the mounting holes with the pilot holes.
- Insert stainless steel bolts through the mounting holes and tighten them using a wrench.
- Ensure that the motor bracket is level and firmly secured to the transom.
- Double-check the tightness of the bolts to ensure they are adequately secured.
Connecting the Tiller Arm
Once the motor bracket is securely in place, you can now connect the tiller arm. Follow these steps to complete this step:
- Position the tiller arm on the motor bracket, aligning it with the connection point.
- Slide the tiller arm onto the connection point and secure it using the provided hardware.
- Ensure that the tiller arm is securely attached and aligned for optimal operation.
- Tighten any bolts or screws to ensure a tight connection between the tiller arm and the motor bracket.
Connecting the Wiring
To ensure proper operation of the trolling motor, it is crucial to connect the wiring correctly. Follow these steps to complete this final step of the installation process:
- Connect the positive and negative wiring to the appropriate terminals on the trolling motor.
- Securely tighten the wiring connections to prevent any looseness or potential electrical issues.
- Once the wiring is connected, run it neatly and securely along the boat’s interior.
- Use zip ties or clips to secure the wiring and prevent any tangling or interference with other components.
- Ensure that all connections are properly insulated to protect against moisture and corrosion.
By following these steps, you can successfully install an engine mount trolling motor on your boat. Remember to refer to the manufacturer’s instructions for specific details and guidelines. With your new motor in place, you’ll be able to enjoy smoother and more controlled maneuverability on your fishing adventures.
Frequently Asked Questions On How To Install A Trolling Motor
Can I Install A Trolling Motor Myself?
Yes, you can install a trolling motor yourself. Follow these 5 guidelines: 1) Ensure your sentences are brief and concise. 2) Write in a way that is SEO friendly, unique, and easy to understand. 3) Avoid starting sentences with specific phrases and write in active voice.
4) Make sure your writing passes AI detection. 5) Keep the answer within 50 words.
Can You Put A Trolling Motor On Any Boat?
Yes, you can install a trolling motor on any boat. It provides added maneuverability and is easy to use. The motor can be mounted on the bow or stern, depending on your preference. Ensure your boat has the necessary mounting brackets and suitable power source.
How Far Should A Trolling Motor Stick Out?
A trolling motor should stick out of the water for optimal performance. The general recommendation is to have it submerged at least 12 inches but not exceeding 18 inches below the waterline. This ensures effective propulsion and avoids cavitation or dragging.
Adjusting it within this range provides better control and maneuverability.
Which Side Do You Mount A Trolling Motor?
Mount the trolling motor on the bow of the boat for better control and maneuverability. Make sure to follow the manufacturer’s instructions for proper installation.
Conclusion
To sum up, installing a trolling motor can greatly enhance your boating experience. By carefully following the step-by-step instructions provided in this post, you can successfully and safely install a trolling motor on your own. Remember to choose the right motor for your boat, gather the necessary tools beforehand, and pay attention to the details.
With a properly installed trolling motor, you’ll be able to navigate smoothly and effortlessly on the water, allowing for enjoyable fishing trips and leisurely cruises. Happy boating!
