To install a Thule bike rack, follow these steps: First, position the rack on the vehicle’s roof or trunk, ensuring it is securely fastened. Then, attach the rack to the vehicle using the provided straps or bolts.
Choosing The Right Thule Bike Rack For Your Vehicle
When it comes to transporting your bikes safely and securely, a Thule bike rack is an excellent choice. Thule is a renowned brand known for its durability, versatility, and ease of use. However, with a wide range of Thule bike racks available, it can be overwhelming to choose the right one for your vehicle. In this guide, we will explore the factors to consider when selecting a Thule bike rack, understand the different types available, and discuss specific considerations for your vehicle model.
Factors to consider when selecting a Thule bike rack
Selecting the right Thule bike rack involves taking into account several key factors. Taking the time to consider these factors will ensure that you choose the bike rack that best suits your needs:
- Number of bikes: Determine how many bikes you need to transport. Thule offers bike racks that can accommodate anything from one to four bikes.
- Compatibility: Check if the bike rack is compatible with your vehicle. Thule provides fit guides on their website to help you find the right rack for your specific make and model.
- Bike types: Consider the types of bikes you plan to transport. Thule offers different racks designed for road bikes, mountain bikes, e-bikes, and more.
- Security: Evaluate the security features of the bike rack. Look for features like locking mechanisms and anti-theft measures to keep your bikes safe during transport.
- Ease of installation: Consider how easy it is to install and remove the bike rack. Look for features like tool-free installation and quick-release mechanisms.
- Storage: Think about the storage options when the bike rack is not in use. Some Thule bike racks fold down or can be easily stored when not in use.
Understanding the different types of Thule bike racks available
Thule offers various types of bike racks to cater to different needs and preferences. Understanding the different types will help you choose a rack that suits your requirements:
- Trunk-mounted racks: These racks attach to the trunk or hatch of your vehicle using straps. They are versatile, affordable, and easy to install. However, they may obstruct rear visibility.
- Hitch-mounted racks: These racks attach to a trailer hitch receiver on your vehicle. They are sturdy, offer excellent bike protection, and are easy to load and unload. However, they require a hitch receiver, and some models may hinder access to the trunk.
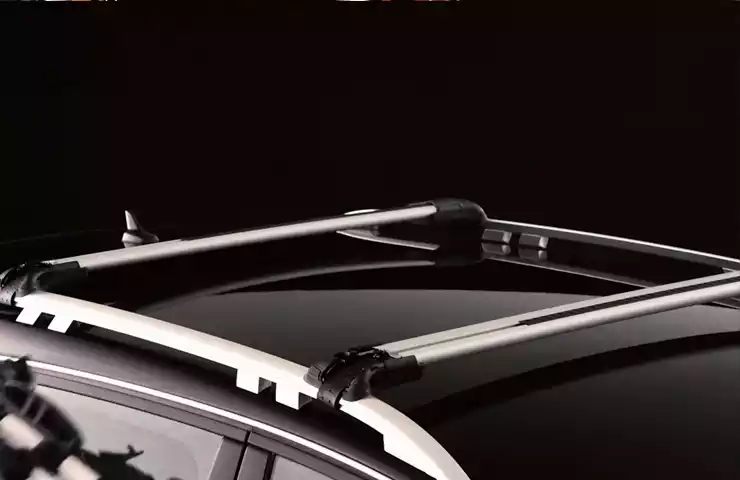
- Roof-mounted racks: These racks attach to the roof rails or crossbars of your vehicle. They provide an unobstructed view and preserve rear accessibility. However, they require lifting bikes overhead and may impact vehicle height and fuel efficiency.
Considerations for your specific vehicle model
When selecting a Thule bike rack, it is crucial to consider your specific vehicle model. Thule provides fit guides that help you determine which racks are compatible with your vehicle. They take into account factors such as the make, model, and year of your vehicle, as well as any existing roof rails or hitch receivers. By following these fit guides, you can ensure a seamless fit and secure attachment for your bike rack.
By considering the factors mentioned above and understanding the different types of Thule bike racks available, you can confidently choose a bike rack that perfectly suits your vehicle and biking needs. Transporting your bikes to your next adventure will be a breeze with a reliable and high-quality Thule bike rack.
Preparing Your Vehicle For Installation
Before you can start installing your Thule bike rack, it’s important to properly prepare your vehicle. This involves cleaning the roof and ensuring it is free from debris, checking the weight capacity of your vehicle’s roof, and measuring the distance between the roof crossbars. Follow these steps to ensure a smooth and successful installation.
Cleaning the roof and ensuring it is free from debris
First and foremost, you’ll want to make sure that the roof of your vehicle is clean and free from any dirt, dust, or debris. This will ensure a secure and stable installation of your Thule bike rack. To clean the roof, use a mild detergent and water, along with a soft cloth or sponge. Avoid using harsh chemicals or abrasive materials that could damage the surface of your vehicle. Rinse thoroughly and dry the roof before proceeding to the next step.
Checking the weight capacity of your vehicle’s roof
Understanding the weight capacity of your vehicle’s roof is crucial to avoid any accidents or damage during the installation process. Each vehicle has a specific weight limit that must be considered. To find this information, refer to your vehicle’s owner’s manual or contact the manufacturer. Once you know the weight capacity, make sure that the Thule bike rack you have is within that limit. This will ensure a safe and secure installation, giving you peace of mind while transporting your bikes.
Measuring the distance between the roof crossbars
The distance between the roof crossbars is another important factor to consider when installing a Thule bike rack. This measurement will determine the placement and fit of the bike rack. To measure the distance, use a tape measure and start from the center of one crossbar to the center of the other. Write down the measurement and make sure it matches the specifications provided by Thule for your specific bike rack model. This will ensure that your bike rack fits perfectly and is properly aligned, providing optimum stability and security for your bikes.
In Conclusion
Preparing your vehicle for the installation of a Thule bike rack is an essential step to ensure a successful and trouble-free process. By cleaning the roof, checking the weight capacity, and measuring the distance between the roof crossbars, you’ll be well-prepared to install your bike rack confidently. Taking the time to prepare properly will not only guarantee a secure installation but also contribute to a smooth and enjoyable biking experience for you and your family.
Installing The Thule Bike Rack
When it comes to transporting your bikes safely and securely, a Thule bike rack is the way to go. Installing a Thule bike rack may seem daunting at first, but with our step-by-step guide, you’ll have it done in no time. In this section, we’ll walk you through the process of installing a roof-mounted Thule bike rack, from securing the crossbars to attaching the bike rack itself.
Step-by-step guide to installing the roof-mounted Thule bike rack
Whether you’re an experienced outdoor enthusiast or a weekend warrior, installing a roof-mounted Thule bike rack is a straightforward process. Follow these steps to ensure proper installation:
- Start by assembling the bike rack according to the manufacturer’s instructions. Take note of any specific parts or accessories that may be included.
- Next, locate the crossbars on your vehicle’s roof. These are the horizontal bars that span the width of your vehicle’s roof and provide a sturdy foundation for the bike rack.
- Secure the crossbars to your vehicle’s roof using the appropriate mounting system. Thule offers a range of mounting options, including clamps, brackets, and tracks. Refer to the user manual for your specific Thule bike rack to determine the correct mounting system and follow the instructions accordingly.
- Once the crossbars are securely in place, it’s time to attach the bike rack. Position the bike rack on top of the crossbars, lining it up with the mounting points provided.
- Secure the bike rack to the crossbars using the included hardware. This may involve tightening bolts, latches, or straps to ensure a snug fit.
- Double-check all connections and ensure the bike rack is properly aligned before proceeding.
- Test the security of the bike rack by giving it a gentle shake. If it feels loose or unstable, revisit the installation process and make any necessary adjustments.
- Once you’re confident that the bike rack is securely installed, you’re ready to load your bikes and hit the road!
Securing the crossbars to your vehicle’s roof
The first step in installing a Thule bike rack is securing the crossbars to your vehicle’s roof. Thule provides a variety of mounting systems to accommodate different roof types and vehicle models. Follow these general steps to secure the crossbars:
- Before installation, ensure that the roof is clean and free from debris. This will provide a smooth surface for attaching the crossbars.
- Position the crossbars on your vehicle’s roof, aligning them parallel to each other and evenly spaced.
- Depending on your Thule bike rack model, secure the crossbars using clamps, brackets, or tracks. Refer to the user manual for your specific Thule bike rack to determine the correct mounting system and follow the instructions accordingly.
- Tighten the mounting hardware to ensure a secure fit. Check the crossbars for any movement or instability.
Attaching the bike rack to the crossbars
Now that you have securely installed the crossbars, it’s time to attach the bike rack itself. Follow these steps to correctly attach the bike rack:
- Position the assembled bike rack on top of the crossbars, ensuring that it is centered and aligned.
- Locate the mounting points on the bike rack and align them with the crossbars.
- Secure the bike rack to the crossbars using the included hardware. This may involve tightening bolts, latches, or straps. Refer to the user manual for your specific Thule bike rack for detailed instructions.
- Check that all connections are secure and the bike rack is properly aligned.
By following these step-by-step instructions, you can confidently install your Thule bike rack and have peace of mind knowing that your bikes are securely transported. With your bike rack properly installed, you’re now ready to embark on your next cycling adventure!
Securing Your Bicycles To The Thule Bike Rack
Once you’ve successfully installed your Thule bike rack, it’s time to secure your bicycles to it to ensure they stay safe and stable throughout your journey. The last thing you want is to have your bikes wobbling or falling off during transit. Follow these steps to properly secure your bicycles to the Thule bike rack for optimal balance and stability.
Positioning the bike on the rack for optimal balance and stability
Properly positioning your bike on the rack is essential for maintaining balance and stability while driving. Follow these steps to ensure your bike is securely attached:
- Hold your bike near the seat and lift it onto the bike rack, making sure the wheels are facing the correct direction.
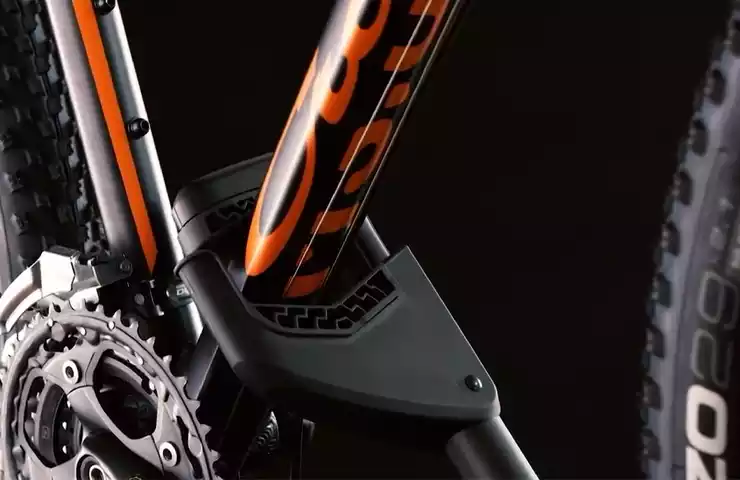
- Position the bike on the rack so that the frame rests securely on the designated cradles or arms.
- Ensure the bike is centered and balanced on the rack, with the weight evenly distributed.
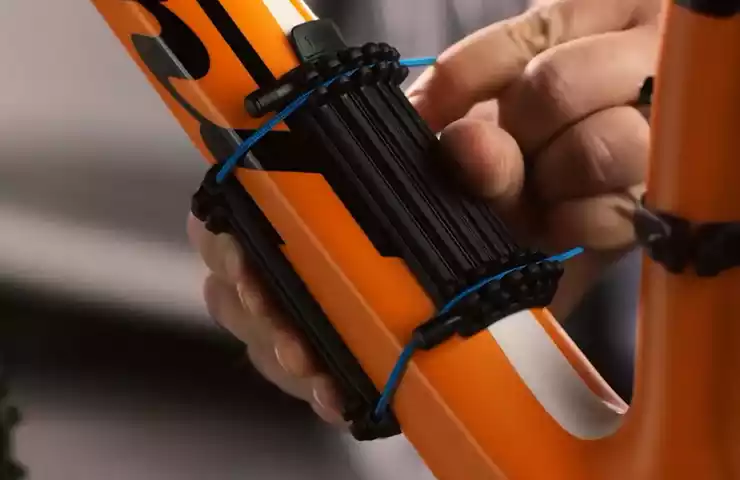
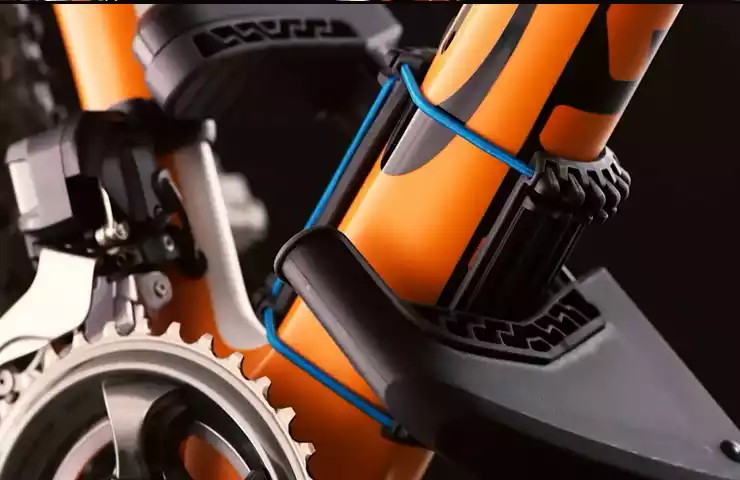
- Use any adjustable straps or cradles provided by Thule to secure the bike frame in place.
By positioning your bike correctly on the Thule bike rack, you’ll enhance its stability and minimize any potential movement during transit.
Securing the bikes using the provided straps and locks
Thule provides straps and locks that are designed to keep your bikes securely attached to the rack. Follow these steps to effectively secure your bikes:
- Confirm that the straps and locks are undamaged and in good working condition.
- Attach the straps to the designated attachment points on your bike frame.
- Tighten the straps securely, ensuring there is no slack or movement.
- Utilize any locks provided by Thule to further secure your bikes to the rack.
By properly utilizing the straps and locks provided, you can provide an additional layer of security for your bikes while on the road.
Checking the security and stability of the bikes on the rack
Before hitting the road, it’s essential to double-check the security and stability of your bikes on the Thule bike rack. Follow these simple steps:
- Give each bike a firm shake to ensure it is securely attached and there is no movement.
- Confirm that the straps and locks are still tight and secure.
- If necessary, adjust the straps or locks to eliminate any potential slack or movement.
By performing these quick checks, you can have peace of mind knowing your bikes are securely fastened to the rack and ready for a smooth and stable journey.
Securing your bicycles to the Thule bike rack is crucial for a safe and enjoyable travel experience. By following the steps outlined above, you can ensure your bikes remain stable, balanced, and securely attached to the rack throughout your entire journey.
Troubleshooting And Maintenance Tips
After successfully installing your Thule bike rack, it’s important to know how to troubleshoot any common issues that may arise during installation as well as how to properly maintain and care for your bike rack. By following these tips, you can ensure that your Thule bike rack remains in top condition and provides a secure and reliable way to transport your bikes.
Common issues encountered during installation and how to resolve them
While installing a Thule bike rack is typically a straightforward process, there are a few common issues that you may encounter. By being aware of these issues and knowing how to resolve them, you can save time and frustration during the installation process.
- Issue: Rack not fitting securely on your vehicle
- Issue: Difficulty attaching bikes to the rack
- Issue: Rack interfering with rear lights or license plate
Regular cleaning and maintenance to ensure the longevity of your Thule bike rack
To keep your Thule bike rack in optimal condition and prolong its lifespan, it’s important to perform regular cleaning and maintenance. This will help prevent any build-up of dirt, grime, or rust, which could potentially compromise the integrity and functionality of the rack.
- Clean your bike rack regularly: Use a mild soap and water solution to clean the rack, paying special attention to any moving parts and areas that may accumulate dirt and debris. Rinse thoroughly and allow it to dry completely before storage.
- Inspect for wear and tear: Regularly inspect your bike rack for any signs of damage or wear. Check for loose or frayed straps, tears in the fabric, or any bent or broken parts. Replace any damaged components to ensure the rack’s safety and reliability.
- Lubricate moving parts: Apply a lubricant, such as silicone spray or bike-specific oil, to any moving parts, such as hinges or joints, to ensure smooth operation.
Proper storage of the bike rack when not in use and during the
off-season
When your Thule bike rack is not in use or during the off-season, it’s important to store it properly to keep it in excellent condition and avoid any unnecessary wear or damage.
- Clean and dry before storage: Before storing your bike rack, make sure it is clean and dry. Remove any dirt, dust, or debris that may have accumulated during use or storage.
- Store in a dry and secure location: Find a dry and secure location to store your bike rack. Avoid exposure to extreme temperatures or humidity, as this can cause damage to the rack’s materials.
- Disassemble if necessary: If your Thule bike rack is designed to be disassembled, consider taking it apart for more compact storage. This can help save space and reduce the risk of any parts becoming damaged during storage.
By following these troubleshooting and maintenance tips, you can ensure that your Thule bike rack remains in optimal condition and provides safe and reliable transportation for your bikes.
Frequently Asked Questions Of How To Install A Thule Bike Rack
How Do You Attach A Thule Bike Rack To A Car?
To attach a Thule bike rack to a car, follow these steps: 1. Make sure the rack is compatible with your car model. 2. Install the rack’s mounting hardware securely. 3. Position the rack on the car’s roof or hitch.
4. Attach the rack using the provided straps, locks, or bolts. 5. Double-check for stability before loading your bikes.
How Does A Thule Bike Rack Attach To Hitch?
A Thule bike rack attaches to a hitch with a straightforward process. You simply slide it into the hitch receiver and secure it with a hitch pin or lock. It provides a secure and stable connection to transport your bikes safely and easily.
How Do You Attach A Thule Bike?
To attach a Thule bike rack, follow these steps: 1. Install the rack’s mounting hardware on the vehicle’s roof or trunk. 2. Attach the bike rack to the mounting hardware securely. 3. Position the bike on the rack, ensuring it is balanced and stable.
4. Secure the bike to the rack using straps or clamps. 5. Double-check the bike’s stability before driving.
How Do You Put A Bike On A Thule 2 Bike Rack?
To put a bike on a Thule 2 bike rack, follow these steps: 1. Lift the bike and place it in the rack’s cradle. 2. Adjust the straps to securely hold the bike in place. 3. Repeat for the second bike, positioning it beside the first.
4. Double-check both bikes for stability before driving.
Conclusion
Installing a Thule bike rack doesn’t have to be a daunting task. With these step-by-step instructions, you can easily mount your bike rack and hit the road in no time. Remember to double-check all the connections and follow the manufacturer’s guidelines for a secure and safe installation.
Whether you’re an experienced cyclist or a newbie, installing a Thule bike rack is a simple and rewarding process that ensures you and your bike can adventure together with ease. Happy riding!