To install a throttle body spacer, first, disconnect the negative battery terminal and remove the air intake hose. Then, remove the throttle body from the intake manifold, place the spacer in between, and reattach the throttle body using the provided bolts and gasket.
Adding a throttle body spacer can improve your vehicle’s performance by increasing the air intake volume and improving the fuel atomization process. This can lead to enhanced throttle response, increased horsepower, and improved fuel efficiency. Installing a throttle body spacer can be a simple DIY project that can provide noticeable benefits for your vehicle’s performance.
In this guide, we will outline the step-by-step process to install a throttle body spacer in a clear and concise manner. So, let’s dive in and get started with the installation process.
Increase In Horsepower And Torque
Improved Engine Performance
Installing a throttle body spacer can provide a significant improvement in engine performance. The throttle body spacer is designed to create a more turbulent air flow, resulting in better atomization of the fuel and air mixture. This leads to a more efficient combustion process, which in turn can increase horsepower and torque. Simply put, the throttle body spacer helps your engine breathe better, allowing it to generate more power. Whether you have a truck, SUV, or a performance car, adding a throttle body spacer can be a cost-effective way to enhance your vehicle’s performance.
Enhanced Acceleration
One of the major benefits of installing a throttle body spacer is improved acceleration. By creating a more turbulent air flow, the spacer can help to increase the amount of air entering the engine, allowing it to burn fuel more efficiently. The result is a noticeable boost in throttle response and quicker acceleration. If you love the feeling of pressing the gas pedal and instantly feeling your vehicle surge forward, a throttle body spacer can provide that extra responsiveness you desire. This upgrade is particularly beneficial for vehicles that frequently need to merge onto highways or make quick passes on the road. Moreover, a throttle body spacer can also enhance your vehicle’s ability to tow heavy loads or haul heavy cargo. The increased torque provided by the spacer allows for easier and more efficient power delivery, enabling your vehicle to handle the extra weight with greater ease. When it comes to installation, a throttle body spacer is fairly straightforward. It can be installed using basic hand tools and typically takes about an hour to complete. However, it’s essential to consult the specific instructions provided by the manufacturer for your vehicle model to ensure proper installation. In conclusion, adding a throttle body spacer to your vehicle can significantly increase horsepower and torque, providing you with improved engine performance and enhanced acceleration. Whether you’re looking to boost your vehicle’s power for better performance on the track or simply want a more responsive driving experience on the road, a throttle body spacer is worth considering. So why wait? Take the first step towards unleashing the full potential of your engine by installing a throttle body spacer today.
Better Fuel Efficiency
Are you looking to improve the fuel efficiency of your vehicle? Installing a throttle body spacer can be a simple yet effective solution. By optimizing the air-to-fuel ratio and enhancing fuel atomization, this modification can help you get more mileage out of each tank of gas. Not only can it lead to potential savings on fuel costs, but it can also contribute to a greener environment. In this article, we will explore how a throttle body spacer can improve fuel efficiency and how you can install it yourself.
<h3> Improved Fuel Atomization </h3>
One of the key benefits of installing a throttle body spacer is the improved fuel atomization it offers. Fuel atomization refers to the process of breaking down fuel into tiny particles, which allows for better combustion within the engine. With a throttle body spacer, the air passing through the system gets swirled and mixed more efficiently with the fuel, resulting in finer fuel particles.
When fuel is atomized effectively, it can burn more efficiently in the combustion chambers of your engine. This means that you can extract more power from the fuel and achieve better fuel economy. Improved fuel atomization also leads to a smoother combustion process, reducing the likelihood of engine knocking or pinging.
Additionally, finer fuel particles are less likely to leave residue behind, ensuring cleaner combustion and reducing the build-up of carbon deposits on the engine’s components. By enhancing fuel atomization, a throttle body spacer can contribute to a cleaner and more efficient running engine.
<h3> Increased Air-to-Fuel Ratio </h3>
Another advantage of a throttle body spacer is the increased air-to-fuel ratio it enables. This modification introduces more mixture air into the combustion process, allowing for a leaner fuel mixture. A leaner mixture means that you are using less fuel for the same power output, resulting in improved fuel efficiency.
By optimizing the air-to-fuel ratio, a throttle body spacer helps your engine run more efficiently. The increased flow of air ensures a more complete combustion of the fuel, minimizing wasted fuel and reducing emissions. With a throttle body spacer, you can maximize the potential energy in each drop of fuel, leading to better mileage and reduced fuel consumption.
<h3> Potential Savings on Fuel Costs </h3>
One of the most enticing benefits of installing a throttle body spacer is the potential savings on your fuel costs. With improved fuel atomization and increased air-to-fuel ratio, your engine becomes more efficient and consumes less fuel for the same level of performance. As a result, you will find yourself making fewer trips to the gas station and experiencing greater mileage from each tank of fuel.
While the actual savings may vary depending on your driving habits and vehicle model, installing a throttle body spacer can help you achieve better fuel economy. Over time, these savings can add up and significantly offset the initial investment made on the spacer.
In conclusion, a throttle body spacer can greatly enhance the fuel efficiency of your vehicle. With improved fuel atomization and increased air-to-fuel ratio, you can experience better mileage, potential savings on fuel costs, and a cleaner-running engine. So why wait? Take the first step towards achieving better fuel efficiency by installing a throttle body spacer today!
Reduction In Intake Restriction
Allowing More Air into the Engine
One of the primary benefits of installing a throttle body spacer is the reduction in intake restriction, which allows more air to flow into the engine. By improving the airflow, the engine can operate more efficiently, resulting in better performance and fuel efficiency.
A throttle body spacer is a simple device that sits between the throttle body and the intake manifold. It features a series of fins or grooves that disrupt the airflow, creating a swirling effect. This swirling effect helps to atomize the air and fuel mixture, ensuring a more complete combustion process.
With the installation of a throttle body spacer, air is able to enter the engine with less restriction, meaning it can take in more air per unit of time. This increased airflow can lead to improved engine performance and responsiveness.
Improved Engine Efficiency
In addition to allowing more air into the engine, a throttle body spacer can also improve engine efficiency. The swirling effect created by the fins or grooves in the spacer helps to create a more uniform air and fuel mixture, allowing for a more complete combustion.
When the air and fuel mixture burns more efficiently, there is less wasted energy and a reduction in emissions. This not only benefits the environment but can also result in improved fuel economy.
By optimizing the combustion process, a throttle body spacer can help the engine operate more efficiently, maximizing the power output from each drop of fuel.
Potential Increase in Overall Power
One of the most exciting aspects of installing a throttle body spacer is the potential increase in overall power. With the increased airflow and improved combustion efficiency, the engine can generate more power.
A throttle body spacer can provide a noticeable boost in horsepower and torque, especially at higher RPMs. This additional power can be felt during acceleration and can make a significant difference in the overall performance of the vehicle.
It’s important to note that the actual increase in power will vary depending on factors such as the engine size and configuration. However, even a slight improvement can be enough to enhance the driving experience.
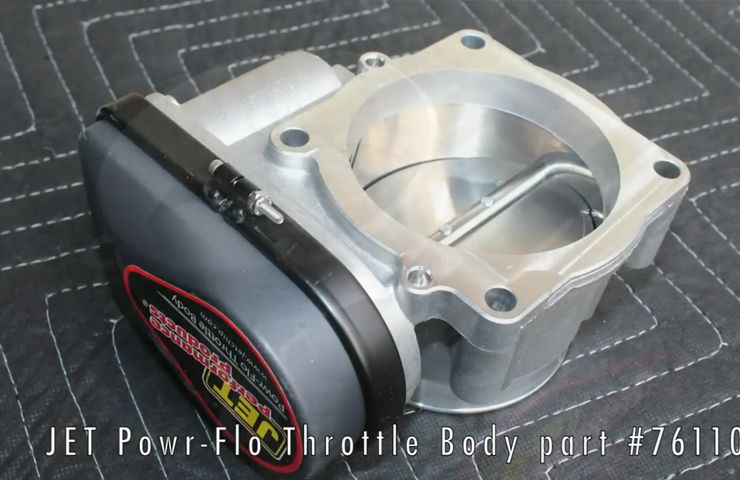
Throttle Body Spacer Kit
The throttle body spacer kit is an essential component for enhancing the performance of your vehicle’s engine. It is designed to improve the air flow to the engine by creating a larger space for the air to pass through. This results in better fuel combustion, increased horsepower, and improved throttle response.
Ensure Compatibility with Vehicle Make and Model
Before purchasing a throttle body spacer kit, it is crucial to ensure compatibility with your specific vehicle make and model. Each vehicle has its own unique specifications, and using a spacer that is not designed for your vehicle can have negative effects on its performance.
When looking for a throttle body spacer kit, make sure to refer to your vehicle’s manufacturer guidelines or consult with a professional mechanic. They can provide you with the necessary information regarding the right spacer kit that is compatible with your vehicle.
Additionally, keep in mind the engine size and year of your vehicle, as this can also affect compatibility.
Installation Process
Now that you have selected the right throttle body spacer kit for your vehicle, it’s time to move on to the installation process. Installing a throttle body spacer kit is a straightforward procedure that can be completed with basic tools and a little patience.
- Start by disconnecting the negative terminal of your vehicle’s battery to prevent any potential electrical mishaps.
- Locate the throttle body, which is usually positioned between the intake manifold and the air intake tube.
- Remove the air intake tube and loosen the clamps connecting it to the throttle body.
- Detach the throttle body from the intake manifold by removing the bolts or screws that secure it in place.
- Clean the mounting surface of the intake manifold and the throttle body with a suitable cleaner to ensure a secure fit for the new spacer.
- Position the throttle body spacer over the mounting surface, aligning the bolt holes with those on the intake manifold and throttle body.
- Secure the spacer in place by tightening the bolts or screws with the appropriate torque specifications.
- Reinstall the throttle body onto the intake manifold and reconnect the air intake tube, securing it with clamps.
- Finally, reattach the negative terminal of the battery to restore power to your vehicle.
It is important to follow the specific instructions provided with your throttle body spacer kit, as the installation process may vary depending on the make and model of your vehicle.
By installing a throttle body spacer kit, you can unleash the full potential of your vehicle’s engine, improving its performance and overall driving experience. With a better air flow to the engine, you can enjoy increased horsepower, enhanced fuel efficiency, and improved throttle response.
Don’t hesitate to take your vehicle to a professional mechanic if you’re unsure about installing the throttle body spacer kit yourself. They have the knowledge and experience to ensure a proper and efficient installation.
Socket Set
One of the essential tools you will need when installing a throttle body spacer is a socket set. A socket set consists of various sizes of sockets and a ratchet handle, allowing you to securely tighten or loosen bolts and nuts. The socket set is a versatile tool that can be used for multiple tasks in automotive maintenance and repair.
Variety of Socket Sizes
The socket set typically includes a wide range of socket sizes to accommodate different bolt and nut sizes. This variety ensures that you can find the right socket size for your throttle body spacer installation. The most common socket sizes you may require for this task are:
| Socket Size | Common Use |
|---|---|
| 10mm | Often used for smaller bolts |
| 13mm | Common size for throttle body bolts |
| 15mm | Used for larger bolts or nuts |
| 17mm | Typically used for specific applications |
While these socket sizes are commonly used for throttle body spacer installation, it’s important to check the specific sizes required for your vehicle’s make and model.
Ratchet Handle
The ratchet handle is a crucial component of the socket set that allows for easy tightening and loosening of bolts and nuts. It features a mechanism that allows the socket to rotate freely in one direction while preventing it from rotating in the opposite direction. This feature saves you time and effort when installing or removing the throttle body spacer.
To use the ratchet handle effectively, simply attach the appropriate socket size to the handle and apply the necessary force to tighten or loosen the bolts. The ratchet handle’s ergonomic design ensures a comfortable grip and enhances control, even in tight spaces.
Make sure to select a ratchet handle that matches the size and drive type of the sockets in your set. The most common drive sizes for automotive applications are 1/4-inch, 3/8-inch, and 1/2-inch.
Having a reliable socket set with a variety of socket sizes and a sturdy ratchet handle is essential when installing a throttle body spacer. These tools will enable you to complete the installation with ease and precision, ensuring optimal performance and efficiency for your vehicle.
Torque Wrench
Precise Tightening of Bolts and Nuts
One of the essential steps in installing a throttle body spacer is ensuring the precise tightening of bolts and nuts. This not only guarantees proper installation but also prevents any potential issues down the line. The use of a torque wrench is crucial to achieve the optimal torque value for each bolt and nut.
A torque wrench is a specialized tool that allows you to apply a specific amount of force while tightening bolts and nuts. It ensures that you don’t over-tighten or under-tighten them, which can lead to damage or poor performance.
Using a Torque Wrench
To achieve the precise tightening, follow these steps when using a torque wrench:
- Select the Correct Torque Value: Before starting, refer to the manufacturer’s instructions or a torque specification chart to determine the appropriate torque value for the specific bolts and nuts involved in the installation.
- Prepare the Torque Wrench: Set the torque wrench to the desired torque value using the adjustment knob or scale. Make sure it is properly calibrated to ensure accurate readings.
- Apply the Torque: Place the torque wrench on the bolt or nut and apply gradual and steady force in a clockwise direction until the wrench clicks or signals that the desired torque has been reached. This click indicates that the proper torque has been applied.
- Double-Check: After tightening, it’s always a good idea to double-check the torque on all the bolts and nuts. This helps to ensure that none were missed or mistakenly left loose.
Benefits of Using a Torque Wrench
Using a torque wrench offers numerous benefits, including:
- Accurate Tightening: The torque wrench allows you to accurately apply the correct amount of force, ensuring the bolts and nuts are tightened precisely as required by the manufacturer.
- Prevention of Damage: Over-tightening or under-tightening can damage the components or lead to leaks. A torque wrench helps to prevent these issues by providing the correct torque value.
- Consistency and Reliability: By using a torque wrench, you can ensure that each bolt and nut receives the same amount of torque, promoting consistency and reliability in the installation.
- Peace of Mind: Knowing that you have followed the manufacturer’s specifications and used a torque wrench to achieve the correct torque value gives you peace of mind that the throttle body spacer is installed correctly.
By following the steps above and utilizing a torque wrench during the installation of your throttle body spacer, you can ensure accurate and proper tightening of bolts and nuts, ultimately leading to a successful installation and improved performance of your vehicle.
Gasket Sealant
1. Ensures proper sealing of the throttle body spacer
Gasket sealant plays a crucial role in the installation of a throttle body spacer. It ensures proper sealing, preventing any air leaks that could affect the performance of your vehicle. Before installing the spacer, it is important to apply a thin layer of gasket sealant to create a tight and secure seal between the throttle body and the spacer.
2. How to apply gasket sealant
To apply gasket sealant, follow these simple steps:
- Clean the surfaces: Before applying the sealant, make sure the throttle body and spacer surfaces are clean and free from any dirt, oil, or debris. Use a suitable cleaning agent and a clean cloth to thoroughly clean both surfaces.
- Apply a thin layer: Using a small brush or your finger, apply a thin and even layer of gasket sealant to the mating surface of the throttle body. Ensure that the entire surface is covered, but avoid applying too much sealant as it can squeeze out when the spacer is installed.
- Place the spacer: Once the sealant is applied, carefully place the throttle body spacer onto the throttle body. Make sure it is aligned properly and press it down gently to create a good seal.
- Tighten the bolts: Use a torque wrench to tighten the bolts that secure the spacer to the throttle body. Follow the manufacturer’s recommended torque specifications to avoid damaging the components.
3. Benefits of using gasket sealant
Applying gasket sealant offers several benefits in addition to ensuring a proper seal:
- Prevents air leaks: Gasket sealant creates a barrier that prevents any air leaks between the throttle body and spacer. This helps maintain the desired air-to-fuel ratio and improves overall engine performance.
- Reduces vibration: The sealant acts as a cushion between the throttle body and spacer, reducing vibration and minimizing the chances of loosening bolts or creating noise.
- Protects against corrosion: Gasket sealant provides a protective layer that helps resist corrosion and extends the lifespan of the throttle body and spacer.
- Enhances durability: By effectively sealing the throttle body and spacer, gasket sealant ensures a secure and long-lasting installation that can withstand the rigors of engine operation.
By following these steps and using gasket sealant during the installation of your throttle body spacer, you can ensure a proper seal and enjoy the benefits it brings to your vehicle’s performance and longevity.
Cleaning Solvent
In order to optimize the performance of your engine and improve fuel efficiency, it is important to regularly clean your throttle body and intake manifold. One effective way to achieve this is by using a cleaning solvent. Cleaning solvents are specifically designed to break down dirt, carbon deposits, and other contaminants that accumulate over time, restoring your throttle body to its original condition. In this section, we will discuss how to clean the throttle body and intake manifold using a cleaning solvent, ensuring maximum effectiveness and longevity of your vehicle’s components.
Cleaning the Throttle Body
The throttle body is a critical component of your vehicle’s engine, regulating the amount of air entering the combustion chamber. Over time, carbon deposits and dirt can build up on the throttle body, affecting its performance. To clean the throttle body, follow these steps:
- Begin by disconnecting the negative battery cable to ensure safety.
- Locate the throttle body, usually positioned between the air intake and the intake manifold.
- Remove the intake air duct if necessary for easy access to the throttle body.
- Using a cleaning solvent specifically formulated for throttle bodies, apply the solvent to a clean cloth or a soft-bristled brush.
- Gently scrub the throttle body’s internal and external surfaces, paying close attention to areas with visible dirt or carbon buildup.
- Once clean, wipe away any excess solvent using a clean cloth.
- Reinstall the intake air duct, if previously removed, and reattach the negative battery cable.
By following these steps, you can effectively clean the throttle body, improving airflow and enhancing engine performance.
Cleaning the Intake Manifold
The intake manifold is responsible for distributing the air-fuel mixture to the engine’s cylinders. Over time, the intake manifold can become clogged with debris, affecting the efficiency of the combustion process. To clean the intake manifold, refer to the following guidelines:
- Before starting, make sure the engine is cool to avoid any risk of burns.
- Remove the intake manifold cover, if applicable, by loosening the fasteners.
- Inspect the intake manifold for any signs of dirt or deposits.
- Using a suitable cleaning solvent, spray the entire surface of the intake manifold.
- Allow the cleaning solvent to sit for a few minutes to break down the contaminants.
- Using a brush or a clean cloth, scrub the intake manifold to remove any remaining dirt or deposits.
- Once clean, rinse the intake manifold with water to remove any residue from the cleaning solvent.
- Allow the intake manifold to dry completely before reinstalling the cover.
Following these steps will ensure that your intake manifold is free from dirt and deposits, promoting optimal performance and longevity of your engine.
Regularly cleaning your throttle body and intake manifold using a cleaning solvent is essential for maintaining your vehicle’s performance and maximizing fuel efficiency. By incorporating this simple maintenance task into your routine, you can enhance the overall performance and lifespan of your engine.
Step 1: Prepare The Vehicle
Before installing a throttle body spacer, it’s important to properly prepare your vehicle. Follow these steps to ensure a smooth installation process:
Park the vehicle on a level surface
Parking your vehicle on a level surface is crucial for both your safety and the success of the installation. Find a flat area, away from any slopes or inclines, and put your vehicle in park or engage the parking brake.
Disconnect the negative battery cable
Now that your vehicle is securely parked, it’s time to disconnect the negative battery cable. This step is essential to prevent any electrical accidents or short circuits during the installation process.
To disconnect the negative battery cable, follow these simple steps:
- Open the hood of your vehicle and locate the negative terminal on your battery.
- Using appropriately sized wrench or pliers, loosen the clamp that holds the negative cable in place.
- Gently remove the cable from the terminal, ensuring it doesn’t accidentally make contact with any metal parts of your vehicle.
Once the negative battery cable is disconnected, you can proceed with the next steps of installing your throttle body spacer.
Step 2: Remove The Air Intake System
Step 2: Remove the Air Intake System
Removing the air intake system is an essential step in the installation process of a throttle body spacer. This step ensures easy access to the throttle body, enabling a smooth and efficient installation. In this step, we will guide you through the process of locating the air intake tube and disconnecting any hoses or clamps attached to the throttle body.
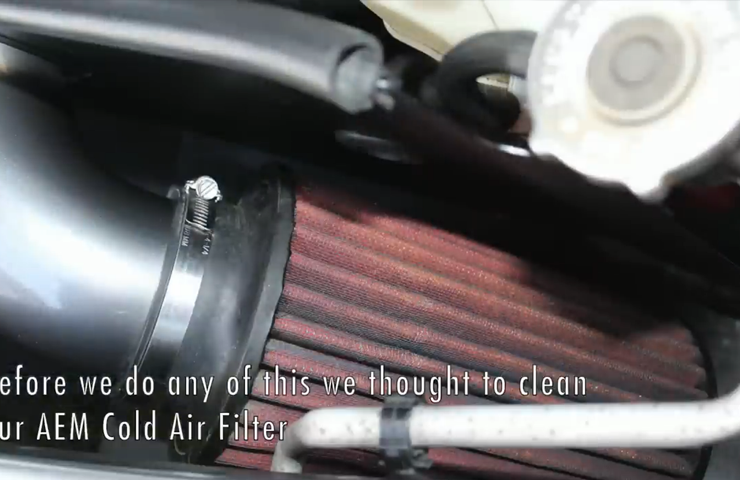
Locate the air intake tube
The air intake tube is usually located between the air filter box and the throttle body. It functions to deliver filtered air from the air filter to the throttle body, which then distributes it to the engine’s cylinders for combustion.
To locate the air intake tube:
- Open the hood of your vehicle and secure it using the provided hood support.
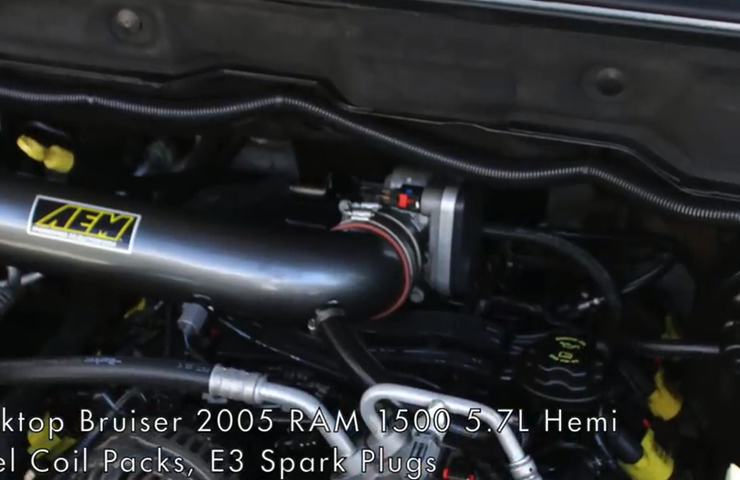
- Inspect the engine compartment and identify the air filter box. It is often a rectangular or cylindrical container made of plastic or metal.
- Follow the air intake tube connected to the air filter box until it reaches the throttle body. It may pass through various engine components, so be sure to trace it carefully.
- Note the position of any clamps or hoses attached to the air intake tube, as you will need to disconnect them in the next step.
Disconnect any hoses or clamps attached to the throttle body
Before proceeding with the removal of the air intake system, it is crucial to disconnect any hoses or clamps attached to the throttle body. This ensures a safe and smooth removal process.
To disconnect hoses or clamps:
- Identify the clamps or hoses attached to the throttle body, noted in the previous step.
- Use a pair of pliers to loosen and remove any clamps securing the hoses to the throttle body.
- Gently pull or twist the hoses to detach them from the throttle body, taking care not to damage any surrounding components.
- Set the disconnected hoses and clamps aside, making sure they are placed in a safe location where they won’t be misplaced.
By locating the air intake tube and disconnecting any hoses or clamps attached to the throttle body, you have successfully completed step 2 of the throttle body spacer installation process. In the next step, we will guide you through the proper removal of the throttle body.
Step 3: Remove The Throttle Body
Now that you have successfully identified the throttle body location and disconnected the electrical connections and hoses, it’s time to remove the throttle body from your vehicle. This step is crucial in order to install the throttle body spacer effectively and improve the overall performance of your engine.
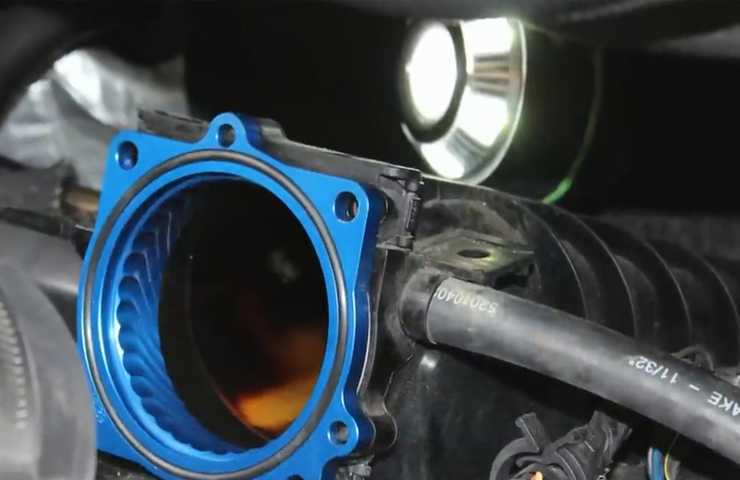
Identify the throttle body location
The throttle body is typically located between the air intake and the intake manifold. It is a cylindrical component with a butterfly valve that controls the airflow into the engine. To remove the throttle body, you first need to locate it in your vehicle.
Note: Before proceeding, make sure the engine is cool and the vehicle is in a safe position. Safety should always be the top priority.
Disconnect electrical connections and hoses
Once you have identified the throttle body, you need to disconnect the electrical connections and hoses attached to it. To do this, follow these steps:
- Start by carefully disconnecting the electrical connectors from the throttle body. These connectors control the sensors and actuators associated with the throttle body’s functionality.
- Next, remove any hoses connected to the throttle body. These hoses are usually used to supply coolant or vacuum to various components in the engine.
- Take your time and ensure that all electrical connections and hoses are properly disconnected. This will prevent any damage to the throttle body or surrounding components during the removal process.
Remove the bolts securing the throttle body
Now that the electrical connections and hoses are disconnected, it’s time to remove the bolts securing the throttle body to the intake manifold. Follow these steps:
- Using the appropriate socket or wrench, carefully loosen and remove the bolts securing the throttle body. These bolts are typically located at the perimeter of the throttle body.
- Make sure to keep track of the bolts and any necessary washers to ensure easy re-installation later on.
- Once the bolts are removed, gently wiggle and lift the throttle body away from the intake manifold. Be cautious not to damage any surrounding components.
Note: Some throttle bodies may have additional components attached, such as idle air control valves or throttle position sensors. Take extra care when removing these components, ensuring they are properly disconnected before removing the throttle body.
Conclusion
By carefully following these steps, you can successfully remove the throttle body from your vehicle in preparation for installing a throttle body spacer. Remember to exercise caution, be meticulous in your work, and ensure all electrical connections and hoses are properly disconnected before removing the throttle body. Once removed, you are one step closer to optimizing your engine’s performance.
Step 4: Clean The Throttle Body And Intake Manifold
One of the crucial steps in installing a throttle body spacer is ensuring that the throttle body and intake manifold are clean. Over time, carbon deposits can build up, affecting the performance of your vehicle. By cleaning these components, you not only prepare a clean surface for the throttle body spacer installation but also optimize your engine’s efficiency. Here’s how to clean the throttle body and intake manifold:
Use a cleaning solvent to remove carbon deposits
To effectively remove carbon deposits, you’ll need a cleaning solvent specifically designed for throttle bodies and intake manifolds. This solvent helps break down the carbon buildup, ensuring a thorough cleaning. Follow these steps:
- First, disconnect the air intake hose from the throttle body.
- Using a clean cloth, cover the intake port to prevent any debris from entering the engine.
- Spray the cleaning solvent generously on the throttle body, focusing on areas with visible carbon deposits.
- Gently scrub the throttle body with a soft-bristle brush or toothbrush to loosen the carbon buildup.
- After scrubbing, use a clean cloth to wipe away the loosened carbon debris.
- Repeat this process until the throttle body is free from carbon buildup.
- Next, move on to the intake manifold.
- Spray the cleaning solvent into the intake manifold, ensuring thorough coverage.
- Gently scrub the manifold’s interior surfaces with the brush to remove any carbon deposits.
- Wipe away the loosened carbon debris with a clean cloth.
- Continue the scrubbing and wiping process until the manifold is clean.
Properly cleaning the throttle body and intake manifold ensures that the throttle body spacer can be installed on a clean surface, maximizing its effectiveness in improving airflow and fuel atomization. Remember, a clean engine is a healthy engine!
Step 5: Install The Throttle Body Spacer
Now that you have properly prepared your throttle body and intake manifold, it’s time to install the throttle body spacer. This simple yet effective modification can improve your engine’s performance and fuel efficiency. Follow these steps to ensure a proper installation:
Apply gasket sealant to the throttle body spacer
Before installing the throttle body spacer, it’s important to apply gasket sealant to ensure a tight seal and prevent any air leaks. The gasket sealant acts as a barrier, creating a secure connection between the throttle body spacer and the intake manifold. Apply a thin layer of gasket sealant to both sides of the spacer.
Align the spacer with the intake manifold
Once the gasket sealant is applied, carefully align the throttle body spacer with the intake manifold. It’s crucial to ensure proper alignment to prevent any issues with the spacer’s installation or functionality. Take your time to align the bolt holes on the spacer with those on the intake manifold.
Secure the spacer with provided bolts
After aligning the throttle body spacer with the intake manifold, it’s time to secure it in place using the provided bolts. Make sure to use the appropriate torque specifications recommended by the manufacturer to prevent overtightening or undertightening. Secure each bolt gradually and evenly, ensuring a balanced and secure installation.
By following these steps, you can successfully install a throttle body spacer to enhance your engine’s performance. Remember to consult your vehicle’s manual or seek professional assistance if necessary. Enjoy the benefits of improved throttle response and fuel efficiency!
Step 6: Reinstall The Throttle Body
Step 6: Reattach electrical connections and hoses
Now that you have successfully cleaned the throttle body and installed the throttle body spacer, it’s time to move on to the next crucial step. Step 6 involves reattaching the electrical connections and hoses to ensure proper functioning of the throttle body.
The electrical connections and hoses are essential components that should be securely reattached. Failure to do so may result in poor throttle response and unwanted engine issues. Follow these simple steps to reattach them correctly:
Secure the throttle body with bolts
After reattaching the electrical connections and hoses, it’s time to secure the throttle body in place using bolts. This step is crucial to ensure that the throttle body remains stable during operation. Follow these steps to securely fasten the throttle body:
- Locate the bolt holes on the throttle body and align them with the corresponding holes on the engine intake manifold.
- Insert the bolts into the holes and tighten them using a suitable wrench or socket. Ensure that each bolt is tightened evenly to provide equal pressure on the throttle body.
- Refer to your vehicle’s manual for the recommended torque specifications. Use a torque wrench to tighten the bolts to the specified torque.
By securely fastening the throttle body with bolts, you can prevent any potential air leaks and ensure smooth airflow into the engine.
Conclusion
With the reattachment of the electrical connections and hoses, followed by the secure fastening of the throttle body with bolts, you have successfully completed the installation of the throttle body spacer. This step is crucial for the proper functioning of your vehicle’s throttle body, ensuring improved throttle response and potential performance gains. Now you can move on to the final step of the installation process – testing your newly installed throttle body spacer to experience its benefits firsthand.
Step 7: Reinstall The Air Intake System
After successfully installing the throttle body spacer, it’s time to move on to the next step – reinstalling the air intake system. This step is crucial as the proper alignment and connection of the hoses and clamps is essential to ensure optimum performance of your vehicle.
Reconnect hoses and clamps
Now that you have installed the throttle body spacer, it’s time to reconnect the hoses and clamps of the air intake system. Start by locating the hose connections on both ends of the air intake tube. Make sure to inspect the hoses for any signs of damage or wear before reconnecting them.
Once you have inspected the hoses, carefully reconnect them to their respective locations. Ensure that the hoses fit snugly onto the connectors. You can use the appropriate size clamps to secure the hoses in place, ensuring a tight and leak-free connection. Make sure to tighten the clamps adequately using the appropriate tools.
Ensure proper alignment
Proper alignment is crucial when reinstalling the air intake system. Ensure that all the components are aligned correctly to avoid any potential issues. First, make sure that the air intake tube is aligned with the throttle body spacer. It should fit securely and snugly without any gaps or misalignments.
Additionally, verify the alignment of the air filter box and the intake tube. They should align properly and securely connect to ensure a smooth flow of air into the engine. Misalignment of these components can lead to air leaks and reduced performance.
During the reinstallation process, make sure to double-check that all the connections are secure and aligned. Take your time to review each connection and ensure that they are properly fitted. Testing the system before proceeding can also help identify any misalignments or issues that need to be addressed.
By taking the time to reconnect hoses and clamps properly and ensure proper alignment during the reinstallation of the air intake system, you are setting yourself up for success. Proper alignment and secure connections will help optimize the performance of your throttle body spacer, contribute to a more efficient combustion process, and potentially enhance your vehicle’s overall performance.
Step 8: Reconnect The Battery
After completing the installation of a throttle body spacer, it is essential to reconnect the battery to ensure proper function and operation of your vehicle. Follow these steps to safely reconnect the battery:
Reconnect the negative battery cable
To begin, locate the negative battery cable, which is typically labeled with a “-” symbol. This cable is connected to the negative terminal of the battery. 1. Take note of the cable’s position and orientation before disconnecting it. This will make it easier to reconnect correctly later on. 2. Using a socket wrench or pliers, carefully loosen and remove the cable clamp that secures the negative cable to the battery terminal. Be cautious not to touch any metal surfaces with the wrench, as it may cause a spark. 3. Once the clamp is free, gently lift the negative cable away from the battery terminal, ensuring it is secured away from any metal surfaces to prevent accidental contact during the rest of the installation process.
Safely reconnecting the negative battery cable
Now that the throttle body spacer has been installed, it’s time to reconnect the negative battery cable to complete the process. Follow these steps to do so! 1. Hold the negative battery cable near the negative terminal of the battery, ensuring it is away from any metal surfaces. 2. Align the cable clamp with the negative terminal, making sure it is positioned correctly to avoid any potential issues during operation. 3. Slide the cable clamp onto the negative terminal, ensuring it fits securely over the terminal post. 4. Use a socket wrench or pliers to tighten the clamp, making sure it is snug but not overly tight. This will ensure a proper connection without risking damage to the battery or cable. And that’s it! The negative battery cable is now securely reconnected, and your throttle body spacer installation is complete. By following these steps and taking the necessary precautions, you can enjoy improved performance and efficiency with your vehicle. Remember, always refer to your vehicle’s owner manual for specific instructions and consult a professional if you are unsure about any part of the installation process.
Check For Compatibility
Before you begin the installation process of a throttle body spacer, it is crucial to ensure that it is compatible with your vehicle’s make and model. Using an incompatible throttle body spacer can lead to performance issues and potential damage to your engine.
Ensure the throttle body spacer is compatible with the vehicle’s make and model
Every vehicle is unique, and it is essential to find a throttle body spacer that matches your vehicle’s specifications. To determine compatibility, follow these steps:
- Consult your vehicle’s manual: Begin by referring to your vehicle’s manual or conducting a quick online search to identify the throttle body specifications and compatible parts for your make and model. Be sure to note the year of manufacture as well, as throttle body designs can change between different model years.
- Research trusted manufacturers: Look for reputable manufacturers that specialize in producing throttle body spacers for your specific vehicle make and model. These manufacturers often provide compatibility information on their websites or product packaging.
- Verify fitment details: Once you have identified a compatible throttle body spacer, check its fitment details. Pay attention to any specific compatibility notes or restrictions provided by the manufacturer. This information ensures that the spacer will fit correctly onto your vehicle’s throttle body without any modifications.
By following these steps, you can confidently choose a throttle body spacer that is compatible with your vehicle. Doing so will guarantee a smooth installation process, optimal performance, and longevity of your engine.
Follow Manufacturer’S Instructions
Refer to the Manufacturer’s Instructions for Specific Installation Steps
Installing a throttle body spacer can be a straightforward process when you follow the manufacturer’s instructions. Each brand and model may have slightly different requirements, so it’s essential to refer to the specific instructions provided by the manufacturer. By following these guidelines, you can ensure a proper installation and maximize the benefits of your new throttle body spacer.
Understanding the Importance of Manufacturer’s Instructions
The manufacturer’s instructions are designed to provide you with clear and concise steps for installing your throttle body spacer. These instructions are created based on the product’s specifications, ensuring that you achieve optimal performance and avoid any potential issues or damage. It’s essential to follow these instructions precisely, as improper installation can cause poor fitting, leaks, or even engine problems.
Preparing for the Installation Process
Prior to starting the installation, gather all the necessary tools and equipment mentioned in the manufacturer’s instructions. It’s important to have everything readily available, making your installation process more efficient and minimizing the risk of losing or misplacing any components. Double-check that you have the correct throttle body spacer for your vehicle’s make and model.
Step-by-Step Installation Guidelines
Once you have all the tools and equipment ready, carefully read through the manufacturer’s instructions. This will give you an understanding of the installation steps and any specific precautions you should take. The instructions will typically include a step-by-step guide with detailed descriptions and, in some cases, visual aids for clarity.
Below is a general outline of the installation process, although keep in mind that the steps may vary depending on the product:
- Start by disconnecting the negative battery cable to ensure your safety and prevent accidental electrical shocks during the installation.
- Locate the throttle body on your vehicle. Depending on the make and model, it can be found on the intake manifold.
- Carefully remove the throttle body from the intake manifold, taking note of any electrical connections or hoses that need to be detached.
- Clean the mounting surface of the intake manifold thoroughly to remove any dirt, debris, or old gasket material.
- Attach the new throttle body spacer onto the intake manifold, ensuring a snug fit without overtightening.
- Reinstall the throttle body, reconnecting any electrical connections or hoses that were detached earlier.
- Double-check all connections and tighten any bolts or clamps as per the manufacturer’s instructions.
- Reconnect the negative battery cable.
- Start the engine and observe any changes in performance. If everything is working correctly, you can now enjoy the benefits of your newly installed throttle body spacer.
Following the manufacturer’s instructions is crucial during the installation process to ensure a proper fit and avoid any potential issues. Additionally, the instructions may include specific torque values or extra precautions that are crucial for a successful installation. By adhering to the provided guidelines, you can confidently install your throttle body spacer and enhance your vehicle’s performance!
Double Check Connections And Tightness
Ensure all electrical connections and hoses are properly reconnected
After installing a throttle body spacer, it is crucial to double check all the electrical connections and hoses to ensure proper functionality of your vehicle. Any loose connections or improperly connected hoses can result in poor performance or even damage to your engine.
Start by visually inspecting all the electrical connectors and hoses. Make sure they are securely plugged in and properly aligned. If any connectors or hoses appear loose or disconnected, reattach them firmly.
Avoid exerting excessive force while reconnecting the electrical connectors and hoses, as it can cause damage. Gently push the connectors together until you hear a click or feel a firm connection. Verify that all the hoses are securely fastened to their corresponding connections.
If you had to disconnect any electronic components during the installation process, such as sensors or wiring harnesses, make sure to reconnect them properly as well. Refer to the vehicle’s manual or the spacer installation instructions for guidance.
Use a torque wrench for precise tightening of bolts
Next, it’s important to tighten all the bolts associated with the throttle body spacer to the manufacturer’s specifications. Using a torque wrench will ensure precise tightening and help prevent any leaks or damage. Refer to the instruction manual or the spacer manufacturer’s website for the recommended torque values for your specific vehicle.
When using a torque wrench, make sure it is set to the correct torque value. Slowly apply force to the bolt until you hear a click or feel the wrench slipping. This indicates that the bolt has reached the desired torque. Avoid over-tightening the bolts, as it can cause damage to the spacer or surrounding components.
Start by torquing the bolts in a crisscross pattern, gradually increasing the torque to the recommended value. This pattern helps distribute the tightening force evenly and ensures a secure fit. Repeat the process for all the bolts associated with the throttle body spacer.
Remember to periodically check the tightness of the bolts after installation, especially during the initial few days. Vibrations and engine heat can sometimes cause bolts to loosen. Ensure that all the bolts remain properly tightened to maintain optimal performance of your throttle body spacer.
Perform A Test Drive
Once you have successfully installed a throttle body spacer, it is essential to take your vehicle for a test drive to ensure proper functionality. This step is crucial to evaluate the impact of the installation and make any necessary adjustments for optimal performance. Here are a few things to keep in mind during the test drive:
1. Acceleration and Power
During your test drive, pay close attention to the acceleration and power of your vehicle. A well-installed throttle body spacer can improve airflow and fuel atomization, resulting in enhanced engine performance. Notice if you experience smoother acceleration and increased power, especially when passing or merging onto highways.
2. Fuel Economy
Another benefit of a throttle body spacer is the potential improvement in fuel economy. This is achieved by creating a better air-fuel mixture, which can optimize combustion efficiency. Monitor your fuel consumption during the test drive to observe any changes in mileage. Keep in mind that driving conditions, such as traffic and terrain, can also impact fuel economy.
3. Throttle Response
A throttle body spacer can enhance throttle response, allowing for quicker and more precise control over acceleration. Pay attention to how the vehicle responds when you press the accelerator pedal. Is there a noticeable decrease in lag time between pressing the pedal and the engine’s response? Improved throttle response can significantly enhance the driving experience.
4. Engine Noise and Vibrations
During the test drive, listen carefully for any abnormal engine noise or vibrations. Although a properly installed throttle body spacer should not cause any issues, it’s essential to be vigilant and notice any unexpected changes. Unusual noises or vibrations may indicate a loose connection or installation error that requires immediate attention.
5. Overall Driving Experience
Lastly, assess your overall driving experience after installing the throttle body spacer. Does the vehicle feel more responsive and enjoyable to drive? Are there any noticeable improvements in performance or comfort? Consider how these changes align with your expectations and goals for installing the throttle body spacer.
In conclusion, a test drive after installing a throttle body spacer is necessary to ensure proper functionality and assess the effects of the modification. By paying attention to acceleration, power, fuel economy, throttle response, engine noise, and overall driving experience, you can determine if the installation has yielded the desired improvements. Remember to make any necessary adjustments or seek professional assistance if you encounter any issues during the test drive.
Regular Maintenance
Periodically inspect the throttle body spacer for any signs of wear or loosening
When it comes to regular maintenance of your throttle body spacer, it is essential to periodically inspect it for any signs of wear or loosening. This simple task can help ensure that your throttle body spacer is functioning optimally and prolong its lifespan. To inspect the throttle body spacer, start by visually examining it for any visible signs of wear, such as cracks, dents, or corroded surfaces. Additionally, check for any loose bolts or screws that may need tightening. Regular inspection will help you catch any potential issues early on and prevent further damage.
Tips for inspecting the throttle body spacer:
- Use a flashlight to thoroughly examine the spacer for any hidden damages or loose components.
- If you notice any cracks or significant wear, it is important to consider replacing the throttle body spacer to maintain optimal performance.
- Tighten any loose bolts or screws using the appropriate tools to ensure a secure fit.
Remember, the throttle body spacer plays a crucial role in enhancing your vehicle’s performance and fuel economy. Regular inspection will help you identify any potential issues early on and address them promptly, ensuring your vehicle continues to operate at its best.
Maintaining the performance of your throttle body spacer
To maintain the performance of your throttle body spacer, it’s important to follow a few additional maintenance steps. Here are some tips to keep in mind:
- Keep the throttle body spacer clean by wiping it down with a clean, lint-free cloth regularly. This will remove any dirt, dust, or debris that can build up over time.
- Inspect the seals and gaskets around the throttle body spacer for any signs of wear or leakage. Replace them if necessary to prevent any loss of performance.
- Ensure that the throttle body spacer is properly aligned with the intake manifold to maximize its effectiveness. Consult your vehicle’s manual or seek professional assistance if needed.
By following these maintenance tips, you can ensure that your throttle body spacer continues to deliver the performance benefits it promises. Regular inspection and maintenance are key to maximizing its lifespan and keeping your vehicle running smoothly. In conclusion, regular maintenance of your throttle body spacer is crucial for optimal performance. Periodically inspecting it for any signs of wear or loosening, and following the maintenance tips mentioned above, will help ensure its longevity and keep your vehicle performing at its best.
Frequently Asked Questions For How To Install A Throttle Body Spacer
Are Throttle Body Spacers Hard To Install?
Throttle body spacers are not hard to install. They can be easily installed without professional assistance. Following the provided instructions will help ensure a smooth installation process.
Which Way Does A Throttle Body Spacer Go?
A throttle body spacer should be installed with the thicker side facing the throttle body and the thinner side facing the intake manifold. It helps improve airflow and increase horsepower.
Does Throttle Body Spacers Really Work?
Throttle body spacers can improve airflow, leading to increased horsepower and fuel efficiency. However, their effectiveness varies depending on the vehicle and engine. It’s recommended to do thorough research and consult with experts before investing in a throttle body spacer.
Does A Throttle Body Spacer Require A Tune?
No, a throttle body spacer does not require a tune.
Conclusion
Adding a throttle body spacer can be a simple yet effective way to enhance your engine’s performance. By increasing air flow and improving fuel atomization, the spacer can help improve throttle response, increase horsepower, and even enhance fuel efficiency. With the proper tools and instructions, installing a throttle body spacer can be a DIY project that any car enthusiast can tackle.
Take your time, follow the steps carefully, and enjoy the benefits of a smoother and more efficient engine performance.