To install a step bumper receiver, position the receiver under the bumper, align the holes, and secure it with bolts. Now, let’s dive into a detailed guide on installing a step bumper receiver.
The step bumper receiver is an essential accessory for your vehicle, as it allows you to tow trailers and mount accessories such as bike racks or cargo carriers. Installing a step bumper receiver is a straightforward process that can be done with basic tools.
In this guide, we will provide step-by-step instructions on how to install a step bumper receiver on your vehicle. So, let’s get started!
Choosing The Right Step Bumper Receiver
When it comes to installing a step bumper receiver, one of the most crucial steps is choosing the right one for your specific needs. The step bumper receiver acts as a crucial link between your vehicle and towing equipment, providing a strong and secure connection. It is essential to select a step bumper receiver that is compatible with your vehicle and can withstand the weight and demands of your towing requirements.
Factors to consider when selecting a step bumper receiver:
Before making your purchase, there are a few vital factors to take into consideration to ensure you choose the right step bumper receiver:
1. Vehicle Compatibility: Not all step bumper receivers are created equal, and it’s important to choose one that is specifically designed to fit your vehicle. Consider the make, model, and year of your vehicle to ensure a proper fit.
2. Towing Capacity: The towing capacity of your vehicle plays a significant role in determining the right step bumper receiver. Check your vehicle’s owner’s manual or consult a professional to understand the maximum weight your vehicle can safely tow.
3. Receiver Size: Step bumper receivers come in different sizes, commonly 1 1/4-inch or 2-inch. Ensure that the receiver size you choose matches the towing equipment you plan to use.
4. Build Quality: The quality and durability of the step bumper receiver are imperative for ensuring a safe and secure towing experience. Look for receivers made from high-quality materials such as steel, which offer strength and resistance to corrosion.
5. Additional Features: Some step bumper receivers come with additional features such as built-in electrical connectors or anti-rattle systems. These features can enhance your towing experience and provide added convenience.
Benefits of installing a step bumper receiver:
Installing a step bumper receiver offers several benefits that make it a worthwhile investment for any vehicle owner:
- Enhanced Towing Capability: A step bumper receiver provides a secure attachment point for towing equipment, allowing you to safely tow trailers, boats, or other heavy loads.
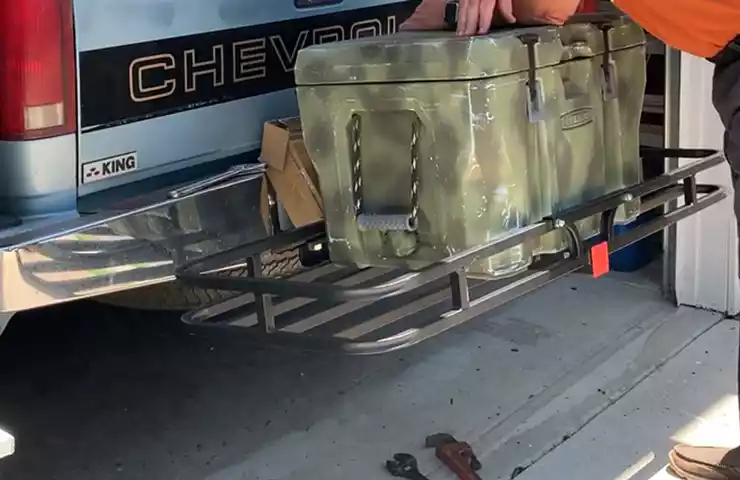
- Versatility: With a step bumper receiver, you can easily switch between different towing accessories, such as bike racks or cargo carriers, according to your specific needs.
- Improved Safety: By using a step bumper receiver, you can ensure a reliable and stable connection between your vehicle and towing equipment, reducing the risk of accidents or trailer sway.
- Convenience: Step bumper receivers are designed to be user-friendly, allowing for easy installation and removal. This convenience factor makes it simpler to switch between towing and regular vehicle use.
- Protection: Step bumper receivers also offer added protection to your vehicle’s rear end, acting as a shield against minor bumps, scrapes, and accidents.
- Aesthetic Appeal: Many step bumper receivers are available in sleek and stylish designs, adding a visual upgrade to your vehicle’s rear appearance.
Tools And Materials Needed
When it comes to installing a step bumper receiver, having the right tools and materials is essential to ensure a smooth and successful process. In this section, we will discuss the various tools and materials you will need to complete the installation. Let’s dive in!
Essential tools required for the installation process
Before you start the installation, make sure you have the following tools on hand:
- A socket set with various sizes
- A ratchet
- A torque wrench
- A breaker bar
- A wrench set
- A drill with drill bits
- A saw (if modifications to the bumper are necessary)
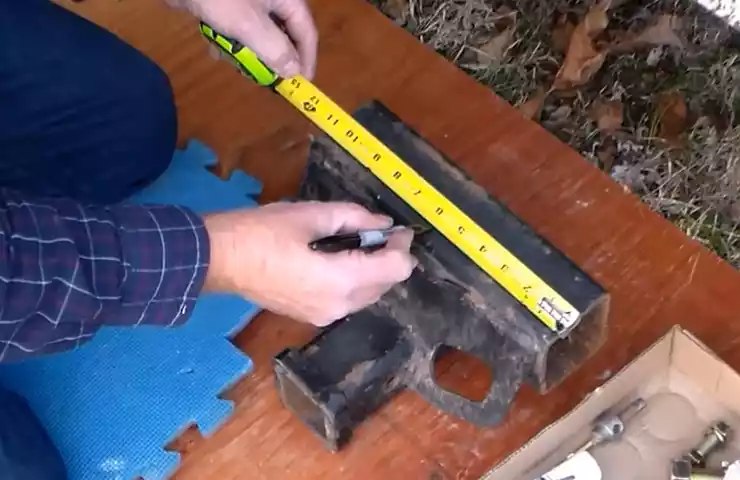
- A measuring tape
- Protective gloves
- Safety goggles
- A jack and jack stands
Having these tools readily available will ensure that you can tackle any challenges that may arise during the installation process, making the whole experience much easier and more efficient.
Materials required for installing a step bumper receiver
In addition to the tools, you will also need the following materials:
- A step bumper receiver kit
- Mounting brackets and hardware
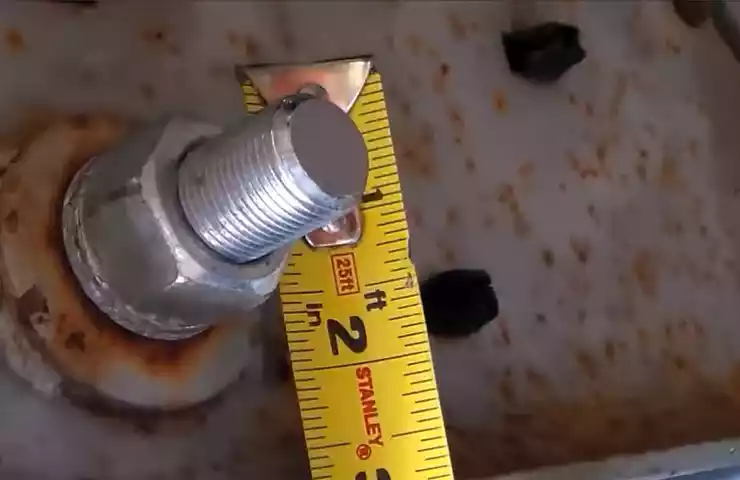
- Bolts, nuts, and washers
- Electrical tape
- Wire connectors
- A paint or rust-proofing spray (if desired)
It is crucial to ensure that you have all these materials before you start the installation process. It will save you time and prevent any unnecessary delays or interruptions.
With the right tools and materials at your disposal, you are now ready to embark on the installation journey. In the next section, we will guide you through the step-by-step process of installing a step bumper receiver.
Step-By-Step Guide To Install A Step Bumper Receiver
Installing a step bumper receiver can greatly enhance the functionality and versatility of your vehicle. Whether you’re hauling trailers, attaching bike racks, or adding storage solutions, a step bumper receiver provides the flexibility you need. In this step-by-step guide, we will walk you through the process of installing a step bumper receiver to ensure a safe and secure installation that meets your needs.
Step 1: Preparing your vehicle for installation
Before you start the installation process, it’s important to prepare your vehicle and gather the necessary equipment and materials. This will help streamline the installation process and ensure a smooth experience. Follow these steps:
- Gather necessary equipment and materials:
| Socket set | Wrench | Wire cutters |
| Electrical tape | Wire connectors | Level |
- Ensure a safe working environment:
- Park your vehicle on a level surface and engage the parking brake.
- Wear appropriate safety gear, such as gloves and protective eyewear.
- Work in a well-ventilated area to avoid inhaling harmful fumes.
Step 2: Removing the existing bumper (if applicable)

If you have an existing bumper that needs to be removed, follow these proper techniques for bumper removal:
- Consult your vehicle’s manual for specific instructions on bumper removal.
- Use a socket set or wrench to loosen and remove the bolts securing the bumper.
- Have a friend or assistant help you carefully lift and remove the bumper from your vehicle.
Step 3: Installing the step bumper receiver
Now that you have prepared the vehicle and removed the existing bumper (if applicable), it’s time to install the step bumper receiver. Follow these steps:
- Positioning the receiver correctly:
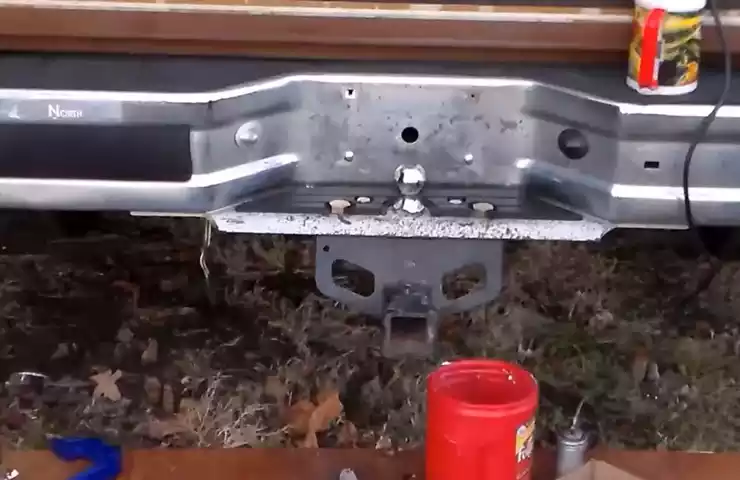
Align the step bumper receiver with the mounting holes on your vehicle. Use a level to ensure it is straight and aligned properly.
- Tightening the bolts securely:
Apply a suitable thread-locking fluid to the bolts before securing them. Use a socket set or wrench to tighten the bolts securely, ensuring the step bumper receiver is firmly attached to your vehicle.
Step 4: Wiring and electrical connections
Wiring and electrical connections are essential for the proper functioning of your step bumper receiver. Follow these steps:
- Connecting the wiring harness:
Locate the wiring harness that comes with your step bumper receiver. Connect the wires to the corresponding electrical connections on your vehicle. Use wire connectors and electrical tape to secure the connections and prevent them from coming loose.
- Testing the electrical components:
Turn on your vehicle’s electrical system and test the step bumper receiver’s electrical components, such as the lights or trailer connectors, to ensure they are functioning correctly.
Step 5: Securing the step bumper receiver

For a secure and stable installation, it’s crucial to follow these steps to ensure the step bumper receiver is properly secured:
- Ensuring stability and alignment:
Double-check the alignment of the step bumper receiver and make any necessary adjustments. Use a level to ensure the receiver is level and aligned with your vehicle’s frame.
- Properly fastening all components:
Tighten all bolts and fasteners securely, ensuring each component of the step bumper receiver is properly fastened. This will help prevent any potential issues during use and ensure the longevity of your installation.
Tips And Troubleshooting During Installation
Tips and Troubleshooting during Installation
Installing a step bumper receiver can be a challenging task, but with the right techniques and troubleshooting methods, you can ensure a smooth and successful installation. In this section, we will discuss some common challenges that you may encounter during the installation process and provide helpful tips to troubleshoot any issues that may arise.
Common challenges faced during installation
When installing a step bumper receiver, it’s important to be aware of the potential challenges that may come your way. By understanding these common issues, you can be better prepared and take necessary precautions to overcome them. Here are a few challenges you may encounter:
- Difficulty aligning the receiver with the mounting holes
- Tight fit due to variations in vehicle models
- Loose or missing hardware
- Issues with electrical connections, if applicable
Troubleshooting techniques for any issues that arise
If you face any of the challenges mentioned above, don’t worry! There are several troubleshooting techniques you can try to overcome these issues and successfully install your step bumper receiver:
- Aligning the receiver: If you’re having difficulty aligning the mounting holes, try using a rubber mallet or a wooden block and a hammer to gently tap the receiver into position. Make sure to follow the manufacturer’s instructions and use caution to avoid damaging the receiver or the vehicle’s bumper.
- Tight fit: Due to variations in vehicle models, you may encounter a tight fit when installing the step bumper receiver. In this case, it can be helpful to use a lubricant such as WD-40 to make the installation process smoother. Apply the lubricant to the mounting points and the receiver, then try fitting them together again.
- Missing hardware: If you discover that you are missing any necessary hardware during the installation process, reach out to the manufacturer or supplier immediately. They will be able to provide you with the missing parts or guide you on alternative solutions.
- Electrical connections: If your step bumper receiver includes electrical components, such as wiring for trailer lights, make sure to carefully follow the wiring diagram provided with the product. If you face any issues with the electrical connections, double-check that all the wires are properly connected and that there are no loose connections. You can also use a multimeter to test the electrical connections for continuity.

By being aware of the common challenges faced during the installation of a step bumper receiver and employing these troubleshooting techniques, you can overcome any issues that arise and ensure a successful installation. Remember to take your time, follow the manufacturer’s instructions, and seek professional help if needed. With the right approach, you’ll have your step bumper receiver installed securely and ready to enhance the functionality of your vehicle.
Maintenance And Safety Considerations
Maintenance and Safety Considerations
When it comes to installing a step bumper receiver, there are two important factors that cannot be overlooked – maintenance and safety. Regular maintenance ensures the longevity and optimal functionality of the receiver, while following safety precautions is essential to prevent accidents and injuries. In this section, we will discuss some helpful tips for regular maintenance and important safety precautions to follow when using a step bumper receiver.
Regular maintenance tips for a step bumper receiver
Maintaining a step bumper receiver doesn’t have to be complicated. By following these simple steps, you can keep it in excellent condition for years to come:
| Regular Maintenance Tips |
|---|
| 1. Inspect the receiver and mounting hardware regularly for any signs of wear or damage. Replace any worn-out or damaged parts immediately to ensure the safety and functionality of your step bumper receiver. |
| 2. Clean the receiver regularly using mild soap and water. Avoid using harsh chemicals or abrasive cleaners, as they can damage the finish and protective coating. |
| 3. Apply a high-quality wax or protective coating to the receiver to prevent rust and corrosion. |
| 4. Lubricate the moving parts of the receiver, such as the hitch pin or receiver tube, with a suitable lubricant to ensure smooth operation. |
| 5. Finally, always refer to the manufacturer’s instructions for specific maintenance guidelines and intervals. |

Safety precautions to follow when using a step bumper receiver
Using a step bumper receiver without taking proper safety precautions can be dangerous. Here are some important guidelines to ensure your safety:
- Always check the weight capacity of your step bumper receiver and make sure it is suitable for the load you intend to carry. Overloading the receiver can cause accidents and damage to your vehicle.
- Inspect the towing equipment, including the hitch, ball mount, and safety chains, before each use. Ensure they are secure and free from any damage or defects.
- Attach safety chains correctly, crossing them under the trailer tongue to prevent it from falling in the event of a hitch failure.
- When towing, maintain a safe distance from other vehicles and drive at a moderate speed. Avoid sudden braking or accelerating, as it can put additional stress on the receiver and compromise its integrity.
- Regularly check the receiver and towing equipment during long trips to ensure everything remains secure and in good condition.
By following these maintenance tips and safety precautions, you can maximize the lifespan of your step bumper receiver and use it with confidence. Remember, safety should always be your top priority when using any towing equipment.
Frequently Asked Questions For How To Install A Step Bumper Receiver
What Is The Difference Between A Step Bumper And A Receiver Hitch?
A step bumper is designed to provide easier access to the truck bed and protect the vehicle’s rear. A receiver hitch, on the other hand, is used to tow trailers or attach other accessories like bike racks. Both serve different purposes to enhance the functionality of a vehicle.
How Do You Install A Car Hitch Receiver?
To install a car hitch receiver, follow these steps: 1. Gather the necessary tools and safety equipment. 2. Position the receiver under the vehicle’s frame and secure it in place. 3. Use a drill to create holes for the mounting hardware.
4. Install the mounting hardware and tighten it securely. 5. Finally, attach the hitch ball and safety chains. Enjoy your newly installed car hitch receiver!
How Much Can I Tow With A Bumper Hitch?
A bumper hitch can typically tow up to 3,500 pounds, but it is important to check your specific vehicle’s towing capacity to ensure safe towing.
What Is A Step Bumper Receiver?
A step bumper receiver is a hitch-style attachment that is installed on the rear bumper of a vehicle. It allows for the connection of various towing accessories, such as bike racks or cargo carriers, making it easier to transport items.
Conclusion
Installing a step bumper receiver is a simple task that can greatly enhance the functionality of your vehicle. By following these step-by-step instructions, you can easily add a receiver to your bumper and enjoy the benefits of increased towing capacity and versatility.
Remember to choose a receiver that matches your vehicle’s specifications and always prioritize safety during the installation process. Happy towing!
