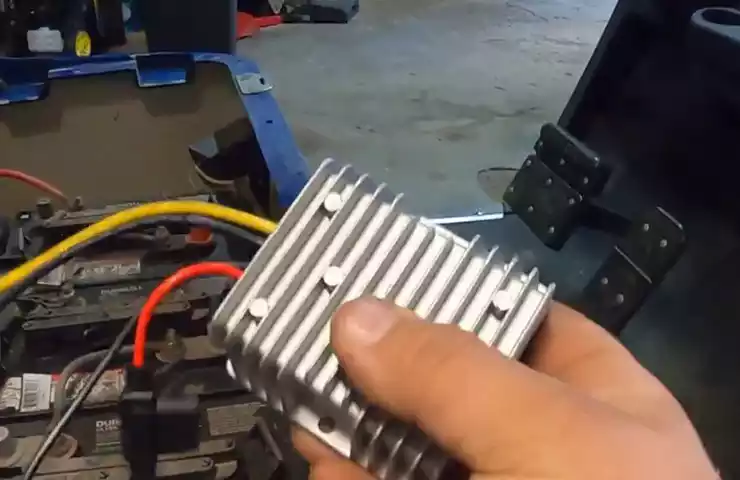
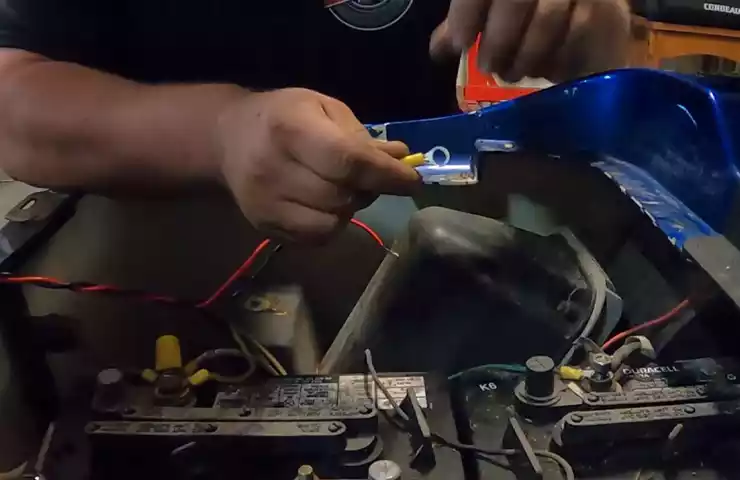
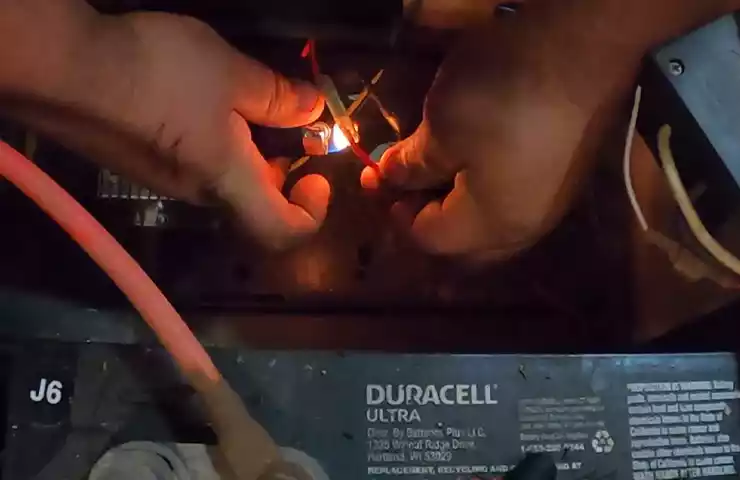
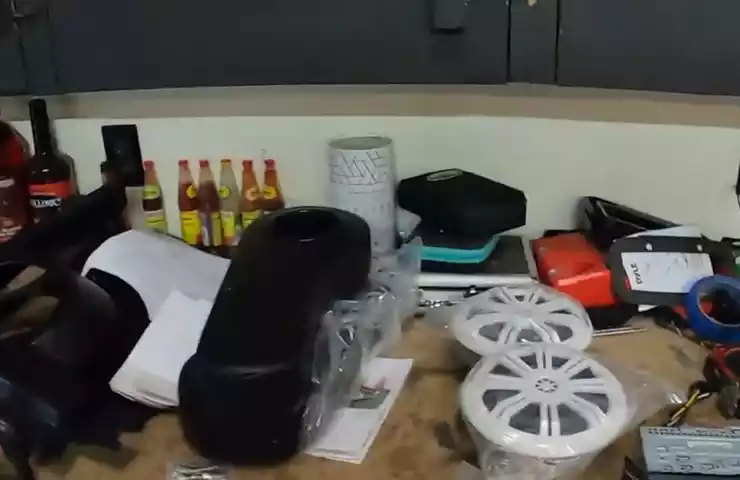
To install a radio in an EZGO golf cart, you will need to follow a simple step-by-step process. First, disconnect the negative battery cable.
Then, remove the dash panel and mount the radio using the provided brackets. Next, connect the wiring harness to the radio and attach the antenna. Finally, reassemble the dash panel and reconnect the negative battery cable to complete the installation.
By carefully following these instructions, you can easily add a radio to your EZGO golf cart for an enhanced entertainment experience while on the course.
Required Tools And Materials
The installation of a radio in an EZGO golf cart can greatly enhance your driving experience by allowing you to enjoy your favorite music or radio stations while on the course. To get started, you will need a few tools and materials to ensure a proper installation. In this section, we will discuss the required tools and materials needed to install a radio in your EZGO golf cart.
Radio unit
The first and most important item you will need is the radio unit itself. Choose a radio unit that is specifically designed for use in a golf cart and offers features that suit your preferences, such as Bluetooth connectivity or USB ports for device charging.
Wiring harness
A wiring harness is crucial for connecting your radio unit to the electrical system of your EZGO golf cart. It simplifies the installation process by providing a plug-and-play connection between the radio and the cart’s wiring. Make sure to get a wiring harness that is compatible with your specific golf cart model.
Mounting brackets
To securely install the radio unit in your golf cart, you will need mounting brackets. These brackets are designed to fit the radio unit and provide a stable and secure attachment to the cart’s dashboard or other suitable locations.
Screwdriver
A screwdriver is an essential tool for removing and securing screws during the installation process. Make sure to have a screwdriver with the appropriate size and type of screw heads for your specific radio unit and mounting brackets.
Wire cutter/stripper
Having a wire cutter/stripper is important for making clean and precise cuts in the wiring and stripping the insulation off the wires. This tool allows you to properly connect the wires from the radio unit to the wiring harness without any loose connections.
Electrical tape
Electrical tape is used to insulate and protect the exposed wires, ensuring a safe and secure connection. Wrap the electrical tape around the connections to prevent any potential short circuits or damage to the electrical system.
By gathering these required tools and materials, you will be well-prepared for the installation process of a radio in your EZGO golf cart. In the next section, we will guide you through the step-by-step process of installing the radio unit and connecting it to your golf cart’s electrical system.
Preparing The Golf Cart
Ensure the Golf Cart is in a Safe and Stable Position
Before starting the installation process of a radio in your EZGO golf cart, it is crucial to ensure that the cart is positioned in a safe and stable manner. This will not only help prevent accidents but also provide you with a comfortable working environment. Here are some steps to follow to ensure the safety and stability of your golf cart:
- Park the golf cart on a flat and level surface. This will minimize the risk of the cart rolling or tipping over while you work on it.
- Engage the parking brake of the golf cart to ensure it stays in place and doesn’t move unexpectedly.
- Block the wheels with wheel chocks or blocks to provide an extra layer of stability and prevent any unintentional movement.
Disconnect the Battery to Avoid Any Electrical Hazards
Taking the necessary precautions when installing a radio in your EZGO golf cart is crucial, and one vital step is to disconnect the battery beforehand. This will help eliminate the risk of electrical shocks or short circuits during the installation process. Follow these simple steps to safely disconnect the battery:
- Locate the battery compartment in your golf cart. Refer to the manufacturer’s manual if you’re unsure about its location.
- Identify the positive and negative terminals of the battery. The positive terminal will typically be marked with a “+” sign, while the negative terminal will be marked with a “-” sign.
- Using a wrench or pliers, loosen the bolts or screws that secure the cables to the battery terminals. Start by disconnecting the negative (black) cable first, followed by the positive (red) cable.
- Once both cables are disconnected, carefully lift the battery out of its compartment and set it aside in a safe location, away from the installation area.
Remove Any Existing Accessories or Components That May Hinder the Installation Process

Before proceeding with the installation of your new radio, it’s essential to remove any existing accessories or components that may hinder the process or interfere with the new radio’s placement. Follow these steps to clear the way for a smooth and successful installation:
- Assess the golf cart and identify any accessories or components, such as cup holders, storage compartments, or other attachments that obstruct the area where the radio will be installed.
- Remove these accessories or components by carefully unscrewing or disconnecting them from the golf cart. Refer to the manufacturer’s manual or consult an expert if you’re unsure about the removal process.
- Set aside the removed accessories or components in a safe location, ensuring they are not damaged or misplaced during the installation process.
By adhering to these preparatory steps, you’ll create a safe and organized environment for installing a radio in your EZGO golf cart. Following the necessary safety measures and ensuring a clear installation space will make the process smoother and guarantee optimum results for your golf cart entertainment system.
Removing The Dash Panel
Before installing a radio in your Ezgo Golf Cart, you will need to remove the dash panel. This step is essential to gain access to the wiring and components necessary for the installation. In this section, we will guide you through the process of removing the dash panel using a few simple steps.
Locate the screws or bolts holding the dash panel in place
The first step in removing the dash panel is to locate the screws or bolts that are holding it in place. These screws or bolts may vary depending on the model of your Ezgo Golf Cart, but they are typically located around the edges of the dash panel.
To locate the screws or bolts, visually examine the dash panel and look for small recessed holes or slots. These are usually indicators that there are screws or bolts underneath. Use your fingers or a small tool to feel for any screws or bolts in these areas.
Use a screwdriver or appropriate tool to remove the screws/bolts
Once you have located the screws or bolts, you will need to use a screwdriver or an appropriate tool to remove them. Ensure that you have the right size and type of screwdriver or tool to avoid stripping the screws or bolts.
Insert the screwdriver or tool into the screws or bolts and turn counterclockwise to loosen them. Apply slight pressure if necessary, but be careful not to use excessive force as this can cause damage.
Gently pry off the dash panel, taking care not to damage any wires or components
After removing the screws or bolts, you can gently pry off the dash panel. Start by applying even pressure along the edges of the panel, gradually working your way around. Be cautious and handle the panel with care to prevent any damage to the wires or components behind it.
If you encounter any resistance while prying off the panel, double-check that you have removed all the screws or bolts. Sometimes, there may be hidden fasteners that need to be removed before the panel can be fully detached.
Once the dash panel is loose, slowly lift it away from the Golf Cart, ensuring that no wires or components are still attached. If you notice any wires or connectors, gently disconnect them using your hands or pliers, if necessary.
With the dash panel removed, you now have access to the wiring and components needed to install a radio in your Ezgo Golf Cart. Stay tuned for the next section, where we will guide you through the process of installing the radio.
Installing The Mounting Brackets
Installing the mounting brackets is an essential step in the process of installing a radio in your Ezgo golf cart. These brackets are responsible for holding the radio unit securely in place on the golf cart dash. Follow the manufacturer’s instructions carefully to ensure proper installation. In this section, we will discuss how to attach the mounting brackets to the radio unit and align them with the designated holes on the golf cart dash. Let’s get started!
Attach the mounting brackets to the radio unit according to the manufacturer’s instructions
To begin, refer to the manufacturer’s instructions that came with your radio unit. These instructions will provide you with the specific steps to attach the mounting brackets correctly. Typically, the brackets will come with screws or other fasteners that are used to secure them to the radio unit.
Here’s a step-by-step guide on how to attach the mounting brackets to the radio unit:
- Place the radio unit on a stable surface for easy access.
- Identify the mounting bracket screw holes on the radio unit.
- Align the brackets with the screw holes, ensuring they are positioned correctly.
- Securely attach the brackets to the radio unit by tightening the screws or fasteners provided.
- Ensure that the brackets are firmly attached to the radio unit to prevent any wobbling or movement during operation.
Align the brackets with the designated holes on the golf cart dash

Once you have attached the mounting brackets to the radio unit, it’s time to align them with the designated holes on the golf cart dash. This step is crucial as it ensures a snug fit and stability of the radio unit within the cart.
Follow these steps to align the brackets with the designated holes on the golf cart dash:
- Locate the designated holes on the golf cart dash where the radio will be installed.
- Hold the radio unit with the attached brackets in front of the designated holes.
- Carefully align the brackets with the holes, ensuring they are centered and level.
- Check that the brackets are aligned correctly and any necessary adjustments are made before proceeding.
Secure the brackets by tightening the screws provided
After aligning the brackets with the designated holes, it’s time to secure them in place by tightening the screws provided. Tightening the screws ensures that the brackets are firmly held in position on the golf cart dash.
Here’s how you can securely attach the brackets:
- Using the appropriate screwdriver or wrench, tighten the screws provided with the brackets.
- Make sure to tighten the screws evenly on both sides to maintain balance.
- Periodically check the tightness of the screws to ensure the brackets remain secure over time.
By following these steps, you will have successfully installed the mounting brackets for your radio in your Ezgo golf cart. This secure installation ensures that your radio unit stays in place throughout your golf cart adventures. In the next section, we will discuss the wiring process to connect the radio to the power source. Stay tuned!
Wiring The Radio
Connect the wiring harness to the back of the radio unit
When it comes to installing a radio in your Ezgo golf cart, wiring is a crucial step that you don’t want to overlook. The wiring harness is what connects the radio unit to the golf cart’s electrical system, allowing you to enjoy your favorite tunes while cruising around the golf course. To start, locate the wiring harness that comes with your radio unit. This harness will typically have a plug on one end that matches the plug on the back of the radio unit. Simply insert the plug into the radio unit until it clicks into place securely.
Match the colors of the wires from the harness to the corresponding wires on the golf cart’s wiring system
Once the wiring harness is connected to the radio unit, it’s time to make the necessary connections to the golf cart’s wiring system. The wiring harness will have several colored wires, each serving a specific function. To ensure a proper connection, you need to match the colors of the wires from the harness to the corresponding wires on the golf cart. For example, if the harness has a red wire, you’ll need to find the red wire in the golf cart’s wiring system. It’s important to match the colors accurately, as improper connections may result in malfunctioning or even damage to the radio unit.
Use wire connectors or electrical tape to secure the connections
After matching the colors of the wires, it’s time to secure the connections. There are a few different methods you can use to do this, but the most common ones are wire connectors and electrical tape. Wire connectors are small plastic caps that you twist onto the exposed ends of the wires, ensuring a secure and reliable connection. On the other hand, electrical tape can be wrapped around the exposed ends of the wires, providing insulation and sealing out any moisture or debris that could cause issues down the line. Whichever method you choose, make sure that each connection is tightly secured to prevent any loose wires that could lead to a poor audio experience. To summarize, wiring the radio in your Ezgo golf cart requires connecting the wiring harness to the back of the radio unit, matching the colors of the wires from the harness to the corresponding wires on the golf cart’s wiring system, and using wire connectors or electrical tape to secure the connections. By following these steps, you’ll be able to enjoy your favorite music or radio stations while cruising around the golf course in style.
Mounting The Radio
Mounting the radio is an important step in the installation process, as it ensures that the unit is securely held in place and aligns properly with the dash panel opening of your Ezgo golf cart. This section will guide you through the necessary steps to mount your radio unit with ease.
Gently slide the radio unit into the mounting brackets
The first step in mounting your radio is to gently slide the unit into the mounting brackets. These brackets are specifically designed to hold the radio securely in place, preventing any unnecessary movement or damage while driving.
To do this, locate the mounting brackets on either side of the radio opening in your golf cart’s dash panel. Carefully align the radio unit with the brackets, ensuring that it is positioned correctly for a proper fit.
Ensure that it fits securely and aligns properly with the dash panel opening

Once you have slid the radio unit into the mounting brackets, it is crucial to ensure that it fits securely and aligns properly with the dash panel opening. This step is important to maintain a neat and professional look.
Take a moment to inspect the alignment of the radio unit with the dash panel opening. Make any necessary adjustments to ensure that the radio is centered and sits flush with the surrounding dash panel.
Tighten any additional screws or bolts to hold the radio in place
After ensuring that the radio unit fits securely and aligns properly, the next step is to tighten any additional screws or bolts to hold the radio in place. This will provide extra stability and prevent any unwanted movement or rattling.
Refer to the manufacturer’s instructions or the mounting kit that came with your radio to locate any supplemental screws or bolts. Carefully tighten each one, ensuring that they are securely fastened but not overtightened, as this may damage the radio or the mounting brackets.
Take a final moment to double-check the position and alignment of the radio before proceeding to the next steps of the installation process.
Reinstalling The Dash Panel
When installing a radio in your Ezgo golf cart, one crucial step is reinstalling the dash panel. This step ensures a secure fit and helps protect the radio and other components. In this section, we will guide you through the process of reinstalling the dash panel, step by step. Let’s get started!
Carefully align the dash panel with the openings and slots on the golf cart dash
Before you begin reinstalling the dash panel, take a moment to locate the openings and slots on the golf cart’s dash. These openings and slots are designed to fit the dash panel securely and allow for easy access to the radio and other controls. Once you have identified the correct locations, carefully align the dash panel with these openings and slots.
Push the panel into place until it clicks or locks securely
Now that you have aligned the dash panel, it’s time to secure it in place. Using gentle and even pressure, push the panel into place. You should feel it click or lock securely into position. This ensures that the dash panel is properly seated and will not come loose while you are driving your golf cart.
Replace and tighten the screws/bolts to ensure a firm and stable fit
Once the dash panel is in place, it’s important to replace and tighten any screws or bolts that were removed during the installation process. This step ensures a firm and stable fit, preventing the dash panel from shifting or rattling while you are driving. Take your time to carefully replace and tighten each screw or bolt, ensuring an even and snug fit.
In conclusion, reinstalling the dash panel in your Ezgo golf cart is a crucial step when installing a radio. By carefully aligning the panel, pushing it into place securely, and tightening the screws or bolts, you can ensure a firm and stable fit for your radio and other components. Follow these steps, and you’ll be enjoying your favorite tunes on the golf course in no time!
Testing And Finishing Touches
After successfully installing the radio in your Ezgo golf cart, there are a few important steps to take to ensure everything is working properly. In this section, we will cover reconnecting the golf cart battery, testing the functionality of the radio, adjusting its settings and controls, securing any loose wiring, and giving a final check to make sure all components are properly installed and functioning before using the golf cart.
Reconnect the golf cart battery
The first step in testing and finishing the installation process is to reconnect the golf cart battery. This ensures that the radio and other electrical components have power and can function properly. To do this, follow these simple steps:
- Ensure the golf cart is turned off and the key is removed.
- Locate the positive and negative terminals on the battery.
- Connect the positive battery cable to the positive terminal and tighten it securely.
- Connect the negative battery cable to the negative terminal and tighten it securely.
- Double-check that the connections are tight and secure to prevent any power issues.
Turn on the radio and test its functionality
Now that the battery is reconnected, it’s time to turn on the radio and test its functionality. Follow these steps:
- Locate the power button or switch on the radio.
- Press or flip the power button or switch to turn on the radio.
- Check if the radio powers on and displays the appropriate settings.
- Adjust the volume and try tuning into different radio stations to ensure the radio is functioning properly.
Adjust the settings and controls as desired
Once the radio is on and functioning, you can adjust its settings and controls according to your preferences. Follow these steps:
- Locate the various controls on the radio, such as volume, bass, treble, and balance.
- Experiment with adjusting each control to achieve the desired sound quality.
- Test different radio stations or input sources to ensure the settings are optimized for your listening experience.
Secure any loose wiring with electrical tape

During the installation process, it’s possible that some wiring could become loose or exposed. To prevent any issues, it’s important to secure any loose wiring using electrical tape. Here’s what you need to do:
- Inspect the wiring connections for any signs of loosening or exposed wires.
- If you find any loose or exposed wiring, use electrical tape to carefully wrap and secure them.
- Make sure the tape is tightly wrapped around the wiring, covering any exposed areas.
Ensure all components are properly installed and functioning before using the golf cart
Before taking your golf cart out for a spin with your newly installed radio, it’s essential to give everything one final check to ensure all components are properly installed and functioning. Use this checklist to ensure everything is in order:
- Double-check all wiring connections to make sure they are secure.
- Confirm that the radio powers on and off correctly.
- Ensure that all radio functions, such as volume control and tuning, are working as intended.
- Test different radio stations or input sources to verify the sound quality.
Once you have completed these final steps and are satisfied that everything is in working order, you are ready to hit the golf course and enjoy your favorite tunes while cruising in your Ezgo golf cart!
Frequently Asked Questions Of How To Install A Radio In A Ezgo Golf Cart
Can You Put A Stereo In A Golf Cart?
Yes, you can add a stereo to your golf cart. It’s a popular modification that allows you to enjoy music while driving.
How Can I Make My Ezgo Golf Cart Faster?
To make your EZGO golf cart faster, you can consider upgrading the motor, replacing the controller, optimizing tire pressure, or modifying the gear ratio. Proper maintenance and regular cleaning of the cart also help maintain its speed.
How Do I Find The Make And Model Of My Ezgo Golf Cart?
To find the make and model of your EZGO golf cart, look for a nameplate or label on the cart’s frame or metal dash. The make and model information is usually printed or engraved on these parts.
Are Ezgo And Club Car The Same?
No, EZGO and Club Car are not the same. They are two different brands of golf carts.
Conclusion
By following these step-by-step instructions, you can easily install a radio in your Ezgo golf cart. With just a few tools and some basic knowledge, you’ll be able to enjoy your favorite tunes while cruising around the course. Enhance your golfing experience and impress your friends with this simple DIY project.
Transform your cart into a mobile entertainment center and enjoy the benefits of music on the go. Happy installation!
