To install an overhead DVD player, start by gathering the necessary tools and materials. Next, locate a suitable mounting location and secure the player to the ceiling using the provided hardware.
Connect the player to a power source and the vehicle’s audio system, then test to ensure it is functioning properly. Installing an overhead DVD player can be a great addition to your vehicle, allowing passengers to enjoy movies and entertainment during long drives.
This guide will provide you with the essential steps to successfully install an overhead DVD player in your car. By following these instructions and using the right tools, you’ll be able to complete the installation process efficiently and enjoy the benefits of a multimedia experience on the go. So, let’s get started with the simple and straightforward steps to install your overhead DVD player.
Factors To Consider When Selecting An Overhead Dvd Player
Installing an overhead DVD player in your vehicle can provide endless entertainment options for passengers, making long journeys more enjoyable. However, selecting the right overhead DVD player can be a daunting task with the numerous options available in the market. To help you make an informed decision, consider the following factors when selecting an overhead DVD player:
Screen Size
The screen size is a crucial factor to consider when choosing an overhead DVD player. You want to ensure that the screen size is appropriate for your vehicle and provides a clear and enjoyable viewing experience for your passengers. A larger screen size, such as a 10-inch or 12-inch display, can enhance the movie-watching experience, especially for rear-seat passengers.
Compatibility with Vehicle
Before purchasing an overhead DVD player, you must ensure that it is compatible with your vehicle’s make and model. Different vehicles may have varying installation requirements, so make sure to check the player’s compatibility with your vehicle’s roof structure and headliner. Additionally, consider whether the overhead DVD player integrates well with your vehicle’s interior design and color scheme.
Connectivity Options
When selecting an overhead DVD player, pay attention to the connectivity options it offers. Look for players that have various input and output options such as HDMI, USB, and SD card slots. These features will allow you to connect external devices like gaming consoles or USB drives, expanding the entertainment possibilities for your passengers. Additionally, consider the player’s wireless connectivity options, such as Bluetooth or Wi-Fi, which can enable streaming from compatible devices.
By considering these factors – screen size, compatibility with your vehicle, and connectivity options – you can make an informed decision when selecting an overhead DVD player. Take the time to research different models, read customer reviews, and compare features to find the perfect overhead DVD player that will provide endless entertainment for your passengers during their travels.
Tools Needed For Installing An Overhead Dvd Player
Installing an overhead DVD player in your vehicle can provide entertainment for your passengers during long drives. To ensure a successful installation, you will need the right tools for the job. Here are the essential tools needed:
Screwdriver
A screwdriver is a versatile tool that will come in handy during the installation process. It allows you to tighten or loosen screws to secure the overhead DVD player in place. Choose a screwdriver that matches the type of screws you will be working with, whether they are Phillips or flathead. Having the right screwdriver will make the installation process smoother and more efficient.
Wire Cutter
A wire cutter is an essential tool for any electrical installation, including installing an overhead DVD player. It allows you to cut wires to the desired length and remove any excess. With a wire cutter, you can ensure that the wires are neatly organized and properly connected. This tool will help you achieve a clean and professional-looking installation.
Wire Crimper
A wire crimper is another crucial tool for installing an overhead DVD player. It allows you to attach connectors to the wires securely. The crimper applies pressure to the connectors, ensuring a strong and reliable connection. This tool enables you to make professional-grade wire connections that will result in optimal performance for your overhead DVD player.
By having these tools readily available, you will be well-prepared to tackle the installation process of an overhead DVD player. To make the installation even smoother, it’s also a good idea to gather any additional tools or materials that may be needed before starting the project.
Measuring The Overhead Space In The Vehicle
Before you can install an overhead DVD player in your vehicle, it’s important to properly measure the available space to ensure a proper fit. This step is crucial to avoid any obstructions or compatibility issues. In this section, we will discuss two key aspects of measuring the overhead space in your vehicle: checking for obstructions and ensuring proper fit.
Checking for Obstructions
Begin by inspecting the overhead area of your vehicle to identify any potential obstructions. These can include ceiling lights, air conditioning vents, sunroofs, or other components that could interfere with the installation of the overhead DVD player. Take note of their size, shape, and position to determine if adjustments will need to be made.
Ensuring Proper Fit
Once you have identified any potential obstructions, it’s important to measure the available space accurately. This will help you determine the correct size and model of the overhead DVD player that will fit seamlessly into your vehicle. Follow these steps to ensure a proper fit:
- Measure the width: Use a tape measure to determine the width of the overhead space. Start from one side and measure across to the other, taking into account any obstructions or irregularities.
- Measure the length: Next, measure the length of the overhead space. Again, consider any obstructions or irregularities that may affect the measurements.
- Measure the height: Finally, measure the height of the overhead space. This will help you determine the maximum size of the overhead DVD player that can be installed without interfering with passengers or other vehicle components.
Once you have accurate measurements, you can compare them with the specifications of different overhead DVD player models to find the best fit for your vehicle. It’s important to choose a model that not only fits the measurements but also matches your desired features and budget.
Remember, measuring the overhead space in your vehicle is a crucial step in the installation process. By checking for obstructions and ensuring a proper fit, you can enjoy a seamless installation of your overhead DVD player, providing entertainment and convenience for you and your passengers.
Removing The Existing Overhead Console
When it comes to installing a new overhead DVD player in your vehicle, one of the first steps is to remove the existing overhead console. This process may vary depending on the make and model of your vehicle, but we have outlined some general steps to help guide you through the process. In this section, we will focus on removing the existing overhead console, including locating and disconnecting any electrical connections, as well as removing screws or fasteners.
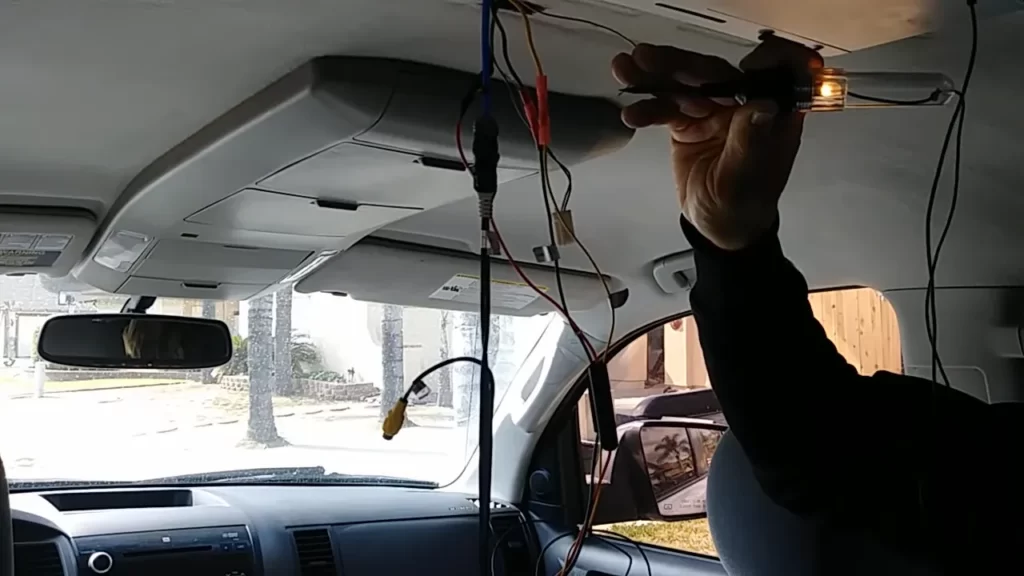
Locating and Disconnecting Any Electrical Connections
The first step in removing the existing overhead console is to locate and disconnect any electrical connections. These connections may include wiring for interior lights, power sunroof controls, or other accessories that are integrated into the console.
To locate these connections, you may need to consult your vehicle’s owner manual or do some simple detective work. Look for any visible wiring harnesses or connectors that are attached to the console. Once you have located the connections, carefully disconnect them by unplugging the connectors.
Removing Screws or Fasteners
After disconnecting the electrical connections, the next step is to remove any screws or fasteners that are securing the overhead console to the vehicle’s roof. Again, the number and location of these screws or fasteners may vary depending on your vehicle’s make and model.
Using a screwdriver or appropriate tool, carefully remove the screws or fasteners one by one, taking care not to strip or damage them in the process. Keep track of the screws or fasteners and store them in a safe place for reinstallation later.
Once all the screws or fasteners have been removed, gently pry the overhead console away from the roof. Be cautious not to force or apply excessive pressure, as this could damage the console or surrounding trim.
With the existing overhead console now removed, you are ready to proceed with the installation of your new overhead DVD player. Consult the installation instructions provided with your specific DVD player for the next steps in the process.
Connecting Power Wires
Identifying the Vehicle’s Power Source
One of the most critical steps in installing an overhead DVD player is connecting the power wires. Before you begin, it’s essential to identify the vehicle’s power source. The power source in most vehicles is the car’s fuse box. The fuse box contains various fuses that control different electrical components in the vehicle. Look for the fuse that controls the accessory or ignition system. This fuse will ensure that the DVD player only receives power when the car is turned on.
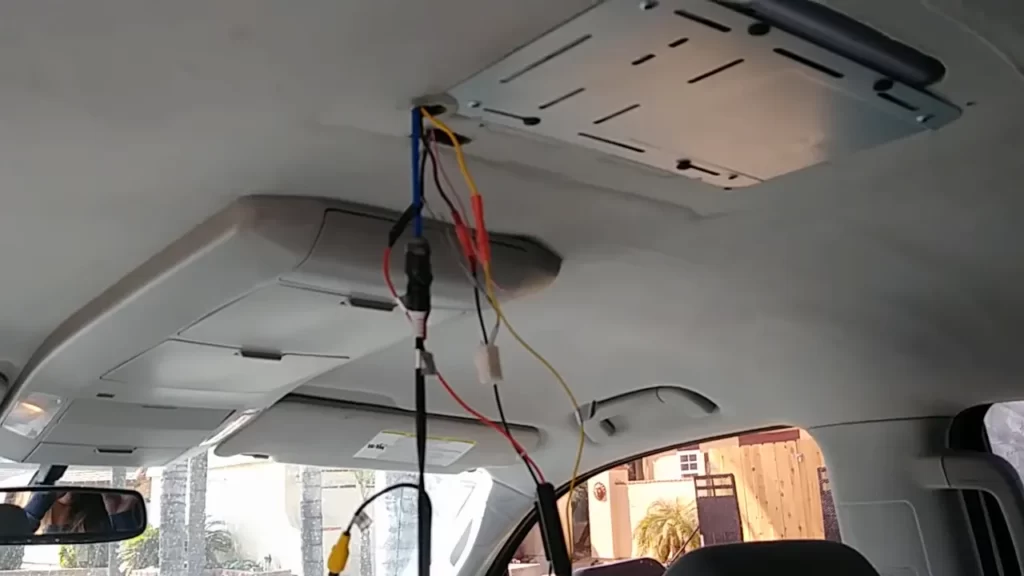
Splicing into the Power Source
To splice into the vehicle’s power source, you will need a power wire with an inline fuse. The inline fuse is crucial as it protects the DVD player from any power surges or short circuits. It’s recommended to use a wire gauge that can handle the power required by the DVD player. Thicker wires with a lower gauge number are ideal to ensure efficient power transmission. Here’s a step-by-step guide on how to splice into the power source:
- Locate the fuse that controls the accessory or ignition system in the fuse box.
- Remove the fuse from its socket, making sure to turn off the car’s ignition before doing so.
- Connect the power wire with the inline fuse to the free socket in the fuse box where you removed the fuse.
- Securely fasten the wire to the fuse box, ensuring it won’t come loose during the installation or when driving.
- Route the power wire from the fuse box to the location where you plan to mount the overhead DVD player.
- Ensure the wire is hidden and safely secured along the way, using clips or zip ties if necessary.
- Once the wire reaches the desired location, connect it to the power input on the DVD player.
- Double-check all connections to ensure they are secure and free from any loose wires.
By following these steps and properly splicing into the vehicle’s power source, you can ensure a safe and reliable power supply to your overhead DVD player. Remember, working with electrical wiring requires caution, so take your time and double-check all connections.
Connecting Audio And Video Wires
In order to enjoy your favorite movies and videos on an overhead DVD player, it’s crucial to establish the proper connections for audio and video. By following these steps, you’ll be able to connect the AV cables and route the wires through your vehicle efficiently and effectively.
Routing Wires through the Vehicle
The first step in connecting audio and video wires for your overhead DVD player is to carefully route the wires through your vehicle. This ensures a clean installation and prevents any cables from becoming tangled or damaged. Follow these simple steps to route the wires securely:
- Identify a suitable pathway for the wires from the DVD player to the vehicle’s dashboard. Look for existing openings or access points, such as vents or areas around the console.
- Use a wire coat hanger or a similar flexible tool to guide the wires through the designated pathway. Be gentle to avoid damaging the wires or the vehicle’s interior.
- If necessary, remove any panels or trim pieces to gain better access and create a cleaner installation. Refer to your vehicle’s manual or seek professional help if needed.
- Secure the wires along the pathway using wire clips or adhesive cable mounts. This will help prevent any movement or interference while driving.
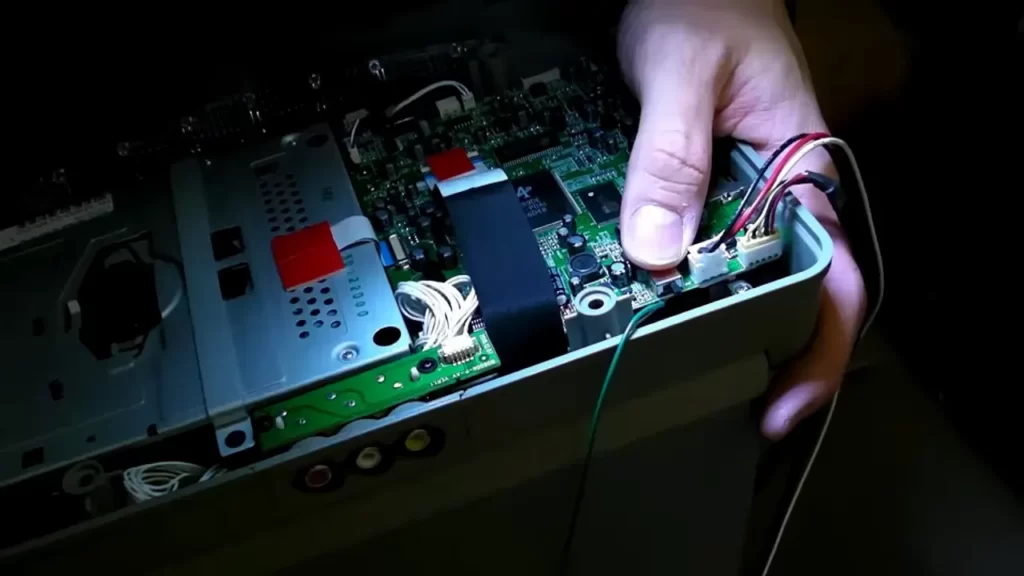
Connecting the AV Cables
Once you have successfully routed the wires through your vehicle, it’s time to connect the audio and video cables to your overhead DVD player. Follow these steps to ensure a proper connection:
- Locate the AV input ports on the back of your overhead DVD player. These will typically be labeled as “AUDIO IN” and “VIDEO IN”.
- Take the corresponding AV cables and match the color-coded plugs to the appropriate ports. Connect the red plug to the red “AUDIO IN” port, the yellow plug to the yellow “VIDEO IN” port, and the white plug to the white “AUDIO IN” port.
- Tighten the connections by gently twisting the plugs until they are securely in place.
- Once the AV cables are connected, plug the other ends of the cables into the corresponding AV output ports on your source device, such as a DVD player or gaming console.
- Double-check all cable connections to ensure they are secure, and neatly organize any excess cable length to maintain a clean installation.
By correctly routing the wires and connecting the AV cables, you’ll be able to enjoy high-quality audio and video playback from your overhead DVD player. Following these steps will ensure a smooth installation process and provide you with entertainment on the go.
Attaching The Mounting Bracket
When it comes to installing an overhead DVD player in your vehicle, one of the crucial steps is attaching the mounting bracket. This step ensures that your DVD player is securely installed in the overhead space of your vehicle, allowing for a comfortable and enjoyable viewing experience for passengers. In this article, we will guide you through the process of attaching the mounting bracket, from positioning it in the overhead space to securing it with screws.
Positioning the Bracket in the Overhead Space
To begin installing your overhead DVD player, you need to properly position the mounting bracket in the overhead space of your vehicle. The exact positioning will depend on the make and model of your vehicle, as well as personal preference. However, there are some general guidelines to follow:
- Start by identifying a suitable location in the overhead space, ensuring that the bracket will not obstruct the view of the driver or front passenger.
- Measure the dimensions of the DVD player and bracket to determine the amount of space required.
- Carefully position the bracket, making sure it is centered and aligned with the overhead space.
Securing the Bracket with Screws
Once you have positioned the bracket in the desired location, it’s time to secure it with screws. This step ensures that the bracket holds the DVD player securely in place, preventing any unwanted movement during vehicle operation:
- Using a screwdriver or drill, carefully insert the screws provided with the mounting bracket into the pre-drilled holes on the bracket.
- Tighten the screws firmly, but be cautious not to overtighten and damage the bracket or the overhead space.
- Double-check the stability of the bracket by gently shaking it. If it feels loose or unstable, re-evaluate the positioning and tighten the screws further, if necessary.
By following these simple steps, you can successfully attach the mounting bracket for your overhead DVD player. Remember to consult the user manual provided with your specific DVD player and bracket for any additional instructions or precautions. Once the bracket is securely attached, you can move on to the next stage of the installation process, such as connecting the wiring or mounting the DVD player onto the bracket.
Installing The Overhead Dvd Player
Installing an overhead DVD player in your car can provide hours of entertainment for passengers on long drives. Whether you’re embarking on a road trip or simply want to keep the kids entertained, a top-quality overhead DVD player can make the journey much more enjoyable. In this guide, we will walk you through the steps of installing an overhead DVD player, from aligning the player with the mounting bracket to locking it into place.
Aligning the Player with the Mounting Bracket
The first step in installing an overhead DVD player is to align the player with the mounting bracket. This ensures the player is properly positioned and securely attached to the ceiling of your car. Follow these steps to align the player with the mounting bracket:
- Start by identifying the mounting bracket, which should be included with your overhead DVD player.
- Hold the mounting bracket up to the ceiling of your car, making sure it is centered and aligned with the desired installation location.
- Once you have determined the correct position, use a marker or pencil to mark the mounting holes on the ceiling. This will serve as a guide when attaching the bracket.
- Now, align the player with the mounting bracket by attaching it to the bracket using the provided screws or fasteners. Be sure to consult the manufacturer’s instructions for specific installation steps.
Locking the Player into Place

After aligning the player with the mounting bracket, the next step is to lock it into place. This will ensure that the player remains securely attached and stable while in use. Follow these steps to lock the player into place:
- Double-check that the player is aligned with the mounting bracket and properly attached.
- Once you are confident in the positioning, tighten the screws or fasteners that secure the player to the mounting bracket. Use a screwdriver or the appropriate tool to ensure a tight fit.
- Test the stability of the player by gently pushing and pulling on it. It should not move or wiggle excessively. If it does, recheck the alignment and tighten the screws or fasteners as needed.
- Finally, connect any necessary wiring or cables to the player, following the manufacturer’s instructions carefully. This may include power cables, audio cables, and video cables.
By aligning the player with the mounting bracket and locking it into place, you can ensure a secure and stable installation that will provide optimal performance. With the overhead DVD player properly installed, you and your passengers can sit back, relax, and enjoy your favorite movies or shows during your travels.
Testing The Overhead Dvd Player
Once you have successfully installed your overhead DVD player, it’s important to test it and ensure that it is functioning properly. In this section, we will guide you through the essential steps to test the player effectively.
Powering On the Player
- Make sure the vehicle’s ignition is on before turning on the overhead DVD player.
- Locate the power button usually located on the player’s control panel, and press it to turn the player on.
- Wait for the player to boot up and display its main menu on the screen. This may take a few moments.
It’s important to note that each overhead DVD player may have a slightly different power-on procedure, so we recommend referring to the user manual for specific instructions.
Testing the Audio and Video Quality
Now that the player is powered on and displaying the main menu, it’s time to test the audio and video quality to ensure an optimal viewing experience.
- Select a DVD or a disc with video content from the player’s main menu.
- Insert the disc into the player’s disc drive, following any specific instructions provided.
- Allow the player to load the disc, and then press the play button to start playback.
As the video plays, pay attention to the following aspects of audio and video quality:
- Video Quality: Check for clarity, color accuracy, and smooth playback. Look for any pixelation, distortions, or artifacts that may affect the viewing experience.
- Audio Quality: Listen for clear, balanced sound without any distortions, buzzing, or static. Make sure the audio syncs properly with the video.
If you notice any issues with the audio or video quality, it may be worth troubleshooting the problem before finalizing the installation. Refer to the user manual or contact the manufacturer’s support for assistance in resolving any quality-related concerns.
By following these steps and thoroughly testing your overhead DVD player, you can ensure a smooth and enjoyable entertainment experience for you and your passengers on the road.
Troubleshooting Common Issues
Even with proper installation, you may encounter some common issues when setting up an overhead DVD player in your car. Don’t worry, though, because we’ve got you covered. In this section, we will discuss some of the most common problems that users face and provide simple troubleshooting steps to help you resolve them quickly and easily.
No Power to the Player
One of the most frustrating issues you may encounter is when there is no power to your overhead DVD player. This can be due to various reasons, such as a loose connection or a blown fuse. Here’s what you can do to troubleshoot this problem:
- Check the power connection: Ensure that the power cables are securely connected to both the player and the power source. A loose connection can easily disrupt the power supply.
- Inspect the fuse: Locate the fuse box in your car and check if the fuse for the DVD player is intact. If it’s blown, replace it with a new one of the same amperage.
- Test with another power source: If you have access to another power source, such as a different car or a power supply adapter, try connecting the player to it to rule out any issues with the current power source.
- Seek professional help: If none of the above steps work, it’s best to consult a professional car audio technician who can diagnose and fix the problem for you.
Poor Audio or Video Quality
Another common issue you might encounter is poor audio or video quality from your overhead DVD player. If you’re experiencing distorted sound or fuzzy images, try the following troubleshooting steps:
- Check the cables: Ensure that all the audio and video cables are plugged in securely and not damaged. A loose or damaged cable can result in poor quality.
- Adjust the settings: Use the player’s menu options to make adjustments to the audio and video settings. Experiment with different configurations to see if it improves the quality.
- Clean the lens: Over time, dust and dirt can accumulate on the player’s lens, affecting playback quality. Use a lens cleaning kit to gently clean the lens and improve performance.
- Update firmware: Check the manufacturer’s website for any firmware updates for your specific model. Installing the latest firmware can often resolve compatibility issues and improve performance.
- Consider external speakers: If the built-in speaker isn’t delivering the sound quality you desire, consider connecting external speakers for a better audio experience.
- Get professional assistance: If you’ve tried all the above steps and are still experiencing poor quality, it’s recommended to consult a professional car audio technician for further assistance.
By following these troubleshooting steps, you can easily address and resolve common issues that may arise when installing an overhead DVD player. Remember, patience and a systematic approach can go a long way in troubleshooting and ensuring that you enjoy a seamless entertainment experience in your car.
Reconnecting Any Electrical Connections
After you have successfully mounted the overhead DVD player in your vehicle, the next step is to reconnect all the electrical connections. This is an essential part of the installation process as it ensures that the player functions properly and delivers an optimal audio-visual experience. In this guide, we will walk you through the steps to reconnect the electrical connections for a seamless installation.
Ensuring all Connections are Properly Secured
Before proceeding with reconnecting the electrical connections, it is crucial to double-check that all the connections are properly secured. Loose or improperly connected wires can lead to malfunctioning or even damage to the overhead DVD player. Take a few moments to carefully examine each connection and ensure they are tightly secured.
If you find any loose connections:
- Identify the loose connection.
- Remove the connection by gently pulling it apart.
- Inspect both ends of the connection for any damage or dirt.
- Reconnect the wires, ensuring they fit together snugly.
Testing the Overhead Console Functions
Once all the electrical connections are securely in place, it’s time to test the overhead console functions. Testing the console will validate the successful installation of the DVD player and help you identify any issues in the early stages.
Follow these steps to test the overhead console functions:
- Turn on your vehicle’s ignition.
- Power on the overhead DVD player by pressing the power button.
- Check if the display turns on and the lights on the console illuminate.
- Press different buttons on the console, such as volume control, play, pause, and menu buttons, to ensure they respond correctly.
- Insert a DVD or CD into the player to verify if it loads properly.
- Play the media and check if the sound and video quality are satisfactory.
If you encounter any issues during the testing process:
- Double-check the electrical connections to ensure they are secure.
- Review the installation instructions to confirm that all steps were followed correctly.
- Contact the manufacturer or seek professional assistance if the issue persists.
By following these steps to reconnect the electrical connections and testing the overhead console functions, you can ensure a successful installation of your overhead DVD player. Now sit back, relax, and enjoy your favorite movies on the move!
Reassembling The Vehicle’S Interior
Now that you have successfully installed your overhead DVD player, it’s time to reassemble the vehicle’s interior. This step is crucial to ensure that everything is put back together properly, and that the DVD player is secure and functional. Here, we will discuss two important aspects of reassembling the vehicle’s interior: attaching and securing any trim pieces, and double-checking for proper fit and function.
Attaching and Securing any Trim Pieces
After installing the overhead DVD player, you may have had to remove some trim pieces from the ceiling or dashboard of your vehicle. Now, it’s time to put those trim pieces back in their rightful place. To do this, follow these steps:
- Check each trim piece for any damage or wear, and replace if necessary.
- Align the trim piece with its designated location, ensuring it fits snugly.
- Using the appropriate fasteners or clips, attach the trim piece securely to the vehicle’s interior.
- Give each trim piece a gentle tug to ensure it is firmly in place.
By following these steps, you can ensure that each trim piece is securely attached, preventing any potential rattling or looseness while driving. Additionally, it helps maintain the overall aesthetic appeal of your vehicle’s interior.
Double-Checking for Proper Fit and Function
Now that the trim pieces are securely in place, it’s time to double-check that the overhead DVD player fits properly and functions correctly. Here’s how:
- Go through each control panel and button, testing their functionality.
- Verify that the DVD player screen is positioned correctly and can be easily viewed by all passengers.
- Make sure all cables and wires are neatly organized and tucked away, out of sight.
- Turn on the DVD player and test it with a DVD or USB device to ensure it plays and outputs audio correctly.
By double-checking for proper fit and function, you can address any potential issues or glitches before hitting the road. This step ensures that the overhead DVD player installation is a success, and that you and your passengers can enjoy countless hours of entertainment during your journeys.
Frequently Asked Questions On How To Install A Overhead Dvd Player
What Channel Does The Tv Need To Be On For Dvd Player?
The TV needs to be on the correct input channel for the DVD player.
Can You Add A Dvd System To A Car?
Yes, you can add a DVD system to your car. It is possible to install a DVD player that allows you to enjoy movies while driving. This enhances your entertainment options during long journeys.
How Do You Install An Overhead Dvd Player?
To install an overhead DVD player, start by selecting a suitable location, removing the headliner, and connecting the power cables. Then, mount the DVD player, run the AV cables and remote sensor, and reconnect the headliner. Finally, connect the power and AV cables, test the player, and secure it in place.
What Tools Are Needed For Installing An Overhead Dvd Player?
To install an overhead DVD player, you will need tools such as a screwdriver, trim panel removal tool, wire strippers, crimping tool, drill, and various sizes of drill bits. Additionally, cable ties, electrical tape, and a voltage meter will come in handy to ensure a safe and secure installation.
Conclusion
Installing an overhead DVD player doesn’t have to be a daunting task. By following the steps outlined in this blog post, you can easily set up your own entertainment system in your vehicle. From choosing the right location to connecting the wires correctly, we’ve covered everything you need to know.
So, get ready to enjoy a seamless, cinematic experience on your next road trip.