To install an oil catch can, locate and secure the canister in a suitable location within the engine compartment. Connect the intake hose to the air intake system and the other hose to the valve cover.
Installing an oil catch can is a simple yet effective way to keep your engine clean and running smoothly. As the name suggests, the catch can is designed to catch and collect any oil vapor or blow-by that may escape from the engine crankcase.
By doing so, it prevents the oil from entering and contaminating the intake system, improving engine performance and reducing the risk of carbon buildup. We will discuss the step-by-step process of installing an oil catch can to help you maintain your engine’s health and efficiency.
Why Install An Oil Catch Can?
An oil catch can, also known as an oil catch tank or oil separator, is an essential component for any vehicle enthusiast or car owner who wants to optimize engine performance and extend the life of their engine. It may seem like a small addition, but the benefits it provides are invaluable for maintaining a healthy engine.
The Importance of an Oil Catch Can
An oil catch can plays a crucial role in preventing harmful substances from entering your engine’s intake system. During the combustion process, the engine produces blow-by gases that contain oil vapor and other contaminants. These gases are primarily a byproduct of the piston rings not providing a perfect seal, allowing some oil to escape into the combustion chamber.
Without an oil catch can, these blow-by gases can recirculate back into the engine, leading to a buildup of carbon deposits. Over time, these deposits can significantly impact engine performance, reduce fuel efficiency, and ultimately cause costly repairs or even engine failure.
| Contaminants | Effect on Engine |
|---|---|
| Oil Vapor | Carbon buildup, reduced engine performance |
| Carbon Deposits | Knocking or pinging noises, decreased fuel efficiency |
| Water Vapor | Corrosion, damage to engine components |
Benefits of Installing an Oil Catch Can
By installing an oil catch can in your vehicle, you can experience a range of benefits that improve the overall health and performance of your engine.
- Reduces carbon buildup: A catch can traps oil vapor and contaminants, preventing them from entering the intake system. This reduction in carbon buildup improves engine performance and extends the life of vital components such as valves and cylinders.
- Enhances fuel efficiency: Carbon deposits can affect the fuel-air mixture, leading to inefficient combustion. By eliminating these deposits, an oil catch can helps maintain optimal fuel efficiency, saving you money at the pump.
- Preserves engine life: The prevention of carbon deposits and contaminants ensures that your engine operates at its best for longer. This can help prevent costly repairs and engine damage down the line.
- Improves throttle response: With a cleaner intake system, an oil catch can enhances throttle response, providing a more enjoyable driving experience.
- Easy maintenance: Oil catch cans are designed for easy installation and maintenance. Regularly emptying and cleaning the catch can is a straightforward task that can prevent buildup and maintain its effectiveness.
Investing in an oil catch can is a small but wise decision that can make a significant impact on your vehicle’s performance, efficiency, and long-term durability. With its ability to prevent harmful contaminants from affecting your engine, installing an oil catch can is an essential step for any car enthusiast or concerned car owner.
Tools And Materials Needed
Installing an oil catch can is an essential modification for any car enthusiast looking to optimize engine performance and protect vital engine components. This simple device works by trapping oil vapor and preventing it from flowing back into the intake system.
List of tools required for installation:
- Socket set
- Ratchet
- Torque wrench
- Screwdriver set
- Pliers
- Drill
- Center punch
- Hacksaw
- Tape measure
- Marker
Required materials for the installation process:
- Oil catch can kit
- Mounting bracket
- Hose clamps
- Vacuum hose
- Rubber grommets
- Silicone sealant
- Clean cloth or rag
Before you start the installation, make sure you have all the necessary tools and materials at hand. Having everything ready will not only save you time but also make the process smoother. Now, let’s dive into the specific tools and materials you’ll need for this project.
The list of tools required for installation includes a socket set, ratchet, torque wrench, screwdriver set, pliers, drill, center punch, hacksaw, tape measure, and a marker. These tools will help you remove necessary components, create holes, and secure the oil catch can in place. Be sure to choose the appropriate sizes and types of tools based on your specific car model and the manufacturer’s instructions.

In addition to the tools, you’ll also need a few materials to complete the installation. These materials include an oil catch can kit, mounting bracket, hose clamps, vacuum hose, rubber grommets, silicone sealant, and a clean cloth or rag. The oil catch can kit should come with all the necessary fittings and hoses to connect to your specific car’s engine. The mounting bracket will help secure the catch can in a suitable location, while the hose clamps and vacuum hose ensure a tight and secure connection. Rubber grommets provide vibration resistance, and silicone sealant helps create a leak-proof seal between components. Lastly, a clean cloth or rag will be handy for wiping away any spills or excess oil during the installation process.
With the right tools and materials in your possession, you’re now ready to begin the installation process of your oil catch can. Make sure to follow any specific instructions provided by the manufacturer and consult your car’s manual for guidance. Proper installation will not only enhance your engine’s performance but also prolong its life, so take your time and enjoy the benefits of this modification.
Step-By-Step Guide: How To Install An Oil Catch Can
An oil catch can is an essential component for maintaining the longevity and performance of your vehicle’s engine. It helps to trap and collect the oil vapors that are produced during the combustion process, preventing them from recirculating back into the engine intake system. Installing an oil catch can is a relatively simple process that can be done with a few basic tools and materials. In this step-by-step guide, we will walk you through the installation process, from preparation to testing and maintenance.
Preparation before installation
Before you begin the installation process, there are a few things you should do to ensure a smooth and successful installation:
- Ensure that you have the correct oil catch can for your vehicle’s make and model.
- Gather all the necessary tools and materials, including a screwdriver, pliers, hose clamps, and the appropriate size hoses.
- Read the instructions provided with your oil catch can to familiarize yourself with the specific installation steps for your particular model.
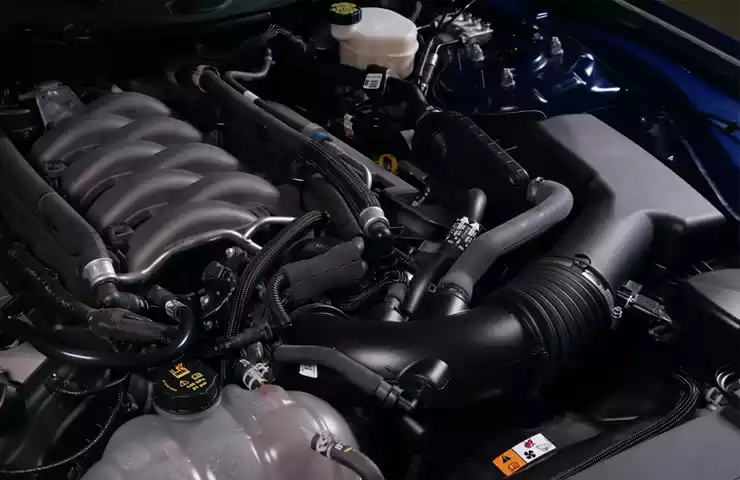
Locate the optimal position for the oil catch can
The next step is to locate the best position for installing the oil catch can. It should be placed in a location that is easily accessible for maintenance and cleaning, as well as away from any sources of heat that could potentially cause damage.
Prepare the necessary tools and materials
Before you start the installation process, make sure you have all the necessary tools and materials readily available. This will help to streamline the installation process and ensure that you have everything you need within reach.
Installation process
Now, let’s get into the step-by-step installation process:
- Step 1: Remove the engine cover
- Step 2: Locate the PCV valve
- Step 3: Disconnect the PCV hoses
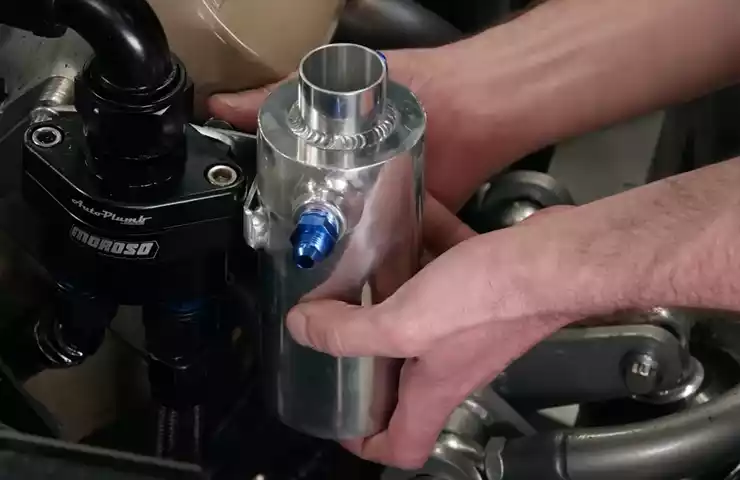
- Step 4: Install the oil catch can
- Step 5: Connect the hoses to the catch can
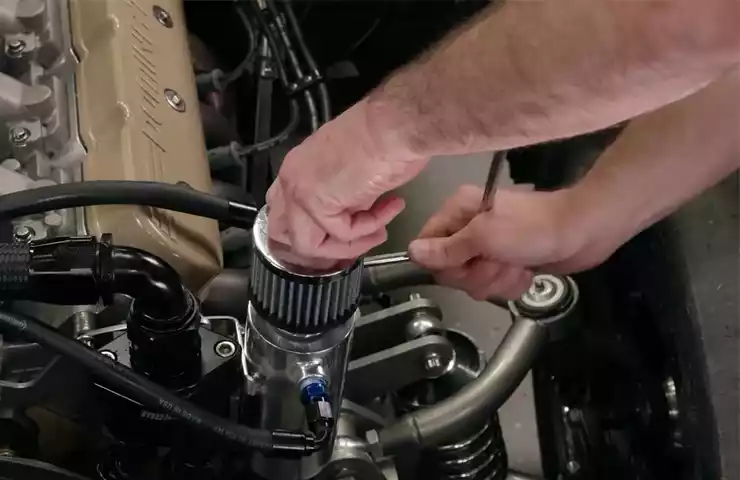
- Step 6: Secure the catch can in place
- Step 7: Reinstall the engine cover
Testing and maintenance
After the installation is complete, it’s crucial to test for proper installation and implement regular maintenance routines:
How to check for proper installation
- Inspect the connections to ensure there are no oil leaks.
- Start the engine and check for any abnormalities in engine performance.
- Monitor the oil catch can regularly and empty it when it reaches the recommended fill level.
Regular maintenance and cleaning of the catch can
- Regularly clean the catch can to remove accumulated oil and debris. Refer to the manufacturer’s instructions for proper cleaning techniques.
- Inspect the hoses and connections for any signs of wear or damage and replace them if necessary.
By following this step-by-step guide and implementing regular maintenance, you can ensure that your oil catch can functions effectively, prolonging the life of your engine and maintaining optimal performance.
Tips For Optimal Performance
After investing in an oil catch can for your vehicle, it’s important to ensure its optimal performance. Proper maintenance and troubleshooting of common issues are crucial in maximizing the benefits it provides. In this section, we will discuss the recommended maintenance schedule and offer solutions for troubleshooting common issues that may arise.
Recommended Maintenance Schedule
To keep your oil catch can working effectively, regular maintenance is essential. Follow this recommended maintenance schedule:
- Inspect and Empty the Can: Check the oil catch can every 1,000 miles or as recommended by the manufacturer. Empty the accumulated oil and debris from the can to prevent any obstruction in the system.
- Clean the Catch Can: Every 5,000 to 10,000 miles, clean the catch can thoroughly. Remove the can from the mounting bracket and disassemble it. Clean all the components with a suitable solvent and ensure all passages are clear.
- Replace Filters and O-rings: Inspect the filters and O-rings every 20,000 miles or as specified by the manufacturer. Replace them if they are damaged or show signs of wear and tear.
- Check Connections: Regularly inspect the hoses and fittings for any leaks or loose connections. Tighten them securely if necessary.
- Inspect Vacuum Lines: Check the vacuum lines periodically for any signs of cracks or damage. Replace them promptly to maintain proper suction.
Following this maintenance schedule will help ensure that your oil catch can continues to function optimally and keeps your engine clean and efficient.
Troubleshooting Common Issues
If you encounter any issues with your oil catch can, here are some common problems and their solutions:
| Issue | Solution |
|---|---|
| Excessive Oil Accumulation | Check for clogged filters or a malfunctioning valve. Clean or replace the filters, and inspect the valve for proper operation. |
| Leaking or Loose Connections | Inspect all connections and tighten them if necessary. Replace any damaged hoses or fittings. |
| Oil Odor in the Cabin | Check for leaks or faulty installation. Ensure all connections are tight, and there are no gaps or cracks in the system. |
| Reduced Engine Performance | Inspect for any blockages or restrictions in the oil catch can or hoses. Clean or replace any clogged components. |
If the issues persist or if you encounter any other problems, it is recommended to consult with a professional or reach out to the manufacturer for further assistance.
By following the recommended maintenance schedule and troubleshooting common issues promptly, you can ensure that your oil catch can operates at its best, providing long-lasting protection for your engine.
Frequently Asked Questions On How To Install A Oil Catch Can
Are Catch Cans Hard To Install?
Catch cans are easy to install, with no special skills required. Simple procedures involve locating the appropriate position, attaching the can, and connecting the necessary hoses. Ensure proper sealing to prevent leaks. Installation can be completed within a short timeframe with basic tools.
Is Oil Catch Can Bad For The Engine?
An oil catch can is not bad for the engine; it can actually help improve its performance. By capturing and separating oil vapors, it prevents them from being recirculated back into the intake system. This reduces carbon buildup, ensures cleaner airflow, and protects vital engine components.
What Are The Disadvantages Of Oil Catch Can?
The main disadvantages of an oil catch can include limited capacity, frequent maintenance, and potential engine damage if not properly installed. Additionally, some oil catch cans may not be compatible with all vehicles, limiting their effectiveness. Regular monitoring and cleaning are necessary to prevent oil buildup and maintain optimal engine performance.
Is An Oil Catch Can A Good Idea?
Yes, an oil catch can is recommended. It helps prevent oil from entering your engine’s intake system, reducing carbon build-up and protecting the engine’s performance. It’s an effective way to maintain your engine’s health and improve overall fuel efficiency.
Conclusion
Installing an oil catch can is a simple yet effective way to protect the engine and improve its performance. By effectively capturing and separating oil vapor from the PCV system, it prevents oil buildup, reduces carbon deposits, and increases the longevity of the engine.
With the step-by-step guide provided you can easily install an oil catch can and enjoy the benefits it offers. Keep your engine running smoothly and efficiently by giving it the care it deserves.