Installing a motorcycle battery involves removing the old battery, attaching the cables to the new battery, and securing it in place. Ensure the bike’s ignition is off, locate the battery compartment, disconnect the negative cable, followed by the positive cable, and remove the old battery.
Next, place the new battery into the compartment, connect the positive cable first, followed by the negative cable, and securely fasten the battery in place. Double-check the connections and turn on the ignition to test the new battery. It’s a simple process that can be done with basic tools and a little care.
Preparing For Installation
Preparing for installation is an important step in the process of installing a motorcycle battery. By properly preparing, you can ensure a smooth and efficient installation, reducing the chances of any mishaps or errors. This section will guide you through the necessary steps to take before installing a new battery in your motorcycle.
Checking the Owner’s Manual for Battery Specifications
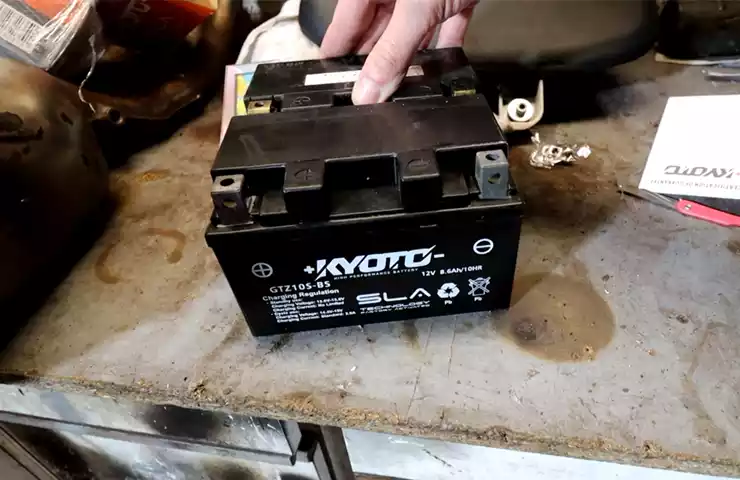
Before you start gathering the necessary tools, it’s crucial to consult your motorcycle’s owner’s manual for battery specifications. Every motorcycle has different requirements when it comes to the type and size of battery it can accommodate. By checking the manual, you can ensure that you purchase the correct battery that fits your motorcycle’s specifications.
Gathering the Necessary Tools
Once you have noted down the battery specifications, it’s time to gather the necessary tools for the installation. Having the right tools on hand will make the process much smoother and more efficient. Here’s a list of tools you might need:
- Socket wrench set
- Phillips and flathead screwdrivers
- Battery terminal cleaner or wire brush
- Battery terminal protectors
- Replacement battery
- Flexible battery strap or bungee cord
- Safety goggles
- Rubber gloves
Make sure to have these tools ready before moving on to the next step.
Ensuring Safety Measures
Before you begin the installation process, it’s crucial to take safety measures to protect yourself and your motorcycle. Here are some important safety precautions to follow:
- Turn off the motorcycle’s ignition and remove the key to avoid any accidental starts.
- Wear safety goggles to protect your eyes from potential battery acid splashes.
- Put on rubber gloves to prevent direct contact with the battery and any harmful substances.
- Avoid smoking or open flames in the vicinity of the battery, as it contains flammable gases.
- Keep all tools and parts away from the battery to prevent any accidental short-circuits.
Following these safety measures will help ensure a safe and successful installation of your motorcycle battery.
Removing The Old Battery
When it comes to installing a new motorcycle battery, the first step is removing the old one. Follow these simple steps to ensure a smooth removal process.
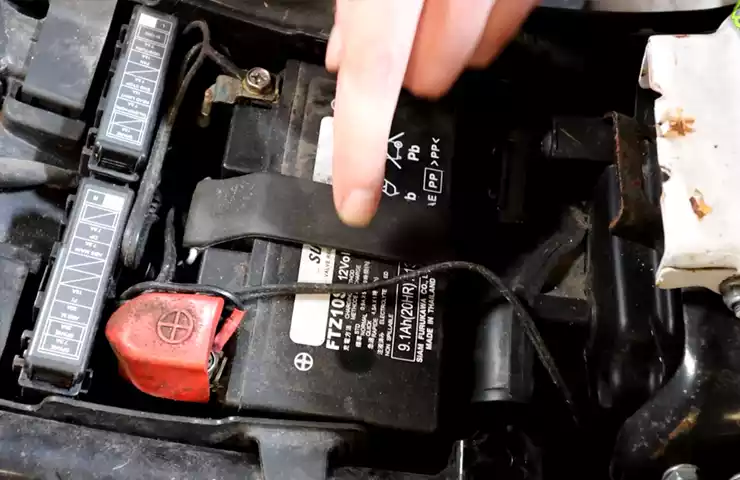
Locating the Battery Compartment
The battery compartment is usually located under the seat or in a side panel of the motorcycle. Refer to your motorcycle’s owner manual to find the exact location of the battery compartment.
Disconnecting the Negative Terminal
Before removing the old battery, you need to disconnect the negative terminal. The negative terminal is usually marked with a “-” symbol. Use a wrench or socket to loosen the nut holding the cable to the terminal. Once the nut is loosened, carefully remove the cable from the terminal. Remember to avoid touching any metal surfaces with the cable as it may cause sparking.
Disconnecting the Positive Terminal
After disconnecting the negative terminal, it’s time to disconnect the positive terminal. The positive terminal is usually marked with a “+” symbol. Similar to the negative terminal, use a wrench or socket to loosen the nut holding the cable to the terminal. Once the nut is loose, carefully remove the cable from the terminal, ensuring it doesn’t come into contact with any metal surfaces.
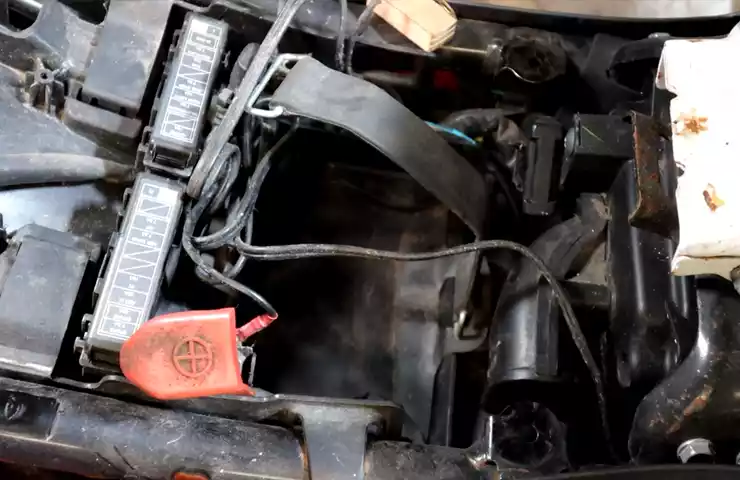
Removing the Battery from the Compartment
Once both terminals are disconnected, you can remove the old battery from the compartment. Carefully lift the battery out of the compartment, taking note of its weight as motorcycle batteries can be quite heavy. If needed, ask for assistance to avoid straining your back or dropping the battery.
Now that you have successfully removed the old battery, you can proceed with installing the new one. Stay tuned for our next blog post on how to install a motorcycle battery!
Installing The New Battery
Now that you have removed the old battery, it’s time to install the new one. This step is crucial for ensuring that your motorcycle starts smoothly and runs efficiently. Follow these simple steps to install the new battery in your motorcycle:
Checking the Battery Terminals for Corrosion
Before you start installing the new battery, it’s important to check the battery terminals for any signs of corrosion. Corrosion can prevent a proper connection and lead to electrical issues.
Here’s how to check the battery terminals:
- Inspect the battery terminals visually. Look for any green or white powdery substance around the terminals.
- If you notice corrosion, use a wire brush or sandpaper to gently clean the terminals.
- After cleaning, wipe the terminals with a clean cloth to remove any debris.
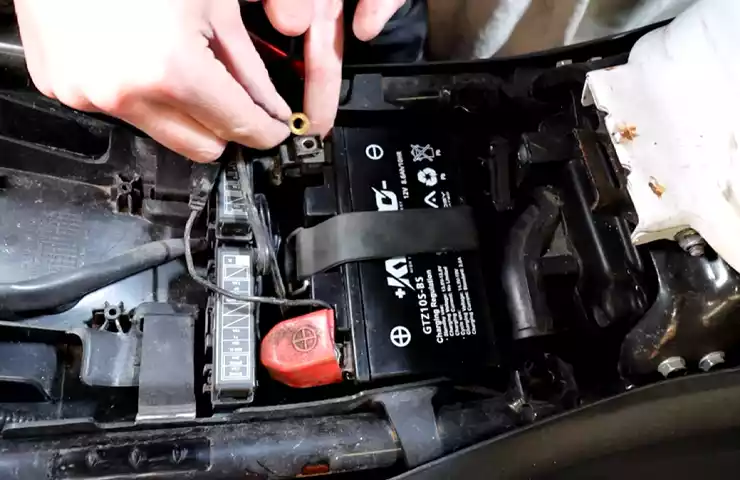
Positioning the New Battery in the Compartment
Now that the battery terminals are clean, it’s time to position the new battery in the compartment. Proper positioning ensures that the battery is secure and stable.
Follow these steps to position the new battery:
- Hold the new battery with both hands and carefully lower it into the battery compartment.
- Make sure the battery is level and fits snugly in the compartment.
- If your motorcycle has a battery strap or bracket, use it to secure the battery in place.
- Double-check that the battery is positioned correctly before proceeding to the next step.
Connecting the Positive Terminal
With the battery properly positioned, it’s time to connect the terminals. Start by connecting the positive terminal first.
Follow these steps to connect the positive terminal:
- Identify the positive terminal, usually indicated by a plus (+) sign.
- Take the positive battery cable (usually red) and attach it to the positive terminal.
- Tighten the terminal nut securely using a wrench or a socket wrench.
Connecting the Negative Terminal
After connecting the positive terminal, it’s time to connect the negative terminal. This step completes the battery installation process and ensures that the electrical system functions properly.
Follow these steps to connect the negative terminal:
- Identify the negative terminal, usually indicated by a minus (-) sign.
- Take the negative battery cable (usually black) and attach it to the negative terminal.
- Tighten the terminal nut securely using a wrench or a socket wrench.
With the new battery installed and the terminals properly connected, you can now enjoy a smoothly running motorcycle. It’s always a good idea to check the battery connections periodically to ensure they remain tight and secure.
Testing And Finalizing
After successfully installing a new motorcycle battery, it is essential to perform a series of tests to ensure everything is properly connected and the battery is functioning as it should. This final step in the installation process will give you peace of mind and allow you to confidently hit the road with your motorcycle. In this section, we will cover the necessary steps to double-check the battery connections, test the battery functionality, secure the battery in the compartment, and provide tips for maintaining the battery’s longevity.
Double-Checking the Battery Connections
Before proceeding with any tests, it is crucial to ensure that all battery connections are secure. Loose connections can hamper the battery’s performance and lead to potential electrical problems down the line. Follow these steps to double-check the battery connections:
- Inspect the battery terminals for any signs of corrosion or damage. Clean the terminals using a battery terminal cleaner and a wire brush if necessary.
- Make sure the positive and negative battery cables are securely connected to the correct terminals. The positive cable should be connected to the positive terminal (+), usually distinguished by a red color or a plus sign.
- Tighten the battery cable connections using a wrench or a socket set. Ensure they are snug, but be cautious not to overtighten them, as this may damage the battery terminals.
Turning on the Motorcycle and Checking Battery Functionality
Once the battery connections are double-checked and secured, it’s time to turn on the motorcycle and evaluate the battery’s functionality. Follow these steps:
- Carefully turn the motorcycle’s ignition switch to the “ON” position, but avoid starting the engine just yet.
- Check the dashboard for any warning lights or indicators. If the battery is properly installed, the lights should illuminate briefly and then turn off, signaling that the battery is supplying power to the motorcycle’s electrical system.
- Test the motorcycle’s starter by engaging it while the ignition switch is in the “ON” position. The engine should start quickly and without any hesitation. If there are any issues with starting the engine, double-check the battery connections and consult a professional if necessary.
Securing the Battery in the Compartment
After ensuring the battery is functioning correctly, it is vital to secure it properly within the motorcycle’s battery compartment. This step will prevent any movement or vibrations that could damage the battery or its connections. Here’s how to securely position the battery:
- Place the battery back into its designated compartment, ensuring that it fits snugly.
- Attach any retaining straps or brackets that are provided or recommended by the manufacturer to keep the battery in place.
- Tighten the retaining straps or brackets using the appropriate tools, such as screws or bolts, until they firmly secure the battery without putting excessive pressure on it.
Maintaining the Battery for Longevity
Now that the battery is installed, tested, and securely positioned, it’s essential to maintain it regularly to ensure its longevity. Follow these tips:
- Keep the battery clean and free of dirt, debris, and corrosion. Wipe it gently with a clean, dry cloth when necessary.
- Regularly inspect the battery connections for any signs of corrosion or looseness. Clean the terminals and tighten the connections if needed.
- If the motorcycle will not be used for an extended period, consider investing in a battery maintainer or trickle charger. These devices help keep the battery charged and healthy during long periods of inactivity.
- Follow the manufacturer’s specifications and recommendations for battery maintenance, including the frequency of inspections and necessary replacements.
By following these guidelines for testing, finalizing, and maintaining your motorcycle battery, you can ensure optimal performance, longevity, and a safe riding experience.
Frequently Asked Questions Of How To Install A Motorcycle Battery
What Is The Correct Way To Hook Up A Motorcycle Battery?
To hook up a motorcycle battery correctly, first, disconnect the negative (black) cable, followed by the positive (red) cable. Next, remove the old battery and clean the terminals. Place the new battery in position and connect the positive cable first, then the negative cable.
Make sure the connections are secure and the cables are not tangled or exposed.
Do You Connect Red Or Black First On A Motorcycle Battery?
Connect the red positive terminal first, then the black negative terminal, when attaching a battery to a motorcycle.
Which Battery Terminal To Connect First?
Connect the positive terminal (+) first and then the negative terminal (-) when connecting a battery.
Which Motorcycle Battery Terminal To Remove First?
Remove the negative (-) terminal first when removing a motorcycle battery.
Conclusion
To sum it up, installing a motorcycle battery is a straightforward process that requires some safety precautions. By following the step-by-step guide mentioned above, you can successfully replace your battery and ensure smooth rides for years to come. Remember to consult your motorcycle’s manual, gather the necessary tools, and take your time to carry out the installation correctly.