To install a marine radio, mount the radio in a suitable location and connect it to the power source and antenna. Here is a brief guide on how to install a marine radio.
Whether you are a boating enthusiast or a professional mariner, having a marine radio is essential for communication and safety on the water. Marine radios allow you to communicate with other boaters, receive weather updates, and call for assistance in case of an emergency.
Installing a marine radio may seem like a daunting task, but with the right instructions and tools, it can be a straightforward process. We will walk you through the steps to install a marine radio properly.
Choosing The Right Marine Radio
Choosing the Right Marine Radio
When it comes to installing a marine radio, one of the most crucial steps is choosing the right radio for your specific needs. A marine radio is an essential communication tool for boaters, allowing them to stay connected, receive weather alerts, and call for help in case of an emergency. However, with so many options available in the market, it can be overwhelming to select the perfect marine radio.
Factors to consider when selecting a marine radio
Before making your purchase, consider these important factors to ensure you choose the right marine radio:
- Range: The range of the marine radio determines how far the signal can reach. It is important to choose a radio with sufficient range to cover your boating area, whether it’s a small lake or open ocean.
- Features: Different marine radios offer a range of features, such as built-in GPS, DSC (Digital Selective Calling) capabilities, and NOAA weather alerts. Consider which features are essential for your boating needs.
- Power Source: Marine radios can be powered by either batteries or the boat’s electrical system. Determine which power source is the most practical for your boating trips.
- Installation: Consider the ease of installation for the marine radio. Some radios require complicated wiring setups, while others can be easily mounted without professional assistance.
- Brand Reputation: Opt for a reputable brand that is known for producing reliable and durable marine radios. Research customer reviews and ratings to gauge the performance and longevity of the radio.
Understanding the different types of marine radios
Marine radios are available in different types, each with its own features and limitations. Familiarize yourself with the different types:
- VHF Marine Radios: VHF (Very High Frequency) marine radios are the most common type used by boaters. They operate on specific VHF channels and provide clear and reliable communication over short to medium distances.
- Handheld Marine Radios: Handheld marine radios are portable and offer the flexibility to communicate on land or water. They are battery-powered and often waterproof, making them a popular choice for kayakers, paddleboarders, and small boat owners.
- Fixed-Mount Marine Radios: Fixed-mount marine radios are installed permanently on a boat. They are usually more powerful than handheld radios and offer additional features like DSC capabilities or AIS (Automatic Identification System) integration.
- CB Radios: CB (Citizens Band) radios, although less common in boating, can be used as a secondary communication tool. They operate on different channels than VHF radios and have a longer range.
The importance of choosing a reliable and waterproof radio
When selecting a marine radio, it is crucial to choose one that is both reliable and waterproof. Boating conditions can be unpredictable, with exposure to water, rain, and rough sea conditions. A reliable radio ensures clear communication with other boaters or the shore, while a waterproof radio prevents damage caused by water exposure.
Investing in a reliable and waterproof marine radio not only enhances communication and safety but also ensures the longevity and durability of the radio, making it a worthwhile investment for any boater.
Preparing For Installation
Before you can begin installing a marine radio, it’s important to properly prepare for the installation process. This involves gathering the necessary tools and equipment, understanding the installation requirements, and choosing the optimal location for the radio. By taking these steps, you can ensure a smooth and successful installation of your marine radio.
Gathering the necessary tools and equipment

To install a marine radio, you will need several tools and equipment to ensure a proper installation. Here are the essentials you will need:
- Marine radio unit
- Marine antenna
- Power cables
- Wire cutters and strippers
- Screwdrivers
- Drill with appropriate drill bits
- Mounting hardware
- Zip ties or cable clips
- Electrical tape
- Heat shrink tubing
By having all these tools and equipment on hand, you can ensure a seamless installation process, without the need for any last-minute trips to the store.
Understanding the installation requirements
Before you dive into the installation process, it’s crucial to thoroughly understand the installation requirements. These requirements may vary depending on the specific marine radio model and boat type. To gain a comprehensive understanding:
- Read the user manual provided with your marine radio. This will outline specific installation instructions and requirements.
- Research any additional guidelines or recommendations from the manufacturer or reliable boating resources.
- Consult with a professional if you are unsure about any aspect of the installation process.
By familiarizing yourself with the installation requirements, you can ensure that your marine radio is installed correctly and functions optimally.
Choosing the optimal location for the radio
The location of your marine radio is crucial for its effectiveness and longevity. Here are some considerations to keep in mind when choosing the optimal location:
- Ensure the radio is easily accessible and within reach of the boat’s main control area.
- Choose a location that is protected from direct exposure to the elements, such as rain or excessive sunlight.
- Ensure the location allows for proper ventilation to prevent overheating.
- Consider the proximity to the marine antenna to minimize signal loss.
- Avoid areas with excessive vibration or movement, as this can affect the radio’s performance.
- Refer to the installation guidelines provided by the manufacturer for specific location recommendations.
By carefully selecting the optimal location for your marine radio, you can maximize its functionality and longevity, ensuring clear and reliable communication while out on the water.
Installing A Marine Radio

Mounting the radio securely
Before you start installing your marine radio, it’s important to ensure that it is mounted securely. This will prevent any vibrations or movements that could potentially damage the radio or affect its performance. Here’s a step-by-step guide on how to mount your marine radio:
- Choose a suitable location for mounting the radio in your boat. Ideally, it should be a place that is easily accessible and visible to the operator.
- Using a template provided by the manufacturer, mark the holes on the mounting surface where the radio will be installed.
- Drill the holes using an appropriate sized drill bit, taking care to not damage any wiring or components behind the mounting surface.
- Securely mount the radio using the provided screws or hardware. Make sure it is firmly attached and does not move or wobble.
Connecting the power source
Now that the radio is securely mounted, the next step is to connect it to a power source. This will ensure that the radio receives the necessary power to function properly. Follow these steps to connect the power source:
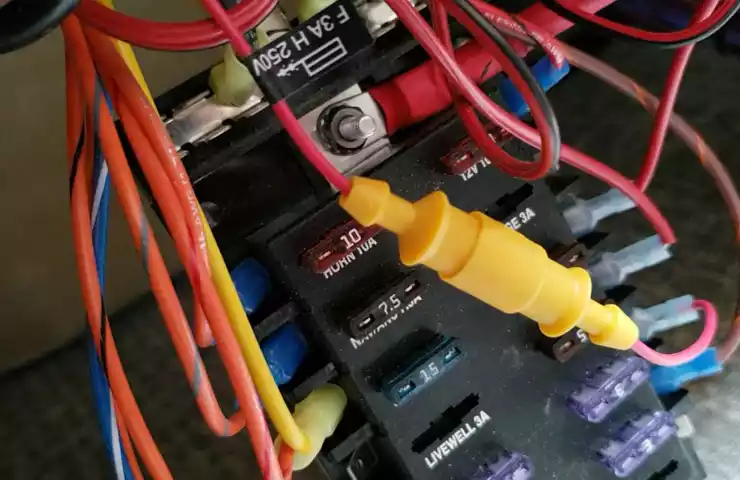
- Locate the power wires on the back of the radio. Typically, there will be a red wire for positive (+) and a black wire for negative (-).
- Connect the positive wire to a suitable power source on the boat, such as the boat’s battery or a designated accessory power outlet. Ensure the power source is capable of providing the required voltage for the radio.
- Connect the negative wire to a ground point on the boat, such as the boat’s metal frame. This will complete the power circuit for the radio.
Installing the antenna and connecting it to the radio
The antenna is a crucial component of your marine radio as it allows for reliable communication over long distances. Here’s how you can install the antenna and connect it to the radio:
- Select a suitable location for mounting the antenna on your boat. Ideally, it should be placed as high as possible to maximize its range.
- Securely mount the antenna using the provided mounting hardware. Ensure it is firmly attached and does not move or wobble.
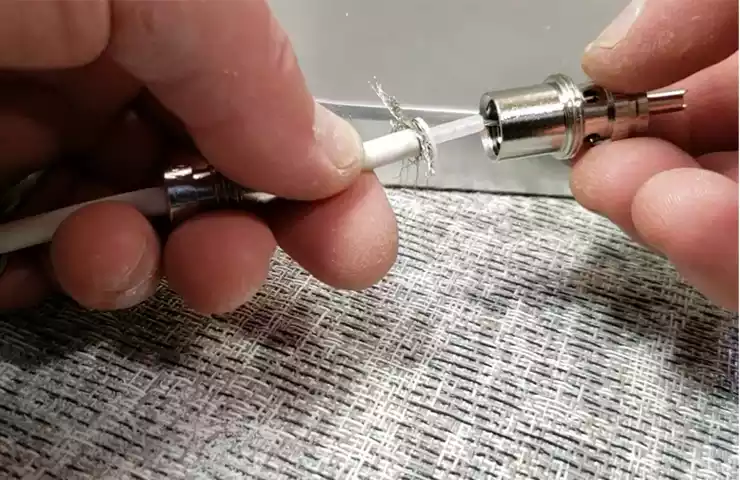
- Connect the antenna cable to the designated antenna input on the back of the radio. Make sure it is securely connected to ensure proper signal reception.
Installing and connecting additional accessories
In addition to the basic components, you may also want to install and connect additional accessories to enhance your marine radio setup. This could include external speakers for better audio quality or other devices for added functionality. Here’s how you can install and connect these accessories:
- Choose a suitable location for mounting the additional accessory, keeping in mind its purpose and functionality.
- Securely mount the accessory using the provided hardware. Ensure it is firmly attached and does not move or wobble.
- Connect the accessory to the appropriate ports or inputs on the back of the radio. Follow the manufacturer’s instructions for proper connection.
By following these steps, you can successfully install a marine radio and ensure that it is securely mounted, powered, and connected to other components. Remember to refer to the manufacturer’s instructions for specific guidance on your particular radio model.
Testing And Troubleshooting

After successfully installing your marine radio, it’s crucial to thoroughly test and troubleshoot to ensure proper functionality and optimal performance while out at sea. Here are some essential steps to follow to ensure the radio is working as expected and troubleshoot any common installation issues that may arise.
Checking the radio’s functionality
Before anything else, it’s imperative to verify that the marine radio is functioning correctly. Here’s a step-by-step guide to help you:
- Power on the radio: Turn on the marine radio and ensure it receives power. Check if the display lights up and all buttons and knobs are responsive.
- Check the audio: Connect a speaker or headphone to the radio’s audio output and play some audio. Make sure you can hear clear and distortion-free sound.
- Tune in to a channel: Select a channel and confirm that the radio can successfully tune in and receive transmissions without any interference or static.
- Test the microphone: Make a test call using the microphone to confirm that it’s transmitting clear audio to other radios. Ensure the microphone is working correctly and has good sensitivity.
Testing the range and reception quality
After verifying the radio’s functionality, it’s time to test its range and the quality of reception. Here’s how:
- Find a clear channel: Locate an unused channel or frequency that is not prone to interference. This will help you assess the range and reception quality accurately.
- Transmit and receive test calls: Send test calls to other marine radios within your desired range. Verify that transmissions are clear, and you receive responses without any loss of signal.
- Test different locations: Move to different locations on your boat and repeat the test calls. This will help you identify any dead spots or areas where the radio’s reception may be weak.
- Measure the range: Measure the maximum distance at which your radio can transmit and receive signals effectively. Take note of any significant drop in signal quality beyond a certain distance.
Troubleshooting common installation issues and solutions

Even with proper installation, issues may still arise. Here’s a list of common installation problems and their potential solutions:
| Issue | Solution |
|---|---|
| No power to the radio | Check the power connections, fuses, and battery voltage. Ensure all connections are secure, and replace any blown fuses. |
| Weak or no signal | Inspect the antenna connection, ensuring it is properly mounted and has a clear line of sight. Consider upgrading to a higher-quality marine antenna. |
| Poor audio quality | Check the speaker connections and audio settings. Adjust the volume, treble, and bass to improve audio clarity. |
| Interference or static | Move away from potential sources of interference, such as other electrical equipment or nearby antennas. Try changing channels to find one with less interference. |
By performing thorough functionality tests, range and reception tests, and troubleshooting common installation issues, you can ensure your new marine radio is working optimally and ready to keep you connected and safe while out on the water.
Frequently Asked Questions On How To Install A Marine Radio
How To Install A Marine Radio Antenna?
To install a marine radio antenna: 1. Choose a suitable location on your boat. 2. Mount the antenna securely using stainless steel brackets or antenna mounts. 3. Connect the antenna cable to the radio using a coaxial connector. 4. Ensure a tight and waterproof seal around the cable entry point.
5. Test the radio’s signal strength and adjust the antenna if needed.
How Do You Wire A Vhf Radio To A Battery?
To wire a VHF radio to a battery, follow these steps: first, identify the positive and negative terminals of the battery. Next, connect the positive wire from the VHF radio to the positive terminal of the battery. Then, connect the negative wire from the VHF radio to the negative terminal of the battery.
Ensure all connections are secure and tight. Test the radio to ensure it is working properly.
Does A Marine Radio Antenna Need To Be Grounded?
Yes, a marine radio antenna needs to be grounded. Grounding ensures proper functioning and safety by dispersing excess electrical energy and protecting against electrical damage.
Do You Need A Gps For A Marine Radio?
Yes, you need a GPS for a marine radio. A GPS helps pinpoint your location accurately, allowing you to communicate your coordinates to rescue services if needed. It enhances safety and navigation on the water.
Conclusion
Installing a marine radio doesn’t have to be a daunting task. With simple steps and a little know-how, you can ensure clear communication on the water. By following this guide, you’ll be able to install your marine radio efficiently and effectively.
Remember, communication is key when it comes to boating safety, so get your radio installed and stay connected out on the water. Happy boating!
