Installing a hitch bike rack is a straightforward process that involves securing the rack to the hitch receiver of your vehicle and mounting the bikes onto the rack. If you enjoy biking and want to transport your bikes conveniently and safely, installing a hitch bike rack can be a great option.
Hitch bike racks are designed to attach to the hitch receiver of your vehicle, allowing you to transport your bikes securely without taking up any interior space. In this guide, we will outline the steps required to install a hitch bike rack effectively.
By following these steps, you’ll be able to easily install and use a hitch bike rack to transport your bikes wherever you desire. So, let’s get started!
Choosing The Right Hitch Bike Rack For Your Vehicle
When it comes to transporting your bikes safely and securely, a hitch bike rack is an excellent choice. By attaching to the hitch receiver on your vehicle, these racks provide a sturdy and convenient solution for transporting your bikes. However, with a variety of options available on the market, it’s important to select the right hitch bike rack that suits your needs and vehicle. Let’s explore the factors to consider when selecting a hitch bike rack and understand the different types.
Factors to consider when selecting a hitch bike rack
Before purchasing a hitch bike rack, there are several essential factors to take into account:
- Bike capacity: Determine how many bikes you need to transport. Hitch bike racks come in various sizes, accommodating anywhere from one to five bikes. Make sure the rack you choose can handle the number of bikes you plan to transport.
- Hitch receiver compatibility: Check the compatibility of your vehicle’s hitch receiver with the rack. Most hitch bike racks are designed to fit standard hitch receivers, but it’s crucial to verify that they are compatible with your specific vehicle.
- Bike frame compatibility: Consider the type of bike frames you will be transporting. Some racks may not be suitable for bikes with non-traditional frame designs, such as women’s or children’s bikes. Ensure that the rack you select can safely accommodate the frames of your bikes.
- Weight capacity: Pay attention to the weight capacity of the hitch bike rack. It’s vital to choose a rack that can support the combined weight of your bikes.
- Security features: Look for hitch bike racks that offer adequate security features. This can include integrated locks or the ability to lock the bikes to the rack to prevent theft.
- Access to the vehicle: Consider whether you need access to the rear of your vehicle while the rack is installed. Some hitch bike racks swing away or tilt down to allow access to the trunk or hatch.
Understanding the different types of hitch bike racks
Hitch bike racks come in various designs to suit different needs. Let’s explore the most common types:
| Type | Description |
|---|---|
| Platform hitch bike racks | These racks have a platform-style design where the bikes sit on top of the rack. They offer excellent stability and support, making them ideal for heavier bikes or bikes with non-traditional frame designs. Platform hitch bike racks often come with features like adjustable arms and integrated locks. |
| Hanging hitch bike racks | As the name suggests, hanging hitch bike racks suspend the bikes from the rack using horizontal arms. They are generally more affordable than platform racks and can accommodate multiple bikes. However, they may require additional adapters for non-traditional frame designs. |
| Tilt-away hitch bike racks | These racks allow you to tilt them away from the vehicle, providing easier access to the trunk or hatch without having to remove the bikes. Tilt-away hitch bike racks are convenient for quick and frequent access to your cargo area. |
Consider your specific requirements and preferences when choosing between these different types of hitch bike racks. Make sure to select a design that suits your bike type, number of bikes, and ease of access to your vehicle.
By carefully considering the factors mentioned above and understanding the different types of hitch bike racks available, you can confidently choose the right rack that matches your vehicle and bike transportation needs.
How To Measure Your Hitch Receiver Size
Determining the hitch receiver size of your vehicle

Before you embark on installing a hitch bike rack, it is crucial to measure your hitch receiver size accurately. This ensures that the bike rack you purchase will be compatible with your vehicle’s hitch. Not all hitches are created equal, so taking the time to determine your hitch receiver size is essential for a successful installation.
Tools and methods to measure your hitch receiver size accurately
Measuring your hitch receiver size may seem daunting at first, but it can be a straightforward process with the right tools and methods. Here are the steps to help you measure your hitch receiver size accurately:
- Step 1: Gather the necessary tools
- Tape measure or ruler
- Pen and paper for noting down measurements
- Step 2: Identify the hitch receiver type
- Step 3: Measure the inside dimensions
- Step 4: Determine the hitch receiver size
By following these steps and utilizing the appropriate tools, you can measure your hitch receiver size accurately. This ensures a seamless installation process for your hitch bike rack, allowing you to enjoy your cycling adventures without any worries.
Step-By-Step Guide To Installing A Hitch Bike Rack
If you love biking but struggle to transport your bikes safely and conveniently, installing a hitch bike rack is the perfect solution for you. A hitch bike rack allows you to easily attach your bikes to the back of your vehicle, making it hassle-free to transport them to your favorite biking trails. In this step-by-step guide, we will walk you through the process of installing a hitch bike rack, from gathering the necessary tools and materials to testing the installation and making any necessary adjustments. Let’s get started!
Gathering the necessary tools and materials
Before you begin the installation process, it’s important to gather all the necessary tools and materials to ensure a smooth and efficient installation. Here’s a list of what you’ll need:
| 1 | Hitch bike rack | A high-quality hitch bike rack that suits your needs and can safely carry your bikes. |
| 2 | Hitch receiver | A hitch receiver specifically designed for your vehicle’s make and model. |
| 3 | Wrench | A wrench to tighten bolts and ensure a secure installation. |
| 4 | Rubber mallet | A rubber mallet to gently tap and secure the hitch bike rack into place. |
Preparing your vehicle and bike rack for installation
Once you have all the necessary tools and materials, it’s time to prepare your vehicle and bike rack for installation. Here are the steps:
- Ensure that your vehicle is parked on a level surface, such as your driveway or garage.
- Inspect your hitch receiver to ensure it is clean and free from any debris or dirt.
- If necessary, use a brush or a cloth to clean the hitch receiver before proceeding.
- Double-check the compatibility of your hitch bike rack with your hitch receiver to avoid any compatibility issues.
Attaching the hitch bike rack to the hitch receiver
Now that your vehicle and bike rack are prepared, it’s time to attach the hitch bike rack to the hitch receiver. Follow these steps:
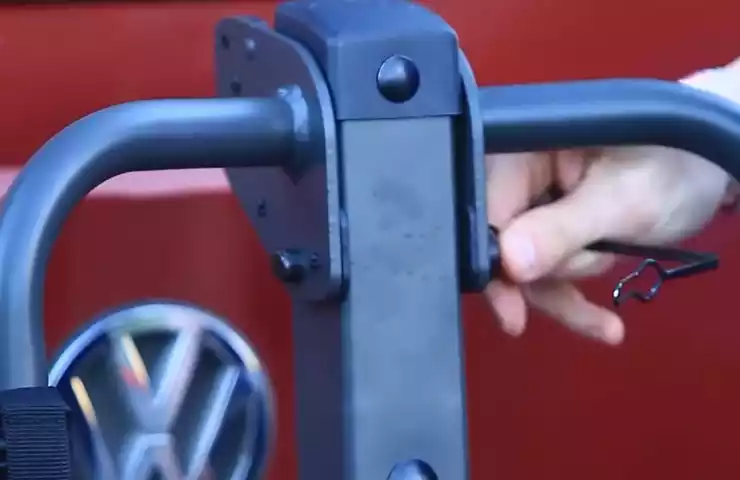
- Lift the hitch bike rack and align it with the hitch receiver on your vehicle.
- Insert the hitch pin into the hitch receiver and secure it tightly with a wrench to prevent any movement or wobbling.
- If your hitch bike rack has an additional security bolt, tighten it using the wrench according to the manufacturer’s instructions.
Securing the bike rack and ensuring stability
With the hitch bike rack attached, it’s essential to secure the bikes on the rack and ensure stability during transportation. Here’s what you need to do:
- Place your bikes onto the bike rack, ensuring that they are properly positioned and balanced.
- Secure each bike individually using the provided straps or bungee cords, ensuring they are tightly fastened to prevent any movement during transit.
- Gently give the bike rack a shake to check for any looseness or instability. If you notice any movement, tighten the straps or adjust the bike positioning accordingly.
Testing the installation and making any necessary adjustments
Before hitting the road, it’s crucial to test the installation of your hitch bike rack and make any necessary adjustments. Follow these final steps:
- Take a short drive around your neighborhood, paying attention to any vibrations, noises, or excessive movement from the hitch bike rack.
- If you notice any issues, stop the vehicle in a safe location and make the necessary adjustments, such as tightening straps or repositioning the bikes.
By following this step-by-step guide, you can easily install a hitch bike rack and enjoy the convenience of transporting your bikes safely and securely. Remember to always refer to the manufacturer’s instructions for specific installation guidelines and consult a professional if needed. Happy biking!
Tips For Properly Loading Bikes Onto A Hitch Bike Rack
When it comes to installing a hitch bike rack, one of the most important steps is properly loading your bikes onto the rack. This ensures their safety during transportation and prevents any damage to the bikes or your vehicle. In this section, we will discuss some valuable tips for securing your bikes onto a hitch bike rack.
Positioning and Balancing the Bikes on the Bike Rack
Proper positioning and balancing of the bikes on the bike rack are crucial for a safe and stable transportation. Here are some tips to guide you:
- Position the bikes alternately: To distribute the weight evenly and prevent any imbalance, alternate the positioning of the bikes. For example, if you have four bikes, position two facing one way, and the other two facing the opposite way.
- Balance the weight: Place the heaviest bikes closer to the vehicle to maintain balance. This prevents the rack from tilting or swaying during transit. Also, make sure the bikes are centered on the rack.
- Secure loose parts: Before loading the bikes, ensure that any loose parts, such as handlebars or pedals, are secure. This prevents any accidental damage during transport.
Using Straps or Clamps to Secure the Bikes in Place

Securing the bikes to the hitch bike rack is essential to prevent them from shifting or falling off during travel. Consider the following tips:
- Use quality straps or clamps: Invest in sturdy straps or clamps that provide a secure grip on the bikes. This ensures that they remain in place, even on bumpy roads.
- Wrap the straps around the frame: When using straps, wrap them around the bike frame instead of the wheels. This provides better stability and reduces the risk of damage to the wheels.
- Fasten the straps tightly: Ensure that the straps are tightened securely. Check for any looseness before setting off on your journey. Additionally, you can use bungee cords or additional straps if needed, for added stability.
Strategies for Preventing Bike-to-Bike or Bike-to-Vehicle Contact
Preventing bike-to-bike or bike-to-vehicle contact is crucial to avoid any scratches, dents, or damage. Implement the following strategies:
- Use protective padding: Consider using protective padding or foam between the bikes and any potential contact points. This creates a buffer zone and reduces the risk of damage.
- Invest in a swing-away bike rack: If your vehicle allows, invest in a swing-away bike rack. This enables you to easily access the rear of your vehicle without the need to unload the bikes, reducing the risk of accidental contact.
- Inspect the bikes after loading: Before hitting the road, double-check that the bikes are properly positioned and there is no chance of contact with each other or the vehicle. This can prevent any mishaps during your journey.
By following these tips for properly loading your bikes onto a hitch bike rack, you can ensure a safe and hassle-free transportation experience. Take the time to position and balance the bikes correctly, secure them with quality straps or clamps, and employ strategies to prevent any bike-to-bike or bike-to-vehicle contact. Happy biking!
Safety Precautions And Maintenance Tips For Hitch Bike Racks
When it comes to installing a hitch bike rack, it’s important to prioritize safety. By following a few simple guidelines and regularly maintaining your rack, you can ensure a secure and enjoyable biking experience. In this section, we’ll cover the key safety precautions and maintenance tips to keep in mind when using hitch bike racks.
Checking the hitch bike rack’s weight capacity and limitations
Before you load up your bikes onto the hitch bike rack, always verify the weight capacity and limitations specified by the manufacturer. One common mistake some people make is overloading the rack, which can lead to damage or even accidents on the road. Be sure to check not only the overall weight capacity but also any limitations on the weight per bike or specific bike sizes that the rack can accommodate.
Regularly inspecting and tightening bolts and connections
Maintaining the integrity of your hitch bike rack is essential to ensure safe transportation. Regularly inspect all the bolts and connections, ensuring they are securely tightened. Loose bolts and connections can cause the bike rack to wobble or detach while driving, posing a significant risk to you, your bikes, and other drivers on the road. Take the time to visually inspect all the components, including the hitch pin, bike frame clamps, and support arms, and tighten them as needed.
Avoiding common mistakes that can damage the bike rack or

vehicle
When using a hitch bike rack, it’s important to avoid common mistakes that can lead to damage to both the rack and your vehicle. One such mistake is failing to properly secure the bikes to the rack using straps or bungee cords. Always make sure the bikes are tightly strapped down to prevent them from moving or falling off during transit. Additionally, be mindful of the distance between the bikes and your vehicle to prevent any accidental scratches or damage to the paintwork.
Another common mistake is forgetting to lock the bikes to the rack. While the bike rack itself may be securely attached to the hitch receiver, it’s important to use a quality bike lock to deter theft. This extra layer of security will give you peace of mind while leaving your bikes unattended.
In conclusion, by thoroughly understanding the weight capacity and limitations of your hitch bike rack, regularly inspecting and tightening bolts and connections, and avoiding common mistakes, you can ensure the safe and reliable transportation of your bikes. Emphasize the importance of regular maintenance and adherence to manufacturer guidelines to maximize the lifespan of your hitch bike rack while keeping yourself and others safe on the road.
Frequently Asked Questions (Faqs) About Hitch Bike Rack Installation
If you’re an avid cyclist or just enjoy the occasional bike ride, investing in a hitch bike rack can be a game-changer. Not only does it provide a safe and secure way to transport your bikes, but it also frees up valuable space inside your vehicle. However, before you rush out to purchase a hitch bike rack, it’s important to have a clear understanding of the installation process. In this section, we’ll address some of the most commonly asked questions about hitch bike rack installation, so you can hit the road with confidence.
How long does it take to install a hitch bike rack?
One of the great advantages of hitch bike racks is their ease of installation. Unlike roof-mounted racks that can be time-consuming, a hitch bike rack can be quickly and easily installed. On average, it takes about 15-30 minutes to install a hitch bike rack, depending on your familiarity with the process and the specific model you choose.
Can I install a hitch bike rack on any type of vehicle?
Yes, hitch bike racks are compatible with a wide range of vehicles. As long as your vehicle has a hitch receiver, you should be able to install a hitch bike rack. Whether you have a compact car, SUV, minivan, or truck, there are hitch bike rack options available to fit your vehicle’s specific needs.
What if my vehicle doesn’t have a hitch receiver?
If your vehicle doesn’t come with a hitch receiver, don’t worry. It is possible to have one installed. Hitch receivers can be added to most vehicles, either by a professional installer or as a DIY project. Keep in mind that the installation of a hitch receiver may require drilling, wiring, or modifying your vehicle, so it’s best to consult with a trusted professional to ensure it is done correctly and safely.
How many bikes can a hitch bike rack hold?
The number of bikes a hitch bike rack can hold depends on the specific model. Hitch bike racks typically come in various sizes, ranging from 2 to 5 bike capacities. When considering the number of bikes you need to transport, be sure to check the weight capacity of the rack as well, as exceeding the weight limit can cause damage to both the rack and your vehicle.
Do I need any additional accessories for installing a hitch bike rack?
Most hitch bike racks come with all the necessary accessories for installation. These accessories usually include the actual rack, the hitch mount, and any straps or brackets needed to secure the bikes. However, depending on your specific vehicle and the rack you choose, you may need to purchase additional accessories such as hitch locks or stabilizers, which can further enhance the security and stability of your hitch bike rack.
Frequently Asked Questions On How To Install A Hitch Bike Rack
Is It Worth Getting A Hitch For Bike Rack?
Yes, it is worth getting a hitch for a bike rack. A hitch provides a secure and stable attachment for your bike rack, ensuring the safety of your bikes during transportation. With a hitch, you can easily and conveniently transport your bikes without any worries.
Are Bike Racks Easy To Install?
Yes, bike racks are easy to install. They can be set up quickly and without much effort.
Do All Bike Racks Fit All Hitches?
Not all bike racks fit all hitches. The compatibility depends on the specific hitch and rack models, so it’s important to match them properly. Check the product specifications or consult the manufacturer to ensure a proper fit.
Do I Need A Hitch Ball For A Bike Rack?
Yes, you need a hitch ball for a bike rack. The hitch ball provides a secure connection between the bike rack and the hitch receiver on your vehicle. It ensures stability and safety while transporting your bikes.
Conclusion
Installing a hitch bike rack is a simple process that can greatly enhance your outdoor adventures. By following the step-by-step instructions outlined in this guide, you can easily attach your bike rack to your vehicle’s hitch and ensure a secure ride for your bikes.
With proper installation, you can enjoy the freedom and convenience of transporting your bikes wherever your journeys may take you. So, get ready to hit the road with confidence and make the most of your cycling experiences. Happy biking!