To install a headache rack, secure it to your truck bed with bolts and use a ratchet to tighten them into place. Now, let’s dive deeper into the process, step by step.
When it comes to protecting the rear window of your truck and keeping your cargo secure, a headache rack is a must-have accessory. Designed to shield your truck’s rear window from shifting items and provide a sturdy anchor for tie-downs, it is an essential addition for any truck owner.
We will guide you through the process of installing a headache rack, ensuring that it is securely attached to your truck bed, providing maximum protection and functionality. Follow these simple steps to install a headache rack and enhance your truck’s safety and versatility.
Understanding The Purpose Of A Headache Rack
A headache rack is an essential accessory for trucks and vehicles that are used for heavy-duty work. This metal framework, also known as a cab guard or back rack, is installed on the rear window of a truck to protect the cab and its occupants from the cargo in the truck bed. In this article, we will explore the importance of understanding the purpose of a headache rack, as well as the benefits it provides.
What is a headache rack and why is it important?
A headache rack is a sturdy metal structure that is installed behind the rear window of a truck or vehicle. Traditionally made of steel or aluminum, it serves as a protective barrier between the cab and any cargo or equipment in the truck bed.
One of the main purposes of a headache rack is to prevent cargo from crashing into the rear window during sudden stops or accidents. It acts as a barrier, absorbing the impact and preventing damage to the cab and its occupants. Furthermore, a headache rack can also prevent objects from falling out of the truck bed, minimizing the risk of accidents or injuries on the road.
Additionally, a headache rack serves as a mounting point for other accessories such as toolboxes, ladder racks, or additional lighting. This allows truck owners to maximize their cargo space efficiently and securely.
Benefits of installing a headache rack
There are several benefits to installing a headache rack on your truck:
- Enhanced safety: By acting as a protective barrier, a headache rack significantly reduces the risk of injury to the cab occupants in the event of an accident or sudden stop.
- Prevention of cargo damage: The headache rack prevents cargo from crashing into the rear window, protecting it from damage and ensuring that your truck remains in good condition.
- Improved organization: With the ability to mount various accessories, a headache rack helps keep your truck bed organized and allows you to transport equipment and tools securely.
- Increased visibility: Some headache racks come with built-in rear-facing lights or can be customized to be compatible with additional lighting. This improves visibility and safety, especially when driving at night.
- Enhanced truck aesthetics: A headache rack can give your truck a rugged, professional look, enhancing its overall aesthetic appeal.
In conclusion, understanding the purpose of a headache rack is crucial for truck owners. Not only does it protect the cab and its occupants from the cargo in the truck bed, but it also provides a range of benefits such as enhanced safety, prevention of cargo damage, improved organization, increased visibility, and enhanced truck aesthetics. Installing a headache rack is a wise investment that ensures your truck remains in top condition and makes your work on the road safer and more efficient.
Essential Tools And Materials
When it comes to installing a headache rack, having the right tools and materials is crucial for a smooth and successful installation. Not only will the right equipment ensure that the job is done correctly, but it will also save you time and frustration. In this section, we will discuss the tools and materials you will need to complete the installation process.
List of Tools Required for Installation
To install a headache rack, you will need a variety of tools to get the job done. Here is a list of essential tools you should have on hand:
- Drill
- Measuring tape
- Socket set
- Wrenches
- Screwdrivers (both flathead and Phillips)
- Ratchet
- Extension bar
- Wire cutters/strippers
- Level
Having these tools readily available will make the installation process much smoother and efficient.
Necessary Materials and Equipment
In addition to the tools listed above, you will also require specific materials and equipment for the headache rack installation. Here are the necessary items:
| Materials | Equipment |
|---|---|
| Bolt-on headache rack | Mounting brackets |
| Mounting hardware | Safety gloves |
| Protective eyewear | Masking tape |
| Drill bits | Wire connectors |
| Sealant or adhesive |
Make sure you have all these materials and equipment ready before starting the installation process. This will help you complete the task efficiently and without any interruptions.
By having the necessary tools and materials for installing a headache rack, you’ll be well-prepared for the task at hand. Remember to take necessary safety precautions and follow the provided instructions. With the right equipment and a little bit of patience, you’ll have your headache rack installed and ready to go in no time!
Preparing For Installation
If you’re looking to enhance your truck’s functionality and add a touch of rugged style, installing a headache rack is a fantastic choice. Before diving into the installation process, proper preparation is essential. This section will guide you through two crucial steps: taking measurements and ensuring a proper fit, and preparing the truck bed and cab for installation.
Taking measurements and ensuring a proper fit
Before purchasing a headache rack, it’s important to know the dimensions that will best fit your specific truck model. Luckily, this process is straightforward and requires just a few simple measurements. Here’s what you need to do:
- Measure the width of your truck bed, ensuring you include any railings or accessories that may affect the fit. Note down this measurement.
- Next, measure the height of your truck’s cab, starting from the bed floor and extending up to the highest point of the cab. Be sure to account for any slope or incline that may be present.
- With these measurements in hand, refer to the specifications provided by the headache rack manufacturer. Ensure that the rack you select is compatible with your truck’s dimensions. Remember, a proper fit is crucial for both functionality and aesthetics.
By taking accurate measurements and choosing a headache rack that aligns perfectly with your truck model, you’ll ensure a hassle-free installation and enjoy the benefits of enhanced safety and functionality.
Preparing the truck bed and cab for installation
Once you have your headache rack ready, it’s time to prepare your truck bed and cab for installation. This step involves some simple yet necessary tasks to ensure a secure and long-lasting fit:
- Clean the truck bed thoroughly, removing any dirt, debris, or rust. This will provide a clean surface for the headache rack to attach to, ensuring a strong and secure fit.
- If your truck has a bed liner, check whether it needs to be removed or if the headache rack can be installed directly over it. Refer to the manufacturer’s instructions for guidance.
- Inspect the cab area for any obstructions or accessories that might interfere with the installation. Remove or adjust them as necessary to allow for a smooth and seamless fit.
- Ensure you have all the necessary tools and equipment readily available. This includes any additional hardware or brackets that may be required for the specific headache rack model.
By meticulously preparing the truck bed and cab, you’ll guarantee a trouble-free installation process. This will not only save you time but also extend the lifespan of your headache rack, providing optimal performance for years to come.
Step 1: Removing Any Existing Components

Removing any existing components that may interfere with the installation process
When it comes to installing a headache rack on your truck, the first step is to remove any existing components that might get in the way. This ensures a smooth and hassle-free installation process.
Clearing the truck bed and cab of any debris
To begin, clear both the truck bed and cab of any debris before installing the headache rack. Removing any dirt, leaves, or other objects helps create a clean and stable working area for the installation.
In addition, it’s essential to clear the truck bed and cab of any personal belongings, tools, or equipment to ensure they don’t impede the installation process. This step not only facilitates the installation but also minimizes the risk of damaging any objects.
Ensuring each H3 heading adheres to HTML syntax
Before we move on to the next step, let’s talk about adhering to HTML syntax when creating H3 headings. Properly formatting the headings not only enhances the readability of your content but also improves search engine optimization.
To ensure that each H3 heading adheres to HTML syntax, it should be enclosed within appropriate opening and closing tags. For example, <h3> is used to start an H3 heading, while </h3> marks the end of the heading. Remember to use these tags to enclose each H3 heading in your blog post.In summary, the first step in installing a headache rack on your truck involves removing any existing components that may interfere with the installation process. After that, it’s important to clear the truck bed and cab of any debris to ensure a clean workspace. Lastly, don’t forget to adhere to HTML syntax when creating H3 headings in your blog post for proper formatting and SEO optimization.
Step 2: Attaching Mounting Brackets
Once you have gathered all the necessary tools and materials, it’s time to move on to the second step of installing a headache rack – attaching the mounting brackets to your truck cab. This crucial step ensures stability and proper function of the headache rack. Follow the simple instructions below to get it right the first time.
Installing the mounting brackets on the truck cab
Start by positioning the headache rack against the cab of your truck. Take note of the recommended spacing between the headache rack and the cab, as specified in the installation instructions provided by the manufacturer. This will vary depending on the brand and model of your headache rack.
Next, determine the appropriate location for the mounting brackets. Typically, these brackets will need to be attached to the top lip of the truck cab, near the rear window. Use a tape measure to ensure equal spacing on both sides of the cab.
Once you have identified the correct position, mark the spot where each bracket will be installed. This will serve as your guide when drilling the necessary holes.
Aligning the brackets to ensure stability and proper function
Aligning the mounting brackets properly is crucial to ensure the stability and proper function of your headache rack. Use a level to ensure that the brackets are perfectly straight before securing them to the truck cab.
If your headache rack comes with adjustable brackets, take advantage of this feature to align them to the correct width of your truck cab. This will provide additional stability and ensure a secure fit.
Once you have aligned the brackets, use the provided hardware – typically bolts and washers – to attach the brackets to the mounting points. Make sure to tighten the bolts securely, but be careful not to overtighten, which could lead to damage or stress on the truck cab.
After attaching the mounting brackets, double-check the alignment to ensure everything is still straight and flush. Take a step back and visually inspect the headache rack from different angles. If any adjustments need to be made, now is the time to do it.
Finally, test the stability of the headache rack by gently pushing and pulling on it. It should feel sturdy and secure, with minimal movement. If you notice any wobbling or instability, reevaluate the alignment of the mounting brackets and make any necessary adjustments.
With the mounting brackets properly installed and aligned, you are now ready to move on to the next step of the headache rack installation process. Stay tuned for our upcoming blog post on Step 3: Attaching the Headache Rack!
Step 3: Installing The Headache Rack

Once you have prepared the mounting brackets and ensured that they are securely attached to your truck, it’s time to move on to the installation of the headache rack itself. This step will guide you through the process of placing the headache rack onto the mounting brackets and securing it in place using the provided hardware.
Placing the headache rack onto the mounting brackets
The first step in installing your headache rack is to carefully place it onto the mounting brackets that you have previously installed on your truck. To do this, follow these steps:
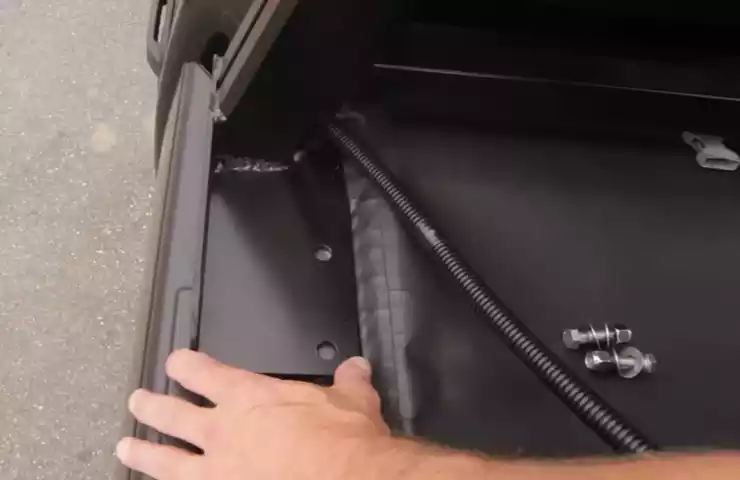
- Ensure that the rack is centered on your truck bed, with the mounting brackets aligned with the corresponding holes or slots on the rack.
- Gently lift the headache rack and position it over the mounting brackets, making sure that it is level and properly aligned.
- Lower the rack onto the brackets, ensuring that the holes or slots on the rack match up with the mounting points on the brackets. The rack should sit securely on the brackets without any gaps or wobbling.
Securing the rack in place using the provided hardware
Once the headache rack is properly placed on the mounting brackets, it’s time to secure it in place to ensure maximum stability and safety. Here’s how you can do it:
- Refer to the manufacturer’s instructions to determine the specific hardware required for your headache rack installation.
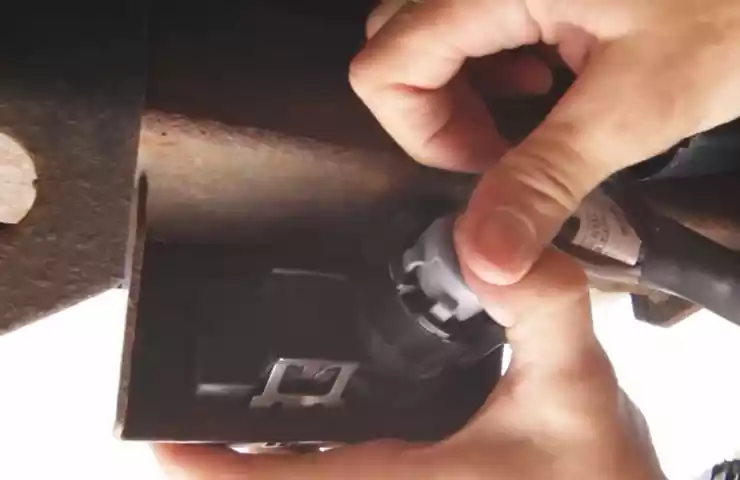
- Using the provided hardware, such as bolts and washers, attach the rack to the mounting brackets. Start by inserting the bolts through the aligned holes or slots on the rack and brackets.
- Tighten the bolts with a wrench or socket set, ensuring that each bolt is securely fastened. Check that the headache rack is stable and does not move when pressure is applied.
- If necessary, perform a final inspection to ensure all the bolts are tightened securely. This will guarantee the headache rack is properly installed and ready to provide the protection you need during transportation.
By following these simple steps, you can ensure a successful installation of your headache rack. Now that your rack is securely in place, you can enjoy a safer and more convenient trucking experience. Stay tuned for the next step in the installation process!
Step 4: Checking For Proper Alignment
Ensuring that the headache rack is properly aligned with the truck bed and cab is crucial for a secure and functional installation. Here’s how you can check and make necessary adjustments for a secure fit:
Ensuring that the headache rack is properly aligned with the truck bed and cab
To start, position the headache rack near the truck bed, lining it up with the mounting brackets or holes. It’s important to note that each truck model may have slightly different mounting requirements, so refer to the manufacturer’s instructions for specific guidelines.
Next, check that the headache rack is sitting straight and level. This can be done using a measuring tape or simply by eye. Make sure the rack is aligned with the side rails of the truck bed and the width matches that of the cab.
Once you’ve confirmed the initial alignment, double-check for any gaps or misalignments between the headache rack and the truck bed or cab. The rack should fit snugly without any loose or uneven areas that could compromise its stability.
Making necessary adjustments for a secure fit
If you notice any misalignments or gaps, it’s important to make the necessary adjustments. These adjustments will vary depending on the specific headache rack and truck model, but here are a few common methods:
- Loosen the mounting brackets or bolts slightly to allow for small adjustments.
- Gently push or pull the headache rack into position to align it properly with the truck bed and cab.
- Use shims or washers to fill any gaps between the rack and the truck bed or cab, ensuring a secure fit.
Remember to tighten the mounting brackets or bolts securely once you’ve made the necessary adjustments. This will ensure that the headache rack remains in place even during rough driving conditions.
By taking the time to check for proper alignment and make any necessary adjustments, you can ensure that your headache rack is securely installed and ready to provide the protection you need while on the road.
Step 5: Tightening And Securing The Headache Rack
Once you have successfully mounted your headache rack onto your truck bed, it is crucial to ensure that it is securely tightened and all connections are stable. This step is important to guarantee the rack’s durability and to provide maximum protection for your vehicle. In this step, we will walk you through the process of using appropriate tools to securely tighten the mounting hardware and the importance of double-checking all connections for stability.
Using the appropriate tools to securely tighten the mounting hardware
To ensure the headache rack is properly secured, it is essential to use the appropriate tools during the tightening process. This will help maintain the integrity of the rack and prevent any potential accidents or damage. Begin by gathering the necessary tools, such as a wrench or socket set, based on the type of mounting hardware used for your specific rack.
Once you have the correct tools at hand, carefully identify each mounting point and use the wrench or socket set to securely tighten the bolts or screws. When tightening, be sure to apply a firm and even amount of force to avoid any loose connections. Remember, your goal is to create a stable and secure foundation for your headache rack.
Double-checking all connections for stability
When it comes to the safety and reliability of your headache rack, double-checking all connections for stability is vital. This simple step can prevent potential hazards and ensure that the rack remains in place, even during rough rides or when hauling heavy cargo.
Take a few minutes to thoroughly inspect each connection point, paying close attention to the bolts or screws. Ensure that they are firmly tightened and show no signs of looseness or wobbling. If you notice any loose connections, use the appropriate tools to tighten them further.
In addition, make sure to examine the overall stability of the headache rack by gently shaking it from different angles. It should feel sturdy and secure without any excessive movement. If you detect any instability, recheck the connection points and tighten them accordingly. By performing these double-checks, you can have peace of mind knowing that your headache rack is firmly secured and ready to withstand the challenges of the road.
In conclusion, Step 5 is a crucial part of the headache rack installation process. By using the appropriate tools to securely tighten the mounting hardware and double-checking all connections for stability, you are ensuring the durability and reliability of your headache rack. With a properly secured rack, you can confidently hit the road and enjoy the added protection and functionality it provides for your truck.
Step 6: Testing And Final Adjustments
After successfully installing your headache rack, it’s time to ensure its stability and make any final adjustments for a perfect fit. This step is crucial to ensure that your headache rack will provide the necessary protection and support when you need it the most. Here’s how you can test the stability and make any final adjustments as needed:
Testing the stability of the headache rack by applying moderate force
Once the headache rack is securely installed, it’s essential to test its stability before hitting the road. This will ensure that it can withstand sudden stops, impacts, or any unexpected movements. To test the stability, follow these steps:
- Stand behind the headache rack and firmly grip it with both hands.
- Apply moderate force by pushing and pulling on the headache rack.
- Check for any excessive movement or rocking.
- If the headache rack moves significantly, further adjustments might be necessary.
- Ensure all mounting bolts and brackets are tight and secure before retesting.
- Repeat the testing process until the headache rack remains stable and stationary under moderate force.
Making final adjustments as needed for a perfect fit
To ensure a perfect fit and optimize the functionality of your headache rack, it’s essential to make any necessary final adjustments. Follow these steps to fine-tune your installation:
- Check for any gaps or misalignments between the headache rack and the truck bed.
- If gaps are present, adjust the mounting brackets as needed to eliminate them.
- Inspect for any areas where the headache rack might interfere with the truck’s accessories or cargo.
- Make any necessary modifications or adjustments to ensure clearance and functionality.
- Double-check all bolts, screws, and brackets to ensure they are secure.
- Test any additional features or functions of the headache rack, such as adjustable bars or tie-down points.
By taking the time to test the stability of your headache rack and make final adjustments, you can ensure a secure and reliable installation. This will provide you with peace of mind knowing that your headache rack will effectively protect the cab and passengers while adding functionality to your truck. Once you have completed these steps, you are ready to hit the road with confidence and enjoy all the benefits your headache rack has to offer.
Frequently Asked Questions For How To Install A Headache Rack
How Does A Headache Rack Attach To A Truck?
A headache rack attaches to a truck by securing it to the truck’s bed or frame using bolts or brackets.
How Do You Wire Lights Into A Headache Rack?
To wire lights into a headache rack, follow these steps: 1) Decide on the type of lights and their placement. 2) Install a fuse block or breaker panel near the battery. 3) Run wires from the fuse block to the lights, routing them through the headache rack.
4) Connect the wires to the lights using connectors and secure them tightly. 5) Test the lights to ensure they are working properly.
How To Install A Headache Rack On An F150?
To install a headache rack on an F150, follow these steps: 1. Gather the necessary tools and materials. 2. Position the rack behind the cab of the truck. 3. Align the mounting brackets with the bed rail holes. 4. Securely tighten the bolts to hold the rack in place.
5. Double-check the installation for stability and adjust if needed.
Do Headache Racks Fit All Trucks?
Headache racks do not fit all trucks. They are designed for specific truck models to provide protection, increase safety, and secure items. Make sure to check compatibility before purchasing a headache rack for your truck.
Conclusion
Installing a headache rack is a straightforward process that can greatly enhance the functionality and safety of your truck. By following these step-by-step instructions, you can easily and efficiently complete the installation on your own. Remember to choose a high-quality headache rack that suits your specific needs and preferences.
So, go ahead and give your truck the added protection it deserves with a sleek and sturdy headache rack.