To install a hard truck bed cover, follow these steps: measure the dimensions of your truck bed, determine the appropriate cover size and type, carefully position the cover on the truck bed, and secure it according to the manufacturer’s instructions. Installing a hard truck bed cover is a simple process that requires proper measurement, alignment, and fastening techniques.
By adhering to these guidelines, you can ensure a secure and functional installation, providing your truck bed with added protection and versatility. So, let’s get started with the installation process of a hard truck bed cover.
Choosing The Right Hard Truck Bed Cover
When it comes to protecting your truck’s bed and keeping your cargo safe and secure, a hard truck bed cover is the way to go. These covers are not only durable and long-lasting, but they also provide added security and protection from the elements. However, with so many options available in the market, choosing the right hard truck bed cover can be a daunting task. To help you make an informed decision, here are some factors to consider and the different types of hard truck bed covers available.
Factors to consider when selecting a hard truck bed cover
Before diving into the various types of hard truck bed covers, it’s important to consider a few key factors. These factors will help you narrow down your options and find the perfect cover for your truck:
- Truck bed size: The first and most crucial factor to consider is the size of your truck bed. Measure the length, width, and height of your bed to ensure a proper fit for the cover.
- Security: Do you need maximum security for your cargo? If so, look for hard truck bed covers that come with reliable locking mechanisms and tamper-proof features.
- Accessibility: Think about how often you need to access your truck bed. Some hard covers are hinged and allow easy access to the bed, while others may require removal or rolling up the cover.
- Installation: Consider whether you prefer a cover that requires professional installation or if you are comfortable with DIY options. Some covers are straightforward to install, while others may require more complex mounting.
- Aesthetics: While functionality is essential, don’t forget about the visual appeal. Select a hard truck bed cover that enhances the overall look of your truck while providing the necessary protection.
Different types of hard truck bed covers available in the market
Now that you have considered the essential factors for selecting a hard truck bed cover let’s explore the different types available in the market:
| Truck Bed Cover Type | Description |
|---|---|
| Folding Hard Cover | This type of cover is made up of multiple panels that fold over one another, allowing you to access different portions of the bed as needed. Folding hard covers are typically hinged and provide excellent security. |
| Roll-up Hard Cover | Roll-up hard covers consist of a series of interconnected aluminum slats that can be rolled up to provide full bed access. These covers are easy to use and offer a sleek, low-profile look. |
| Retractable Hard Cover | Similar to roll-up covers, retractable hard covers feature aluminum slats but offer a more flexible design. They can be partially or fully retracted, providing customizable bed access while maintaining security. |
| Hinged Hard Cover | Hinged hard covers are one solid piece that opens up from the front or back of the bed. They offer maximum security and are perfect for those who require complete bed access and heavy-duty protection. |
Consider the specific needs of your truck and cargo when choosing the type of hard truck bed cover that suits you best. Whether you opt for a folding, roll-up, retractable, or hinged cover, you can rest easy knowing that you’ve made the right decision in protecting your truck bed and cargo.
Measuring Your Truck Bed For Installation
Steps to Measure the Dimensions of Your Truck Bed Accurately
Installing a hard truck bed cover can greatly enhance the functionality and aesthetics of your truck. However, before you rush to purchase one, it is crucial to measure your truck bed accurately. By doing so, you can ensure a proper fit and avoid the hassle of returning or exchanging the cover later. To help you with this essential step, here are a few simple steps to follow:
- Clear out your truck bed: Before you start taking measurements, remove any items or debris from your truck bed. This will provide you with a clear working space and prevent any obstructions that could affect the accuracy of your measurements.
- Prepare your measuring tools: To measure your truck bed, you will need a tape measure or a ruler. Make sure the measuring tool you choose is long enough to reach the entire length of your truck bed.
- Measure the length: Starting from the bulkhead, which is the frontmost part of your truck bed, extend your measuring tool all the way to the tailgate. Ensure that the tape measure is straight and taut against the bed walls while taking this measurement. Note down the measurement in inches or centimeters.
- Measure the width: Locate the widest point of your truck bed and position your measuring tool across this point. Again, keep the tape measure straight and taut against the bed walls. Jot down this measurement, which will give you the width of your truck bed.
- Measure the depth: Lastly, determine the depth of your truck bed by measuring the distance from the bed floor to the top of the bed walls. This measurement is crucial to ensure that the hard cover you choose provides sufficient clearance for your cargo.
Importance of Measuring Your Truck Bed Before Purchasing a Hard Cover
Accurate measurements of your truck bed are paramount when it comes to purchasing a hard cover. Failing to measure your truck bed correctly can lead to ill-fitting covers that may not only compromise the appearance of your truck but also fail to protect your cargo effectively. Here are a few reasons why measuring your truck bed is crucial:
- Ensures a perfect fit: Measuring your truck bed before purchasing a hard cover ensures a snug and proper fit. An ill-fitting cover may not only look aesthetically unpleasing but can also allow water, dirt, or other debris to enter the bed, potentially damaging your cargo.
- Prevents unnecessary returns or exchanges: By taking accurate measurements, you reduce the risk of purchasing a cover that doesn’t fit your truck bed properly. Avoiding the hassle of returning or exchanging the cover saves you time, effort, and potentially additional costs.
- Maximizes cargo space: Properly measured and fitted hard covers offer maximum protection without taking up unnecessary space in your truck bed. By measuring the dimensions precisely, you can ensure a cover that fits snugly, allowing you to fully utilize the available cargo space.
By following these simple steps and acknowledging the importance of accurate measurements, you are on your way to selecting the perfect hard truck bed cover that provides both functionality and style to your truck.
Preparing Your Truck Bed For Installation
Before installing a hard truck bed cover, it’s important to properly prepare the surface of your truck bed. This involves removing any existing accessories or items from the bed and thoroughly cleaning the surface to ensure a secure installation. In this section, we will guide you through the necessary steps to prepare your truck bed for the installation of a hard cover.
Removing any existing accessories or items from the truck bed
First things first, you’ll want to clear your truck bed of any existing accessories or items. This includes toolboxes, bed liners, tie-downs, or any other obstructions. Removing these items not only gives you a clear surface to work with, but it also prevents any potential damage to the cover or accessories during installation. Ensure that you carefully store these items in a safe place so they can be easily reinstalled once the cover is in place.
Cleaning and preparing the surface of the truck bed for installation
Once you have cleared your truck bed, it’s time to give the surface a thorough cleaning. This step is vital to ensure a proper fit and secure installation of the hard truck bed cover. Use a mild detergent, water, and a soft brush or sponge to scrub away any dirt, dust, or debris. Pay special attention to the corners and edges, as these areas can accumulate more grime. Rinse the bed with clean water and allow it to dry completely before proceeding with the installation process.
Once your truck bed is clean and dry, it’s important to examine the surface for any imperfections that could affect the installation. Check for any rust, dents, or scratches that may need to be addressed before proceeding. It’s a good idea to use a rust inhibiting primer or touch-up paint to treat any areas where the metal is exposed. This will ensure that your truck bed is ready to withstand the installation process and provide a solid foundation for the hard cover.
By removing any existing accessories or items and thoroughly cleaning and preparing the surface of your truck bed, you are now ready to move on to the next step of installing your hard truck bed cover. Following these steps and paying attention to detail will help ensure a successful installation and a secure, durable cover for your truck bed.
Installing A Hard Truck Bed Cover
Are you tired of your truck bed being exposed to the elements and potential theft? Installing a hard truck bed cover not only offers protection but also enhances the overall look of your vehicle. If you’re ready to take on this project yourself, follow our step-by-step guide to installing a hard truck bed cover. We’ll also provide you with a list of necessary tools and equipment to ensure a smooth and successful installation process. Let’s get started!
Step-by-step guide to installing a hard truck bed cover:
Installing a hard truck bed cover may seem daunting, but with the right approach, it can be a straightforward process. Follow these steps to ensure a seamless installation:
- Start by cleaning your truck bed to remove any dirt, debris, or residue that may hinder the installation process. It’s crucial to have a clean and smooth surface to work with.
- Once the truck bed is clean and dry, measure and mark the locations for the rails or brackets that will hold the cover in place. Use a tape measure and ensure the measurements are accurate.
- After marking the locations, carefully drill holes for the rails or brackets. Ensure the holes are aligned with the marking, and use an appropriate drill bit size.
- Attach the rails or brackets to the truck bed using the provided hardware. Make sure they are securely fastened and level.
- Place the hard truck bed cover onto the rails or brackets. Ensure it fits properly and aligns with the edges of the truck bed.
- Secure the cover to the rails or brackets using the provided clamps or screws. Follow the manufacturer’s instructions for the specific installation process.
- Test the functionality of the cover by opening and closing it a few times. Ensure it operates smoothly and without any obstructions.
- Make any necessary adjustments or tighten any loose components to ensure a secure and proper fit.
- Finally, take a step back and admire your newly installed hard truck bed cover. Enjoy the enhanced protection and aesthetics it provides!
Necessary tools and equipment for the installation process:
To successfully install a hard truck bed cover, you’ll need the following tools and equipment:
| Tools | Equipment |
|---|---|
| Screwdriver set | Tape measure |
| Drill | Clamps or screws (provided with the cover) |
| Drill bits (appropriate size for the holes) | Marking pen or pencil |
| Socket set | Level |
| Clean cloth or sponge |
Having these tools and equipment readily available will streamline the installation process and ensure that you have everything you need. It’s essential to use the correct tools to prevent damage and ensure a secure and successful installation.
Now that you have a step-by-step guide and the necessary tools and equipment, you’re well-equipped to install a hard truck bed cover on your own. By following these instructions and taking your time, you’ll have added protection and style to your truck in no time. Enjoy the benefits of a secure and sleek truck bed cover!
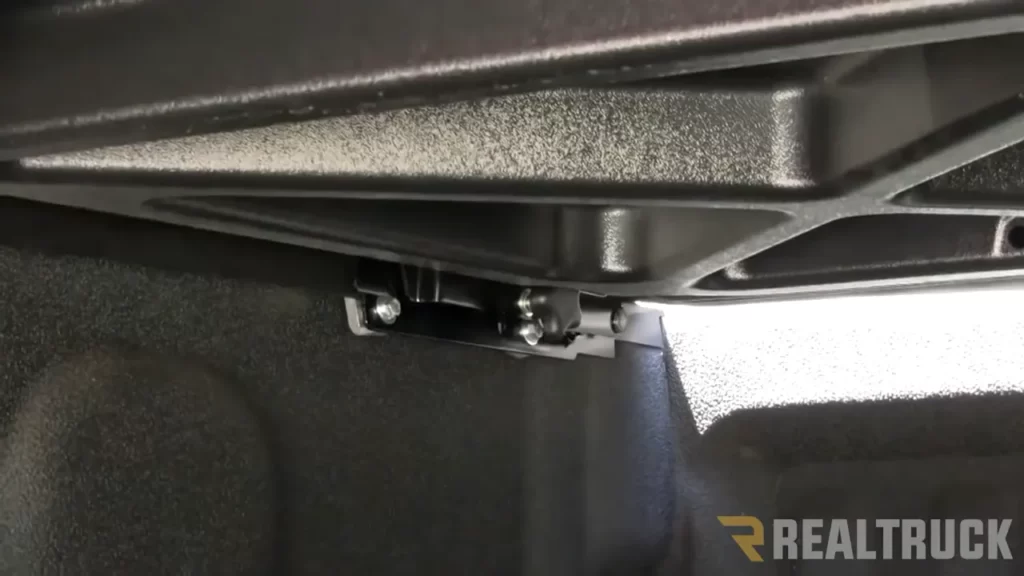
Mounting The Clamps Or Brackets
Installing Clamps or Brackets Securely onto the Truck Bed
Mounting the clamps or brackets securely onto the truck bed is a crucial step in installing a hard truck bed cover. This ensures that the cover remains firmly in place and provides maximum protection to your truck bed and cargo. Here are the necessary steps to follow to ensure a secure installation:
- Begin by unpacking the clamps or brackets included in the hard truck bed cover kit.
- Inspect the clamps or brackets for any visible damage or defects.
- Clean the truck bed thoroughly to remove any dirt, debris, or rust that may affect the clamps’ or brackets’ grip.
- Position the clamps or brackets evenly along the sides of the truck bed, ensuring that they are equidistant from one another and centered.
- Place the clamps or brackets on the truck bed rail, aligning them with the pre-drilled holes or mounting points, if provided.
- Securely tighten the clamps or brackets using an adjustable wrench or a suitable tool, making sure they are snugly fitted without overtightening to prevent damage.
- Double-check the tightness of the clamps or brackets to ensure they are firmly attached to the truck bed.
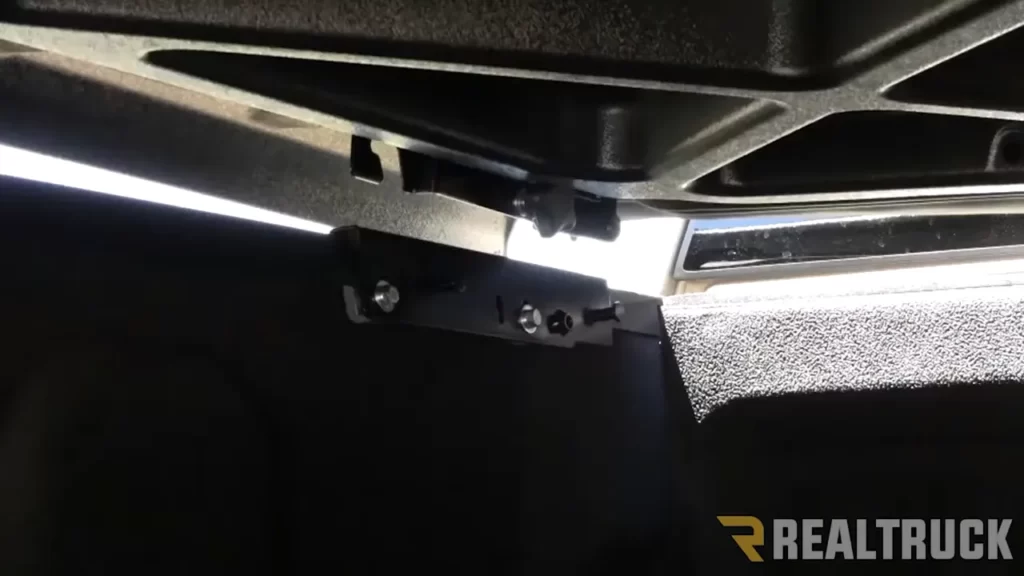
Ensuring Proper Alignment and Positioning of the Clamps or Brackets
Proper alignment and positioning of the clamps or brackets are essential to ensure that the hard truck bed cover fits securely and functions effectively. Follow these steps to achieve an accurate alignment:
- Take measurements of your truck bed to determine the ideal location for the clamps or brackets.
- Ensure that the clamps or brackets are centered and aligned with the truck bed rails.
- Refer to the manufacturer’s instructions for any specific recommendations on alignment or positioning.
- Make adjustments as necessary to achieve a proper fit, ensuring that the clamps or brackets are not obstructing any other components or hardware.
- Use a level or straightedge to verify the alignment of the clamps or brackets, ensuring they are parallel to the truck bed rails.
- Proceed to tighten the clamps or brackets once their alignment has been verified.
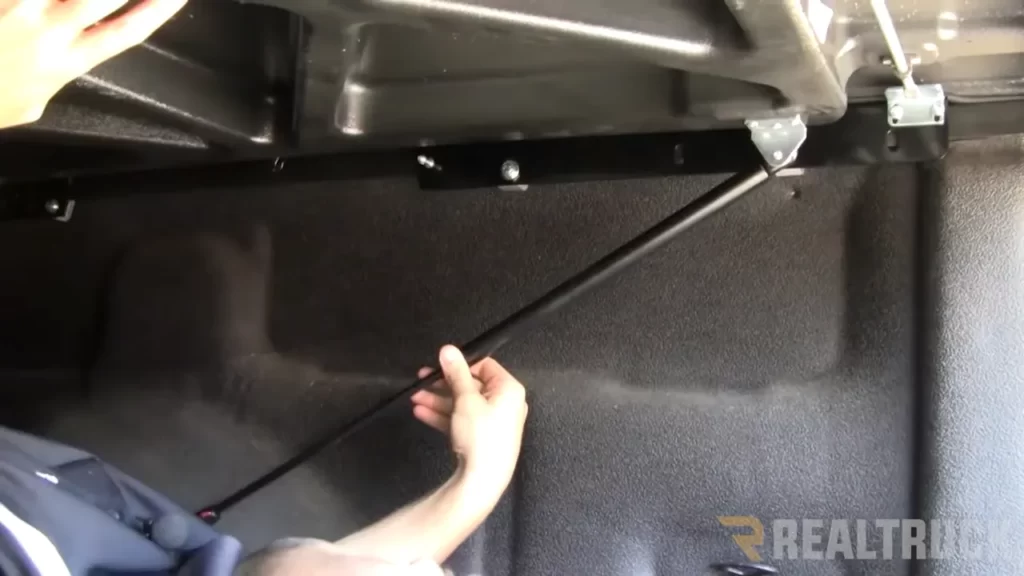
Placing The Hard Truck Bed Cover On The Truck Bed
Once you have prepared the truck bed and assembled the necessary supplies, the next step in installing a hard truck bed cover is placing it onto the truck bed itself. This crucial step ensures a secure and proper fit for optimum performance.
Carefully placing the hard cover onto the truck bed
When it comes to placing the hard truck bed cover onto the truck bed, it is important to proceed with caution and pay attention to detail. Follow these steps to ensure a smooth installation process:
- Using proper lifting techniques, carefully lift the hard truck bed cover and position it near the back of the truck bed. It is recommended to have an assistant for this step to avoid any unnecessary strain or accidents.
- Position yourself in a way that allows you to maintain a clear view of both the cover and the truck bed while aligning them.
- Slowly and evenly lower the hard cover onto the truck bed. Ensure that it is centered and aligned with the truck bed to achieve a balanced and symmetrical appearance.
Aligning the cover with the mounting clamps or brackets
Once the hard truck bed cover is in place, the next step is aligning it with the mounting clamps or brackets. This ensures that the cover is properly secured and won’t shift during use. Follow these steps for a seamless alignment:
- Check the instructions provided by the manufacturer to identify the specific mounting points for your truck bed cover.
- Locate the mounting clamps or brackets and position them near the edges of the truck bed cover, ensuring they are lined up with the designated mounting points.
- Securely attach the mounting clamps or brackets, making sure they are tightened sufficiently to hold the cover in place without causing any damage or distortion.
- Double-check the alignment and positioning of the cover, making any necessary adjustments, if needed, to achieve a perfect fit.
By carefully placing the hard truck bed cover onto the truck bed and aligning it with the mounting clamps or brackets, you are well on your way to a successful installation. Taking the time to ensure proper placement and alignment will not only enhance the aesthetics of your truck but also provide added security and protection for your cargo.
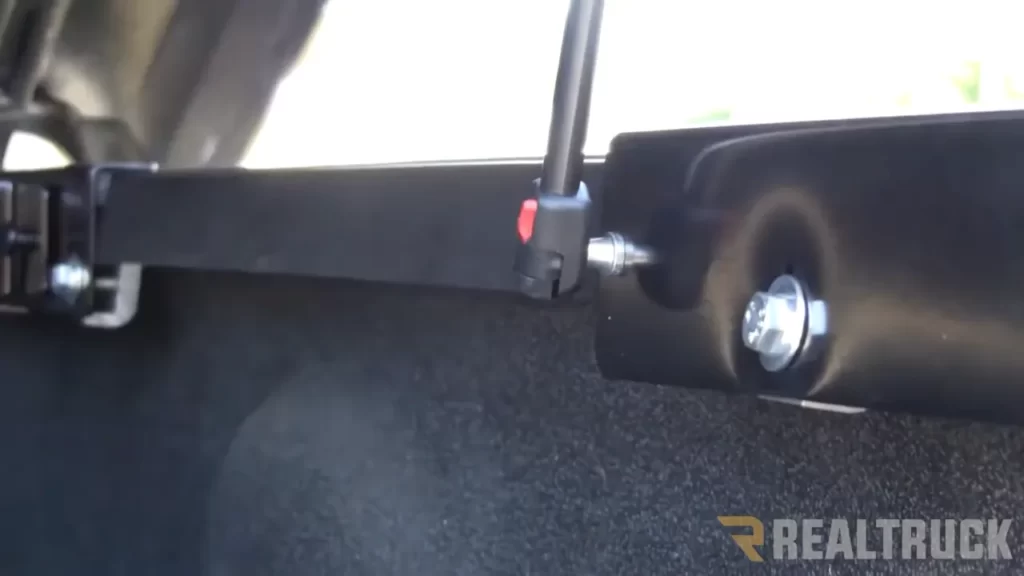
Securing The Hard Truck Bed Cover
Fastening the cover securely to the mounting clamps or brackets
One of the most important steps in installing a hard truck bed cover is securing it properly to the mounting clamps or brackets. This ensures that the cover stays in place while you’re driving and protects your belongings in the truck bed. Here’s how you can fasten the cover securely: 1. Align the cover: Start by aligning the cover with the truck bed. Make sure it sits evenly on all sides and that there is no overhang or gaps. This will help to create a tight and secure fit. 2. Attach the mounting clamps or brackets: Depending on the type of hard truck bed cover you have, you will either have mounting clamps or brackets. These are usually provided with the cover or can be purchased separately. Place the clamps or brackets in the designated locations on the truck bed. 3. Position the cover: Lift the cover and position it over the truck bed, making sure it aligns with the mounting clamps or brackets. Take your time to ensure that the cover is centered and sitting flush on the truck bed. 4. Tighten the clamps or brackets: Begin by tightening the clamps or brackets on one side of the truck bed. Use a wrench or socket to securely fasten them in place. Repeat this process for each clamp or bracket, working your way around the truck bed until all are tightened properly. 5. Double-check the tightness: Once you have tightened all the clamps or brackets, double-check their tightness. Give each one a gentle tug to make sure it is secure. This step will help prevent any loosening during travel.
Troubleshooting any issues during the securing process
While securing the hard truck bed cover may seem straightforward, it’s possible to encounter some issues along the way. Here are some common troubleshooting tips to help you overcome any problems that may arise: 1. Uneven mounting clamps or brackets: If you notice that the mounting clamps or brackets are not sitting evenly on the truck bed, adjust their positions. This will ensure a proper fit and prevent any gaps or misalignment. 2. Loose clamps or brackets: If you find that the clamps or brackets are not tightening securely, check if any components are damaged or need replacement. It’s important to have a tight fit to prevent the cover from shifting during travel. 3. Difficulty aligning the cover: If you’re having trouble aligning the cover with the truck bed or if it’s not sitting flush, double-check the mounting clamps or brackets. They may need adjustment or repositioning to ensure a proper fit. 4. Insufficient tightening: If you notice that the cover is still loose even after tightening the clamps or brackets, try using a torque wrench to apply more pressure. This will help achieve a secure and snug fit. Remember, securing the hard truck bed cover properly is essential to its functionality and longevity. Taking the time to align, tighten, and troubleshoot any issues will result in a secure and reliable truck bed cover that will protect your belongings in style.
Testing And Adjusting The Hard Truck Bed Cover
Once you have successfully installed your hard truck bed cover, it’s important to test and adjust it to ensure proper fit and functionality. This step is crucial to guarantee optimal performance and longevity of your cover. In this section, we will walk you through the process of checking for proper fit and functionality, as well as making necessary adjustments if needed.
Checking for Proper Fit and Functionality of the Cover
Before putting your hard truck bed cover to the test, it’s crucial to make sure it fits securely and functions properly. Follow these steps:
- Inspect the cover for any visible damage or defects. This includes checking for cracks, loose hinges, or any other signs of wear and tear.
- Ensure that the cover is aligned properly on your truck bed. It should sit flush with the bed rails and tailgate.
- Test the opening and closing mechanism of the cover. Make sure it operates smoothly without any resistance or sticking points.
- Verify that the latches or locks engage securely to keep your truck bed protected.
- Check the weather-stripping around the edges of the cover. It should form a tight seal to prevent water or debris from infiltrating your truck bed.
Making Necessary Adjustments to Ensure Optimal Performance
If you encounter any issues during the initial testing phase, don’t worry! It’s common to need a few adjustments to get your hard truck bed cover working perfectly. Follow these steps to make the necessary adjustments:
- Loosen any mounting hardware that is holding the cover in place. This will allow you to adjust the positioning of the cover.
- Shift the cover slightly to achieve a better fit. Make sure it sits evenly and aligns properly with the bed rails and tailgate.
- Tighten the mounting hardware once you have made the necessary adjustments. Ensure that it is securely fastened to prevent any movement or shifting while driving.
- Test the cover again to ensure that the adjustments have resolved any issues. Verify that the opening and closing mechanism works smoothly, and the latches or locks engage securely.
Remember, it’s essential to take the time to thoroughly test and adjust your hard truck bed cover before putting it to regular use. This will not only ensure optimal performance but also protect your cargo from any potential damage.
Inspecting For Any Gaps Or Leaks
Examining the Cover for Any Gaps or Spaces
Inspecting your hard truck bed cover for any gaps or leaks is an essential step in ensuring its proper installation. These gaps or spaces can lead to water leakage or dust accumulation, compromising the functionality and effectiveness of your cover. To make sure your hard truck bed cover is sealed properly, follow these steps:
- Begin by visually examining the cover. Use your hands to feel for any noticeable gaps or spaces between the cover and the truck bed. Pay close attention to the edges and corners where leaks are most likely to occur.
- Check the back area of the cover for any areas where it may not be flush against the truck bed. If you notice any gaps, it’s important to address them before moving forward with the installation.
- If you come across any gaps or spaces during your inspection, the next step is to fix and seal them. This will ensure that your hard truck bed cover provides maximum protection and keeps your cargo safe and secure.
Steps to Fix and Seal Any Potential Leaks
Fixing and sealing any potential leaks in your hard truck bed cover doesn’t have to be a complicated process. Following these steps will help you address and correct any issues you identified during your inspection:
- Start by thoroughly cleaning the areas where you found gaps or spaces using soap and water. This will remove any dirt or debris that could interfere with the sealing process.
- If the gaps are small, you can use a weather-resistant adhesive or sealant to fill them. Apply the adhesive or sealant directly to the gaps, making sure to cover the entire area with a thin, even layer.
- For larger gaps or spaces, consider using foam weather stripping or rubber seals. Measure the length of the gap and cut the foam weather stripping or rubber seal to fit. Then, press it firmly into place, ensuring it covers the gap completely.
- Once you’ve applied the adhesive, sealant, or weather stripping, allow it to dry or cure according to the manufacturer’s instructions. This will ensure that the seal is strong and durable.
- After the sealant or adhesive has fully dried, verify that the gaps or spaces have been effectively sealed. Run your hand along the edges and corners of the cover to confirm there are no remaining gaps.
- Finally, double-check for any signs of leakage by spraying water onto the cover and inspecting the truck bed underneath. This will give you peace of mind knowing that your hard truck bed cover is properly sealed and ready to protect your cargo.
By carefully inspecting your hard truck bed cover for any gaps or leaks, and taking the necessary steps to fix and seal them, you can ensure that your cover will provide optimal protection for your truck bed. Don’t overlook this important step in the installation process, as it can make a significant difference in the performance and longevity of your hard truck bed cover.
Testing The Opening And Closing Mechanism
After successfully installing your hard truck bed cover, the next step is to test the opening and closing mechanism. This is an essential part of the installation process to ensure that the cover operates smoothly and without any issues. By testing the mechanism, you can identify and address any potential problems before they become major headaches.
Operating the opening and closing mechanism of the cover
Once the hard truck bed cover is securely installed, it’s time to test its opening and closing mechanism. This involves operating the latch or handle that allows you to easily open and close the cover. To do this, follow the manufacturer’s instructions specific to your cover model.
Typically, you will need to locate the latch or handle, which is usually located near the tailgate of your truck bed. Give it a firm grasp and gently pull upwards to open the cover. Take note of how smoothly the mechanism operates and if there are any unusual noises or resistance along the way.
Ensuring smooth functionality and addressing any issues
During the testing process, it’s important to ensure that the opening and closing mechanism of the hard truck bed cover functions smoothly. This means that it should open and close without any hitch, gliding effortlessly along its track. Smooth functionality is crucial for easy access to your truck bed and convenience in daily use.
If you encounter any issues during the testing, such as rough movement, sticking, or jamming, it’s vital to address these problems promptly. Start by inspecting the track or rails where the cover operates. Look for any debris, loose parts, or misalignment that could be causing the issue. Regularly cleaning and lubricating the tracks can help maintain smooth functionality.
Additionally, check the latch or handle mechanism itself. Ensure that it is properly adjusted and tightened. If necessary, consult the manufacturer’s instructions or contact their customer support for guidance on troubleshooting and resolving any issues.
Avoid ignoring any problems you encounter during the testing process. Ignored issues can lead to further damage and potentially render your truck bed cover unusable. Stay proactive and take the necessary steps to address any problems early on, ensuring that your hard truck bed cover continues to operate smoothly for years to come.
Maintaining Your Hard Truck Bed Cover
Proper Care and Maintenance Tips for Your Hard Cover
Maintaining your hard truck bed cover is essential to ensure its longevity and optimal functionality. By following a few simple care and maintenance tips, you can keep your cover looking great and protect it from damage caused by the elements and regular wear and tear. Here are some key guidelines to keep in mind:
Cleaning and Protecting the Cover to Prolong Its Lifespan
Regular cleaning is an important part of maintaining your hard truck bed cover. This helps remove dirt, debris, and other contaminants that can build up on the cover’s surface and potentially damage it over time. To clean your cover:
- Start by rinsing the cover with water to remove loose dirt and grime.
- Use a mild soap or truck bed cover cleaner to gently scrub the cover with a soft cloth or sponge. Avoid using abrasive cleaners or brushes that can scratch the surface.
- Rinse off the soap thoroughly to ensure no residue is left behind, as this can dull the cover’s appearance.
- Dry the cover with a clean, soft towel to prevent water spots or streaks.
In addition to regular cleaning, it’s important to protect your hard truck bed cover from the elements and UV rays. Excessive exposure to sunlight can cause the cover to fade and deteriorate over time. To protect your cover:
- Park your truck in a shaded area whenever possible to minimize sun exposure.
- If a shaded area is not available, consider using a car cover or a specialized cover specifically designed for truck bed covers to shield it from direct sunlight.
- Apply a UV protectant spray or treatment to the cover’s surface to help prevent fading and damage caused by UV rays.
Ensuring Proper Maintenance for Long-lasting Performance
In addition to cleaning and protecting your hard truck bed cover, proper maintenance is crucial to ensure its long-lasting performance. Here are a few essential maintenance tips:
- Inspect the cover regularly for any signs of damage, such as cracks, dents, or loose parts. Address any issues promptly to prevent further damage.
- Lubricate the hinges, latches, and other moving parts as recommended by the manufacturer to keep them functioning smoothly.
- Check the seals and gaskets for wear and tear. Replace them if necessary to maintain a watertight seal and prevent water from seeping into the truck bed.
- Follow the manufacturer’s guidelines for any specific maintenance requirements or restrictions related to your hard truck bed cover.
By following these proper care and maintenance tips, you can enjoy the benefits of your hard truck bed cover for years to come. Remember, a well-maintained cover not only enhances the appearance of your truck but also protects your cargo from the elements and provides added security.
Cleaning The Hard Truck Bed Cover
As a truck owner, it’s important to keep your hard truck bed cover clean and well-maintained. Regular cleaning not only enhances the appearance of your truck but also prolongs the lifespan of the cover. In this section, we will discuss the recommended cleaning methods and products for your hard truck bed cover, as well as how to remove dirt, grime, and other stains without causing any damage.
Recommended Cleaning Methods and Products for the Cover
When it comes to cleaning your hard truck bed cover, it’s essential to use the right methods and products to ensure effective and safe cleaning. Here are some recommended methods and products:
- Mild Soap and Water: Start by mixing a few drops of mild soap with warm water. Dip a soft cloth or sponge into the soapy solution and gently scrub the surface of the truck bed cover.
- Non-abrasive Cleaner: If your hard cover is particularly dirty or stained, you can use a non-abrasive cleaner specifically designed for truck bed covers. Follow the instructions on the product label for best results.
- Microfiber Cloth: When cleaning your truck bed cover, always use a soft microfiber cloth. This type of cloth is gentle on the surface and helps to prevent scratches or damage.
Removing Dirt, Grime, and Other Stains without Causing Damage
Over time, dirt, grime, and other stains can accumulate on your hard truck bed cover. However, it’s important to remove them without causing any damage. Here’s how you can do it:
- Pre-Rinse: Before starting the cleaning process, give your truck bed cover a good pre-rinse to remove loose dirt and debris. This step will prevent scratching the surface while scrubbing.
- Gentle Scrubbing: Using a soft cloth or sponge, gently scrub the dirty areas in a circular motion. Avoid applying excessive pressure as it can lead to scratches or damage.
- Rinse Thoroughly: After scrubbing, rinse the cover thoroughly with clean water to remove any residue. This will ensure that no cleaning product is left behind.
- Dry Completely: Once you have finished cleaning, make sure to dry the truck bed cover thoroughly. Leaving it wet can promote the growth of mold or mildew.
By following these recommended cleaning methods and tips, you can keep your hard truck bed cover looking clean and well-maintained for years to come. Remember, regular cleaning is key to ensure the longevity and durability of your truck bed cover.
Protecting The Hard Truck Bed Cover
A hard truck bed cover is a valuable investment that not only adds a sleek and stylish look to your truck but also protects your cargo from the elements. To ensure your hard truck bed cover remains in pristine condition for years to come, it is crucial to adopt protective measures. In this section, we will explore some strategies to protect and enhance the durability of your hard truck bed cover, preventing scratches, dents, and fading.
Applying protective coatings or sealants to enhance durability
One effective method to enhance the longevity of a hard truck bed cover is by applying protective coatings or sealants. These coatings act as a barrier against UV rays, moisture, and other external damaging factors that can cause fading or deterioration over time. They create a protective shield that helps maintain the original color and finish of the cover while ensuring it remains resistant to scratches and dents. Consider using high-quality protective coatings or sealants specifically designed for truck bed covers, and follow the manufacturer’s instructions on application and reapplication intervals.
Strategies to prevent scratches, dents, and fading of the cover
Preventing scratches, dents, and fading is essential to preserve the aesthetic appeal and functionality of your hard truck bed cover. Here are some practical strategies you can implement:
- Consider using a bed liner or mat: Installing a bed liner or mat helps create a protective layer between the truck bed and the cover. This not only prevents direct contact between the cover and potential damaging objects but also adds cushioning to reduce the risk of dents or scratches.
- Avoid placing heavy or sharp-edged objects directly on the cover: While a hard truck bed cover is designed to withstand heavy loads, it is best to avoid placing sharp-edged or excessively heavy items directly on the cover. Always use appropriate restraints or secure the cargo to minimize the risk of damage.
- Regularly clean the cover: Proper cleaning is key to preventing grime, dirt, or debris from accumulating on the surface of the cover. Use a mild detergent, water, and a soft cloth or sponge to gently remove any stains or dirt. Avoid using abrasive materials that may scratch or damage the cover.
- Apply a UV protectant spray: Exposure to sunlight can cause fading and discoloration of the cover over time. Applying a UV protectant spray designed for automotive use can help prevent UV damage and maintain the cover’s original color and finish.
- Store the cover properly when not in use: If you temporarily remove the hard truck bed cover, ensure you store it in a safe, dry place away from direct sunlight or extreme temperatures. Using a storage bag or cover can provide an additional layer of protection.
By following these strategies, you can significantly prolong the lifespan of your hard truck bed cover and keep it looking as good as new. Remember, regular maintenance and proactive measures are key to safeguarding your truck bed cover from scratches, dents, and fading.
Frequently Asked Questions For How To Install A Hard Truck Bed Cover
How Hard Is It To Install A Truck Bed Cover?
Installing a truck bed cover is fairly easy. It typically involves measuring, drilling holes, and securing the cover in place. Most covers come with clear instructions and necessary hardware for installation. With basic tools and some patience, you can easily complete the installation process yourself.
How Do You Secure A Hard Tonneau Cover?
To secure a hard tonneau cover, follow these steps: 1. Attach the clamps to the truck bed and position the cover correctly. 2. Check the alignment and adjust if needed. 3. Fasten the latch or lock mechanisms to securely close the cover.
4. Verify all the fasteners are tight for a snug fit. 5. Test the cover by applying pressure to ensure it stays in place.
How Long Does It Take To Install A Hard Tonneau Cover?
Installing a hard tonneau cover typically takes about 30 minutes to an hour. It’s a straightforward process that involves securing the cover to your truck bed with clamps or bolts, depending on the model. The installation time may vary based on the type of truck and the experience of the installer.
Can You Install Your Own Truck Bed Cover?
Yes, it is possible to install your own truck bed cover. Just follow the installation instructions provided by the manufacturer.
Conclusion
To sum up, installing a hard truck bed cover is a straightforward process that ensures the safety and protection of your truck bed. By following these step-by-step instructions, you can easily secure your cargo and keep it safe from the elements.
Remember to choose a cover that fits your truck bed dimensions and your specific needs. With the right tools and a little patience, you’ll have your truck bed covered in no time. So go ahead and give it a try!