To install a gooseneck hitch on a flatbed truck, start by measuring and marking the hitch location on the truck bed. Then, using a drill and appropriate sized drill bits, create the necessary holes for the hitch mounting brackets.
Finally, secure the gooseneck hitch into place using the provided hardware and ensure it is properly tightened. Once installed, the gooseneck hitch will provide a sturdy connection point for towing heavy loads with your flatbed truck.
Gathering The Necessary Tools And Materials
Introduction: Gathering the Necessary Tools and Materials
In order to successfully install a gooseneck hitch on a flatbed truck, it is essential to gather all the necessary tools and materials. This ensures that you have everything you need before you begin the installation process. This section will guide you through the process of choosing the right gooseneck hitch, checking the vehicle’s payload capacity, and gathering the required tools. By following these steps, you can ensure a smooth and efficient installation of your gooseneck hitch.
Choosing the Right Gooseneck Hitch
Before you begin gathering tools and materials, it is important to choose the right gooseneck hitch for your flatbed truck. This decision is crucial as it determines the compatibility and functionality of the hitch with your vehicle. Consider the following factors when making your choice:
- Weight Capacity: Determine the weight capacity of the hitch that is suitable for your truck. It is important to select a gooseneck hitch that can safely support the weight of your trailer and cargo.
- Trailer Type: Different gooseneck hitches are designed for specific types of trailers, such as livestock trailers or flatbed trailers. Ensure that you choose a hitch that is compatible with the type of trailer you will be towing.
- Vehicle Compatibility: Check the specifications of the gooseneck hitch to ensure that it is compatible with your flatbed truck. Consider factors such as the truck’s make, model, and year of manufacture.
By carefully considering these factors, you can select a gooseneck hitch that meets your specific towing needs and is compatible with your flatbed truck.
Checking the Vehicle’s Payload Capacity
Once you have chosen the right gooseneck hitch, it is crucial to check your vehicle’s payload capacity. This ensures that your truck is capable of safely carrying the extra weight of the gooseneck hitch and the trailer. To determine the payload capacity of your truck, refer to the manufacturer’s specifications or consult the owner’s manual. It is important to note that exceeding the payload capacity can lead to safety hazards and damage to your vehicle. Make sure to consider the weight of the loaded trailer, the hitch itself, and any additional cargo you may be carrying. By staying within the recommended payload capacity, you can ensure the safe towing of your trailer.
Gathering the Required Tools
Before you begin the installation process, gather the necessary tools and materials to make the job easier and more efficient. Here is a list of the essential tools you will need:
| Tools | Materials |
|---|---|
| Socket set | Gooseneck hitch kit |
| Torque wrench | Drill and bits |
| Wrenches | Measuring tape |
| Wire cutters | Marker or pencil |
These tools are essential for securely installing the gooseneck hitch on your flatbed truck. Having them on hand will streamline the installation process and ensure that you have everything you need to complete the job. By following these steps in choosing the right gooseneck hitch, checking the vehicle’s payload capacity, and gathering the necessary tools and materials, you will be well-prepared to install a gooseneck hitch on your flatbed truck.
Preparing The Truck
Before you can install a gooseneck hitch on your flatbed truck, you need to properly prepare the truck to ensure a secure and successful installation. This involves measuring and marking the placement of the hitch, preparing the flatbed, and, if necessary, removing the truck bed.
Measuring and Marking the Placement
The first step in preparing the truck is to measure and mark the placement of the gooseneck hitch. This will help ensure that the hitch is installed in the correct position for optimal towing performance. Here’s what you need to do:
- Start by removing any existing bed liner or covering that may be on the flatbed of your truck.
- Next, locate the center of the flatbed and mark it with a measuring tape and a marker.
- Measure the distance from the center mark to the rear edge of the truck bed, as this will determine the placement of the hitch.
- Consult the manufacturer’s instructions for the specific hitch you are installing to determine the recommended placement distance.
- Measure and mark the recommended placement distance from the rear edge of the truck bed, both on the driver’s side and the passenger’s side.
- Ensure that the marks are level and straight to ensure the hitch is installed properly.
Preparing the Flatbed
Once you have measured and marked the placement of the gooseneck hitch, you need to prepare the flatbed for installation. Here are the steps to follow:
- Inspect the flatbed for any damage or rust that may affect the installation of the hitch. If there is any damage or rust, it is important to repair or remove it before proceeding.
- Check the underside of the flatbed for any wiring or components that may need to be relocated or protected during the installation process.
- If necessary, remove any debris or obstructions from the flatbed to ensure a clean and smooth surface for the hitch installation.
- Apply a corrosion-resistant coating or paint to the flatbed to protect it from the elements and extend its lifespan.
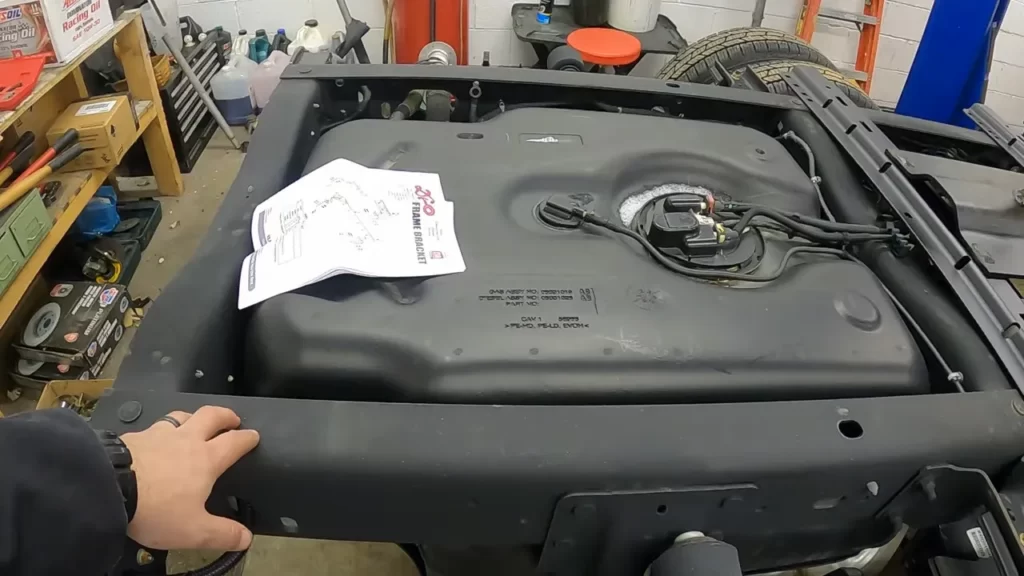
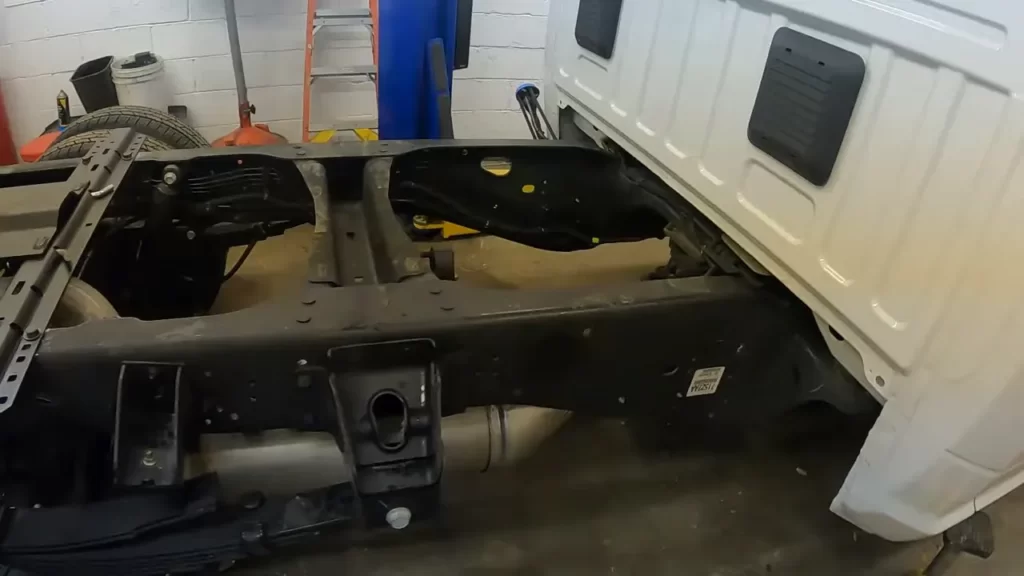
Removing the Truck Bed if Necessary
In some cases, it may be necessary to remove the truck bed in order to install the gooseneck hitch properly. Here’s what you need to do:
- Consult the manufacturer’s instructions to determine if removing the truck bed is necessary for your specific hitch installation.
- If removal is required, gather the necessary tools and equipment, such as a socket wrench, to disconnect the bolts securing the bed to the frame.
- With the help of another person, carefully lift and remove the truck bed from the frame, taking care to avoid any damage or injury.
- Set the truck bed aside in a safe location.
By properly preparing your truck, measuring and marking the placement, and preparing the flatbed, you are setting yourself up for a successful gooseneck hitch installation. In the next section, we will guide you through the process of installing the gooseneck hitch itself.
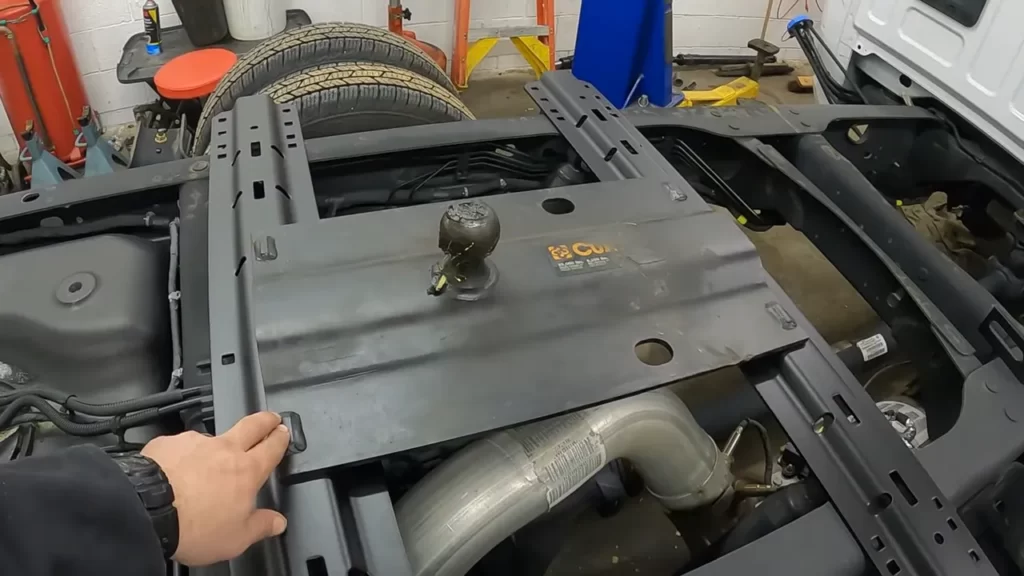
Installing The Gooseneck Hitch
Installing a gooseneck hitch on a flatbed truck can greatly increase its towing capabilities. Whether you’re hauling heavy equipment, livestock, or any other substantial load, a gooseneck hitch provides the strength and stability needed for safe towing. In this guide, we’ll walk you through the step-by-step process of installing a gooseneck hitch on your flatbed truck, from assembling the hitch components to securing it to the frame.
Assembling the Hitch Components
The first step in installing a gooseneck hitch is to assemble all the necessary components. Make sure you have the following items:
- Gooseneck ball
- Crossbar assembly
- Mounting brackets
- Bolts and hardware
Before starting the assembly, ensure that you have read and understood the manufacturer’s instructions to ensure proper installation.
Attaching the Gooseneck Ball
Once you have assembled the hitch components, the next step is to attach the gooseneck ball to the crossbar assembly. Follow these steps:
- Position the gooseneck ball on the crossbar assembly, aligning the holes.
- Insert the bolts through the holes and secure them tightly with the provided hardware.
- Ensure that the gooseneck ball is securely attached to the crossbar assembly.
Mounting the Ball and Crossbar Assembly
After attaching the gooseneck ball to the crossbar assembly, the next step is to mount this assembly onto the flatbed truck. Here’s how:
- Locate the mounting brackets and position them on the truck’s bed, ensuring proper alignment.
- Secure the mounting brackets in place using the provided bolts and hardware.
- Double-check the alignment of the crossbar assembly and make necessary adjustments.
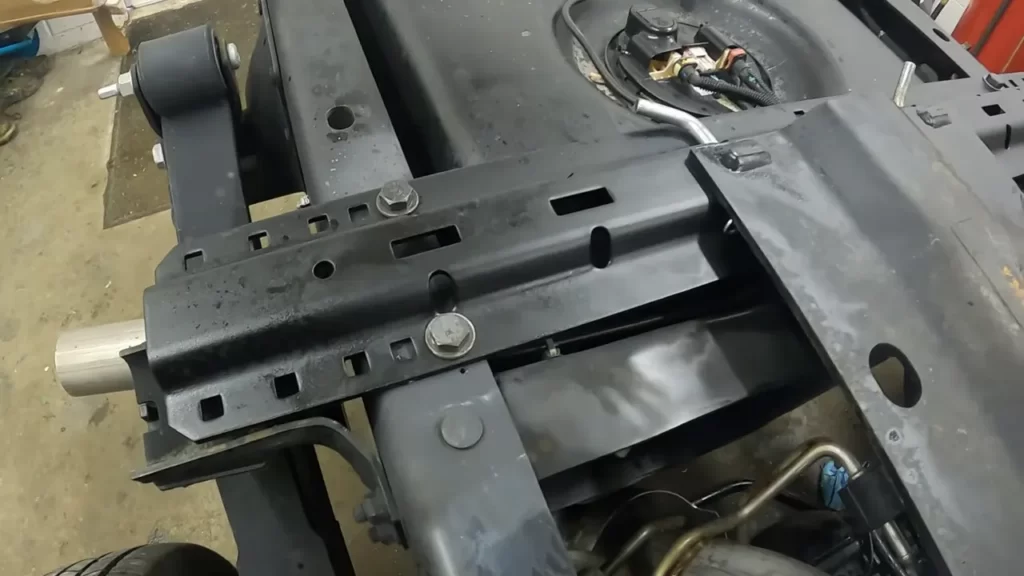
Securing the Hitch to the Frame
With the gooseneck ball and crossbar assembly mounted on the truck’s bed, the final step is to secure the hitch to the frame. Follow these steps:
- Identify the attachment points on the truck’s frame.
- Position the hitch over these points, ensuring proper alignment.
- Secure the hitch to the frame using the provided bolts and hardware.
- Tighten all the bolts to ensure a secure and stable installation.
Once you have completed these steps, your gooseneck hitch will be safely installed on your flatbed truck, ready for any towing task you have in mind. Remember to always follow the manufacturer’s instructions and consult a professional if you have any concerns about the installation process.
Wiring And Testing
Once you have successfully installed the gooseneck hitch on your flatbed truck, the next step is to wire it properly and test its connection and lights. Wiring and testing are crucial to ensure that your gooseneck hitch is functioning correctly and guarantees a safe towing experience.
Wiring the Gooseneck Hitch
Wiring the gooseneck hitch involves connecting the electrical system of your truck to the gooseneck trailer. The electrical connection allows you to activate the signal lights, brake lights, and other important functions of the trailer.
- Start by locating the electrical harness of your truck. It is typically found near the rear bumper. Ensure the harness is clean and free of any dirt or debris.
- Next, identify the wiring connectors on both the harness and the gooseneck trailer. These connectors make the electrical connection between the two.
- Match the corresponding wiring colors on the harness and the trailer connectors. The most common colors include white for ground, yellow for left turn/brake, green for right turn/brake, and brown for tail lights.
- Connect the harness and trailer connectors by pushing them together firmly. Ensure that they lock securely to guarantee a reliable connection.
Once the wiring connections are complete, it’s important to test the hitch to ensure everything is working as it should.
Testing the Hitch Connection and Lights
Testing the gooseneck hitch connection and lights is a crucial step to ensure their proper functioning. Follow these steps to perform a thorough test:
- Plug the electrical connector into the appropriate outlet on your truck.
- Have an assistant stand behind your gooseneck trailer to observe the lights.
- Activate your truck’s turn signals, brake lights, and tail lights one by one, and ask your assistant to confirm that each corresponding light on the trailer is functioning correctly.
- Ensure that all lights are bright and clearly visible, without any flickering or dimness, which could indicate a wiring issue.
By conducting this test, you can identify any wiring problems or faulty connections that need to be addressed before hitting the road. Regularly performing these tests can ensure the safety of your towing operation and provide peace of mind.
Ensuring Proper Functionality
After wiring and testing the gooseneck hitch, it is essential to ensure its proper functionality. Here are a few additional steps to guarantee optimal performance:
- Inspect the wiring connections regularly to ensure they are secure and free of corrosion.
- Test the gooseneck hitch and trailer lights before each towing trip.
- If you notice any issues during testing, address them promptly by troubleshooting or seeking professional assistance.
- Follow your truck and gooseneck trailer manufacturer’s recommendations for maintenance and inspection intervals.
Following these guidelines will not only ensure the proper functioning of your gooseneck hitch but also provide you with a worry-free towing experience.
Frequently Asked Questions On How To Install A Gooseneck Hitch On A Flatbed Truck
Can You Put A Gooseneck Hitch In A Flatbed?
Yes, you can install a gooseneck hitch in a flatbed. It provides a sturdy framework for towing trailers and allows for increased stability and weight capacity. A gooseneck hitch is a practical solution for those who need to tow heavy loads with their flatbed truck.
What Is The Proper Placement Of A Gooseneck Hitch?
The proper placement of a gooseneck hitch is crucial for safe towing. It should be positioned directly above the rear axle of the towing vehicle to ensure proper weight distribution. Make sure to follow the manufacturer’s guidelines for specific measurements and installation instructions.
Do You Have To Remove The Bed To Install A Gooseneck Hitch?
No, you do not have to remove the bed to install a gooseneck hitch. The hitch can be installed under the bed, allowing the bed to remain intact. This makes the installation process easier and more convenient.
Can I Install My Own Gooseneck Hitch?
Yes, you can install your own gooseneck hitch as long as you follow the instructions carefully and have the necessary tools. It is important to ensure proper installation for safety and functionality.
Conclusion
To summarize, installing a gooseneck hitch on a flatbed truck is a straightforward process that can greatly enhance its towing capabilities. By following the step-by-step instructions outlined in this guide, you can ensure a safe and secure installation. Remember to gather all the necessary tools and materials, take your time, and seek professional assistance if needed.
With a little patience and dedication, you’ll be ready to tackle any towing job with confidence. Happy towing!