To install a fuel cell in a truck, follow these steps: First, gather the necessary tools and equipment. Next, locate the ideal spot in the truck bed for the fuel cell installation.
Factors To Consider When Selecting A Fuel Cell
When it comes to installing a fuel cell in your truck, there are several important factors to consider. These factors will not only ensure that the fuel cell is compatible with your truck’s make and model but also guarantee fuel efficiency, safety, and ease of installation and maintenance. In this section, we will take a closer look at the key aspects you should keep in mind when selecting a fuel cell for your truck.
Compatibility with your truck’s make and model
One of the first factors you need to consider when selecting a fuel cell for your truck is its compatibility with your truck’s make and model. Each truck has different specifications and requirements, so it is crucial to choose a fuel cell that is designed to fit seamlessly into your truck’s existing setup.
Before making any purchase, thoroughly research the fuel cell options available for your specific truck make and model. Look for compatibility charts provided by the manufacturers or consult with automotive experts to ensure you select a fuel cell that will integrate smoothly with your truck without requiring costly modifications.
Fuel capacity and range
Another important factor to consider is the fuel capacity and range offered by the fuel cell. The capacity of the fuel cell will determine how much fuel it can store, while the range indicates how far you can drive on a full tank. Both these factors are crucial in determining the overall performance and efficiency of your truck.
Consider your average driving habits and the distances you cover on a regular basis. Do you frequently undertake long-haul journeys or mainly use your truck for short trips within the city? Assessing your fuel requirements will help you determine the ideal fuel capacity and range for your truck’s fuel cell.
Safety features such as pressure relief valves and leak detection systems
Safety should be a top priority when selecting a fuel cell for your truck. Look for fuel cells that are equipped with safety features such as pressure relief valves and leak detection systems to ensure the secure transportation and storage of fuel.
Pressure relief valves are designed to release excess pressure from the fuel cell, preventing any potential damage or accidents. Leak detection systems, on the other hand, can quickly identify and alert you to any fuel leaks, minimizing the risk of fire or other hazards.
Ease of installation and maintenance
The ease of installation and maintenance is another crucial aspect to consider when selecting a fuel cell for your truck. Opt for a fuel cell that comes with clear installation instructions and requires minimal modifications to your truck’s existing setup.
Additionally, choose a fuel cell that is easy to maintain. Look for features such as easily accessible components and straightforward maintenance procedures, including regular inspections, filter replacements, and fuel cell cleaning. This will save you time, effort, and money in the long run.
By evaluating these factors – compatibility with your truck’s make and model, fuel capacity and range, safety features, and ease of installation and maintenance – you can make an informed decision when selecting a fuel cell for your truck. Properly considering these factors will not only ensure a smooth installation process but also guarantee optimal performance, efficiency, and safety for your truck’s fuel system.
Ensuring Proper Ventilation In The Truck Bed
When installing a fuel cell in your truck, ensuring proper ventilation is crucial. Proper ventilation not only promotes air circulation, but also helps prevent the buildup of potentially harmful gases. In this section, we will look at two important aspects of ensuring proper ventilation in the truck bed:
Creating vent holes for air circulation

One way to ensure adequate air circulation within the truck bed is by creating vent holes. These vent holes allow for the exchange of air, preventing the accumulation of fumes and helping to maintain a safe environment. When creating vent holes, it is important to consider their placement and size.
To create vent holes, follow these steps:
- Choose an appropriate location for the vent holes. Consider factors such as the proximity to the fuel cell, accessibility for maintenance, and drainage.
- Using a drill with the appropriate bit size, carefully drill holes in the chosen locations. Start with smaller holes and gradually increase the size if necessary.
- Once the vent holes are created, deburr the edges to ensure a clean finish.
By creating vent holes in strategic locations, you can promote proper air circulation in the truck bed, reducing the risk of gas accumulation and enhancing the safety of your fuel cell installation.
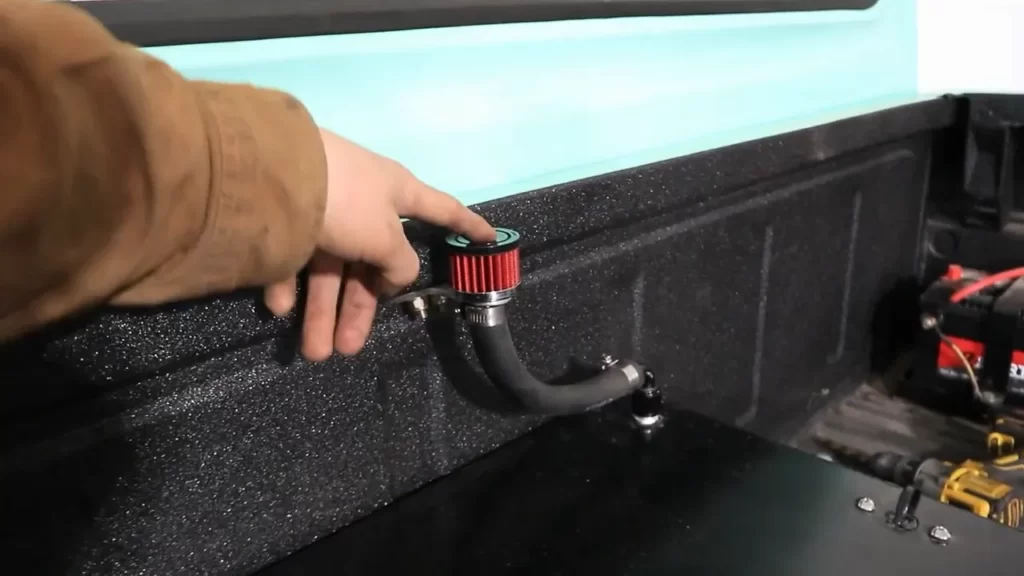
Installing vents or ventilation fans
In addition to creating vent holes, installing vents or ventilation fans can further enhance the airflow in the truck bed. These components help in expelling any trapped gases, keeping the environment within the truck bed well-ventilated.
Follow these steps to install vents or ventilation fans:
- Choose suitable vent or ventilation fan options based on your specific requirements and the size of the truck bed.
- Position the vents or ventilation fans in the designated areas, ensuring they are not obstructed by any other components.
- Secure the vents or ventilation fans using the provided mounting hardware, making sure they are firmly attached.
Installing vents or ventilation fans in the truck bed is an effective way to improve air circulation and prevent the accumulation of potentially harmful gases. By doing so, you contribute to the overall safety and performance of your fuel cell installation.
Now that we have discussed the importance of proper ventilation and explored methods to ensure air circulation in the truck bed, let’s move on to the next crucial step – securing the fuel cell to prevent movement.
Installing A Fuel Cell Mounting System
When it comes to installing a fuel cell in your truck, one crucial step is choosing the appropriate mounting system. The mounting system ensures that the fuel cell is securely and stably installed, preventing any potential hazards on the road. In this section, we will guide you through the process of selecting the right mounting system, measuring and marking the installation location, and attaching the mounting brackets.
Choosing the appropriate mounting system for your truck
Before installation, it is important to choose a mounting system that is compatible with your truck and the specific fuel cell you will be installing. There are various types of mounting systems available in the market, such as strap-style mounts, wedge-style brackets, and custom metal fabrication. Consider factors like the size and weight of the fuel cell, the mounting options on your truck, and your budget when selecting the appropriate mounting system.
Measuring and marking the installation location
Once you have chosen the mounting system, the next step is to measure and mark the installation location. Start by identifying an area in your truck that is suitable for mounting the fuel cell. This area should provide enough support and clearance for the fuel cell. Measure the dimensions of the fuel cell and mark the corresponding position on the truck. You can use a tape measure, level, and marking tools to ensure accuracy.
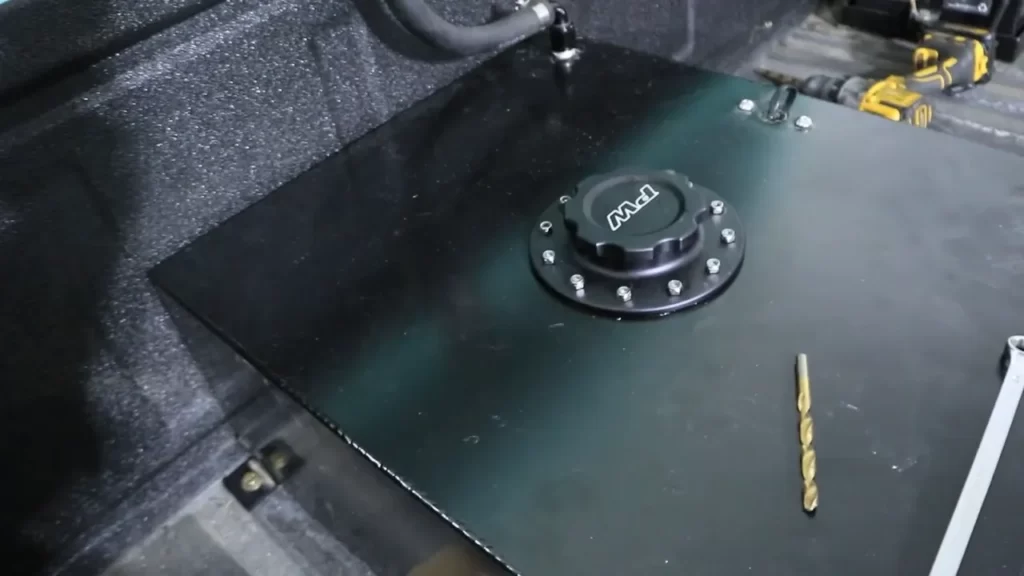
Drilling holes and attaching the mounting brackets
With the installation location marked, it’s time to drill holes and attach the mounting brackets. Use a drill machine and the appropriate drill bit size for creating holes in the truck frame or bed. Make sure to align the holes with the mounting holes on the brackets. Insert the mounting bolts into the holes and tighten them securely. Double-check that the brackets are firmly attached and can support the weight of the fuel cell.
Ensuring a secure and stable installation
After attaching the mounting brackets, it’s essential to ensure a secure and stable installation. Check for any looseness or movement in the brackets and make any necessary adjustments. It’s crucial that the fuel cell is tightly secured to prevent shifting while driving. Additionally, consider using anti-vibration pads or rubber grommets between the fuel cell and the mounting brackets to minimize vibration and potential damage.
Installing a fuel cell mounting system in your truck is a critical step towards a safe and effective fuel system. By choosing the appropriate mounting system, accurately measuring and marking the installation location, drilling holes, and ensuring a secure and stable installation, your fuel cell will be securely mounted in your truck, ready to deliver optimal performance on the road.
Installing A Fuel Cell Wiring Kit
When it comes to installing a fuel cell in your truck, one of the crucial steps is properly installing the fuel cell wiring kit. This kit is essential for connecting the fuel cell to the battery and electrical components of your truck, ensuring proper functioning and safety. In this section, we will discuss the importance of selecting the right wiring kit for your truck and fuel cell, as well as routing the wires properly to avoid damage or interference.
Selecting the right wiring kit for your truck and fuel cell
When selecting a wiring kit for your truck’s fuel cell installation, there are a few key factors to consider. Firstly, you need to ensure that the kit is compatible with both your truck’s electrical system and the specific fuel cell you are installing. This can typically be determined by checking the manufacturer’s specifications for both the truck and the fuel cell.
Additionally, it’s important to consider the amperage capacity of the wiring kit. Fuel cell systems often require high amperage to function properly, so you want to make sure that the wiring kit can handle the load. Look for a kit that is rated for the appropriate amperage and has ample insulation to prevent any potential overheating or short circuiting.
Furthermore, consider the length of the wiring kit. Measure the distance between your fuel cell and the battery or electrical components to ensure that the kit is long enough to reach without stretching or straining the wires. It’s always better to have some extra length than to come up short.
Routing the wires properly to avoid damage or interference
Once you have selected the right wiring kit, the next step is to properly route the wires to avoid any potential damage or interference. It’s essential to keep the wires away from any sharp edges or moving components that could cause them to be cut or damaged. Additionally, make sure to route the wires away from any heat sources such as the exhaust system or engine components that could cause them to melt or become damaged.
One effective method for routing the wires is to use cable ties or clamps to secure them in place along existing wiring harnesses or brackets within your truck. This not only keeps the wires organized but also helps to prevent them from moving around or tangling with other components.
Another important consideration is to avoid routing the wires in close proximity to any sensitive electronic devices or components that could be negatively affected by electromagnetic interference. This can include things like the truck’s radio or navigation system. Keep a safe distance between the wiring and these components to ensure optimal performance.
Connecting the fuel cell to the battery and electrical components
Once the wiring has been properly routed, it’s time to connect the fuel cell to the battery and electrical components of your truck. Refer to the manufacturer’s instructions for your specific wiring kit and fuel cell for the correct wiring connections.
Start by ensuring that the power to your truck is turned off and the battery is disconnected. Then, carefully strip the ends of the wires from the wiring kit and connect them to the corresponding terminals on the battery, fuel cell, and electrical components, using appropriate connectors or crimping techniques.
It’s crucial to double-check all connections to ensure they are secure and properly insulated. This helps to prevent any loose connections or potential short circuits. Once all connections are made, reconnect the battery and turn on the power to test the fuel cell and ensure everything is functioning correctly.
In conclusion, installing a fuel cell wiring kit is an essential part of the overall fuel cell installation process in your truck. By selecting the right wiring kit, routing the wires properly, and connecting everything securely, you can ensure a safe and efficient fuel cell system in your truck.
Testing And Troubleshooting The Electrical Connections
Testing and troubleshooting the electrical connections is a crucial step in ensuring the successful installation of a fuel cell in your truck. Proper voltage and current flow are essential for the fuel cell to function optimally. In this section, we will cover how to check for proper voltage and current flow, address any wiring issues or faulty connections, and ensure the fuel cell is correctly integrated into the truck’s electrical system.
Checking for proper voltage and current flow
Before proceeding with the installation, it is important to verify that your truck’s electrical system is supplying the appropriate voltage and current. To do so:
- Step 1: Start by disconnecting the negative terminal of the truck’s battery to avoid any potential electrical shorts.
- Step 2: Using a multimeter, set the dial to measure DC voltage. With the ignition off, touch the multimeter leads to the positive and negative terminals of the fuel cell.
- Step 3: Ensure that the reading on the multimeter matches the voltage specifications provided by the fuel cell manufacturer. Any significant deviation may indicate an issue with the electrical supply.
- Step 4: Similarly, check the current flow by setting the multimeter to measure DC current. Connect the multimeter in series with the positive wire connecting to the fuel cell. Compare the reading to the current requirements specified by the manufacturer.
Addressing any wiring issues or faulty connections
If you encounter any wiring issues or faulty connections during the installation process, it is crucial to address them promptly. Here are some steps to follow:
- Step 1: Carefully inspect all wiring connections to ensure they are securely connected and free from any visible damage.
- Step 2: If you notice any loose or damaged wires, replace them immediately. It is essential to use the correct gauge and type of wire recommended by the fuel cell manufacturer.
- Step 3: Double-check the connections at both ends to ensure a tight and secure fit. Loose connections can lead to voltage drops and poor performance.
- Step 4: If you encounter any wiring issues that are beyond your expertise, it may be necessary to seek the assistance of a professional electrician or a certified mechanic.
Ensuring the fuel cell is correctly integrated into the truck’s electrical system
Proper integration of the fuel cell into the truck’s electrical system is essential for its efficient operation. To ensure correct integration:
- Step 1: Follow the manufacturer’s instructions carefully to connect the fuel cell to the appropriate power source.
- Step 2: Securely attach the fuel cell’s positive and negative terminals to the corresponding electrical connections in the truck.
- Step 3: Check for any error codes or warning lights on the fuel cell’s control panel or dashboard. Address any issues promptly by referring to the manufacturer’s troubleshooting guide.
- Step 4: Test the fuel cell’s functionality by turning on the ignition and monitoring its performance. Ensure that the fuel cell is supplying the required power to the truck’s electrical components.
By thoroughly testing and troubleshooting the electrical connections, you can guarantee the successful installation and integration of a fuel cell in your truck. It is essential to perform these steps with caution, following the manufacturer’s instructions and seeking professional assistance when necessary.
Installing Fuel Lines And Connections
Choosing the Appropriate Fuel Lines and Fittings
When installing a fuel cell in your truck, one of the crucial steps is choosing the appropriate fuel lines and fittings. The right choice will ensure a secure and leak-free fuel system. Here are some factors to consider when making your selection:
- Compatibility: Check the compatibility of the fuel lines and fittings with the type of fuel you will be using. Different fuels may require specific materials to prevent corrosion or deterioration.
- Pressure Rating: Consider the pressure rating of the fuel lines and fittings to ensure they can withstand the demands of your truck’s fuel system. High-pressure applications may require reinforced lines and fittings for added durability.
- Size: Determine the appropriate size of the fuel lines and fittings based on the flow requirements of your fuel system. Using the wrong size can cause inefficient fuel delivery or restrict fuel flow altogether.
- Quality: Opt for high-quality fuel lines and fittings that are specifically designed for automotive applications. Cheap or substandard components may not withstand the rigors of the road, leading to potential leaks or failures.
Routing and Securing the Fuel Lines to Prevent Leaks
Proper routing and securing of the fuel lines are crucial to prevent leaks and ensure the safety of your truck’s fuel system. Here are some tips for routing and securing your fuel lines:
- Follow Manufacturer’s Guidelines: Consult the fuel cell manufacturer’s instructions to determine the recommended routing of the fuel lines. This will ensure that the lines are installed correctly and minimize the risk of kinks or bends that could cause fuel flow restrictions or leaks.
- Use Mounting Brackets or Clamps: Secure the fuel lines to the frame of the truck using mounting brackets or clamps. This will help prevent the lines from shifting or rubbing against other components, reducing the likelihood of abrasion or damage.
- Maintain Adequate Clearance: Ensure that the fuel lines have sufficient clearance from sharp edges, hot surfaces, or moving parts. Any contact with these elements can lead to abrasion, wear, or punctures in the fuel lines, resulting in fuel leaks.
- Inspect Regularly: Periodically inspect the fuel lines for signs of wear, damage, or leaks. Replace any worn or damaged lines immediately to maintain the integrity of your fuel system.
Connecting the Fuel Cell to the Truck’s Fuel System
To successfully connect the fuel cell to your truck’s fuel system, follow these steps:
- Prepare the Fuel Cell: Ensure that the fuel cell is properly secured in the desired location within your truck. Make sure it is level and accessible for future maintenance or inspections.
- Identify the Fuel Line Connections: Locate the fuel line connections on both the fuel cell and the truck’s fuel system. These connections may vary depending on the specific make and model of your truck.
- Remove Existing Fuel Lines (if necessary): If you are replacing an old fuel cell or modifying your truck’s fuel system, carefully disconnect the existing fuel lines. Use caution to avoid any spills or leaks.
- Connect the Fuel Lines: Attach the appropriate fuel lines and fittings to the fuel cell and the truck’s fuel system. Ensure that the connections are secure and leak-proof.
- Tighten the Connections: Use a wrench or socket to securely tighten the fittings, taking care not to overtighten and potentially damage the threads or fittings.
- Test for Leaks: Before fully operating your truck, conduct a thorough leak test. Apply a small amount of pressure to the fuel system and check for any signs of fuel leakage. Address any leaks immediately to prevent hazards and ensure optimal performance.
By carefully selecting the appropriate fuel lines and fittings, routing and securing the lines properly, and ensuring a secure connection between the fuel cell and your truck’s fuel system, you can install a fuel cell confidently and avoid potential leaks or fuel system issues.
Testing For Leaks And Proper Operation
Testing for leaks and ensuring proper operation is a crucial step when installing a fuel cell in a truck. Conducting a detailed leak test helps to identify any potential issues and ensures the safety and efficiency of the fuel cell system. Additionally, checking for signs of leakage or fuel odor is essential to prevent any accidents or damage. Verifying the proper functioning of the fuel cell and related components ensures that the system is working as intended and can provide reliable power to the truck.
Conducting a detailed leak test before starting the truck
Before starting the truck, it is important to conduct a comprehensive leak test to identify any possible leaks in the fuel cell system. This can be done by pressurizing the system with air or a specified gas and monitoring any pressure drop over time. A pressure drop indicates the presence of a leak, which should be promptly addressed. To conduct the leak test, follow the steps below:
- Ensure all connections and fittings are properly tightened.
- Apply a suitable leak detection solution to all connections and joints.
- Inspect for any bubbles or foam formation, which indicates a leak.
- If a leak is found, loosen the connection, reapply the sealant, and retighten to eliminate the leak.
- Reapply the leak detection solution and recheck for any signs of leakage.
- Repeat the process until no leaks are detected.
Checking for any signs of leakage or fuel odor
Even after conducting the initial leak test, it is important to regularly check for any signs of leakage or fuel odor. This ensures that the fuel cell system is functioning properly and there are no potential safety hazards. To check for signs of leakage or fuel odor:
- Visually inspect all connections, fittings, and fuel lines for any signs of leakage or damage.
- Look for any wet spots or stains, which may indicate a leak.
- Check for any noticeable fuel odor near the fuel cell or fuel lines.
- If any signs of leakage or fuel odor are detected, address the issue immediately by tightening connections or replacing damaged components.
Verifying the proper functioning of the fuel cell and related
components
Once the leak test is complete and there are no signs of leakage or fuel odor, it is crucial to verify the proper functioning of the fuel cell and its related components. This helps ensure that the fuel cell system is delivering the expected performance and providing reliable power to the truck. To verify the proper functioning:
- Check the fuel cell’s power output and compare it to the manufacturer’s specifications.
- Monitor the fuel cell’s temperature and coolant levels to ensure they are within the recommended range.
- Inspect the fuel cell’s control panel or monitoring system for any error codes or abnormal readings.
- Verify the functionality of the fuel cell’s auxiliary components, such as pumps, filters, and pressure regulators.
- If any issues or abnormalities are detected, consult the manufacturer’s guidelines or seek professional assistance to troubleshoot and resolve the problem.
By conducting a detailed leak test, checking for signs of leakage or fuel odor, and verifying the proper functioning of the fuel cell and related components, you can ensure the safe and reliable operation of the fuel cell system in your truck. Regular maintenance and inspections will help prevent any potential issues and ensure optimum performance.
Regular Inspection And Maintenance
Regular inspection and maintenance are crucial for ensuring the proper functioning of a fuel cell in a truck. By following a few simple steps, you can keep your fuel cell in optimal condition, preventing any potential issues or breakdowns down the line.
Cleaning and Inspecting the Fuel Cell Regularly
To ensure the longevity and efficiency of your fuel cell, it’s essential to clean and inspect it regularly. By doing so, you can identify any potential issues or signs of wear before they become major problems.
Here’s a step-by-step guide to cleaning and inspecting your fuel cell:
- Turn off the power: Before cleaning or inspecting the fuel cell, make sure to turn off the power supply to avoid any accidents or injuries.
- Remove any debris: Start by removing any debris or dirt from the exterior of the fuel cell. Use a cloth or brush to gently wipe away any dust or particles.
- Inspect for leaks: Carefully examine the fuel cell for any signs of leaks or damage. Pay close attention to the connections, seals, and gaskets. If you notice any leaks, it’s important to address them promptly.
- Clean the interior: Open the fuel cell and inspect the interior. Remove any dirt or deposits using a mild detergent solution and a soft-bristle brush. Avoid using harsh chemicals that might damage the fuel cell.
- Check the fuel lines: Inspect the fuel lines for any signs of wear, cracks, or blockages. Clean or replace the fuel lines as needed.
Checking for Any Signs of Wear or Damage
Regularly checking your fuel cell for signs of wear or damage is essential for preventing any unexpected issues. By catching these problems early on, you can avoid costly repairs and potential safety hazards.
Here are some key areas to inspect for signs of wear or damage:
- Fuel cell casing: Examine the fuel cell casing for any cracks, dents, or corrosion. These issues can compromise the integrity of the fuel cell and should be addressed immediately.
- Electrodes: Check the electrodes for any signs of corrosion or degradation. Clean or replace them if necessary.
- Fuel cell membrane: Inspect the fuel cell membrane for any tears or punctures. If you notice any damage, it’s crucial to replace the membrane to ensure proper fuel cell functionality.
- Connectors: Check the connectors and wiring for any loose connections, frayed wires, or damaged components. Tighten or replace connectors as needed.
Replacing Worn-Out Parts or Components as Needed
Over time, certain parts or components of your fuel cell may wear out and require replacement. By promptly replacing these worn-out parts, you can maintain the performance and efficiency of your fuel cell.
Here are some common parts that may need replacement:
- Seals and gaskets: Regularly inspect the seals and gaskets for any signs of wear or damage. If they are worn out or leaking, replace them to prevent fuel leaks and maintain proper sealing.
- Fuel filters: Check the fuel filters regularly and replace them when they become clogged or dirty. Clean fuel filters ensure that only clean fuel reaches the fuel cell, preventing any potential damage.
- Fuel cell stack: The fuel cell stack is a critical component of the system. If you notice a significant decrease in performance or efficiency, it may be necessary to replace the stack.
By following these regular inspection and maintenance practices, you can ensure that your fuel cell in your truck remains in optimal condition, providing reliable and efficient power for your vehicle.
Troubleshooting Common Issues
Installing a fuel cell in your truck can greatly improve its performance and efficiency. However, like any other mechanical component, fuel cells can sometimes encounter issues that require troubleshooting. In this section, we will discuss some common issues that you might face when installing a fuel cell and how to address them.
Identifying and addressing fuel cell performance issues
If you notice a decrease in your truck’s performance after installing a fuel cell, it could be due to various reasons. Here are some steps you can take to identify and address fuel cell performance issues:
- Check the fuel cell connections: Make sure that all the connections are secure and properly tightened. Loose connections can lead to poor fuel flow and affect the performance of your fuel cell.
- Inspect the fuel lines: Look for any signs of damage or leaks in the fuel lines. Even a small leak can cause a drop in fuel pressure and hinder the performance of the fuel cell.
- Clean the fuel cell filters: Over time, the filters in your fuel cell can become clogged with dirt and impurities. Regularly clean or replace the filters to ensure proper fuel flow.
- Monitor the fuel pressure: Keep an eye on the fuel pressure gauge while driving. If the pressure is consistently low or fluctuating, it could indicate a problem with the fuel cell.
- Inspect the fuel cell for signs of wear and tear: Check the fuel cell for any visible signs of damage or corrosion. If you notice any issues, it may be necessary to replace or repair the fuel cell.
Dealing with leaks or fuel delivery problems
Leaks or fuel delivery problems can significantly affect the performance of your fuel cell. Here are some steps you can take to deal with these issues:
- Inspect the fuel cell for leaks: Carefully examine the fuel cell for any signs of leaks. Look for wet spots or fuel stains around the fuel cell or fuel line connections.
- Tighten the connections: If you find any loose connections, tighten them to prevent fuel leaks. Be careful not to overtighten, as it can damage the fittings.
- Replace damaged fuel lines: If you identify any damaged or leaking fuel lines, it’s crucial to replace them immediately. Using damaged fuel lines can lead to fuel leaks and potential hazards.
- Check the fuel cell vents: Ensure that the vents on the fuel cell are clean and free from any obstructions. Blocked vents can cause pressure build-up and lead to leaks.
- Use appropriate fuel line fittings: Make sure you are using the correct fittings for your fuel cell and fuel lines. Incorrect fittings can cause fuel leaks and affect the performance of the fuel cell.
Seeking professional assistance when necessary
While troubleshooting common fuel cell issues can often be done by yourself, sometimes professional assistance may be required. Here are a few instances where seeking professional help is necessary:
- Complex issues that you are unable to diagnose or fix on your own
- Electrical problems related to the fuel cell
- Significant damage or corrosion to the fuel cell
Professionals have the knowledge and experience to diagnose and repair complex fuel cell issues effectively. It’s important to reach out to them when necessary to ensure the proper functioning of your fuel cell and truck.
Frequently Asked Questions On How To Install A Fuel Cell In A Truck
Is A Fuel Cell Street Legal?
Yes, a fuel cell is street legal. It is a clean energy technology that meets the necessary regulatory requirements for use on public roads.
Does A Fuel Cell Need Foam?
No, a fuel cell does not require foam.
What Does A Fuel Cell Do For A Diesel Truck?
A fuel cell powers a diesel truck by converting chemical energy from fuel and oxygen into electrical energy. It works by using a chemical reaction to produce electricity, which can then be used to power the vehicle’s motor.
How Many Gallons Does A Fuel Cell Hold?
A fuel cell can hold varying amounts of gallons depending on the size and type.
Conclusion
Installing a fuel cell in your truck can greatly improve its performance and efficiency. By following the step-by-step process outlined you’ll be able to enjoy the benefits of increased fuel capacity and reduced emissions. Don’t forget to ensure compatibility with your vehicle and consult the manufacturer’s instructions for proper installation.
Remember to prioritize safety and seek professional assistance if needed. Start enjoying the advantages of a fuel cell-equipped truck today!