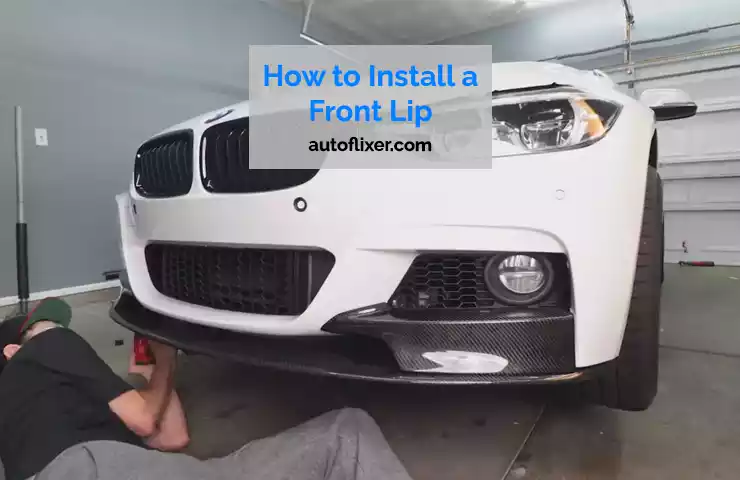
To install a front lip, begin by ensuring the car is on a level surface and gather all necessary tools. Remove any existing lip or bumper trims, then clean the area thoroughly.
Carefully position the lip and use screws or clips for proper installation. Double-check the alignment and make any necessary adjustments before tightening all screws securely. Introducing a front lip to your car can greatly enhance its aesthetics and aerodynamics. A front lip is a simple yet effective addition that can improve the overall look of your vehicle while also providing practical benefits.
By directing airflow underneath the car, it reduces lift and improves stability at higher speeds. Installing a front lip does not have to be a complex process if you follow the right steps and take your time. We will provide a concise guide on how to install a front lip properly, ensuring a seamless and secure fit.
Understanding The Basics Of Front Lips
Front lips, also known as front splitters, are a popular modification for car enthusiasts who want to enhance the appearance and performance of their vehicles.
These sleek attachments are typically made from materials like plastic, carbon fiber, or fiberglass and are installed on the front bumper of a car. If you’re new to the world of automotive customization, it’s essential to understand the basics of front lips before diving into the installation process.
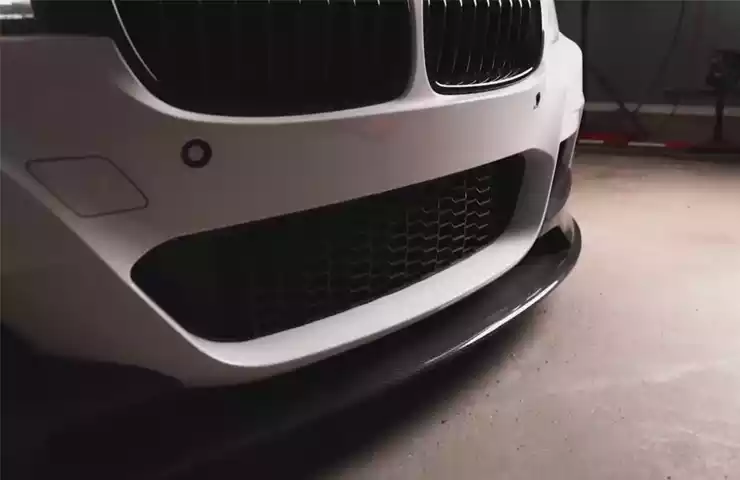
Different types and styles of front lips
Front lips come in various types and styles, each offering a unique aesthetic and performance appeal. Let’s explore some of the most common types:
| Type | Description |
|---|---|
| Universal Lip | A universal front lip is designed to fit a wide range of vehicle makes and models. It’s a versatile option that can enhance the appearance of any car. |
| Custom Lip | A custom front lip is specifically designed for a particular car model. It offers a seamless fit and integrates seamlessly with the original bumper. |
| Aggressive Lip | An aggressive front lip features a more pronounced design and a lower profile, giving your car a sporty and aggressive look. |
| Splitter Lip | A splitter lip is a front lip that extends further forward, creating downforce and improving aerodynamics at high speeds. |
Benefits of installing a front lip
Installing a front lip can provide several benefits beyond just enhancing the visual appeal of your vehicle. Here are a few advantages worth considering:
- Improved aerodynamics: A well-designed front lip can help reduce drag and improve airflow around the vehicle, resulting in better handling and fuel efficiency.
- Enhanced stability: The added downforce generated by a front lip can increase traction and stability, especially at higher speeds.
- Protects the front bumper: The front lip acts as a barrier, shielding the front bumper from road debris, curbs, and other potential damage.
- Personalized style: With a wide range of styles and materials available, installing a front lip allows you to customize the appearance of your car to reflect your unique taste.
By understanding the basics of front lips and the different types available, you can make an informed decision when it comes to selecting the right front lip for your vehicle. Keep in mind that installation may vary depending on the specific front lip and your car’s make and model, so it’s always a good idea to consult the manufacturer’s instructions or seek professional assistance if needed.
Essential Tools For Front Lip Installation
When it comes to installing a front lip on your car, having the right tools is essential for a successful and hassle-free installation. Without the proper tools, you may find yourself struggling and frustrated throughout the process. In this blog post, we will discuss the essential tools you’ll need to install a front lip, including screwdrivers, a drill, a tape measure, and masking tape.
Screwdrivers
Screwdrivers are a basic yet crucial tool for front lip installation. They are used to remove any screws or fasteners on your car’s bumper or undercarriage. To ensure a secure and tight fit, it’s important to have screwdrivers of different sizes and types, such as Phillips and flathead screwdrivers. This will allow you to easily adjust and tighten the screws on the front lip.
Drill
A drill is another essential tool for front lip installation, especially if you need to create new holes for mounting brackets or screws. When choosing a drill, make sure it has enough power and torque to easily penetrate your car’s bumper material. Additionally, having a variety of drill bits will come in handy when working with different types of materials, such as metal or plastic.
Tape measure
A tape measure is an invaluable tool when it comes to achieving precise and accurate measurements during front lip installation. It allows you to measure the length, width, and height of your car’s bumper, ensuring that your front lip fits perfectly. This tool will help you avoid any guesswork and mistakes that can lead to an ill-fitting front lip or uneven installation.
Masking tape
Masking tape is often overlooked but plays a crucial role in front lip installation. It is used to temporarily secure the front lip in place before permanently attaching it. By using masking tape, you can position and align the front lip to your desired position, ensuring that it looks even and balanced. Once you are satisfied with the placement, you can then proceed to secure it with screws or adhesive.
In conclusion, having the right tools is vital for a successful front lip installation. Screwdrivers, a drill, a tape measure, and masking tape are all essential tools that will make the installation process easier and more efficient. By using these tools, you’ll be able to achieve a professional-looking front lip that enhances the appearance of your car.
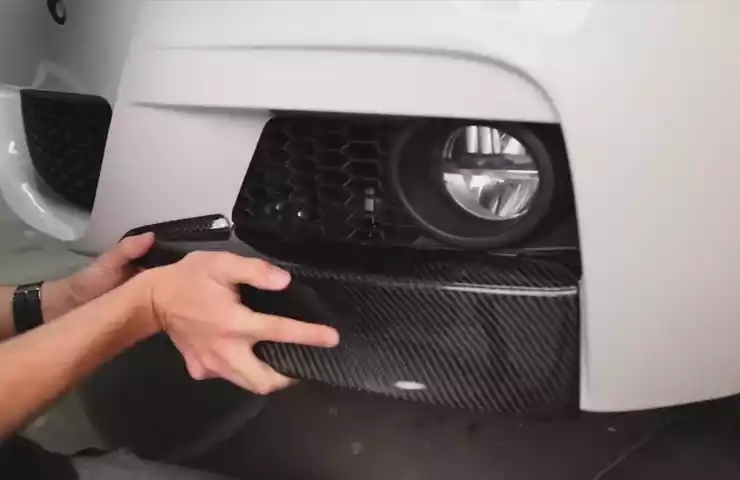
Choosing The Right Front Lip
When it comes to installing a front lip on your vehicle, choosing the right one is crucial. The front lip not only enhances the appearance of your car but also provides added protection to the front bumper. In this section, we will discuss the importance of considering the make and model of your vehicle, researching different front lip options, and ensuring compatibility with your vehicle’s front bumper.
Consider the Make and Model of Your Vehicle
Before purchasing a front lip, it is essential to consider the make and model of your vehicle. Different vehicles have different designs and dimensions, and not all front lips are compatible with every car. Make sure to find a front lip that is specifically designed for your vehicle, as this ensures proper fitment and functionality. Additionally, consider the overall style and aesthetic of your vehicle and choose a front lip that complements its look.
Research Different Front Lip Options
Researching different front lip options is vital to finding the one that matches your preferences and requirements. There are various styles and materials available, such as carbon fiber, polyurethane, and ABS plastic. Each material has its own benefits and drawbacks, so it is important to do your homework and understand the pros and cons of each. Look for front lips with good reviews and ratings, as this can help you gauge their quality and durability.
Ensure Compatibility with Your Vehicle’s Front Bumper
Compatibility with your vehicle’s front bumper is crucial when choosing a front lip. Not all front lips can be installed on all bumpers, so it is essential to ensure proper fitment. Take measurements of your front bumper and compare them to the dimensions provided by the front lip manufacturer. Additionally, consider any specific installation requirements or modifications that may be needed. Installing a front lip that is compatible with your vehicle’s front bumper ensures a seamless and secure fit.
Removing The Front Bumper
When it comes to installing a front lip on your vehicle, the first step is removing the front bumper. This may sound like a daunting task, but with a little bit of guidance, you can easily remove the front bumper and proceed with the installation. In this section, we will walk you through the process of removing the front bumper in a few simple steps. Let’s get started!
Referencing the vehicle’s manual for instructions
Before starting any work, it is essential to refer to your vehicle’s manual for specific instructions on how to remove the front bumper. Every car model may have slight variations in the process, so it’s important to follow the manufacturer’s guidelines for your particular vehicle. The manual will provide you with details and diagrams that will make the process easier to understand.
Disconnecting the battery
It is crucial to disconnect the battery before working on any electrical components of your vehicle, including the front bumper. This step ensures your safety and prevents the risk of electrical shock. Locate the battery in your car’s engine bay and carefully disconnect the negative terminal using a wrench or a socket set. Remember, safety should always be your top priority.
Removing screws and clips securing the front bumper
Once the battery is disconnected, it’s time to start removing the screws and clips that secure the front bumper to the vehicle’s frame. Using a screwdriver or a suitable tool, locate and remove the screws that hold the bumper in place. Pay close attention to any clips that may also be securing the bumper, and gently release them by prying them with a flathead screwdriver or using a trim removal tool.
Ensure that you keep track of all the screws and clips you remove during this process. You can place them in a small container or bag to keep them organized and prevent losing any important pieces.
As you remove the screws and clips, be cautious of any electrical connectors or wiring that may be attached to the bumper. Take care not to damage or strain any connections, and be sure to detach any connectors as you go along.
After you have removed all the screws, clips, and electrical connections, gently pull the front bumper away from the vehicle. Take your time during this step to avoid any unnecessary damage, and have someone help you if needed to ensure a smooth and steady removal.
With the front bumper successfully removed, you are now ready to proceed with installing the front lip. Keep your vehicle’s manual nearby for future reference, as you may need it during the installation process. Good luck!
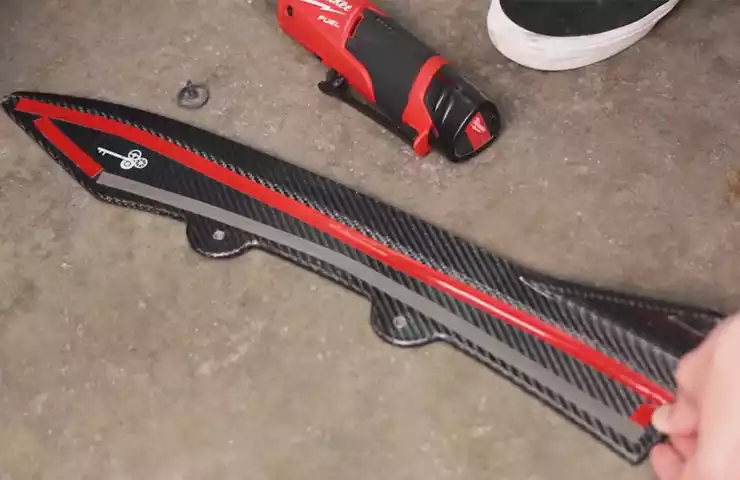
Cleaning And Prepping The Front Bumper
Before you start installing a front lip on your vehicle, it is crucial to properly clean and prep the front bumper surface. This step ensures a smooth and secure installation. By following these steps, you’ll be able to achieve optimal adherence and a professional-looking finish.
Cleaning the surface thoroughly
The first step in prepping your front bumper is to clean the surface thoroughly. This will remove any dirt, grime, or residue that may hinder the adhesive’s effectiveness. Here’s how you can clean the surface:
- Start by rinsing the front bumper with water to remove any loose debris.
- Use a gentle automotive detergent mixed with water to create a soapy solution.
- Apply the soapy solution to the bumper using a clean microfiber cloth or sponge.
- Gently scrub the surface in circular motions, paying close attention to areas with visible dirt or stains.
- Rinse off the soapy residue with clean water.
- Allow the bumper to dry completely before moving on to the next step.
Sanding any rough areas
After cleaning the front bumper, it’s essential to sand any rough areas to create a smooth and even surface. This step promotes better adherence of the front lip and improves the overall appearance. Follow these steps to sand any rough areas:
- Inspect the front bumper for any imperfections or rough spots.
- Using a fine grit sandpaper, gently sand the rough areas in a back-and-forth or circular motion.
- Be sure to apply consistent pressure and keep the sandpaper flat against the bumper.
- Wipe away any sanding residue with a clean cloth.
Applying primer for better adherence
Applying primer to the front bumper helps improve adhesion between the bumper and the front lip. This additional layer creates a stronger bond and increases the longevity of the installation. Here’s how you can apply primer:
- Choose a suitable automotive primer designed specifically for your bumper material.
- Follow the instructions provided by the manufacturer for proper application.
- Apply the primer in thin, even coats, making sure to cover the entire surface.
- Allow each coat of primer to dry completely before applying the next coat.
- Once the final coat is dry, gently sand the primered surface with a fine grit sandpaper to ensure smoothness.
- Wipe away any sanding residue with a clean cloth before proceeding with the front lip installation.
By cleaning the surface thoroughly, sanding any rough areas, and applying primer for better adherence, you’re now ready to proceed with installing the front lip on your vehicle. These steps will ensure a secure and long-lasting installation, giving your vehicle a sleek and enhanced appearance on the road.
Aligning And Positioning The Front Lip
Aligning and positioning the front lip is an important step in the installation process. Ensuring proper alignment not only enhances the aesthetic appeal of your vehicle but also improves its aerodynamics. In this section, we will guide you through two key steps: using a measuring tape to ensure proper alignment and marking the positions for installation.
Using measuring tape to ensure proper alignment
Before you start the installation process, it’s crucial to measure and ensure that the front lip is aligned properly. This will help you achieve a symmetrical and balanced look. Follow these steps:
- First, park your vehicle on a level surface and make sure the front tires are straight.
- Measure the distance between the front edge of the fender and the ground on both sides of the vehicle using a measuring tape. Record these measurements for reference.
- Next, measure the distance between the center of the front bumper and the ground. This will help you position the front lip accurately.
- Compare the measurements on both sides to ensure they are equal. If there is a slight difference, adjust the alignment until they are symmetrical.
Marking the positions for installation
Once you have ensured proper alignment, it’s time to mark the positions for installation. This step will help you accurately attach the front lip to your vehicle. Follow these guidelines:
- Start by placing the front lip on the ground, aligning it with the front bumper.
- Moving to one side of the vehicle, hold the front lip firmly against the bumper while ensuring it is aligned with the measurements you took earlier.
- Using a pencil or a piece of chalk, mark the positions where the front lip should be attached to the bumper. Make sure to mark multiple points to ensure a secure installation.
- Repeat this process on the other side of the vehicle, aligning the front lip and marking the positions.
Now that you have aligned and marked the positions for installation, you are ready to move on to the next step: attaching the front lip securely to your vehicle. Stay tuned for our upcoming blog post on how to complete the installation process and enjoy the enhanced look and performance of your vehicle.
Attaching The Front Lip
Once you have properly positioned your front lip, it’s time to secure it to your vehicle. There are two commonly used methods for attaching a front lip – using adhesive or double-sided tape, and securing it with screws or clips. Let’s go over each method in detail.
Applying adhesive or double-sided tape
One way to attach your front lip is by using adhesive or double-sided tape. This method is ideal for those who want a secure and flush fit without any visible screws or clips. Here’s how you can do it:
- Clean the surface of your front bumper thoroughly with a mild detergent and water. This will help remove any dirt or debris that could hinder the adhesion process.
- Dry the bumper completely with a clean cloth.
- Cut the adhesive or double-sided tape into small strips or sections, depending on the size of your front lip. Make sure to use a strong and durable tape suitable for automotive applications.
- Peel off the backing of the adhesive tape to expose the sticky side.
- Apply the adhesive tape onto the backside of your front lip, ensuring even coverage along the entire length.
- Align the front lip with the front bumper and press firmly to adhere the tape to the bumper.
- Apply consistent pressure for a few minutes to ensure a strong bond.
- Allow the adhesive to cure according to the manufacturer’s instructions before driving your vehicle.
Securing the front lip with screws or clips
If you prefer a more secure attachment method or if your front lip requires additional support, using screws or clips is a viable option. Here’s how you can secure your front lip using this method:
- Identify the mounting points on your front lip and mark them on the bumper.
- Drill small pilot holes at the marked points to prepare them for screws or clips.
- Align the front lip with the pilot holes and insert the screws or clips through the mounting points.
- Tighten the screws or clips using a screwdriver or appropriate tool until the front lip is securely attached to the bumper.
- Make sure to not overtighten the screws or clips, as this may cause damage to the front lip or bumper.
- Double-check the alignment and fitment of the front lip before driving your vehicle.
By following these instructions and using the appropriate attachment method, you can successfully install a front lip on your vehicle. Whether you choose adhesive or screws and clips, always prioritize safety and ensure a secure fit to enhance the aesthetics and aerodynamics of your car.
Credit: blog.rwcarbon.com
Checking The Fit And Adjusting
When it comes to installing a front lip on your vehicle, checking the fit and making adjustments is an essential step to ensure the lip aligns perfectly and enhances the overall appearance of your car. In this section, we will guide you through the process of ensuring proper alignment and making adjustments if necessary.
Ensuring Proper Alignment
Before making any adjustments to the front lip, it’s important to ensure that it is aligned correctly with your vehicle. Follow these steps to ensure proper alignment:
- Begin by placing the front lip on the front bumper of your car.
- Make sure the lip is centered and aligns with the contours of your bumper.
- Check the gaps between the lip and the bumper on both sides to ensure they are even.
- Confirm that the lip is symmetrically aligned with the front portion of your vehicle.
By carefully inspecting the alignment using these steps, you can ensure that the front lip fits properly and enhances the overall look of your car.
Making Adjustments if Necessary
If you find that the front lip does not align perfectly with your vehicle, some adjustments may be necessary. Follow these steps to make the required adjustments:
- Loosen any screws or clips that secure the front lip to the bumper.
- Gently push or pull the lip to adjust its position according to the alignment requirements.
- Check the alignment again after each adjustment to ensure you achieve the desired fit.
- Once you have achieved the perfect alignment, tighten the screws or clips to secure the front lip in place.
| Important Tips: |
|---|
| Consider using plastic or rubber trimming tools to avoid scratching the paint while making adjustments. |
| If the front lip is made of a flexible material, applying gentle heat with a hairdryer can make it easier to adjust. |
| Remember to double-check the alignment before finalizing the installation. |
By following these steps and making adjustments if necessary, you can ensure that your front lip fits perfectly and enhances the aesthetic appeal of your vehicle. Take your time during this process to achieve the desired look and enjoy the enhanced appearance of your car.
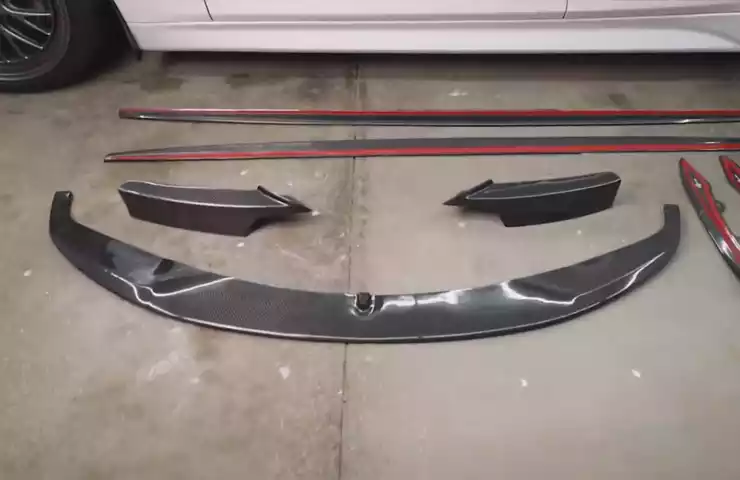
Painting And Customization
When it comes to installing a front lip, it’s not just about the functionality and aesthetics. Painting and customization play a vital role in achieving the desired look for your vehicle. Whether you want to match the color of your car or add a unique touch, painting and customizing the front lip can make a big difference.
Priming and painting the front lip
Before you can start painting the front lip, it’s essential to prepare it properly. This includes priming the surface to ensure better adhesion and a smoother finish. Here’s how you can do it:
- Clean the front lip: Wipe down the front lip with a mild detergent and water solution to remove any dirt, grease, or debris. This step will ensure that the primer adheres properly.
- Sand the front lip: Use a fine-grit sandpaper to lightly sand the surface of the front lip. This will help remove any imperfections and provide a better surface for the primer to adhere to.
- Apply the primer: Using a high-quality automotive primer, apply a thin, even coat to the front lip. Make sure to follow the manufacturer’s instructions regarding drying time and the number of coats needed.
- Sand the primer: Once the primer is fully dry, sand it lightly with a fine-grit sandpaper. This step will help smooth out any imperfections and create a flawless surface for the paint.
- Apply the paint: Now comes the fun part – applying the paint! Choose a high-quality automotive paint in the desired color and apply it in thin, even coats. Allow each coat to dry fully before applying the next one. Repeat this process until you achieve the desired color and coverage.
Applying a clear coat for protection
To ensure the longevity and protection of the paint job, it’s crucial to apply a clear coat. A clear coat acts as a protective layer against UV rays, fading, and scratches. Here’s how you can do it:
- Clean the painted front lip: Use a mild detergent and water solution to clean the painted front lip. Ensure that it is free from any dust, dirt, or debris.
- Apply the clear coat: Using a high-quality automotive clear coat, apply a thin, even layer to the front lip. Be sure to follow the manufacturer’s instructions regarding drying time and the number of coats required.
- Allow it to dry: Once the clear coat is applied, allow it to dry completely. This may take a few hours, so be patient.
- Buff and polish: Once the clear coat is dry, use a soft cloth to buff and polish the front lip. This step will help achieve a glossy, professional-looking finish.
By following these steps, you can successfully prime, paint, and customize your front lip to match your car or add a personal touch. It’s important to take your time and pay attention to detail to ensure a flawless result. So, unleash your creativity and give your vehicle the customized look it deserves!
Maintaining And Cleaning The Front Lip
The front lip of your car not only enhances the appearance but also plays a crucial role in protecting the front bumper from scratches and debris. To ensure that it continues to serve its purpose and maintains its attractive look, regular cleaning and inspections are necessary. In this section, we will discuss the importance of regular cleaning and waxing as well as inspecting for any damage or wear on the front lip.
Regular Cleaning and Waxing
Regular cleaning and waxing of the front lip is essential to remove dirt, grime, and other contaminants that may accumulate over time. This not only keeps the front lip looking its best but also helps to maintain its durability. Below are the steps you can follow for proper cleaning and waxing:
- Start by rinsing the front lip with a hose to remove any loose dirt and debris.
- Use a mild car wash soap and warm water to wash the front lip. Avoid using harsh chemicals or abrasive scrubbing tools as they may damage the lip’s surface.
- Gently scrub the front lip with a soft sponge or microfiber cloth to remove any stubborn dirt or stains.
- Rinse thoroughly with clean water to remove any soap residue.
- Dry the front lip using a soft towel or allow it to air dry.
- Apply a high-quality car wax to the front lip, following the manufacturer’s instructions. The wax helps to protect the lip from environmental factors such as UV rays and road debris.
- Buff the waxed surface with a clean, dry cloth to achieve a glossy finish.
By regularly cleaning and waxing the front lip, you can ensure its longevity and prevent any damage caused by accumulated dirt and grime.
Inspecting for any Damage or Wear
In addition to cleaning and waxing, it is important to inspect the front lip for any signs of damage or wear. This can help you identify and address any issues before they become more severe and potentially lead to costly repairs. Here are some key areas to inspect:
| Areas to inspect | What to look for |
|---|---|
| Cracks or chips | Small cracks or chips in the front lip can compromise its integrity and effectiveness. Look for any visible damage and address it promptly. |
| Sagging or misalignment | Check if the front lip is properly aligned and securely attached to the bumper. Any sagging or misalignment could indicate a need for adjustment or repair. |
| Scratches or scrapes | Minor scratches or scrapes can occur during regular driving. Inspect the front lip for any visible marks and consider touch-up paint if necessary. |
Regular inspections will help you catch any issues early on, allowing for timely repairs and ensuring the front lip remains in optimal condition for both aesthetics and protection.
By following these maintenance and cleaning practices, you can keep your front lip looking stylish and functioning effectively for years to come!
Frequently Asked Questions
How Do You Secure A Bumper Lip?
To secure a bumper lip, follow these steps: 1. Clean the surface of the bumper thoroughly. 2. Apply adhesive tape or glue evenly on the lip and the bumper. 3. Press the lip firmly against the bumper, ensuring a secure attachment.
4. Use clamps or weights to hold the lip in place while the adhesive sets. 5. Allow sufficient time for the adhesive to dry before driving the vehicle.
Does A Front Lip Increase Drag?
Yes, a front lip can increase drag on a vehicle. It alters the airflow, causing air to push against the car, resulting in higher resistance and reduced efficiency.
What Does A Front Bumper Lip Do?
A front bumper lip helps improve the aerodynamics of a vehicle by redirecting air flow around the bumper, reducing drag and increasing fuel efficiency. It also adds a stylish and sporty look to the front end of the car.
What Is The Lip On The Front Bumper Called?
The lip on the front bumper is commonly referred to as a lower spoiler or a front splitter.
Conclusion
To conclude, installing a front lip on your vehicle can greatly enhance its aesthetic appeal and performance. By following the step-by-step guide shared you can confidently take on the task yourself. Remember to gather all the necessary tools, measure and align the lip properly, and secure it firmly.
With a little patience and attention to detail, you’ll enjoy the eye-catching look and improved aerodynamics that a front lip provides. Happy installing!
