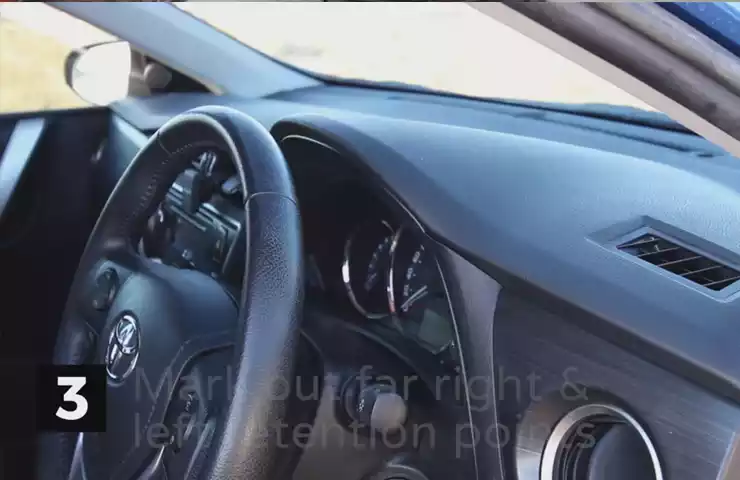
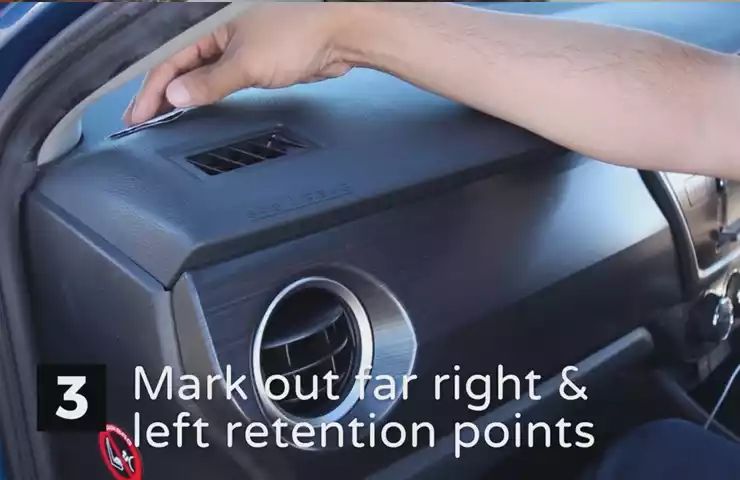
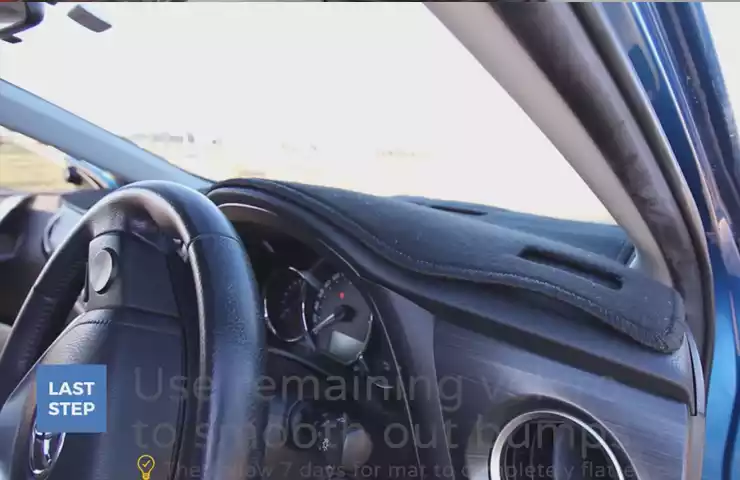
To install a dash cover, first clean the dashboard thoroughly and remove any existing covers. Carefully position the new cover on the dash and secure it using adhesive or straps.
Preparation:
Prior to installing a dash cover, it is crucial to gather the necessary tools and materials, clean the dashboard thoroughly, and remove any existing accessories or objects. This preparation phase sets the foundation for a successful installation and ensures the longevity of your dash cover. Let’s delve into each step in more detail:
Gather the necessary tools and materials:
Before you begin, it’s important to equip yourself with the right tools and materials. Here is a list of items you will need:
| Tools: | Materials: |
| ScrewdriverPliersTape measureTrim removal tool | Dash coverCleaning solutionLint-free clothTrim adhesiveProtective gloves |
Clean the dashboard thoroughly:
Next, it’s time to prepare the dashboard by thoroughly cleaning it. Follow these steps:
- Remove any loose debris: Begin by removing any loose debris such as dust, crumbs, or dirt using a handheld vacuum or a soft brush. Ensure all vents and crevices are clear of any obstructions.
- Apply cleaning solution: Mix a small amount of mild cleaning solution with water. Dampen a lint-free cloth with the solution and gently wipe down the entire dashboard, including all surfaces, buttons, and knobs. Pay extra attention to areas that are prone to buildup, such as air vents and crevices.
- Dry the dashboard: After cleaning, use a dry lint-free cloth to thoroughly dry the dashboard. Be sure to remove any moisture to prevent water stains or damage to the dash cover later.

Remove any existing accessories or objects:
To ensure a smooth installation of the dash cover, it is important to remove any existing accessories or objects from the dashboard. This includes items such as air fresheners, dashboard trims, or electronic devices. Follow these steps:
- Remove dashboard trims: Use a trim removal tool or a flat-headed screwdriver to carefully detach any dashboard trims or panels. Take your time and be gentle to avoid damaging the dashboard or trims.
- Take out accessories: Remove any accessories or objects from the dashboard, such as air fresheners, phone holders, or non-permanent decorations.
- Clear the area: Once all accessories and objects have been removed, clear the dashboard area to ensure a clean and clutter-free surface for the installation of the dash cover.
By following these preparation steps, you will set the stage for a successful installation of your new dash cover. The clean and well-prepared dashboard will not only make the installation process easier but also help prolong the lifespan of your dash cover, ensuring it continues to enhance and protect your vehicle’s interior for years to come.
Measuring And Cutting The Dash Cover
Installing a dash cover is a great way to protect your vehicle’s dashboard from wear and tear, as well as add a touch of personalization to your car’s interior. However, before you can start enjoying these benefits, you’ll need to measure and cut the dash cover to fit your specific vehicle. Follow these steps to ensure a precise fit for your dash cover:
1. Measure the dimensions of the dashboard accurately
The first step in installing a dash cover is measuring the dimensions of your vehicle’s dashboard accurately. It is crucial to take detailed measurements to ensure a perfect fit. To measure your dashboard, follow these steps:
- Start by using a tape measure to measure the width of the dashboard from one end to the other. Place the tape measure at one end and extend it to the opposite side, making sure to measure the widest part of the dashboard.
- Next, measure the length of the dashboard from the windshield to the back of the dashboard. Place the tape measure at the base of the windshield and extend it to the edge of the dashboard.
- Measure any additional areas of the dashboard that may require coverage, such as vents or controls. Note down these measurements separately, as you’ll need them when trimming the dash cover.

2. Use the measurements to trim the dash cover accordingly
Once you have accurate measurements of your vehicle’s dashboard, it’s time to use them to trim the dash cover accordingly. Follow these steps to trim the dash cover:
- Lay the dash cover flat on a clean and flat surface. Ensure that there are no wrinkles or folds in the cover, as this could affect the accuracy of your measurements.
- Using a fabric marker or chalk, transfer the measurements you took earlier onto the dash cover. Mark the width and length measurements, as well as any additional areas that require coverage, such as vents or controls.
- Using a sharp pair of scissors or a utility knife, carefully cut along the marked lines. Take your time to ensure accurate cuts and avoid any jagged edges.
Remember to double-check your measurements and cuts before proceeding. It’s always better to make small adjustments rather than cutting too much off at once.
Once you’ve trimmed the dash cover to the correct measurements, you’re ready to install it on your vehicle’s dashboard. Follow the manufacturer’s instructions for installation to ensure a secure and proper fit. With your newly installed dash cover, you can enjoy a protected and personalized dashboard for years to come.
Applying The Dash Cover
Now that you have successfully aligned the dash cover with the dashboard, it’s time to apply it. This step is crucial as it ensures a perfect fit and a sleek appearance. Follow these guidelines to smoothly apply your dash cover:
Align the dash cover with the dashboard
To start, make sure the dash cover is properly aligned with the dashboard. Take your time to position it correctly, ensuring that all the edges and corners match up with the contours of your dashboard. This initial alignment is essential to achieve a seamless and professional-looking installation.
Smooth out any wrinkles or bubbles on the surface
Once the dash cover is aligned, carefully smooth out any wrinkles or bubbles that may have formed on the surface. These imperfections can detract from the overall appearance and functionality of the cover. Gently press down on the areas where wrinkles or bubbles occur, using your hands or a soft cloth. Work from the center towards the edges to ensure an even distribution of pressure and a smooth result.

Secure the cover in place using adhesive or clips
After ensuring a wrinkle-free surface, it’s time to securely attach the dash cover to the dashboard. There are two common methods for this: adhesive or clips.
- Using adhesive:
Apply a high-quality automotive adhesive to the back of the dash cover in several strategic locations, such as the corners and the middle. Be sure to follow the manufacturer’s instructions carefully. Once applied, carefully press the cover onto the dashboard, starting from the center and working your way outwards. Apply pressure evenly to ensure a strong bond between the cover and the dashboard. Allow the adhesive to dry according to the instructions before moving on. - Using clips:
Some dash covers come with clips that attach them securely to the dashboard. These clips are usually included in the package and can be easily installed. Simply follow the instructions provided by the manufacturer to securely fasten the cover using the clips. Make sure each clip is firmly attached, providing a snug fit for the dash cover.
By using either adhesive or clips, you can have peace of mind that your dash cover will stay in place, even when facing rough road conditions or extreme temperatures.
With the dash cover now securely applied to your dashboard, take a step back and admire your handiwork. Not only does it enhance the appearance of your car’s interior, but it also provides protection against sun damage, dirt, and general wear and tear. Additionally, by installing a dash cover, you can prolong the lifespan of your dashboard, saving you money on potential repairs down the line.
Now that you have successfully applied the dash cover, sit back, relax, and enjoy the stylish and functional upgrade it brings to your vehicle.
Tips For A Proper Installation
When it comes to installing a dash cover, it’s important to handle the process with care to ensure a proper fit and maintain the longevity of your dashboard. One of the essential tips for a successful installation is to avoid excessive stretching or tugging of the dash cover. By following this guideline, you can prevent any unnecessary damage to the cover or your dashboard.
Excessive stretching or tugging can result in the misalignment of the dash cover, causing it to look uneven and unappealing. Not only can this compromise the aesthetic appeal of your vehicle’s interior, but it can also hinder the functionality of your dashboard features. The last thing you want is to have buttons or switches obstructed by a poorly installed dash cover.
So how do you avoid excessive stretching or tugging? It’s simple. Start by carefully aligning the corners and edges of the dash cover with your vehicle’s dashboard. Gently work your way from one side to the other, ensuring that the cover fits snugly without the need for any forceful stretching or pulling.
Remember, a dash cover should provide a protective layer for your dashboard without interfering with any of its features. By avoiding excessive stretching or tugging, you can achieve a seamless and functional installation that enhances both the look and usability of your dashboard.
An essential aspect of properly installing a dash cover is ensuring a snug fit that does not interfere with any of the dashboard features. While it’s important to protect your dashboard, you don’t want to compromise its functionality in the process. Here are a few tips to help you achieve this:
- Before installing the dash cover, clean the dashboard surface thoroughly. This will ensure proper adhesion and prevent any dirt or debris from getting trapped underneath.
- Take your time when aligning the cover to ensure it lines up perfectly with your dashboard’s contours. Pay close attention to any buttons, switches, or vents that may need to remain accessible.
- If your dash cover comes with adhesive strips or Velcro, apply them carefully according to the manufacturer’s instructions. Be sure to double-check their placement and adhesion to avoid any future issues.
- Once the cover is securely in place, inspect all the dashboard features to ensure they are not obstructed or hindered in any way. Test all the buttons, switches, and vents to guarantee they are working correctly.
By adhering to these tips, you can achieve a proper installation that allows for a snug fit without compromising the functionality of your dashboard features. This way, your dash cover can both protect and enhance the overall appearance of your vehicle’s interior.
Installing a dash cover is not a one-time process. To ensure its longevity and maximum effectiveness, regular cleaning and maintenance are crucial. By following these tips, you can keep your dash cover in top shape:
- Regularly dust off the dash cover using a soft, lint-free cloth. This will prevent the buildup of dirt and debris that can accumulate over time.
- For more stubborn stains or spills, use a mild soap or dashboard cleaner specifically designed for automotive use. Gently wipe the affected areas, being careful not to use excessive force.
- Avoid using harsh chemicals or abrasive cleaners, as these can damage the material of the dash cover.
- When cleaning, pay attention to any crevices or seams on the cover to ensure a thorough cleaning.
By regularly cleaning and maintaining your dash cover, you can protect it from fading, discoloration, and general wear and tear. This will not only extend its lifespan but also keep your vehicle’s interior looking clean and stylish.

Troubleshooting Common Issues
While installing a dash cover is a relatively simple task, it’s not uncommon to encounter a few hiccups along the way. In this section, we will address some of the most common issues faced during the installation process and provide you with simple solutions to overcome them.
Dealing with air bubbles or wrinkles
Air bubbles and wrinkles can be frustrating, but fortunately, they are quite easy to fix. Here are a few steps to follow:
- Start by thoroughly cleaning the dashboard surface before installation. Any dirt or debris can prevent the dash cover from adhering properly.
- Once the surface is clean, position the dash cover onto the dashboard, ensuring it is aligned correctly.
- Using a credit card or a squeegee, gently smooth out any air bubbles or wrinkles. Start from the center and work your way towards the edges.
- If wrinkles persist, try using a hairdryer on low heat to warm up the dash cover. This will make it more pliable and easier to smoothen out.
Resolving alignment or fitment problems
If you are having difficulty with the alignment or fitment of your dash cover, here are some steps to help you rectify the problem:
- Double-check the manufacturer’s guide to ensure you have the correct dash cover for your vehicle’s make and model. Using an incompatible cover can result in poor fitment.
- Carefully remove the dash cover and try repositioning it. Sometimes, a minor adjustment can make a significant difference in alignment.
- If the dash cover is still not aligning properly, you may need to trim it slightly. Use a sharp pair of scissors or a utility knife to carefully trim any excess material to fit your dashboard perfectly.
- If all else fails, reach out to the manufacturer or consult professional assistance for further guidance.
Repairing or replacing damaged or worn-out dash covers
If your dash cover has sustained damage or shows signs of wear and tear, don’t worry. You have several options to rectify the situation:
- If the damage is minor, you can attempt to repair it using a vinyl repair kit. These kits typically include adhesive and color-matching materials to help restore the appearance of the dash cover.
- In cases where the damage is extensive or the cover is severely worn out, it is recommended to replace the dash cover entirely. Measure your dashboard dimensions accurately and choose a new cover that fits snugly.
- Before installing the new cover or repaired one, ensure that the dashboard surface is clean and free of any residue from the old cover.
By following these troubleshooting steps, you can overcome common issues encountered during dash cover installation. Remember to exercise patience and refer to the manufacturer’s instructions whenever necessary. Installing a dash cover not only protects your dashboard but also enhances the overall aesthetics of your vehicle.
Frequently Asked Questions (Faqs)
In this section, we’ll address some commonly asked questions about installing and maintaining dash covers. If you’re considering adding a dash cover to your vehicle, read on to find answers to your queries.
What materials are dash covers typically made of?
Dash covers are usually made from a variety of materials, each with its own benefits. Here are some commonly used materials:
- Carpet: This material offers a classic look and is often budget-friendly. It provides excellent protection against sunlight and heat.
- Velour: Known for its soft and plush texture, velour dash covers add a luxurious touch to your vehicle’s interior. They are highly resistant to fading and are available in various colors.
- Suede: Suede dash covers give a sleek and modern appearance. They are durable and resistant to wear and tear.
- Leather: If you prefer a more elegant and upscale look, leather dash covers are a great option. They are known for their durability and resistance to spills and stains.
- Custom-fit materials: Some dash covers are made from materials specifically designed for certain vehicle models. These provide a precise fit and blend seamlessly with the original dashboard.
Can I install a dash cover myself or should I seek professional help?
Installing a dash cover can often be done without professional assistance. Most dash covers come with installation instructions that guide you through the process. However, it’s important to assess your DIY skills and comfort level before embarking on the installation. If you’re unsure about your abilities or if you want a perfect and seamless installation, seeking professional help is recommended. Professional installers have the experience and tools necessary to ensure a flawless fit.
How do I clean and maintain the dash cover properly?
To keep your dash cover looking its best, regular cleaning and maintenance are important. Here’s a step-by-step guide:
- Gently remove any loose dirt and debris from the dash cover using a soft-bristle brush or vacuum cleaner.
- Wipe the surface of the dash cover with a damp cloth or sponge. Avoid using harsh chemicals or abrasive cleaners as they may damage the material.
- Dry the dash cover with a clean, lint-free cloth.
- If your dash cover is made of carpet or velour, you can use a fabric cleaner to remove any stains or spills. Follow the instructions on the cleaner’s label and blot the area gently with a clean cloth.
- For leather or suede dash covers, it’s best to use a specialized cleaner and conditioner specifically designed for those materials. Apply the cleaner according to the manufacturer’s instructions and then use a soft cloth to buff and protect the surface.
- If your dash cover gets wet, allow it to air dry completely before reinstalling it. This helps prevent mold and mildew growth.
By following these cleaning and maintenance guidelines, you can extend the lifespan of your dash cover and keep it looking as good as new.

Credit: www.youtube.com
Frequently Asked Questions For How To Install A Dash Cover
How Do You Attach A Dash Cover?
To attach a dash cover, follow these steps: 1. Clean the dashboard surface with a mild cleanser. 2. Fit the cover over the dashboard, ensuring it aligns with the vents and buttons. 3. Secure the cover in place with Velcro or adhesive strips.
4. Smooth out any wrinkles or bubbles for a seamless look. 5. Enjoy your newly protected dash!
What Is The Best Adhesive For A Dash Cover?
The best adhesive for a dash cover is a high-quality automotive adhesive specifically designed for interior applications. It provides strong and long-lasting bonding without damaging the surface. Ensure to clean and prepare the surface before applying the adhesive for optimal results.
Are Dashboard Covers A Good Idea?
Dashboard covers can be a good idea. They protect the dashboard from UV rays and prevent fading, cracking, and warping. Additionally, they provide a clean and sleek look to the interior.
What Is The Point Of A Dashboard Cover?
Dashboard covers provide protection for your vehicle’s dashboard from harmful UV rays, dirt, and scratches. They also help to maintain the condition and appearance of your dashboard, preserving its value over time. These covers are easy to install and remove, making them a convenient accessory for any vehicle owner.
Conclusion
To sum up, installing a dash cover is a simple and effective way to protect your vehicle’s dashboard from damage and enhance its overall appearance. By following the step-by-step guide provided in this blog post, you can easily complete the installation process without any professional help.
Remember to choose the right material and size for your dash cover to ensure a perfect fit. So, why wait? Start installing your dash cover today and enjoy long-lasting protection and style for your vehicle’s interior.
