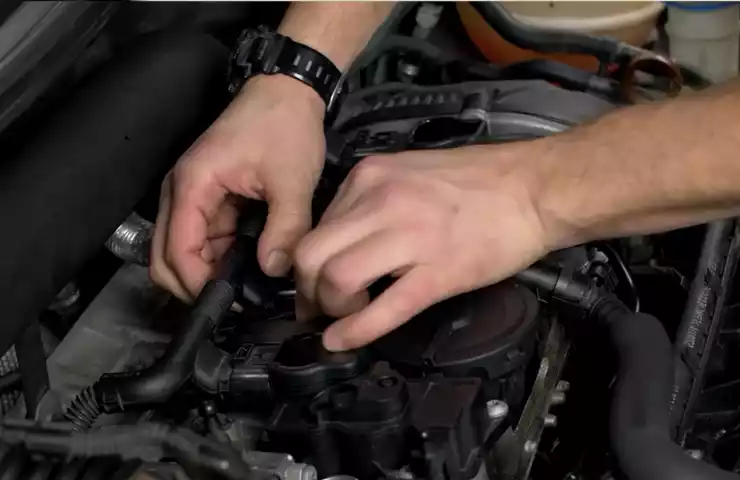
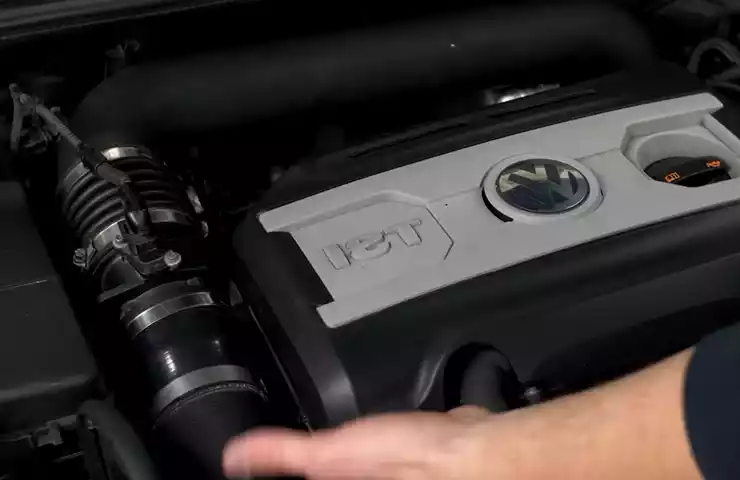
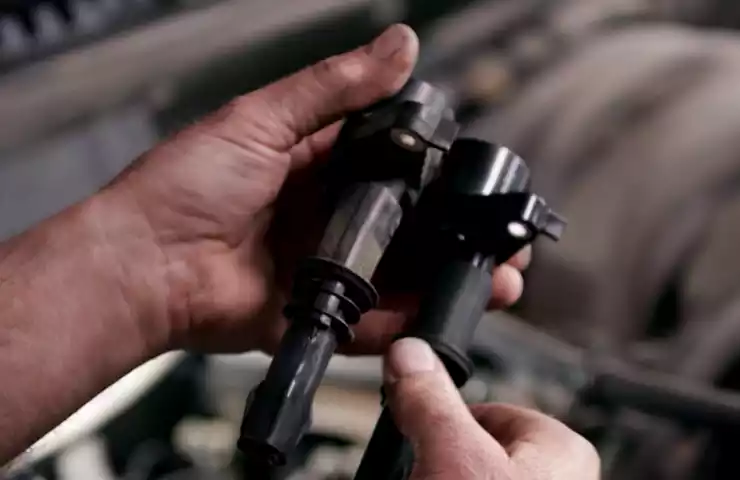
To install a coil pack, first locate the coil pack on your vehicle’s engine. Then, remove the old coil pack and carefully install the new one, making sure it is securely fastened.
The coil pack in a vehicle is a crucial component of the ignition system, responsible for delivering high voltage to the spark plugs. Over time, coil packs can wear out or fail, resulting in engine misfires and decreased performance. If you’re experiencing these issues, it may be time to install a new coil pack.
In this guide, we’ll walk you through the steps to successfully install a coil pack, ensuring optimal performance and engine efficiency. Let’s get started.
Understanding The Importance Of A Coil Pack
A coil pack is a vital component of the ignition system in modern vehicles. It plays a crucial role in ensuring that your vehicle starts and runs smoothly. Understanding the importance of a coil pack can help you take appropriate measures to maintain it and address any potential issues. In this section, we will discuss what a coil pack is and its function, as well as the signs of a faulty coil pack.
What is a coil pack and its function?
A coil pack, also known as an ignition coil, is responsible for generating the high voltage needed to ignite the air-fuel mixture in the combustion chamber. It converts the low voltage from the battery into a high voltage spark that is capable of igniting the fuel. This process is essential for the proper functioning of the engine.
The coil pack typically consists of multiple ignition coils, each of which is dedicated to a specific cylinder. This design allows for more precise control over the ignition timing and ensures that each cylinder receives the correct spark at the right time.
Signs of a faulty coil pack
A faulty coil pack can lead to various issues with your vehicle’s performance. Recognizing the signs of a faulty coil pack is crucial in order to address the problem promptly. Here are some common signs to look out for:
- Engine misfires: One of the most noticeable signs of a faulty coil pack is engine misfires. This may manifest as a rough running engine, hesitation, or a loss of power.
- Difficulty starting the engine: A faulty coil pack can make it challenging to start your vehicle. If you find that your engine cranks but struggles or fails to start, a faulty coil pack could be the culprit.
- Poor fuel economy: A coil pack that is not functioning properly can lead to inefficient combustion, resulting in reduced fuel economy. If you notice a significant decrease in your vehicle’s mileage, it is worth investigating the coil pack as a potential cause.
- Illuminated check engine light: A faulty coil pack can trigger the check engine light on your vehicle’s dashboard. It is always advisable to have the engine codes read by a professional to determine the specific cause.
If you experience any of these symptoms, it is essential to have your coil pack inspected and, if necessary, replaced by a qualified mechanic. Ignoring a faulty coil pack can not only impact your vehicle’s performance but also lead to more severe engine damage over time.
In conclusion, understanding the importance of a coil pack helps you recognize the signs of a faulty one. By paying attention to these signs and taking appropriate action, you can ensure the optimal performance and longevity of your vehicle’s ignition system.
Gathering The Necessary Tools And Materials
Before you begin installing a new coil pack, it’s crucial to gather all the necessary tools and materials to ensure a smooth and efficient installation process. Having everything ready beforehand will save you time and frustration. In this section, we will discuss the tools needed for coil pack installation and how to choose the right replacement coil pack.
Tools needed for coil pack installation
Here are the essential tools you’ll need to have on hand:
- Socket set: A set of sockets in various sizes is necessary for removing and installing bolts.
- Ratchet: A good quality ratchet will make tightening and loosening bolts much easier.
- Extension: An extension will allow you to access hard-to-reach areas.
- Screwdriver: Both flathead and Phillips screwdrivers may be needed depending on your vehicle.
- Coil Pack Puller: This specialized tool is designed to remove the coil pack without damaging it.
- Dielectric Grease: Applying dielectric grease to the spark plug boots helps prevent corrosion and improves electrical conductivity.
- Safety Glasses and Gloves: Always prioritize safety by wearing protective eyewear and gloves during the installation process.
Having all the necessary tools ready will ensure a hassle-free coil pack installation. Now that you have gathered your tools, it’s important to choose the right replacement coil pack.
Choosing the right replacement coil pack
When it comes to selecting a replacement coil pack, you need to consider a few important factors:
- Compatibility: Check the compatibility of the coil pack with your vehicle’s make, model, and year to ensure a proper fit.
- Quality: Look for a reputable brand that offers high-quality coil packs to ensure longevity and reliability.
- Price: Consider your budget, but beware of overly cheap options that may compromise the performance and durability of the coil pack.
- Warranty: Opt for a replacement coil pack that comes with a warranty for added peace of mind.
By considering these factors, you can confidently choose a replacement coil pack that meets your vehicle’s requirements. Now that you have all the necessary tools and the right replacement coil pack, you’re ready to move on to the next step of the installation process.

Removing The Old Coil Pack
Installing a new coil pack can improve the performance and efficiency of your vehicle’s ignition system. However, before you can install the new coil pack, you need to remove the old one. In this article, we will guide you through the process of removing the old coil pack, step by step.
Locating the coil pack in your vehicle
The first step in removing the old coil pack is to locate it in your vehicle. The coil pack is usually located near the engine, and it is connected to the spark plugs through a series of wires. Look for a group of wires and connectors that are attached to the engine. The coil pack is typically a square or rectangular-shaped component with several electrical connectors on top.
Disconnecting the electrical connections
Once you have located the coil pack, you will need to disconnect the electrical connections. Start by identifying the connectors that are attached to the coil pack. These connectors are usually secured with a locking tab or clip. To disconnect the connectors, press down on the locking tab or clip and gently pull the connectors away from the coil pack. Be careful not to damage the connectors or the wires.
Removing the mounting bolts or screws
After disconnecting the electrical connections, you can proceed to remove the mounting bolts or screws that secure the coil pack to the engine. The number and location of these bolts or screws may vary depending on the make and model of your vehicle. Consult your vehicle’s manual or online resources for specific instructions.
Using the appropriate tools, such as a wrench or socket set, loosen and remove each bolt or screw. Place them in a safe location where they won’t get lost. Once all the mounting bolts or screws have been removed, carefully lift the coil pack away from the engine. Take note of any additional brackets or clips that may be holding the coil pack in place and remove them if necessary.
With the old coil pack successfully removed, you can now proceed to install the new one. Refer to our next article on how to install a coil pack for a step-by-step guide on this process.
Installing The New Coil Pack
After removing the old coil pack and inspecting it for any signs of damage or wear, it’s time to install the new coil pack in its place. This crucial step ensures that your vehicle’s ignition system is functioning optimally and helps maintain a smooth-running engine. Follow these steps to properly install the new coil pack:
Positioning the new coil pack
The first step is to position the new coil pack in the correct location. Locate the mounting bracket or area where the coil pack resides. Place the new coil pack onto the mounting bracket, ensuring that it aligns perfectly with the existing bolt holes. Take care not to force the coil pack into place, as this may damage the electrical connections.
Securing the mounting bolts or screws
Once the new coil pack is properly positioned, it’s time to secure the mounting bolts or screws. Refer to the vehicle’s manual or documentation to determine the appropriate torque specifications for the mounting bolts or screws. Tighten the bolts or screws in a crisscross pattern, ensuring that the coil pack is securely fastened to the mounting bracket. This will prevent any vibrations that may affect the performance of the ignition system.
Reconnecting the electrical connections
The final step in installing the new coil pack is to reconnect the electrical connections. Locate the electrical connectors that were disconnected during the removal of the old coil pack. Gently push the connectors onto the corresponding terminals of the new coil pack, ensuring a snug fit without any loose connections. Take care to match the connectors correctly to their respective terminals, as incorrectly connected wires may lead to ignition issues or electrical malfunctions.
Once you have successfully completed these steps, your new coil pack is installed and ready to go. Restart your vehicle and listen for any unusual sounds or vibrations that may indicate a faulty installation. If everything sounds and feels normal, you can expect a smoother running engine and improved ignition performance.

Testing And Verifying The Installation
Once you have successfully installed a new coil pack in your vehicle, it is important to test and verify the installation to ensure everything is working properly. This step is crucial as it allows you to identify any issues or errors that may have occurred during the installation process. In this guide, we will walk you through the steps you need to take to test and verify the installation of your coil pack.
Performing a Visual Inspection
Before diving into the testing process, it is essential to perform a visual inspection of the newly installed coil pack. This inspection helps you ensure that the coil pack is securely in place and that all connections are properly tightened. Look for any signs of damage, such as cracks or corrosion, and make sure there are no loose wires or connectors. Additionally, check the surrounding components for any potential issues that may affect the performance of the coil pack.
Testing the Ignition System
After completing the visual inspection, the next step is to test the ignition system to verify if the coil pack is functioning correctly. The ignition system test helps determine if the coil pack is generating the necessary spark to ignite the fuel-air mixture in the combustion chamber. Follow these steps to perform the ignition system test:
- Start by disconnecting the negative terminal of the vehicle’s battery to ensure safety.
- Next, remove the ignition coil cover to access the coil pack.
- Locate the ignition coil connectors and disconnect them from the coil pack.
- Using an ohmmeter, measure the resistance across each coil pack terminal. Consult your vehicle’s manual to determine the correct resistance values.
- If the measured resistance values are within the specified range, it indicates that the coil pack is functioning properly.
- If there are any significant deviations from the recommended resistance values, it may indicate a faulty coil pack that needs to be replaced.
Checking for Any Error Codes
In addition to visually inspecting and testing the ignition system, it is important to check for any error codes that may be stored in the vehicle’s onboard computer. These error codes can provide valuable insights into any potential issues related to the coil pack or other ignition system components. Follow these steps to check for error codes:
- Connect an OBD-II scanner to the vehicle’s diagnostic port, usually located under the dashboard.
- Turn the vehicle’s ignition on without starting the engine.
- Use the scanner to retrieve the error codes stored in the vehicle’s computer.
- Refer to the scanner’s user manual or online resources to interpret the error codes and determine if any of them are related to the coil pack.
- If any relevant error codes are present, address the underlying issues accordingly. This may involve further troubleshooting or replacing faulty components.
By performing a visual inspection, testing the ignition system, and checking for error codes, you can effectively test and verify the installation of a new coil pack. These steps ensure that the coil pack is properly installed and functioning optimally, allowing for smooth and reliable engine operation. Remember to consult your vehicle’s manual or seek professional assistance if you encounter any difficulties during the testing process.
Tips And Precautions For Successful Installation
When it comes to installing a new coil pack in your vehicle, it’s important to follow some tips and precautions to ensure a successful installation. Properly grounding the new coil pack, avoiding common mistakes during installation, and regular maintenance and care are the key factors to consider for a longer lifespan of your coil pack. In this section, we will discuss each of these factors in detail.

Properly grounding the new coil pack
One crucial step in installing a coil pack is ensuring that it is properly grounded. A well-grounded coil pack ensures that the voltage is distributed correctly to the spark plugs, improving the overall performance of your engine. Here are some tips to ensure proper grounding when installing a new coil pack:
- Inspect the grounding wire connections on the coil pack and make sure they are secure.
- Ensure that the ground wire is free from any corrosion or damage.
- Tighten the ground wire securely to the vehicle’s chassis or ground point.
Avoiding common mistakes during installation
While installing a coil pack may seem straightforward, there are some common mistakes that can affect its functionality. It’s important to be aware of these mistakes and take precautions to avoid them. Here are some common mistakes to avoid:
- Excessive force during installation can damage the coil pack or its connectors. Handle the coil pack with care and gently insert the connectors.
- Failure to disconnect the battery before starting the installation can lead to electrical shocks or damage to the electrical system. Always disconnect the battery before working on any electrical components.
- Not following the correct firing order when connecting the spark plug wires can result in misfiring or poor engine performance. Refer to the vehicle’s manual or consult a professional for the correct firing order.
Regular maintenance and care for a longer lifespan
To ensure a longer lifespan and optimal performance of your coil pack, regular maintenance and care are crucial. Here are some tips to help you maintain your coil pack:
- Inspect the coil pack regularly for any signs of wear or damage.
- Keep the coil pack and its connectors clean and free from dirt or debris.
- Replace worn-out spark plug wires to avoid excessive strain on the coil pack.
By following these tips and precautions, you can successfully install a new coil pack and ensure its longevity. Remember to pay attention to proper grounding, avoid common mistakes during installation, and regularly maintain and care for your coil pack. This will not only enhance the performance of your vehicle but also save you from potential issues in the future.
Additional Resources And Troubleshooting
Troubleshooting common issues during coil pack installation
Installing a coil pack is a relatively straightforward process, but sometimes issues can arise. Here are some common problems you might encounter during coil pack installation and how to troubleshoot them:
1. Misfiring or rough idle:
If your engine is misfiring or experiencing a rough idle after installing a new coil pack, it could be due to a few reasons:
- Make sure the connectors are properly seated and all the wires are connected securely.
- Check the spark plug wires for any signs of damage or corrosion. Replace them if necessary.
- Inspect the spark plugs for wear or fouling. Replace them if needed.
- Verify that the coil pack is compatible with your vehicle’s make and model.
2. No spark:
If you’re not getting any spark after installing a new coil pack, follow these steps:
- Check the coil pack wiring harness for any loose or damaged connections.
- Ensure that the electrical connections are properly grounded.
- Inspect the ignition control module for any signs of damage. Replace it if necessary.
- Confirm that the battery voltage is sufficient. Low voltage can affect spark production.
3. Overheating or melting:
If you notice overheating or melting of the coil pack, it’s essential to address the issue promptly. Here’s what you can do:
- Check for any obstructions around the coil pack that may be obstructing airflow.
- Inspect the coil pack for any signs of damage or worn insulation. Replace it if needed.
- Verify that the coil pack is correctly installed and securely mounted.
- If your vehicle has aftermarket modifications, ensure that they are not causing excessive heat buildup.
Online resources and forums for further assistance
If you encounter persistent issues or need additional guidance during the coil pack installation process, there are several online resources and forums available to assist you. These platforms can provide valuable insights, troubleshooting tips, and community support. Here are a few recommended resources:

| Resource | Description |
|---|---|
| Forum Example | Active online forum with a dedicated section for coil pack installation questions and discussions. |
| Website Example | A comprehensive website with articles, tutorials, and step-by-step guides on various automotive topics, including coil pack installation. |
| Community Example | An online community of vehicle enthusiasts where you can seek advice, post questions, and share your experiences with coil pack installations. |
Remember that these resources are intended to assist you in resolving any issues you may encounter during the coil pack installation process. Be sure to provide relevant details and follow any rules or guidelines specified by the respective platforms to ensure you receive accurate and helpful assistance.
Frequently Asked Questions For How To Install A Coil Pack
Can I Replace A Coil Pack Myself?
Yes, you can replace a coil pack yourself. It’s a fairly simple process that doesn’t require specialized knowledge or tools. Just make sure to follow the manufacturer’s instructions and safety precautions. By doing it yourself, you can save money on labor costs.
How Do You Put A Coil Pack In?
To install a coil pack, first, locate the old one in your engine compartment. Then, disconnect the electrical connector and remove the bolts or screws securing the pack. Next, insert the new coil pack and tighten the bolts or screws.
Finally, reconnect the electrical connector.
Is Replacing A Coil Pack Hard?
Replacing a coil pack is not difficult. It can be done by following a few simple steps. Disconnect the battery, remove the old coil pack, replace it with the new one, and reconnect everything. It is recommended to consult the vehicle’s manual or seek professional assistance for proper guidance.
Do You Grease A Coil Pack?
No, you should not grease a coil pack. Greasing the coil pack can interfere with its performance and cause damage. It is important to follow the manufacturer’s instructions and not apply any additional lubrication or substances to the coil pack.
Conclusion
Replacing a coil pack can be a simple task with the right guidance. By following the step-by-step instructions outlined in this blog post, you can confidently install a new coil pack on your vehicle. Regularly checking and maintaining your coil pack can help optimize the performance of your engine and prevent potentially costly repairs.
So, don’t hesitate to tackle this maintenance task yourself and keep your vehicle running smoothly.
