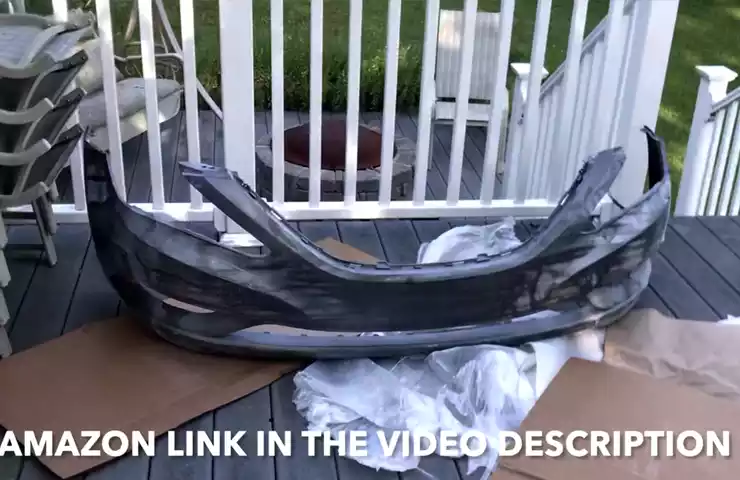
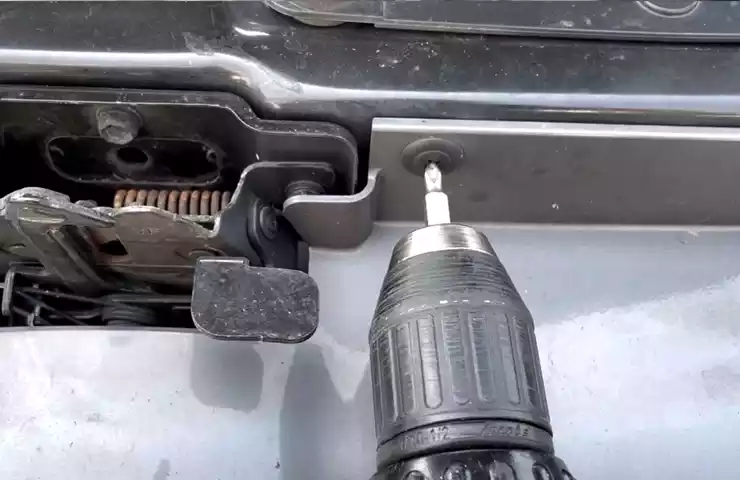
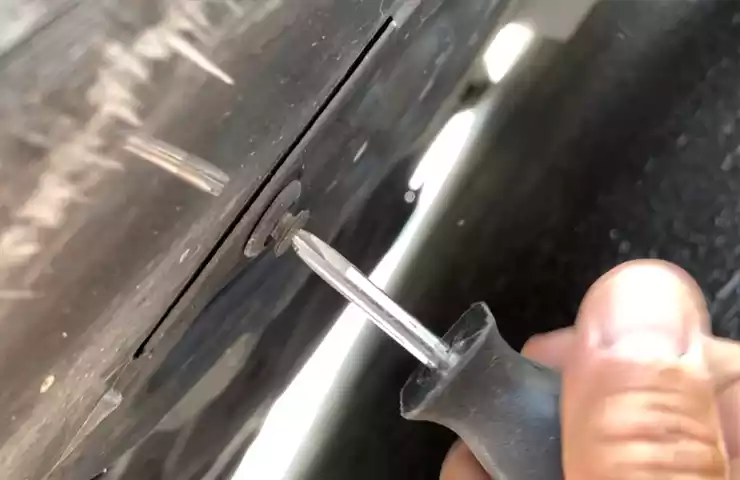
To install a bumper, first, remove any existing screws or bolts holding the old bumper in place. Then, align the new bumper with the mounting brackets and secure it with screws or bolts.
Getting Started With Bumper Installation
Installing a new bumper on your vehicle can not only enhance its appearance but also provide protection against potential damage. Whether you’re replacing a damaged bumper or simply upgrading for style, getting started with the installation process is important. In this section, we will guide you through the necessary steps to ensure a successful bumper installation. So, let’s begin by understanding the importance of a good bumper.
Understanding the Importance of a Good Bumper
A bumper is a crucial component of your vehicle’s body, designed to absorb impact and protect both the occupants and the underlying structure in the event of a collision. A well-maintained and sturdy bumper can significantly reduce the risk of damage to other parts of your vehicle, such as the engine or radiator. It also plays a role in preserving the structural integrity of your car.
Assessing the Condition of Your Existing Bumper
Before you start the process of installing a new bumper, it’s important to assess the condition of your current one. Carefully inspect it for any cracks, dents, or signs of wear and tear. Structural damage, such as weak attachment points or misalignments, indicates the need for immediate replacement. If you notice any of these issues, it is advisable to proceed with a new bumper installation.
Choosing the Right Bumper for Your Vehicle
When selecting a new bumper, it’s crucial to find the one that is compatible with your vehicle’s make and model. Consider factors such as the bumper’s material, design, and functionality. There are various types of bumpers available in the market, including steel, aluminum, or plastic ones. Each has its own advantages and disadvantages, so choose the one that best suits your needs and preferences.
Gathering the Necessary Tools and Materials
Before you begin installing the bumper, it’s important to gather all the necessary tools and materials. Having everything prepared in advance will save time and prevent frustration during the installation process. Here is a list of commonly needed tools and materials:
| Tools | Materials |
|---|---|
| Socket wrench setPhillips and flathead screwdriversPliersTrim removal toolTape measure | New bumperBumper bracketsFastenersAdhesive tapeProtective gloves |
Make sure to have all these tools and materials ready before you proceed with the installation process, ensuring a smoother and more efficient experience.
Now that you understand the importance of a good bumper, have assessed the condition of your existing one, chosen the right replacement, and gathered all the necessary tools and materials, you are ready to move on to the next steps of the bumper installation process. Stay tuned for our upcoming blog posts, as we guide you through each step in detail, ensuring a successful and hassle-free bumper installation.
Removing The Old Bumper
When it comes to installing a new bumper on your vehicle, the first step is to remove the old bumper. This process may seem intimidating, but with the right tools and a bit of patience, you can easily complete this task. In this section, we will break down the process into three key steps for removing the old bumper:
Removing Necessary Components and Hardware
The first step in removing the old bumper is to remove any necessary components and hardware that may be attached to it. This can include items such as license plate holders, brackets, or sensors. Take note of where each component and piece of hardware is located, as this will make it easier to reattach them later on. Use a wrench or appropriate tool to carefully remove the bolts or screws securing these items to the bumper.
Detaching the Bumper from the Vehicle
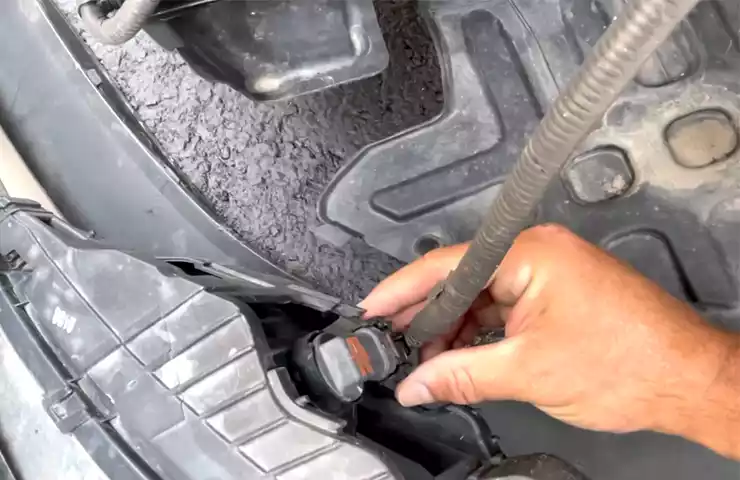
Once the necessary components and hardware have been removed, it is time to detach the old bumper from the vehicle. Start by locating the fasteners or clips that hold the bumper in place. These may be located along the top, bottom, or sides of the bumper. Carefully pop out or unscrew these fasteners using a trim tool, screwdriver, or socket wrench. It is important to exert caution and gentle pressure to avoid any damage to the vehicle’s body or paint. As you detach the bumper, be mindful of any electrical connectors or wiring harnesses that may still be connected to it. Disconnect these with care to prevent any potential damage.
Properly Storing and Disposing of the Old Bumper

Once the old bumper has been detached from the vehicle, it is important to properly store and dispose of it. If the bumper is still in good condition, you may consider selling or donating it. However, if it is damaged or no longer usable, it is best to dispose of it responsibly. Check with your local recycling facilities or auto body shops to determine the appropriate disposal method for your old bumper.
Preparing For The Installation
Before diving into the installation process of a new bumper for your vehicle, it is crucial to properly prepare yourself and your vehicle to ensure a smooth and successful installation. This section will guide you through the necessary steps to take before getting started.
Cleaning and Preparing the Vehicle’s Surface
One of the first things you need to do when preparing for a bumper installation is to thoroughly clean the surface of your vehicle. Dirt, grime, and debris can hinder the adhesion of the new bumper, resulting in an improper fit and potential damage. Follow these steps to properly clean and prepare the vehicle’s surface:
- Wash your vehicle using a gentle car wash soap and clean water. Ensure that you remove any dirt, grease, or residue that may be present on the surface.
- Use a detailing clay bar to remove any embedded contaminants that may not be removed by washing alone. This will help create a smooth surface for the bumper installation.
- Dry the vehicle thoroughly using a lint-free microfiber cloth or a blower dryer to eliminate any leftover moisture.
Test Fitting the New Bumper
Before you start installing the new bumper, it is highly recommended to test fit it to ensure proper alignment and fitment. This step will save you time and frustration later on. Follow these guidelines for a successful test fit:
- Remove any protective covering on the new bumper, if applicable.
- With the help of a friend or a car lift, carefully hold the new bumper up against the vehicle.
- Check the alignment and fitment by comparing the new bumper to the existing attachment points and body lines of the vehicle.
- Make sure the bumper is level and centered before proceeding to the actual installation.
Making Any Necessary Adjustments or Modifications
In some cases, the new bumper may require adjustments or modifications to fit perfectly on your vehicle. Follow these steps to address any necessary changes:
- If the bumper does not fit perfectly, carefully remove it from the vehicle.
- Identify any areas that need to be modified, such as holes that need to be drilled or attachment points that need to be adjusted.
- Make the necessary modifications using appropriate tools and techniques.
- Test fit the modified bumper once again to ensure a proper fit before proceeding with the installation.
By taking the time to properly prepare your vehicle for a bumper installation, you can ensure that the process goes smoothly and the end result is a bumper that fits perfectly and enhances the overall appearance of your vehicle.

Installing The New Bumper
When it comes to enhancing the appearance and functionality of your vehicle, installing a new bumper can make a significant difference. Whether you are replacing a damaged bumper or upgrading to a more stylish one, the installation process is relatively straightforward. In this guide, we will walk you through the step-by-step process of attaching the bumper, aligning and securing it to the vehicle, tightening all bolts and screws, and testing the stability and fit of your new bumper.
Attaching the Bumper Mounting Brackets
The first step in installing a new bumper is to attach the mounting brackets. These brackets are typically included with the new bumper and are designed to fit the specific make and model of your vehicle. Depending on your vehicle, the bumper may require multiple mounting brackets.
To attach the brackets, follow these steps:
- Locate the pre-drilled holes on your vehicle’s frame where the brackets will be attached.
- Position the brackets over the holes and align them properly.
- Secure the brackets using the provided screws or bolts.
Aligning and Securing the Bumper to the Vehicle
Once the mounting brackets are in place, it’s time to align and secure the bumper to your vehicle. This step ensures that the bumper is positioned correctly and will be securely attached.
Follow these steps to align and secure the bumper:
- Position the bumper onto the mounting brackets.
- Adjust the bumper as needed to ensure it is centered and aligned with your vehicle’s body.
- Use the provided hardware (bolts or screws) to secure the bumper to the mounting brackets.
- Tighten the hardware until it is snug, but be careful not to overtighten, as this may cause damage.
Tightening All Bolts and Screws to the Proper Torque

After the bumper is securely attached, it’s crucial to tighten all bolts and screws to the proper torque. This step ensures that the bumper is firmly in place and will not come loose while driving.
Here are some tips for tightening the bolts and screws:
- Refer to the manufacturer’s instructions for the recommended torque specifications.
- Use a torque wrench to ensure that you apply the correct amount of force when tightening the hardware.
- Tighten the bolts and screws in a cross pattern to distribute the force evenly.
Testing the Stability and Fit of the New Bumper
With the bumper fully installed and all the hardware properly tightened, it’s essential to test its stability and fit. This step helps ensure that the bumper is securely attached and properly aligned with your vehicle.
Perform the following tests to assess the stability and fit of your new bumper:
- Gently push and pull on the bumper to check for any excessive movement or wobbling.
- Inspect the alignment of the bumper with the vehicle’s body lines and make any necessary adjustments.
- Review the overall appearance of the bumper to ensure it meets your expectations.
By following these steps and guidelines, you can successfully install a new bumper on your vehicle. Remember to exercise caution, read the manufacturer’s instructions carefully, and take your time to ensure a proper and secure installation.
Final Touches And Maintenance
Now that you have successfully installed your new bumper, it’s time to add those final touches and ensure proper maintenance for a long-lasting finish. In this section, we will cover essential steps such as checking for proper bumper alignment, applying any necessary trim or decals, cleaning and maintaining the new bumper, and providing tips to avoid common installation mistakes.
Checking for Proper Bumper Alignment

After the bumper is secured in place, it is crucial to check for proper alignment to ensure it fits seamlessly with the rest of your vehicle. Follow these simple steps to ensure a perfect fit:
- Step 1: Stand back and visually inspect the bumper from different angles to see if it sits flush with the body.
- Step 2: Gently tug on the bumper to check for any looseness or misalignment. If you notice any issues, it might require readjustment.
- Step 3: Double-check that all mounting bolts and brackets are tightened correctly.
Applying Any Necessary Trim or Decals
If your new bumper requires additional trim or decals for a customized look, follow these steps to complete the installation:
- Step 1: Clean the area where the trim or decals will be applied using a mild detergent or automotive cleaner. Ensure the surface is free from any dust, grease, or dirt.
- Step 2: Carefully measure and mark the desired location for the trim or decals.
- Step 3: Peel off the backing of the trim or decal and start applying it slowly and evenly, avoiding any wrinkles or air bubbles.
- Step 4: Use a rubber squeegee or a clean, lint-free cloth to press the trim or decal firmly onto the surface, ensuring proper adhesion.
Cleaning and Maintaining the New Bumper
Maintaining a clean and well-maintained bumper not only enhances the appearance of your vehicle but also extends its lifespan. Follow these tips for proper cleaning and maintenance:
- Regularly wash the bumper using a mild automotive soap and water solution.
- Avoid using abrasive cleaners, as they can damage the bumper’s finish.
- Apply a high-quality automotive wax or polish to protect the bumper against UV rays and environmental elements.
- Inspect the bumper periodically for any scratches, dents, or signs of damage. Address any issues promptly to prevent further problems.
Tips for Avoiding Common Installation Mistakes
Installing a bumper can be a straightforward process if done correctly. To avoid common installation mistakes, consider the following tips:
- Read and follow the manufacturer’s installation instructions carefully.
- Double-check your vehicle model and year to ensure compatibility with the bumper.
- Use proper tools and equipment as recommended by the manufacturer.
- Seek the assistance of a professional if you are unsure or lack the necessary experience.
- Take your time during the installation process to ensure accuracy and prevent any potential damage.
By following these final touches and maintenance steps, you can enjoy the flawless appearance and functionality of your newly installed bumper for years to come.
Frequently Asked Questions On How To Install A Bumper
Can I Install A New Bumper Myself?
Yes, you can install a new bumper yourself. Just follow the instructions carefully, use the proper tools, and take your time.
How Do You Attach A Bumper?
To attach a bumper, follow these steps: 1. Position the bumper correctly against the car. 2. Secure the bumper using bolts or screws. 3. Tighten the bolts or screws properly. 4. Check if the bumper is aligned with the car’s body.
5. Ensure the bumper is securely attached and doesn’t wobble or move.
How Much Does It Cost To Put A Bumper On A Car?
The cost of putting a bumper on a car varies depending on the make and model. On average, prices range from $500 to $1,500, including labor and parts. It is recommended to get an estimate from a trusted auto body shop for an accurate cost.
How Long Does It Take To Install A Bumper?
The installation time for a bumper varies depending on the vehicle and complexity. Generally, it can be completed in a few hours by a professional. However, certain factors like customization or unexpected issues may impact the time required.
Conclusion
To wrap up, installing a bumper doesn’t have to be a daunting task. By following the step-by-step guide outlined in this post, you’ll have your bumper securely in place in no time. Remember to gather all the necessary tools, take your time, and stay patient throughout the process.
With a little effort and attention to detail, you’ll achieve a professional-looking installation that enhances the appearance and functionality of your vehicle. Start DIY-ing today and give your car a stylish makeover!
