To install a brush guard on a Chevy Silverado, start by purchasing a compatible brush guard for your specific truck model. Then, carefully follow the manufacturer’s instructions to mount the guard onto the front of your Silverado using the included brackets and hardware.
Additionally, ensure that the guard is securely attached and aligned correctly to provide optimal protection for your truck’s grille and headlights. Regularly inspect the guard for any signs of damage or loosening, and tighten any loose bolts or screws as necessary to maintain its effectiveness.
By following these steps, you can easily install a brush guard on your Chevy Silverado for added protection and rugged style.
Preparing For Installation
Choosing the Right Brush Guard for Your Chevy Silverado
Before you begin the installation process, it is crucial to select the right brush guard for your Chevy Silverado. With various options available in the market, you must choose one that fits your vehicle’s specific model and year.
Consider factors such as the materials used, the design, and the level of protection it offers. A brush guard made of durable steel or aluminum can provide excellent protection against various off-road hazards and potential collisions.
Furthermore, pay attention to the design of the brush guard. Some models come with a pre-drilled installation design, making the installation process easier and quicker. Others might require some modifications to fit your specific vehicle, so be sure to double-check the compatibility before making a purchase.
Tools and Materials Needed for the Installation
Before getting started, gather all the necessary tools and materials to streamline the installation process. Here’s a list of essentials you will need:
- Socket set
- Ratchet wrench
- Wrench set
- Torque wrench
- Hex key set
- Power drill
- Rubber mallet
- Marker
- Measuring tape
- Protective gloves
- Safety goggles
- User manual from the brush guard manufacturer
- And of course, your brand-new brush guard
Having all these tools readily available will ensure a smooth installation process without any unnecessary delays or frustrations.
Preparing the Vehicle for Installation
Now that you have chosen the right brush guard and gathered all the necessary tools and materials, it’s time to prepare your Chevy Silverado for the installation. Follow these steps to ensure a successful installation:
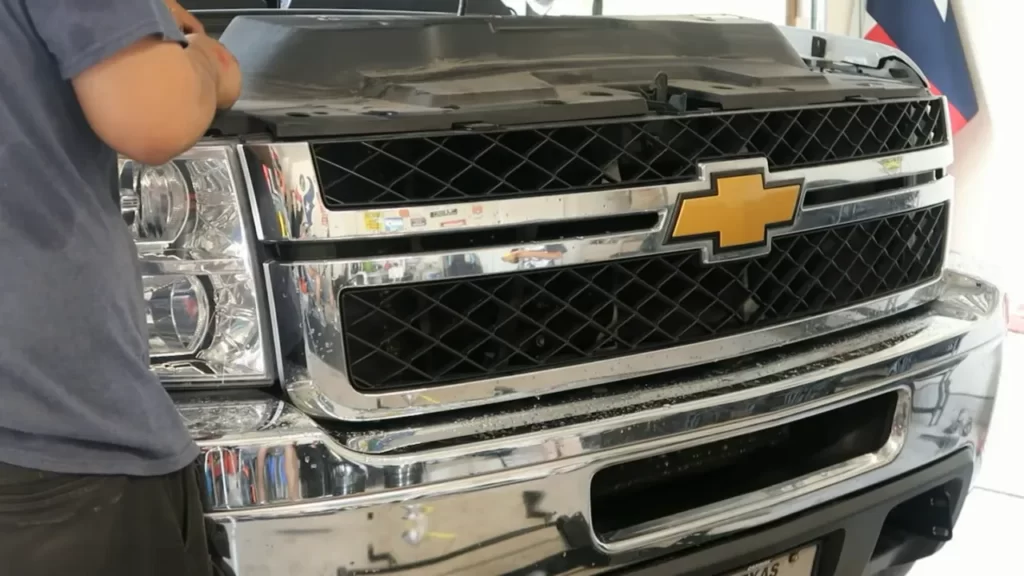
- Begin by thoroughly cleaning the front part of your vehicle, removing any dirt, dust, or debris that might interfere with the installation process.
- Locate and remove any existing trim or accessories that might obstruct the installation of the brush guard. Be sure to refer to the user manual provided by the manufacturer for specific instructions on how to remove these components.
- Use a measuring tape and marker to mark the mounting hole locations on the frame of your Silverado. This will help you align the brush guard correctly during the installation process.
- Next, refer to the user manual to determine the appropriate tools and hardware needed for the specific installation of your brush guard. Familiarize yourself with the installation process, ensuring you understand each step before proceeding.
- Before attaching the brush guard, it might be helpful to have a friend or family member assist you in holding it in place while you secure it to the vehicle’s frame.
- Finally, ensure that all bolts and screws are securely tightened, double-checking for any loose connections.
By following these preliminary steps, you will be well-prepared for the installation of a brush guard on your Chevy Silverado, ensuring a seamless and hassle-free process. Stay tuned for our next blog post, where we will dive into the detailed installation instructions!
Removing The Front Bumper
Removing the Bolts and Screws from the Bumper

Before installing a brush guard on your Chevy Silverado, the first step is to remove the front bumper. This process involves unscrewing and detaching the bolts holding the bumper in place. In this section, we will guide you through the steps to remove these bolts and screws.
To begin, make sure you have the necessary tools, such as a socket wrench and a screwdriver, handy. You’ll need these to effectively remove the bolts and screws. Once you’re ready, follow these steps:
- Locate the bolts and screws that are securing the front bumper to the frame of your Chevy Silverado. These are usually found underneath the bumper and along the sides.
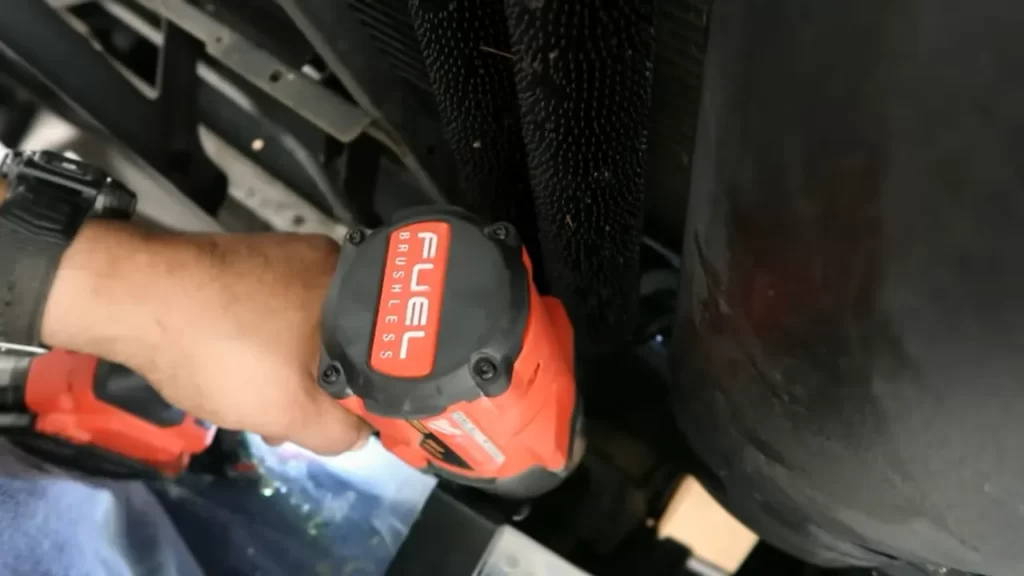
- Using the appropriate socket wrench or screwdriver, carefully loosen and remove each bolt and screw. It’s important to keep track of where each bolt and screw came from, as they may differ in size and length.
- As you remove the bolts and screws, set them aside in a safe location to avoid misplacing them. Consider using a container or a labeled bag to keep them organized.
By following these steps, you will be able to successfully remove the bolts and screws from the front bumper of your Chevy Silverado, setting the stage for the next phase of removing the bumper.
Disconnecting the Wiring and Sensors
In addition to the bolts and screws, the front bumper of your Chevy Silverado is also connected to wiring and sensors. As the next step in removing the bumper, it’s crucial to disconnect these electrical components. Here’s how:
- Locate the wiring connections and sensors that are attached to the bumper. These are typically found near the headlights and fog lights. Carefully inspect the connections to identify any clips or plugs holding them in place.
- Using your fingers or a small flathead screwdriver, gently release the clips or unplug the connectors. Take care not to damage the wiring or sensors while doing so.
- Once the wiring connections and sensors are fully detached, double-check that everything is disconnected. Ensure there are no hidden connections or wires still connected to the bumper.
By following these steps, you will have successfully disconnected the wiring and sensors from the front bumper of your Chevy Silverado, allowing you to proceed to the final step of detaching the bumper.
Detaching the Bumper from the Vehicle
Now that you have removed the bolts and screws, as well as disconnected the wiring and sensors, it’s time to detach the front bumper from your Chevy Silverado. Here’s how you can do it:
- Supporting the bumper with one hand, gently pull it away from the vehicle. This step will help you disengage the tabs and clips that secure the bumper in place.
- Once you have disengaged the tabs and clips, carefully lower the bumper to the ground. Be cautious as it can be quite heavy.
- Ensure that the bumper is completely detached and free from any remaining connections or components before setting it aside.
By following these steps, you will have successfully removed the front bumper from your Chevy Silverado. With the bumper removed, you can now proceed with the installation of a brush guard to enhance the protection and aesthetics of your vehicle.
Installing The Brush Guard

Installing the Brush Guard on your Chevy Silverado is a great way to improve the look of your truck while adding extra protection to the front end. In this guide, we will walk you through the step-by-step process of installing a brush guard. In this section, we will focus on the installation process itself, including mounting brackets and hardware, aligning the brush guard with the front bumper, and securing it in place.
Mounting Brackets and Hardware
Before you start installing the brush guard, gather all the necessary mounting brackets and hardware that came with the kit. Check the instructions or the manufacturer’s website to make sure you have everything you need. Lay out all the pieces on a clean and organized workspace. Step 1: Take the mounting brackets and place them on the frame of your Chevy Silverado. Ensure that they are positioned correctly according to the instructions. Step 2: Once you have positioned the brackets, attach them to the frame using the provided hardware. Tighten the bolts securely, but be careful not to over-tighten them as it may cause damage to the brackets or the truck’s frame.
Aligning the Brush Guard with the Front Bumper
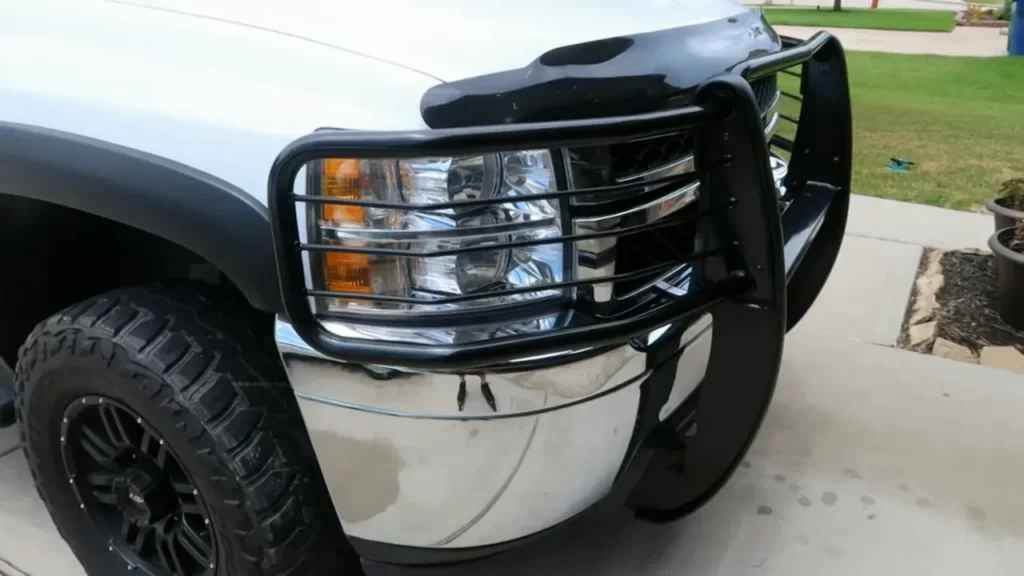
Now that the mounting brackets are securely in place, it’s time to align the brush guard with the front bumper of your Chevy Silverado. Step 3: Carefully lift the brush guard and position it in front of the mounting brackets. Make sure it is centered and level with the truck’s front bumper. Step 4: As you align the brush guard, check for any interference with the truck’s headlights, sensors, or other components. Adjust the position if necessary, ensuring there is proper clearance for all the truck’s features.
Securing the Brush Guard in Place
With the brush guard properly aligned, it’s time to secure it in place. Step 5: Insert the bolts provided with the brush guard kit through the brush guard’s mounting holes and into the mounting brackets. Make sure to hand-tighten them initially, ensuring the brush guard stays in place. Step 6: Once the bolts are hand-tightened, use a wrench or socket set to securely tighten them. Start from one side and work your way to the other, tightening each bolt evenly. By following these steps, you can easily install a brush guard on your Chevy Silverado. Not only will it enhance the appearance of your truck, but it will also provide added protection for your front end. Remember to consult the specific instructions provided with your brush guard kit for any manufacturer-specific steps or guidelines. Enjoy the peace of mind and rugged look that a brush guard can offer to your Chevy Silverado!
Reattaching The Front Bumper
After properly installing the brush guard on your Chevy Silverado, it’s time to reattach the front bumper. This crucial step ensures that your vehicle looks complete and maintains its structural integrity. Taking the time to align the bumper with the vehicle, reconnecting the wiring and sensors, and fastening the bumper with bolts and screws will ensure a secure and professional installation. Let’s dive into each step below.
Aligning the Bumper with the Vehicle
Begin by carefully aligning the front bumper with the mounting brackets on your Chevy Silverado. It’s important to make sure that the bumper is centered and level on the vehicle’s frame. This will not only improve the aesthetics but also guarantee a proper fit. Take a step back and visually inspect the alignment from various angles to ensure it meets your satisfaction.
Reconnecting the Wiring and Sensors
Next, locate the wiring harnesses and sensor connectors that were detached during the initial removal of the front bumper. You may need to refer to your vehicle’s manual or consult online resources to identify the correct connections. Once identified, carefully reconnect the wiring and sensor connectors, ensuring a secure fit. It’s essential to pay close attention to proper alignment and avoid any forceful connections that could potentially damage the components.
Fastening the Bumper with Bolts and Screws
Now that the bumper is aligned and the wiring and sensors are properly connected, it’s time to secure the bumper to the vehicle’s frame. Start by inserting the bolts and screws into their respective holes on the mounting brackets. Tighten them gradually, alternating between each side to maintain an even fit. It’s crucial to follow the manufacturer’s guidelines for torque specifications to prevent over or under tightening, which could affect the bumper’s stability.
Once all the bolts and screws are snug, give the bumper a gentle shake to ensure it’s securely fastened. Double-check all the connections, including the wiring harnesses and sensor connectors, to ensure they are still intact. If everything looks and feels secure, congratulations! You have successfully reattached the front bumper of your Chevy Silverado.
Remember, following these steps diligently will guarantee a professional installation of your brush guard. Take pride in knowing that your Chevy Silverado is now equipped with added protection and style.
Final Steps
After successfully completing the installation of your brand new brush guard on your Chevy Silverado, there are a few final steps to take to ensure that everything is properly aligned, adjusted if necessary, and securely installed. By following these final steps, you can be confident that your brush guard is securely attached and ready to provide the necessary protection for your vehicle.
Checking for Proper Alignment and Fitment
Start by visually inspecting the brush guard to make sure it is aligned correctly and sits flush with the front of your Chevy Silverado. Check for any gaps or misalignments that may need adjusting. To do this, stand back a few feet and examine the brush guard from different angles. Ensure that it aligns with the contours of your truck’s front end. If you notice any misalignment, you may need to make some minor adjustments.
Making Adjustments if Necessary
If adjustments are needed, refer to the manufacturer’s installation instructions to understand the proper adjustment process for your specific brush guard model. Most brush guards can be adjusted using bolts or brackets that allow you to tweak the position slightly. Loosen the necessary bolts or brackets, carefully reposition the brush guard, and then tighten everything back up. Take your time during this step to ensure that the brush guard is aligned perfectly with your Chevy Silverado’s front end.
Testing the Security of the Brush Guard
Once you have checked for proper alignment and made any necessary adjustments, it’s time to test the security of the brush guard. Gently push and pull on the guard to ensure it is securely attached to your truck. Pay attention to any excessive movement or wobbling, as this may indicate that the guard isn’t properly secured. If you notice any issues, you may need to revisit the installation process and double-check that all bolts are tightened to the manufacturer’s specifications. Testing the security of the brush guard is an essential step to ensure its effectiveness in protecting your vehicle from potential hazards.
By following these final steps and conducting a thorough inspection, adjustment, and security test, you can be confident that your brush guard is installed correctly and will provide the protection your Chevy Silverado needs. So, go ahead and enjoy the added style and functionality that your brush guard brings to your truck!
Safety Considerations
When it comes to installing a brush guard on your Chevy Silverado, there are several safety considerations that you need to keep in mind. While a brush guard can enhance the appearance and functionality of your truck, it’s important to ensure that it doesn’t compromise the safety features of your vehicle. In this section, we will discuss three important safety considerations that you should be aware of before installing a brush guard: ensuring it doesn’t block headlights or airflow, regular maintenance, and understanding warranty and liability information.
Ensuring the Brush Guard Doesn’t Block Headlights or Airflow
One of the crucial factors to consider when installing a brush guard is that it should not block the headlights or airflow of your Chevy Silverado. Clear visibility is essential for safe driving, especially during nighttime or adverse weather conditions. Therefore, always choose a brush guard that is specifically designed for your Silverado model and ensures that it does not obstruct the headlights. It’s also important to select a low-profile brush guard that allows proper airflow to the engine to prevent overheating.
Regular Maintenance of the Brush Guard
Like any other automotive accessory, your brush guard also requires regular maintenance to ensure its longevity and optimal performance. Regularly inspect the brush guard for any signs of damage, such as dents, cracks, or loose fittings. If you notice any issues, address them promptly to prevent further damage and potential safety hazards. Furthermore, make sure to clean the brush guard regularly to remove any dirt or debris that may accumulate on its surface. This will not only keep it looking good but also prevent rust or corrosion, which can weaken its structure.
Understanding Warranty and Liability Information
Before installing a brush guard on your Chevy Silverado, it’s crucial to thoroughly understand the warranty and liability information provided by the manufacturer. Familiarize yourself with the terms and conditions of the warranty, as well as any limitations or exclusions that may apply. It’s also important to understand any potential liability implications that may arise from improper installation or usage of the brush guard. By being aware of these aspects, you can ensure that you are installing the brush guard correctly and that you are adequately protected in case of any issues.
Frequently Asked Questions Of How To Install A Brush Guard On A Chevy Silverado
How Do You Attach A Brush Guard?
To attach a brush guard, follow these steps: 1. Start by gathering the necessary tools and equipment. 2. Position the brush guard in front of your vehicle’s grille. 3. Align the mounting brackets with the pre-drilled holes on your vehicle’s frame.
4. Secure the brush guard using the provided hardware. 5. Double-check for proper fit and alignment.
How To Install Ranch Hand Grille Guard For Chevy?
To install a Ranch Hand grille guard on a Chevy, follow these steps: 1. Start by positioning the grille guard onto the front of your Chevy. 2. Use the provided brackets and bolts to secure the grille guard to the frame.
3. Make sure the guard is aligned properly before tightening the bolts. 4. Double-check all connections to ensure a secure fit. 5. Test the grille guard to ensure it’s properly installed and secure.
How Much Does It Cost To Have A Brush Guard Install?
The cost of installing a brush guard varies depending on the type and make of your vehicle. Generally, it can range from $200 to $800, including the cost of the brush guard. However, it’s best to get an accurate quote from a professional installer.
How Long Does It Take To Put A Brush Guard On?
Installing a brush guard typically takes around 1-2 hours.
Conclusion
Installing a brush guard on a Chevy Silverado is a practical way to enhance the performance and protection of your vehicle. By following the simple steps outlined in this guide, you can easily add an extra layer of defense to your front end.
Not only will a brush guard help shield your Silverado from potential damage, but it can also provide a rugged and stylish look. So, why wait? Get started on installing your brush guard today and enjoy the added benefits it brings to your Chevy Silverado.