To install a bike tire, first, release the brake if necessary, then remove the wheel by loosening the axle nuts and sliding it out of the frame. Place one side of the tire onto the rim, starting at the valve stem, and use your hands or tire levers to work the remaining side of the tire onto the rim, being careful not to pinch the inner tube.
Inflate the tire to the recommended pressure, reinstall the wheel onto the bike, tighten the axle nuts, and check that the tire is centered and spins freely. Finally, reattach the brake if needed, and take a test ride to ensure the tire is securely installed.
Choosing The Right Bike Tire
One of the most important aspects of installing a bike tire is choosing the right one for your needs. The type of bike tire you choose can greatly impact your riding experience, so it’s essential to consider factors such as terrain, riding style, and intended use. In this section, we will discuss the different types of bike tires – road tires, mountain bike tires, and hybrid tires, to help you make an informed decision.
Different Types of Bike Tires
Road Tires
Road tires are specifically designed for smooth pavement surfaces, making them ideal for road cycling. They typically have a slick and narrow tread pattern, which allows for reduced rolling resistance and increased speed. Road tires are made from high-quality rubber compounds that offer excellent grip on asphalt, ensuring a smooth and efficient ride. These tires are generally lightweight, providing enhanced control and maneuverability on the road.
Mountain Bike Tires
If you enjoy off-road adventures, mountain bike tires are the perfect choice for you. These tires are specially designed to tackle various terrains such as dirt, gravel, rocks, and mud. Mountain bike tires have a knobby tread pattern that provides superior traction and grip, allowing you to navigate challenging trails with ease. They are generally wider compared to road tires, offering enhanced stability and shock absorption. Depending on your preferences, you can choose between different types of mountain bike tires like cross-country, trail, and downhill tires.
Hybrid Tires
If you use your bike for both on-road and off-road purposes, hybrid tires are an ideal option. These tires combine the features of road and mountain bike tires, providing versatility and adaptability. Hybrid tires have a semi-slick tread pattern, with some tread on the sides for improved grip on unpaved surfaces. They are narrower compared to mountain bike tires but wider than road tires, ensuring a balance between speed and stability. Hybrid tires are designed to handle different terrains, making them suitable for recreational riders, commuters, and urban cyclists.
Remember, choosing the right bike tire is crucial for optimizing your riding experience. Consider the type of terrain you will be riding on, your preferred riding style, and the specific demands of your cycling activities. By selecting a tire that matches your needs, you can enjoy improved performance, grip, and overall comfort while riding your bike.
Step-By-Step Guide To Installing A Bike Tire
If you’re a cycling enthusiast or simply looking to replace a worn-out bike tire, knowing how to install a bike tire is an essential skill. Whether you’re a beginner or an experienced rider, having a step-by-step guide can make the process much easier and smoother. In this post, we’ll walk you through the entire process of bike tire installation, ensuring you’ll have your bike ready for your next adventure in no time.
Gather the Necessary Tools
Before you begin, it’s important to gather all the necessary tools for the task ahead. Having everything you need at hand will save you time and frustration. Here’s a list of tools you’ll need to install a bike tire:
- Tire levers
- A pump with a pressure gauge
- An adjustable wrench
- A patch kit or spare inner tube
Deflate the Tire and Remove the Wheel
The first step in installing a bike tire is to deflate the tire completely and remove the wheel from the bicycle frame. To do this, follow these steps:
- Using an adjustable wrench, loosen the nuts or quick release on the wheel axle.
- Once the wheel is loose, carefully pull it out of the frame.
- Deflate the tire completely by depressing the valve at the center of the tube. You can use a valve cap or your fingernail to press it down.
Remove the Old Tire
With the wheel removed and the tire deflated, it’s time to remove the old tire from the rim. Follow these steps:
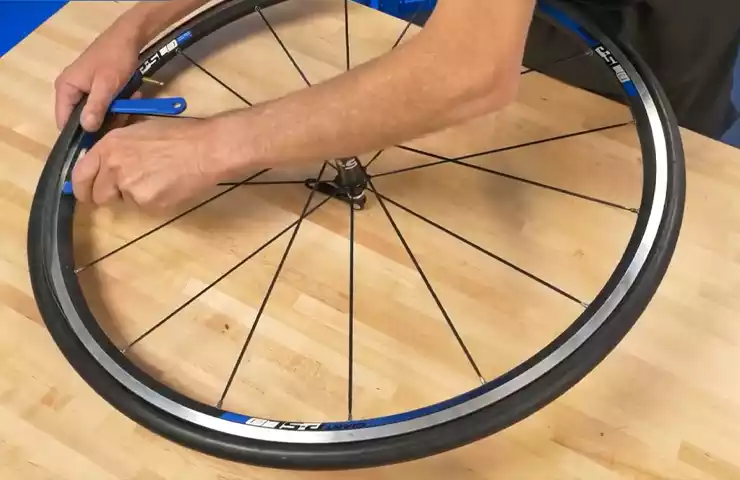
- Place one tire lever under the bead of the tire.
- Using the lever, pry one side of the tire off the rim.
- Move along the tire, using additional levers if necessary, until one side of the tire is completely off the rim.
- Repeat the process on the other side of the tire until it is completely removed from the rim.
Inspect the Inner Tube
Before installing the new tire, take a moment to inspect the inner tube for any signs of damage or wear. Check for cuts, punctures, or weak spots. If the tube is damaged beyond repair, it’s best to replace it with a new one.
Install the New Tire
Now that you’ve removed the old tire and inspected the inner tube, it’s time to install the new tire. Follow these steps:
- Starting at the valve stem, place one side of the new tire onto the rim.
- Using your hands, work your way around the rim, pushing the tire onto the rim until it is completely seated.
- Make sure the tire is evenly seated on both sides of the rim.
Inflate the Tire and Check for Proper Installation
With the tire installed, it’s time to inflate it to the recommended pressure. Follow these steps:
- Using a pump with a pressure gauge, attach the pump head to the valve stem.
- Pump air into the tire until it reaches the recommended pressure, which can be found on the tire sidewall.
- Once inflated, carefully check the tire for any bulges or uneven seating on the rim.
- If everything looks good, give the wheel a spin to ensure it rotates smoothly.
Congratulations! You’ve successfully installed a bike tire. Now you’re ready to hit the road or trail with confidence.
Tips And Tricks For Easy Bike Tire Installation
Installing a bike tire may seem like a daunting task, especially for beginners. However, with a few tips and tricks, you can make the process much easier and ensure a smooth installation. In this section, we will cover some essential techniques that will help you install a bike tire effortlessly.
Lubricating the Tire Beads
To make the tire installation process more manageable, it is crucial to lubricate the tire beads. Apply a small amount of lubricant, such as soapy water or a dedicated tire lubricant, to the tire beads. This will reduce friction between the tire and the rim, making it easier to slide the tire onto the rim. Additionally, lubrication helps prevent damage to the bead and ensures a secure fit. Remember to wipe off any excess lubricant after installation to avoid slipping while riding.
Using Tire Levers Properly
Tire levers are handy tools when it comes to tire installation. They provide leverage to lift the tire off the rim, making it easier to insert and remove the tire. To use tire levers properly, follow these steps:
- Start by deflating the tire completely to allow more flexibility.
- Insert one tire lever between the tire and the rim, hooking it onto a spoke.
- Gently pry the tire lever downward, lifting the tire bead over the rim edge.
- Hold the first lever in place and insert the second lever a few inches away.
- Repeat the prying motion until one side of the tire is completely off the rim.
- Remove the remaining part of the tire by hand, carefully pulling it off the rim.
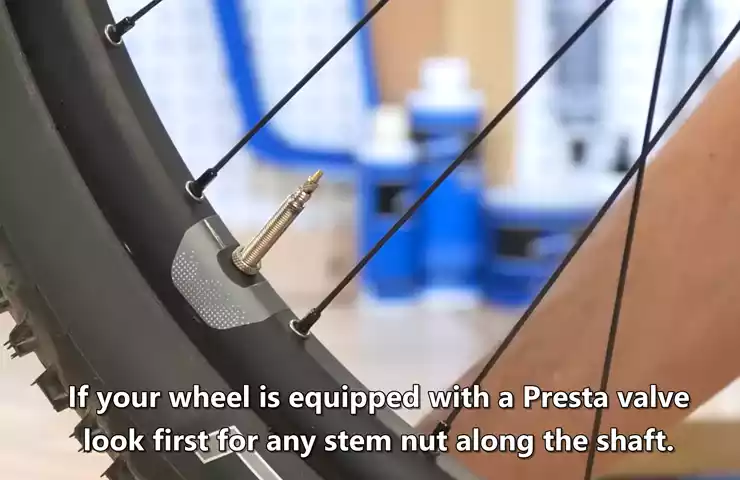
Aligning the Tire Valve
Proper alignment of the tire valve is crucial for accurate inflation and safe riding. Before installing the tire, double-check the valve’s position relative to the rim hole. Align the valve with the hole to ensure easy access for inflating the tire. Incorrect valve alignment can result in difficulty attaching the pump and potential damage to the valve stem.
Checking Tire Tread Direction
When installing a new tire, it is essential to check the tread direction. Most tires have arrows or indicators on the sidewall, indicating the correct rotation direction. Ensure that the arrows on both tires point in the same direction. Correct tread direction improves traction, water displacement, and overall performance. Installing the tire in the wrong direction can lead to reduced grip and compromised safety.
Taking Proper Safety Precautions
Finally, always prioritize safety during the tire installation process. Here are some safety precautions to keep in mind:
- Wear protective gloves to prevent injury from sharp objects or pinch points.
- Inspect the tire and rim for any damage or foreign objects that could affect performance.
- Use caution when using tire levers to avoid puncturing the tube or damaging the tire bead.
- Avoid using excessive force, as it may cause damage to the tire, rim, or tube.
- Ensure proper tire pressure according to manufacturer guidelines before riding.
By following these tips and tricks, installing a bike tire can be a breeze. Remember to take your time, pay attention to detail, and prioritize safety throughout the process. With practice, you’ll become more confident in handling tire installations and enjoy hassle-free rides.
Understanding Tire Maintenance And

Troubleshooting
Tire maintenance is a crucial aspect of owning a bike. Whether you go on leisurely rides or tackle challenging terrains, a well-maintained tire contributes to the overall performance and safety of your bike. In this section, we will explore the different aspects of tire maintenance and troubleshooting to help you keep your bike rolling smoothly.
<h3>Regular Tire Inspection</h3>
To ensure your bike tires are in optimal condition, regular inspections are essential. Taking a few minutes to inspect your tires can save you from potential problems on the road. Here’s what you need to look out for during your tire inspection:
- Check for any signs of wear and tear, such as cracks, bulges, or punctures.
- Examine the tire tread depth. A worn-out tread can affect traction and handling.
- Inspect the sidewalls for any damage, including cuts or bulges.
- Ensure the tire is properly seated on the rim without any misalignment.
By performing regular inspections, you can catch any issues early on and prevent potential tire failures while riding.
<h3>Monitoring Tire Pressure</h3>
Maintaining the correct tire pressure is vital for your bike’s performance and safety. Depending on your bike and the tire type, the recommended tire pressure may vary. You can find this information either on the sidewall of the tire or in the bike’s manual. Here are some key points to keep in mind when monitoring tire pressure:
- Use a reliable pressure gauge to check the tire pressure regularly.
- Underinflated tires can lead to increased rolling resistance and potential pinch flats.
- Overinflated tires can reduce traction and increase the risk of punctures.
- Adjust the tire pressure as needed to match the recommended range for your specific bike and tire type.
Regularly monitoring and maintaining the correct tire pressure will enhance your biking experience and prolong the life of your tires.
<h3>Dealing with Punctures and Flats</h3>
One of the most common issues cyclists face is the dreaded punctures or flats. However, with the right knowledge and tools, you can get back on the road in no time. Here are some important steps to take when dealing with punctures and flats:
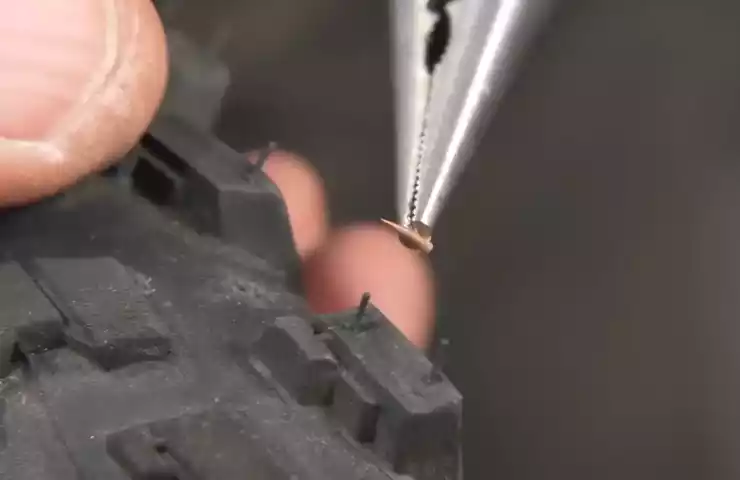
- Locate the puncture by visually inspecting the tire for any sharp objects.
- Remove the tire from the rim using tire levers.
- Inspect the inner tube for the puncture and mark the spot.
- Repair the puncture with a patch or replace the tube if necessary.
- Properly reinstall the tire onto the rim and inflate it to the recommended pressure.
Learning how to handle punctures and flats will give you the confidence to handle these situations efficiently and continue enjoying your bike rides.
<h3>Patching a Tube</h3>
When encountering a minor puncture in your bike’s inner tube, patching the tube can be a cost-effective solution. Here’s a step-by-step guide to patching a tube:
- Locate the puncture by inflating the tube slightly and listening for leaks or submerging it in water to look for bubbles.
- Clean the area around the puncture with an alcohol wipe or sandpaper to ensure proper adhesion.
- Apply a thin layer of rubber cement on the punctured area.
- Apply the patch firmly onto the puncture and press down to ensure a secure bond.
- Allow the patch to dry completely, then inflate and test the tube.
By patching the tube, you can save money and extend the life of your inner tubes.
<h3>Replacing a Tube</h3>
Sometimes, a puncture may be too large or the tube may be beyond repair, requiring you to replace the tube. Follow these simple steps to replace a tube:
- Remove the tire from the rim using tire levers.
- Deflate the tube completely by pressing the valve stem.
- Pull the tube out from the tire, starting from the valve stem end.
- Insert the new tube into the tire, making sure it sits evenly inside.
- Carefully reinstall the tire onto the rim, ensuring proper alignment.
- Inflate the tube to the recommended pressure and check for any leaks or bulges.
Replacing a tube is a straightforward process and allows you to get back on the road quickly.
<h3>Fixing a Tubeless Tire</h3>
Tubeless tires have become increasingly popular among cyclists due to their greater puncture resistance and lower rolling resistance. However, in the event of a puncture, fixing a tubeless tire requires a different approach. Here’s what you need to do:
- Identify the location of the puncture by adding sealant or spraying soapy water onto the tire.
- If the puncture is small, the sealant may be able to seal it automatically. Simply rotate the wheel to distribute the sealant evenly.
- For larger punctures, insert a tire plug into the hole, ensuring it creates a tight seal.
- After fixing the puncture, reinflate the tire to the recommended pressure and check for any additional leaks.
Understanding how to fix a tubeless tire will allow you to get back on your bike with minimal disruption to your ride.
<h3>Balancing Tire Pressure for Optimal Performance and Comfort</h3>
The right tire pressure not only affects the performance of your bike but also impacts your comfort while riding. Here are some tips for balancing tire pressure:
- Consider the type of terrain you’ll be riding on. Lower tire pressures are ideal for rough terrains, providing better traction and cushioning.
- Adjust the tire pressure based on your weight. Heavier riders may need higher pressures to avoid pinch flats, while lighter riders can decrease pressure for improved comfort.
- Experiment with different pressures to find the optimal balance between performance and comfort for your riding style and preferences.
By finding the right tire pressure, you can ride with confidence, knowing that you are maximizing both performance and comfort.
Frequently Asked Questions On How To Install A Bike Tire
How Do You Put A Bike Tire Back On?
To put a bike tire back on, first, deflating it can make the process easier. Then, align the tire with the rim and push one side of the tire into the rim. Using your hands or tire levers, push the remaining portion of the tire into the rim.
Finally, inflate the tire to the recommended pressure.
Can You Replace A Bike Tire Yourself?
Yes, you can replace a bike tire yourself. It’s a simple task that can be done easily without any professional help. Just follow a few steps to remove the old tire, replace it with a new one, and ensure proper inflation.
How Do You Put A Bike Tire On A Rim By Hand?
To put a bike tire on a rim by hand, start by deflating the tube completely. Next, insert one side of the tire bead into the rim groove. Then, using your hands, push the other side of the tire bead onto the rim, making sure it’s fully seated.
Inflate the tube slowly, and you’re done!
Which Way Does My Bike Tire Go On?
The bike tire should be aligned with the rotation arrow on the sidewall for proper installation. Make sure it’s secure for safe riding.
Conclusion
Installing a bike tire may seem daunting at first, but with these simple steps, you can easily do it yourself. Remember to start by deflating the tire and removing it from the bike. Then, carefully insert the new tire onto the rim, making sure it is seated properly.
Finally, inflate the tire to the recommended pressure and give it a spin to ensure everything is in place. With a little practice, changing bike tires will become second nature to you. Happy riding!