To install a bike chain, start by disengaging the rear derailleur and removing the old chain. Then, thread the new chain through the derailleur and onto the front chainring, making sure it matches the old chain’s length.
Finally, secure the chain by connecting the ends with a quick link or a chain pin. Cycling is a popular and enjoyable activity for many people, providing both exercise and a means of transportation. However, like any mechanical device, bicycles require maintenance and occasional repairs.
One such repair is the installation of a bike chain, which may become necessary due to wear and tear or breakage. Being able to replace a bike chain is an essential skill for any cyclist, allowing them to keep their bike in optimal working condition. In this guide, we will provide step-by-step instructions on how to install a bike chain, ensuring a smooth and effortless process. So, let’s get started and learn how to properly install a bike chain.
Why A Well-Functioning Bike Chain Is Essential
When it comes to riding a bike, having a well-functioning bike chain is absolutely essential. It’s not just a simple piece of the bicycle, but rather, the bike chain plays a crucial role in the overall performance and functionality of your ride. In this blog post, we will explore why a well-functioning bike chain is so important and how it can greatly enhance your cycling experience.
Efficient Power Transfer
One of the primary reasons why a well-functioning bike chain is essential is because it enables efficient power transfer from your legs to the wheels. A properly installed and lubricated chain allows for the smooth transmission of energy, ensuring that every ounce of power you exert is effectively utilized to propel the bike forward. This means that you can expect better acceleration, faster speeds, and overall improved performance while pedaling.
Smooth Shifting
Smooth shifting is another significant advantage of having a well-functioning bike chain. When your chain is in good condition, it seamlessly interacts with the cassette and chainrings, facilitating seamless gear transitions without any hiccups or annoying mis-shifts. This means that you can switch between gears effortlessly, enabling a more comfortable and enjoyable ride. Whether you’re climbing a steep hill or cruising downhill, a well-functioning bike chain ensures that your gear changes are smooth and seamless.
Increased Longevity of Drivetrain Components
In addition to efficient power transfer and smooth shifting, a well-functioning bike chain also helps to increase the longevity of your drivetrain components. The drivetrain includes essential parts such as the chainrings, cassette, and derailleurs, all of which work together to ensure a smooth and efficient ride. When the chain is properly maintained and functioning optimally, it reduces the wear and tear on these components, thereby extending their lifespan. This means that you won’t have to replace expensive drivetrain components as frequently, saving you both time and money in the long run.
By understanding the importance of a well-functioning bike chain, you can see how it directly impacts your overall cycling experience. With efficient power transfer, smooth shifting, and increased longevity of drivetrain components, a properly installed and maintained bike chain can make a world of difference in how your bike performs. So, make sure to take the time to properly install and maintain your bike chain to enjoy all these benefits and enhance your cycling adventures.
Preparing For The Bike Chain Installation
Before you begin the bike chain installation process, it is essential to adequately prepare. Taking the time to gather the necessary tools and materials, ensuring the bike is clean and in a stable position, and familiarizing yourself with the different parts of the bike chain will make the process smoother and more efficient. Follow these steps to get started:
Gather necessary tools and materials
To successfully install a bike chain, you’ll need a few key tools and materials. Make sure you have these on hand:
- Chain breaker tool: This tool is used to remove the old chain, shorten the new chain if needed, and connect the ends together.
- New bike chain: Ensure you have the correct size and type of chain for your bike.
- Chain lubricant: Lubricating the chain will improve its performance and prevent premature wear.
- Pedal wrench: A pedal wrench will be necessary to remove the pedals if required for chain installation.
- Rag or towel: Use a rag or towel to wipe off any excess grease or dirt on the bike chain.
Ensure the bike is clean and in a stable position
Before beginning the installation process, it’s crucial to have a clean bike to work with. Remove any dirt, debris, or grime from the chain, gears, and derailleur to optimize performance. Additionally, ensure the bike is in a stable position. You can use a bike stand or flip the bike upside down and rest it on the handlebars and seat.
Familiarize yourself with the different parts of the bike chain
Before diving into the installation process, it’s essential to become familiar with the different parts of the bike chain. This knowledge will help you understand how the chain links together, making the installation process more straightforward. The key parts of a bike chain include:
| Part | Description |
|---|---|
| Outer plates | Metal plates on the outside of the chain that hold it together |
| Inner plates | Metal plates on the inside of the chain; these also hold the chain together |
| Pins | Metal rods that connect adjacent chain links |
| Roller | A small metallic tube that rotates around the pin, allowing the chain to move smoothly over the gears |
Understanding the different parts of the bike chain will assist you in properly installing and connecting each section.
By following these steps and adequately preparing for the bike chain installation process, you’ll be ready to venture on your next cycling adventure in no time. Remember to always refer to your bike’s specific instructions or reach out to a professional if you encounter any difficulties.
Step 1: Removing The Old Bike Chain
When it comes to maintaining your bike, one crucial task is knowing how to properly install and remove a bike chain. This is especially important when your chain starts to show signs of wear and tear, as a worn-out chain can affect the performance of your bike and potentially lead to accidents. In this step-by-step guide, we will walk you through the process of removing the old bike chain, allowing you to replace it with a new one and get your bike running smoothly again.
Properly position the bike chain on the rear cogs
The first step in removing the old bike chain is to properly position the chain on the rear cogs. This will ensure that the chain is aligned properly and prevent any unnecessary tension or damage during removal. To do this, follow these simple steps:
- Shift the gears to the smallest chainring and smallest rear cog.
- If your bike has a derailleur, position the chain on the outermost rear cog.
- If your bike has a single-speed or internal hub, position the chain on any rear cog.
By following these steps, you will have the chain in the correct position for removal, making the process smoother and easier.
Use a chain tool to disconnect the chain
Once the chain is properly positioned on the rear cogs, the next step is to use a chain tool to disconnect the chain. A chain tool is a specialized tool designed specifically for this purpose, allowing you to push the chain pin out and break the chain apart. Here’s how to do it:
- Select an outer link on the chain that you want to remove.
- Position the chain tool on the outer link, aligning it with the chain pin.
- Tighten the chain tool until it contacts the chain pin.
- Turn the handle of the chain tool to push the chain pin out, breaking the chain apart.
Be cautious not to push the chain pin completely out, as it can be difficult to reinsert if you push it too far. By following these steps, you will successfully disconnect the chain and be ready to remove it from the bike.
Remove the old chain from the bike
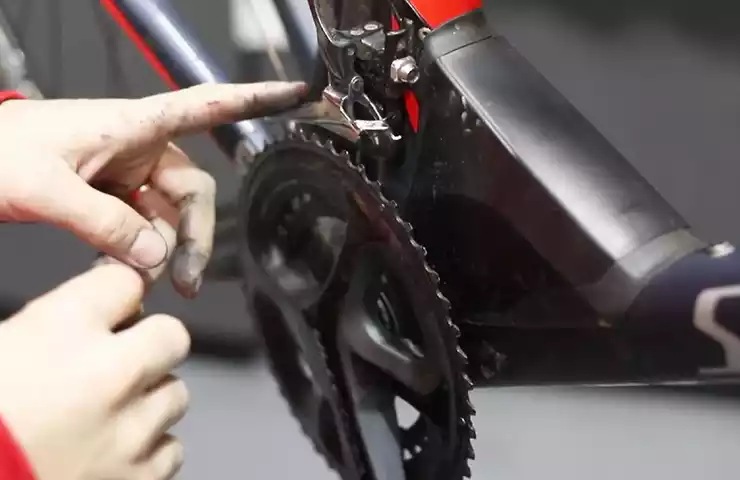
Now that the chain is disconnected, the final step is to remove the old chain from the bike. This process involves detaching the chain from the front chainring and carefully pulling it through the rear derailleur. Here’s how to do it:
- Shift the gears to the smallest chainring and smallest rear cog, creating slack in the chain.
- Carefully pull the chain away from the front chainring, guiding it through the rear derailleur.
- Once the chain is free from the rear derailleur, pull it through the bike frame and remove it completely.
Ensure that the chain is fully removed and take the opportunity to inspect the derailleur and chainring for any signs of wear or damage. This will help you identify any potential issues that may need attention before installing the new chain.
In conclusion, by properly positioning the bike chain on the rear cogs, using a chain tool to disconnect the chain, and removing the old chain from the bike, you have successfully completed the first step in installing a bike chain. Stay tuned for the next steps in this comprehensive guide, where we will walk you through the process of installing a new bike chain and ensuring its proper alignment.
Step 2: Choosing The Right Replacement Chain
Once you have identified that your bike chain needs to be replaced, the next step is to choose the right replacement chain. This is a crucial step as selecting the wrong chain can lead to poor performance and even damage to your bike. In this section, we will discuss how to determine the type and size of the bike chain needed, consider the specific needs of your bike and riding style, and ultimately select a chain that fits your requirements.
Determine the type and size of the bike chain needed
Determining the appropriate type and size of the bike chain is essential for a successful installation. Different bikes require different types and sizes of chains. To determine the type and size of the chain needed for your bike, you can:
- Consult your bike’s owner’s manual: The owner’s manual typically provides information on the recommended chain type and size for your specific bike model.
- Check the current chain: If you are replacing an old chain, you can refer to the markings on the chain itself. Look for numbers such as 8-speed, 9-speed, or 10-speed, which indicate the compatibility and speed of the chain.
- Measure the chainstay length: The chainstay length is the distance between the center of the crankset and the center of the rear wheel axle. Measure this distance to ensure you choose a chain with the appropriate length.
Consider the specific needs of your bike and riding style
When choosing a replacement chain, it’s important to consider your bike’s specific needs and your riding style. Factors to consider include:
- Terrain: Consider the type of terrain you usually ride on. If you often ride on rough or muddy terrain, you may need a more durable and reliable chain.
- Riding style: Are you a casual rider or an avid cyclist? Your riding style can determine the level of performance and durability you require from a chain.
- Weather conditions: If you frequently ride in wet or rainy conditions, you might need a chain that is corrosion-resistant to prevent rust.
- Maintenance capabilities: Some chains require more frequent cleaning and lubrication than others. Consider how much time and effort you are willing to invest in maintaining your chain.
Select a chain that fits your requirements
Based on the information gathered from the previous steps, you can now select a chain that fits your requirements. Look for a chain that matches the type and size recommended for your bike and also takes into account your specific needs and riding style. Additionally, consider factors such as the chain’s durability, weight, and price.
Remember, a well-chosen replacement chain will not only enhance the performance of your bike but also contribute to a smoother and more enjoyable riding experience. Take the time to carefully evaluate your options and select a chain that is the perfect fit for your bike.
Step 3: Preparing The New Bike Chain
Now that you have removed the old bike chain, it’s time to prepare the new one. Follow these important steps to ensure a smooth installation process:
Ensure the new chain is the correct length
Before installing the new bike chain, it’s crucial to make sure it is the correct length for your bicycle. An improperly sized chain can lead to poor shifting performance or even damage to your bike’s drivetrain.
Here’s how you can check the length of the new bike chain:
- Hold the chain around the largest chainring at the front and the largest cog at the rear.
- Pull the two ends of the chain together, overlapping them without tension.
- Ensure there is a slight slack of about half an inch or 1-2 links in the chain.
If the chain is too long, you will need to remove some links using a chain tool. On the other hand, if it is too short, you will need to purchase a longer chain to ensure proper functionality.
Apply lubrication to the chain for smoother operation
Lubricating your new bike chain is an essential step to increase its lifespan and ensure smooth operation. Applying lubrication properly will help reduce friction, prevent rust, and keep your drivetrain running smoothly.
Here’s how you can apply lubrication to the chain:
- Choose a high-quality bicycle-specific lubricant. Avoid using household oils, as they can attract dirt and grime.
- Hold the lubricant bottle over the chain, and apply a drop of lubricant on each roller.
- Rotate the pedals backward to allow the lubricant to penetrate the chain thoroughly.
- Wipe off any excess lubricant using a clean rag.
Remember to periodically clean and reapply lubricant to your bike chain to maintain optimal performance.
Check the chain for any defects or damage
Prior to installation, it’s essential to inspect your new bike chain for any defects or damage. Using a damaged chain can lead to safety issues and further damage to your bike.
Follow these steps to check the chain for defects:
- Visually examine the chain links for any signs of wear, such as elongation, rust, or bent plates.
- Flex the chain laterally to check for excessive stiffness or binding.
- Listen for any unusual noises or rattling when moving the chain.
If you notice any defects, it’s best to replace the chain with a new one to ensure a safe and reliable ride.
By ensuring the correct length, applying proper lubrication, and checking for defects, you are now ready to proceed with the final step of your bike chain installation. Stay tuned to the next step to complete the process successfully!
Step 4: Installing The New Bike Chain
Now that you have removed the old bike chain, it’s time to install the new one. This step-by-step guide will walk you through the process of installing a bike chain with ease.
Route the new chain through the derailleur and sprockets
The first step in installing a new bike chain is to carefully route it through the derailleur and sprockets. This ensures that the chain will run smoothly and efficiently, providing you with a smooth ride.
- Hold the chain in your hands, making sure that the ends are properly aligned.
- Begin threading the chain through the derailleur, starting with the upper pulley and then wrapping it around the lower pulley.
- Once the chain is properly threaded through the derailleur, begin routing it through the sprockets.
- Starting from the smallest sprocket, carefully guide the chain onto each sprocket, making sure that it sits properly on the teeth.
Connect the ends of the chain using a master link or pin
After routing the chain through the derailleur and sprockets, it’s time to connect the ends of the chain. There are two common methods for connecting a bike chain: using a master link or a pin. Let’s take a look at both options.
- Master link:
- Align the ends of the chain with the master link, ensuring that the pins on the master link match the holes on the chain.
- Slide the master link onto the chain, making sure that it engages properly.
- Push the plates of the master link together until they snap into place, creating a secure connection.
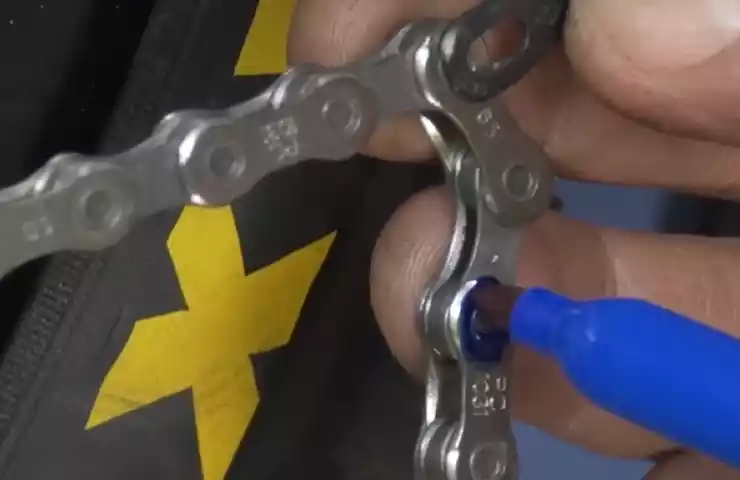
- Pin:
- Align the ends of the chain, ensuring that the holes are properly aligned.
- Insert the pin into the holes on the chain, making sure that it goes all the way through.
- Using a chain tool, push the pin in until it is securely in place.
- Be sure to break off any excess pin that may be sticking out of the chain, as it can cause damage or discomfort while riding.
Adjust the tension of the chain for optimal performance
Once the chain is connected, it’s important to adjust the tension for optimal performance. A properly tensioned chain will not only provide a smoother ride but also prevent excessive wear on the drivetrain components. Follow these steps to ensure the correct tension:
- Shift the bike into the smallest chainring and smallest rear cog.
- Locate the rear derailleur’s tension adjustment screw and turn it clockwise to tighten or counterclockwise to loosen the tension on the chain.
- While turning the adjustment screw, check the tension by pressing down on the chain. There should be a slight amount of upward movement (around 0.5-1 cm) in the middle of the chain.
- Once you have adjusted the tension to your satisfaction, shift through the gears to test the chain’s performance. It should shift smoothly and without any skipping or catching.
- Make any necessary further adjustments to the tension until you achieve optimal performance.
With the new bike chain installed and properly tensioned, you’re now ready to hit the road or trail with confidence. Remember to periodically check the chain for wear and maintenance to ensure it remains in optimal condition. Happy cycling!
Regular Cleaning And Lubrication

Use a degreaser and brush to remove dirt and grime
Regular cleaning is essential for maintaining the performance and longevity of your bike chain. Over time, dirt, dust, and grime can accumulate on the chain, causing it to become less efficient and potentially leading to premature wear and tear. To keep your bike chain in top condition, you’ll want to use a degreaser and brush to remove any built-up dirt and grime.
First, carefully shift your bike into a high gear, so the chain is on the smallest front and rear cog. This will release tension on the chain, making it easier to clean. Wipe off any excess dirt or debris with a clean cloth.
Next, apply a suitable degreaser to the chain. There are many degreasing products available in the market, specifically designed for bike chains. Ensure that you use a degreaser that is compatible with your bike chain.
Take a stiff-bristled brush, preferably a chain cleaning brush or an old toothbrush, and gently scrub the chain, taking care to reach all its nooks and crannies. Move the pedals backward slowly and continue brushing until the entire chain is clean.
Once you’ve thoroughly scrubbed the chain, rinse off the remaining degreaser with clean water. You can use a hose or a bucket of water, but be careful not to overdo the water pressure as it can force water into areas you don’t want it to go. After rinsing, wipe the chain dry with a clean cloth and let it air dry for a few minutes before proceeding to the next step.
Apply lubrication to the chain after cleaning
After cleaning the chain, the next step is to apply lubrication. Lubricating the chain is crucial as it reduces friction, prevents rust, and ensures smooth and efficient gear shifting.
Before applying the lubricant, make sure the chain is completely dry. Excess water can dilute the lubricant, making it less effective. Apply a small amount of chain lubricant to each individual link, making sure you cover the entire length of the chain.
You can either drip the lubricant onto the chain or use a lubricant applicator tool for a more precise application. Slowly rotate the pedals backward a few times to help the lubricant penetrate the chain. Then, using a clean cloth, wipe off any excess lubricant to prevent attracting dirt and debris.
Remember, choosing the right lubricant is crucial. There are different types of bike chain lubricants available, such as dry, wet, and ceramic-based lubricants. Consider factors like weather conditions, riding environment, and personal preference when selecting the most suitable lubricant for your bike chain.
Regular cleaning and lubrication of your bike chain will not only improve its performance but also prolong its lifespan. By removing dirt and debris and keeping the chain properly lubricated, you’ll ensure smooth and reliable rides, whether you’re exploring new trails or commuting to work.
Checking For Wear And Damage
Look for signs of elongation or stretched links
A bike chain is an essential component that directly impacts the performance and functionality of any bicycle. Over time, however, the chain can wear out or become damaged due to regular use, improper maintenance, or exposure to the elements. Therefore, it is crucial to regularly check for signs of wear and damage to ensure a safe and enjoyable ride.
One of the most common issues with bike chains is elongation or stretched links. Elongation occurs when the chain’s pins and bushings wear down, causing the chain to become longer than its original length. This can lead to poor shifting, decreased power transfer, and a higher risk of chain breakage. To check for signs of elongation, you can use a chain checker tool or simply measure the length of a certain number of links using a ruler or tape measure. If your chain is significantly longer than its recommended length, it may be time to replace it.
Inspect the chain for rust or corrosion
In addition to elongation, rust and corrosion can also compromise the integrity of your bike chain. When exposed to moisture or harsh conditions, the metal components of the chain can develop rust, leading to reduced functionality and increased wear. To inspect your chain for rust or corrosion, carefully examine each link, paying close attention to areas where moisture may have accumulated. Look for any signs of discoloration, flaking, or rough surfaces that may indicate the presence of rust. If you find any signs of rust, it is advisable to clean and lubricate your chain. If the rust is severe or has caused significant damage, it may be necessary to replace the chain altogether.
Replace the chain if necessary to prevent further damage
When it comes to bike chains, prevention is key. Regularly checking for wear and damage is essential to catch any issues early on and prevent further damage to your bike’s drivetrain. If you have identified signs of elongation, stretched links, or rust during your inspection, it is crucial to replace the chain promptly. Using a worn or damaged chain can not only cause poor performance and potential safety hazards but also lead to additional wear on other drivetrain components such as the chainrings and cassette. To replace the chain, ensure you have the correct length and type of chain for your bike’s drivetrain system, and follow the manufacturer’s instructions for installation. By replacing the chain when necessary, you can prolong the lifespan of your bike’s drivetrain and enjoy smoother, more efficient rides.
Regular Maintenance Routine
Enjoying A Smooth And Reliable Bike Chain
Proper installation ensures a well-functioning bike chain
Regular maintenance enhances the longevity of the chain
Following these steps will lead to a smooth and enjoyable ride
Proper installation ensures a well-functioning bike chain
Installing a bike chain may seem like a straightforward task, but doing it properly is crucial for the performance of your bike. A well-functioning chain is essential for a smooth and reliable ride. To begin the installation process, make sure you have the necessary tools at hand: a chain breaker tool, a replacement chain, and a quick link.
Regular maintenance enhances the longevity of the chain
Just installing a bike chain is not enough to ensure its longevity. Regular maintenance is equally important. It is recommended to clean and lube your bike chain at least once a month. This will help remove dirt and debris that can cause friction and wear down the chain over time. Additionally, regularly checking the tension of the chain and adjusting it if necessary will also contribute to extending its lifespan.
Following these steps will lead to a smooth and enjoyable ride
Now that you understand the importance of proper installation and regular maintenance, let’s go through the steps to install a bike chain:
- Begin by removing the old chain, if applicable, using a chain breaker tool.
- Check the length of the replacement chain and determine whether it needs to be shortened. You can do this by laying the chain on the largest front and rear sprockets and ensuring there is enough tension without overstretching the chain.
- If the chain needs to be shortened, use the chain breaker tool to remove the excess links, ensuring you keep the ends with the quick link slots.
- Attach the quick link to one end of the chain, making sure it’s securely in place.
- Thread the chain through the rear derailleur, ensuring it follows the correct path and engages with the jockey wheels.
- Guide the chain onto the front chainring and, if necessary, adjust the front derailleur to ensure proper alignment.
- Carefully rotate the pedals to test the functionality of the chain, ensuring it moves smoothly across the sprockets and does not skip or slip.
- Finally, check the tension of the chain and adjust it if needed, ensuring there is a bit of slack but not too much that it may come off during use.
By following these steps, you can install a bike chain correctly, maintain it effectively, and enjoy a smooth and enjoyable ride. Remember, a well-functioning chain is key to an optimal biking experience.
Frequently Asked Questions Of How To Install A Bike Chain
How Do You Put A Chain On A Bike?
To put a chain on a bike, follow these steps: 1. Turn the bike upside down. 2. Align the chain with the gears and pulleys. 3. Slide the chain onto the grooves of the gears and pulleys. 4. Make sure the chain is properly tensioned.
5. Use a chain tool to connect the ends of the chain.
How Do You Size And Install A Bike Chain?
To size and install a bike chain, follow these steps: measure the old chain and match the new chain to the same length, remove the old chain using a chain tool, thread the new chain through the derailleur and around the chainring, join the ends with a master link or pin, and ensure proper tension.
Can You Replace Bike Chain Yourself?
Yes, you can replace a bike chain yourself. It’s a simple process that you can do at home with the right tools and instructions. Just make sure to follow the steps carefully for a successful replacement.
How Do You Know Which Way Your Bike Chain Goes?
To determine the correct direction for your bike chain, look for the small arrows on the chain links. These arrows indicate the direction in which the chain should be mounted on the bike’s chainring and cassette. Install the chain accordingly, ensuring the arrows point forward while pedaling.
Conclusion
Installing a bike chain is a straightforward process that can be easily accomplished with the right tools and techniques. By carefully following the steps outlined in this guide, you’ll be able to enjoy a smooth and efficient ride on your bike.
Remember to regularly maintain and lubricate your chain to ensure its longevity and optimal performance. With these tips in mind, you can confidently tackle any bike chain installation and get back on the road in no time.