To install a bike basket, attach it to the front handlebars using a mounting bracket and screws, ensuring a secure fit. Bike baskets are a practical and versatile accessory for cyclists that provide a convenient way to carry items while riding.
Whether you need to transport groceries, a bag, or a pet, a bike basket can make your cycling experience more enjoyable. Installing a bike basket is a simple process that can easily be completed with just a few tools and a little bit of time.
We will provide you with step-by-step instructions on how to install a bike basket on your front handlebars, ensuring a secure and stable fit. So, let’s dive in and get your bike ready to carry all your essentials in style!
Prepare The Bike Basket And Tools
Installing a bike basket is a simple and effective way to add practicality and style to your bike. Before you begin the installation process, it’s important to prepare your bike basket and gather the necessary tools and materials. This will ensure that the installation goes smoothly and that your bike basket is securely attached. In this section, we will guide you through the process of preparing the bike basket and the tools you will need.
Gather the Necessary Tools and Materials
Before you start installing your bike basket, it’s important to gather all the necessary tools and materials. Having everything on hand will make the installation process more efficient and save you time and effort. Here are the tools and materials you will need:
- A screwdriver
- Adjustable wrench
- Allen wrench set
- Bike basket mounting bracket
- Screws for mounting bracket
Having these tools and materials ready will ensure that you have everything you need at your fingertips to complete the installation. Now that you have gathered the necessary tools and materials, it’s time to move on to the next step.
Inspect the Bike Basket for Any Damage or Defects
Before installing your bike basket, it’s important to inspect it for any damage or defects. This step is crucial as it ensures that your bike basket is in proper working condition and will not cause any issues during the installation process or while you are using it. Here’s how you can inspect your bike basket:
- Check for any visible cracks or breaks in the basket material.
- Ensure that the mounting points of the basket are secure and intact.
- Inspect the handlebar brackets for any signs of damage or wear.
- Make sure that the brackets can be securely attached to your bike’s handlebars.
If you notice any damage or defects during the inspection, it’s recommended to replace the bike basket to ensure your safety and the longevity of the installation. However, if everything looks good, you can proceed with the installation process knowing that you have a solid and reliable bike basket.
In conclusion, preparing the bike basket and gathering the necessary tools and materials is an essential step in the installation process. By taking the time to gather all the tools and inspect the basket for any damage or defects, you can ensure a successful installation and enjoy the benefits of having a functional bike basket on your rides.
Keyword: How To Choose The Right Bike Basket
Consider the bike basket type and material
When it comes to choosing the right bike basket, one of the first factors to consider is the type and material. Bike baskets come in various types, each designed for different purposes. Some popular types include front baskets, rear baskets, and handlebar baskets. Front baskets are typically mounted on the front of the bike and offer easy access, while rear baskets are attached to the rear rack and provide more stability. Handlebar baskets, on the other hand, are mounted on the handlebars and are ideal for carrying lighter items.
Next, let’s talk about materials. Bike baskets are commonly made of metal, plastic, or wicker. Each material has its own set of advantages and considerations. Metal baskets, such as those made of steel or aluminum, are durable and can withstand heavier loads. They are also easier to clean and maintain. Plastic baskets, on the other hand, are lightweight and resistant to rust and corrosion. They are a great option if you frequently ride in wet conditions. Lastly, wicker baskets add a touch of vintage charm to your bike and are eco-friendly. However, it’s important to note that wicker baskets require more care to prevent damage from weather exposure.
Determine the appropriate size and weight capacity for your needs
Another crucial aspect of choosing the right bike basket is determining its size and weight capacity. You want a basket that is large enough to hold your belongings without obstructing your riding experience. Consider the items you usually carry while biking and ensure the chosen basket can accommodate them comfortably.
When it comes to weight capacity, it is essential to select a basket that can handle the load you intend to carry. Overloading a basket can affect your bike’s balance and stability, making it potentially unsafe to ride. Refer to the manufacturer’s specifications and choose a basket with an appropriate weight capacity. It’s worth noting that weight capacity can vary depending on the basket type and material.
To summarize, when choosing the right bike basket, consider the basket type and material to ensure it fits your specific needs. Additionally, determine the size and weight capacity that suits your requirements. By carefully considering these factors, you can find the perfect bike basket that enhances your riding experience and allows you to carry your belongings safely and conveniently.
Remove The Front Wheel And Handlebars
Installing a bike basket is a great way to add functionality and style to your bike. Whether you need a place to carry groceries, a pet carrier, or just some extra storage space, a bike basket can come in handy. In this section, we will guide you through the process of removing the front wheel and handlebars as a necessary step for installing your bike basket.
Loosen and remove the front wheel using a wrench
To begin, you’ll need to remove the front wheel of your bicycle. This step may vary depending on the type of brakes your bike has. If you have rim brakes, you’ll need to release the brake tension by squeezing both brake levers together. For disc brakes, you won’t need to adjust anything related to the brakes. Once you’ve addressed the brakes, follow these steps:
- Place your bicycle on a flat surface and turn it upside down, resting it on the handlebars and seat.
- Locate the quick-release lever or bolt on the front wheel axle.
- Use a wrench to loosen the quick-release lever or bolts by turning them counterclockwise. It is usually a 15mm wrench, but check your bike’s specifications to be sure.
- Once the wheel is loose, carefully lift it out of the fork ends. Keep in mind that the wheel may be heavier than you expect, so be prepared to support its weight.
Detach the handlebars from the bike frame
After removing the front wheel, you’ll need to detach the handlebars from the bike frame. Follow these steps to complete this process:
- With the bike still resting upside down, locate the stem, which connects the handlebars to the bike’s frame.
- Use a 5mm Allen wrench to loosen the bolts or hex screws on the stem. Typically, there will be two bolts: one in front and one on the side. Loosen these bolts by turning them counterclockwise.
- Once the bolts are loosened enough, you should be able to lift the handlebars away from the bike frame. Be careful not to damage any cables or wires that may be attached to the handlebars.
With the front wheel and handlebars successfully removed, you can now move on to the next steps of installing your bike basket. Stay tuned for our next section on attaching the basket to your bike frame!
Keyword: How To Adjust Handlebars For Bike Basket Installation
Adjusting the handlebars of your bike is an important step when it comes to installing a bike basket. It ensures that you have a comfortable position while riding and allows you to easily access the basket. In this section, we will guide you through the process of adjusting the handlebars to a position that suits your needs.
Find the handlebar stem and loosen the bolts
The first step is to locate the handlebar stem, which is the part that connects the handlebars to the bike frame. It is usually located at the front of the bike, just above the front wheel. Once you have located the handlebar stem, you will need to loosen the bolts that hold it in place.
Note: It is important to ensure that your bike is stable and stationary before attempting to adjust the handlebars.
Using a suitable wrench or Allen key, loosen the bolts on the handlebar stem. These bolts are typically located on the top or side of the stem. By loosening these bolts, you will be able to rotate the handlebars and adjust their position.
Adjust the handlebars to a comfortable position for the bike basket installation
Now that the bolts are loosened, you can adjust the handlebars to a position that feels comfortable for you. This is an important step as it will ensure that you have easy access to the bike basket without straining your arms or wrists while riding.
Tip: It is recommended to have the handlebars positioned slightly higher than the seat for a more comfortable riding experience.
Once you have decided on the desired position, tighten the bolts on the handlebar stem using your wrench or Allen key. Make sure to tighten them sufficiently to ensure that the handlebars are secure.
Important: Before proceeding with the bike basket installation, it is crucial to test the handlebars to ensure that they are secure and have been adjusted to a comfortable position for you.
Now that you have successfully adjusted the handlebars, you are ready to move on to the next step of installing your bike basket. Whether you use it for carrying groceries, commuting essentials, or just adding a touch of style to your ride, the bike basket will now be easily accessible as you cruise along on your bike.
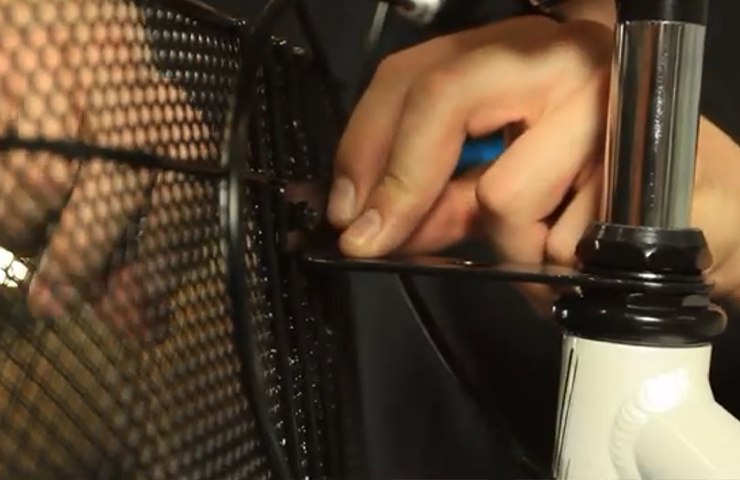
Attach The Bike Basket To The Handlebars
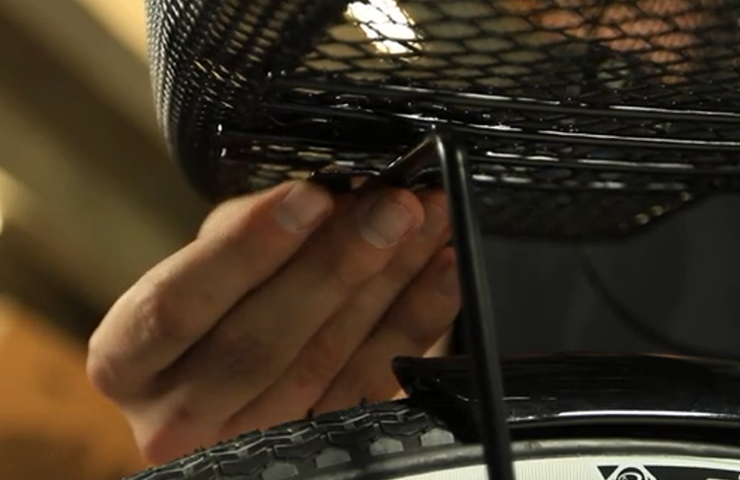
Installing a bike basket can significantly enhance your cycling experience and provide a convenient way to carry your belongings on your two-wheeled adventures. Once you have chosen the perfect bike basket, it is time to attach it securely to your handlebars. Follow these step-by-step instructions to ensure a proper and sturdy attachment.
Position the Bike Basket on the Handlebars
The first step in attaching the bike basket is to position it correctly on your handlebars. Place the basket in front of the handlebars and adjust it until it is centered and level. This will help you maintain balance while riding and prevent any interference with the functionality of your bike.
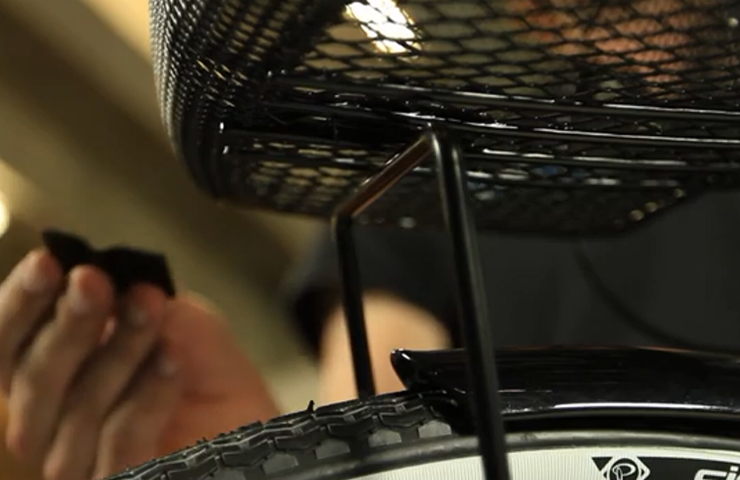
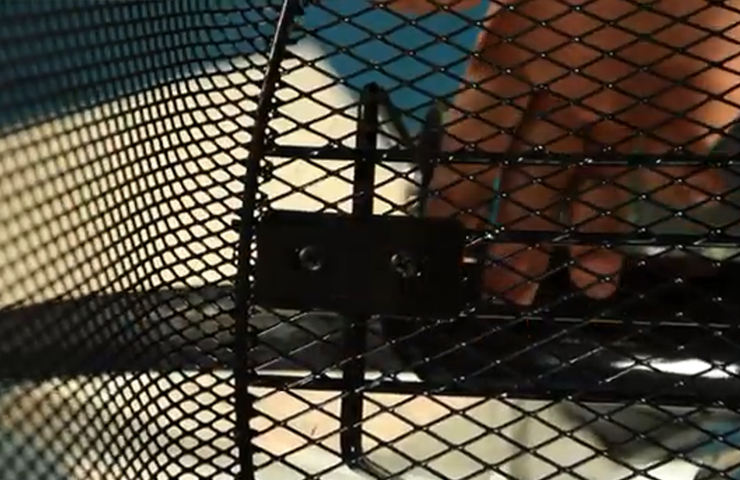
Fasten the Basket Securely Using Zip Ties or Mounting Brackets
Once you have positioned the bike basket, it’s time to secure it firmly to the handlebars. There are two common methods to accomplish this: using zip ties or mounting brackets. Here’s how to do each:
Using Zip Ties
- Take a zip tie and thread it through the openings of the basket and around the handlebars.
- Pull the zip tie tight, ensuring that the basket remains in the desired position.
- Trim the excess length of the zip tie, leaving a neat and tidy attachment.
- Repeat this process with additional zip ties, depending on the size and weight of your basket, for added stability.
Using Mounting Brackets
- Before installing the bike basket, attach the mounting brackets to the handlebars using the provided screws or clamps.
- Position the basket onto the mounting brackets and align the holes in the basket with the holes in the brackets.
- Insert the screws through the holes and tighten them with a screwdriver or Allen wrench, ensuring a secure fit.
- Double-check that the bike basket is tightly fastened to the mounting brackets before setting off on your ride.
Regardless of the method you choose, make sure to check the attachment periodically to ensure it remains secure. Loose attachments can compromise the stability of the bike basket and potentially lead to accidents while cycling. Additionally, avoid overloading the basket with heavy items to maintain balance and prevent strain on your handlebars.
Now that you know how to attach a bike basket to your handlebars, you can confidently hit the road knowing that your belongings are safely stowed away. Enjoy your rides with the convenience and style that a bike basket brings!
Keyword: How To Securely Mount A Bike Basket On Handlebars
When it comes to installing a bike basket, ensuring it is securely mounted on the handlebars is crucial to avoid any accidents or damage. By following these simple steps, you can ensure your bike basket is centered, level, and tightly fastened, providing a safe and sturdy ride.
Ensure the bike basket is centered and level on the handlebars
The first step in securely mounting a bike basket on your handlebars is to ensure it is centered and level. This is essential for maintaining balance and stability while riding. To do this:
- Position the bike basket on top of the handlebars, aligning it with the center of the bike.
- Check that the basket sits evenly on both sides of the handlebars.
- Make sure the basket is level and not tilted in any direction.
Tighten the fastening mechanism to prevent any movement
Once the bike basket is properly centered and leveled, the next step is to tighten the fastening mechanism to prevent any movement while riding. Follow these guidelines:
- Identify the fastening mechanism of your bike basket. It may be in the form of adjustable straps, brackets, or screws.
- Securely attach the fastening mechanism to the handlebars, ensuring a firm grip.
- Tighten the fastening mechanism using the appropriate tool, whether it be a screwdriver or an adjustable wrench.
- Double-check that the fastening mechanism is tight enough to prevent any wobbling or loosening during rides.
By following these steps, you can securely mount your bike basket on the handlebars, ensuring a safe and enjoyable riding experience. Remember to regularly inspect the mounting to make sure it remains secure over time. Now you’re ready to hit the road with your trusty bike basket!
Reinstall The Front Wheel And Test
Once you have successfully attached the bike basket to your bicycle, it’s time to reinstall the front wheel and make sure everything is working properly. Follow these simple steps to complete the process:
Align the front wheel with the bike fork
The first step is to align the front wheel with the bike fork. This ensures that the wheel is centered and balanced, which is crucial for a smooth and safe ride. To do this, follow these instructions:
- Hold the wheel between your legs and position it in front of the bike fork.
- Align the axle of the wheel with the dropouts on the bike fork.
- Ensure that the brake pads are properly aligned with the rim of the wheel.
Securely fasten the wheel back into place
After aligning the front wheel, it’s time to securely fasten it back into place. This will ensure that the wheel stays in position, even during bumpy rides. Follow these steps to securely fasten the wheel:
- Slide the axle into the dropouts of the bike fork.
- Tighten the quick release or axle nuts, making sure they are snug but not overly tight.
- Check the wheel to make sure it spins freely and doesn’t rub against the brake pads.
Once you have securely fastened the front wheel, it’s time to test whether everything is in working order.
Test the bike to ensure proper installation
To ensure that the bike basket installation was successful and the bike is safe to ride, perform a quick test:
- Spin the front wheel to check for any rubbing or wobbling.
- Squeeze the brakes to make sure they engage properly.
- Take a short ride to test the stability of the bike.
If everything feels and works as it should, then congratulations! You have successfully installed a bike basket and reinstalled the front wheel. Now you’re ready to enjoy your bike rides with the added convenience of a basket to carry your belongings.
Keyword: How To Reattach The Front Wheel After Installing A Bike Basket
Once you have successfully installed your bike basket, it’s time to reattach the front wheel and ensure that it is secure before hitting the road. Follow these steps to make sure your wheel is properly reattached:
Make sure the wheel is fully inserted into the fork dropouts
The fork dropouts are the U-shaped slots on each side of the front fork where the axle of the wheel fits into. Before tightening anything, ensure that the axle is fully inserted into these slots. This will help to maintain the stability and alignment of the front wheel while riding.
Tighten the axle nuts or quick-release lever to secure the wheel
Once the wheel is properly seated in the fork dropouts, it’s time to tighten the axle nuts or quick-release lever. This step is crucial for ensuring that the wheel stays in place while you’re riding and doesn’t come loose. Here’s how to do it:
- With a wrench, tighten the nuts on both sides of the axle in a clockwise direction. Make sure to keep the axle centered in the fork dropouts as you tighten.
- If your bike is equipped with a quick-release lever, flip it to the closed position and ensure that it is secure. You may need to push down on the lever and turn it to tighten it, depending on the specific design of your bike.
Remember, it’s important to check that the wheel is secured tightly before each ride to avoid any accidents or mishaps. Give the wheel a gentle tug after tightening to ensure there is no play or wobbling.
Now that you know how to reattach the front wheel after installing a bike basket, you can confidently enjoy your rides with all your essentials securely stowed away. Happy riding!
Frequently Asked Questions For How To Install A Bike Basket
Can You Attach A Basket To Any Bike?
Yes, you can attach a basket to any bike.
How Do You Install A Front Basket?
To install a front basket, follow these steps: 1. Position the basket on the handlebars. 2. Align the mounting brackets with the handlebars. 3. Tighten the brackets using a wrench or screwdriver. 4. Ensure the basket is secure by giving it a gentle tug.
5. Double-check the stability before using.
Should I Put A Basket On My Bike Front Or Back?
A basket on your bike is a personal choice, but it’s generally more practical to put it on the back. It’s easier to balance the weight and keeps your bike’s handling more stable. However, putting a basket on the front can give you easier access to items while riding.
Consider your preference and needs.
Can You Attach A Basket To A Folding Bike?
Yes, you can attach a basket to a folding bike.
Conclusion
To sum up, installing a bike basket is a simple process that can greatly enhance your cycling experience. By following the steps outlined in this guide, you can easily attach a basket to your bike and conveniently carry your belongings while on the go.
Remember to consider the weight capacity of the basket and ensure it is properly secured before setting off on your next ride. Happy biking!