To install a Cherry Bomb, first, gather the necessary tools and equipment. Second, locate the muffler and exhaust pipe, and remove any existing components as needed.
Installing a Cherry Bomb muffler on your vehicle can enhance its performance and give it a more aggressive sound. Whether you’re a car enthusiast or simply looking to upgrade your exhaust system, the process of installing a Cherry Bomb is relatively straightforward.
In this guide, we’ll provide step-by-step instructions to help you install a Cherry Bomb in your vehicle. We’ll cover everything from the tools and equipment needed to the removal of existing components and the actual installation process. By following these instructions, you’ll be able to enjoy the benefits of a Cherry Bomb muffler in no time. So, let’s get started!
Preparing For Installation
Before installing a Cherry Bomb, it is essential to prepare yourself and have all the necessary tools and materials ready.
Gathering the necessary tools and materials
To install a Cherry Bomb successfully, you’ll need the following tools and materials:
- Cherry Bomb exhaust kit
- Socket set
- Wrench
- Jack stands
- Rubber mallet
- New exhaust clamps
- Safety goggles
- Gloves
- Penetrating oil
- Wire brush
- Shop rag
Make sure to gather the above tools and materials before starting the installation process. It’s essential to have everything within reach to avoid any unnecessary delays.
Ensuring safety precautions are in place
Safety should always be a priority when working on any automobile-related task. Before you begin installing the Cherry Bomb, make sure the following safety precautions are in place:
- Park your vehicle on a flat surface and engage the parking brake.
- Put on safety goggles and gloves to protect yourself from any potential injuries.
- Always work in a well-ventilated area to avoid the accumulation of exhaust fumes.
- Use jack stands to secure the vehicle properly and prevent it from accidentally falling.
- Do not smoke or work near open flames to minimize the risk of fire and explosion.
By taking these safety precautions, you’ll ensure a secure and hazard-free installation process.
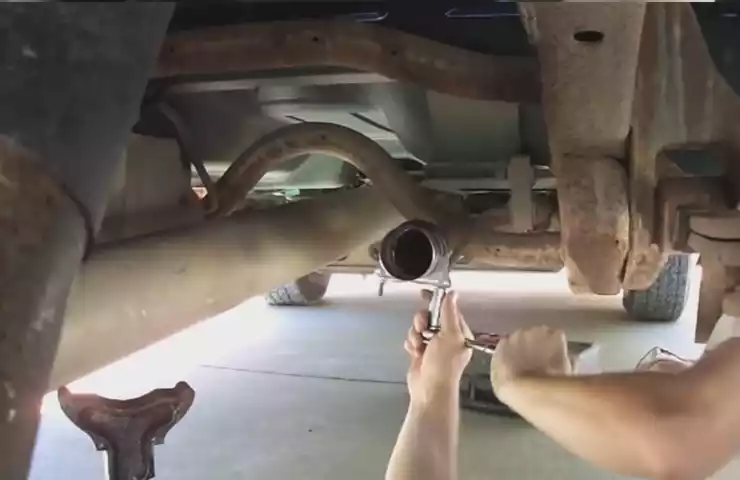
Removing The Old Exhaust System
Identifying and removing the old muffler and exhaust pipes
Before you can install your brand new Cherry Bomb exhaust system, you’ll need to remove the old one. Identifying and removing the old muffler and exhaust pipes is the first step in this process.
Start by locating the muffler, which is typically located in the middle or rear section of the vehicle. It is connected to the exhaust pipes, which are responsible for carrying the exhaust gases away from the engine and out of the vehicle.
Here’s a step-by-step guide to remove the old muffler and exhaust pipes:
- Make sure your vehicle is parked on a flat surface and the engine is cool to the touch.
- Put on protective gloves and eyewear to ensure your safety during the removal process.
- Locate the clamps or bolts that are securing the muffler and exhaust pipes to the vehicle’s undercarriage.
- Using a wrench or socket set, loosen and remove the clamps or bolts, carefully setting them aside.
- Gently slide the muffler and exhaust pipes off the hangers, which are usually attached to the vehicle’s frame.
- Inspect the old muffler and exhaust pipes for any signs of damage or wear. If necessary, take note of any replacements that may be required.
- Set the old muffler and exhaust pipes aside, making sure they are safely out of the way to avoid any accidents or injuries.
Detaching the hangers and brackets
Once you have successfully removed the old muffler and exhaust pipes, the next step is to detach the hangers and brackets. These components provide additional support and stability to the exhaust system.
Follow these steps to detach the hangers and brackets:
- Inspect the hangers and brackets to determine how they are attached to the vehicle’s frame. They are commonly secured with bolts or screws.
- Using a wrench or socket set, carefully loosen and remove the bolts or screws, taking care not to damage the hangers or brackets.
- Once the bolts or screws are removed, gently slide the hangers and brackets off the vehicle’s frame.
- Inspect the hangers and brackets for any signs of damage or wear. Replace them if necessary to ensure a secure installation of the new Cherry Bomb exhaust system.
- Set the old hangers and brackets aside, making sure they are safely out of the way.
By identifying and removing the old muffler and exhaust pipes, as well as detaching the hangers and brackets, you are now ready to install your new Cherry Bomb exhaust system. Stay tuned for the next section on how to properly install the new exhaust components to optimize your vehicle’s performance and unleash that signature Cherry Bomb sound.
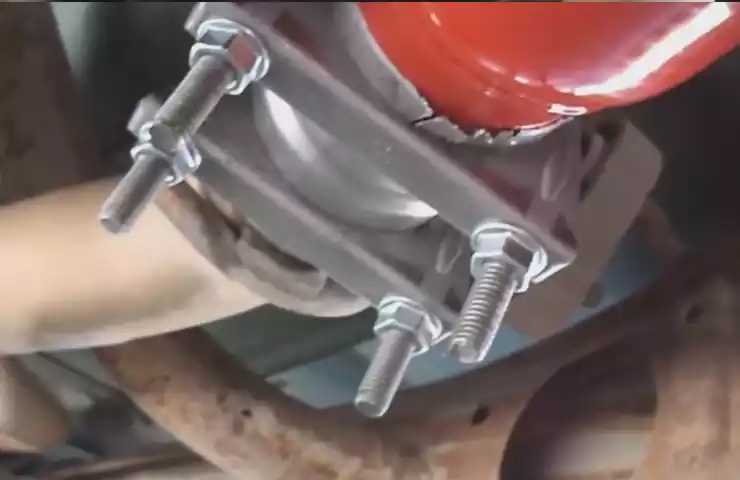
Fitting The Cherry Bomb
The fitting process of a Cherry Bomb muffler is a crucial step in ensuring optimal performance and sound. This section will guide you through the steps of selecting the appropriate muffler, positioning it correctly, and securing it with hangers and brackets. By following these instructions, you’ll be able to install your Cherry Bomb and get your vehicle sounding and performing just the way you want. Let’s get started!
Selecting the appropriate Cherry Bomb muffler
When it comes to selecting the right Cherry Bomb muffler for your vehicle, it’s essential to consider factors such as sound preference and compatibility with your exhaust system. Cherry Bomb offers a range of mufflers, each with its own unique sound characteristics. Whether you’re looking for a deep, aggressive rumble or a more mellow tone, Cherry Bomb has a muffler to suit your needs.
Moreover, it’s crucial to ensure that the selected Cherry Bomb muffler is compatible with your exhaust system. Check the inlet and outlet diameters of both the muffler and your exhaust pipes to ensure a proper fit. Matching the sizes will make the installation process much easier and will prevent any leaks or compatibility issues down the line.
Positioning and aligning the muffler with the exhaust system
To achieve optimal performance and sound, it’s important to properly position and align the Cherry Bomb muffler with your exhaust system. Start by identifying the ideal location for the muffler along the exhaust pipe. This positioning will depend on factors such as clearance, aesthetics, and personal preference.
Use a jack stand or similar support to hold the muffler in place temporarily while you finalize its position. Ensure that the muffler is aligned straight and level with the vehicle’s chassis or body lines. Take into account any bends or curves in the exhaust system, making sure that the muffler’s orientation matches the existing layout.
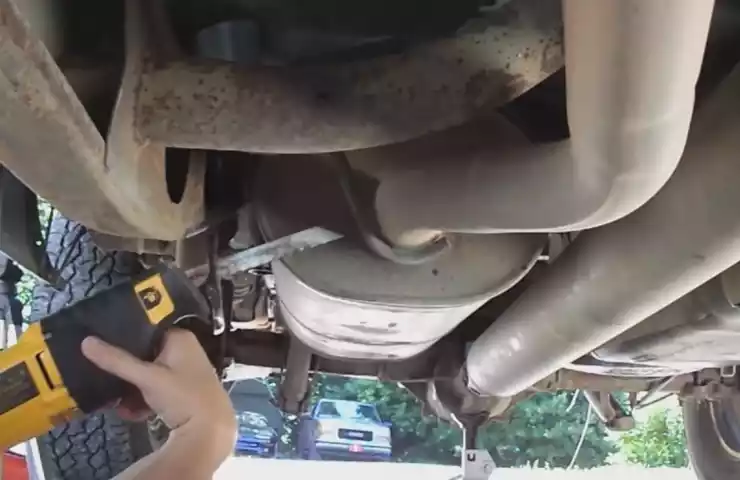
Attaching the hangers and brackets to secure the Cherry Bomb
Once you’ve positioned the Cherry Bomb muffler correctly, it’s time to secure it in place using hangers and brackets. These components will ensure the stability and longevity of your installation. Use the existing hanger locations on your vehicle’s chassis or exhaust system as a guide for placement.
Attach the hangers to the designated mounting points on the muffler, making sure they are tightened securely. If necessary, adjust their positioning to achieve a balanced and symmetrical appearance. Additionally, utilize any provided brackets to reinforce the muffler’s connection to the exhaust system.
Double-check all connections and ensure that everything is securely fastened. Give the muffler a gentle shake to confirm its stability. If any adjustments are needed, make them before finalizing the installation.
In conclusion, fitting a Cherry Bomb muffler involves selecting the right muffler for your vehicle, positioning it correctly along the exhaust system, and securing it with hangers and brackets. By following these steps, you’ll have a properly installed Cherry Bomb muffler that not only enhances the sound of your vehicle but also ensures optimal performance. Don’t hesitate to reach out to a professional if you’re unsure or need assistance with the installation process.
Connecting The Exhaust Pipes
One crucial step in installing a Cherry Bomb muffler is connecting the exhaust pipes. This process ensures the smooth flow of exhaust gases and helps achieve optimal performance and sound. In this section, we will discuss two important sub-steps: cutting and measuring the pipes, and fitting the pipes together using clamps or welding techniques.
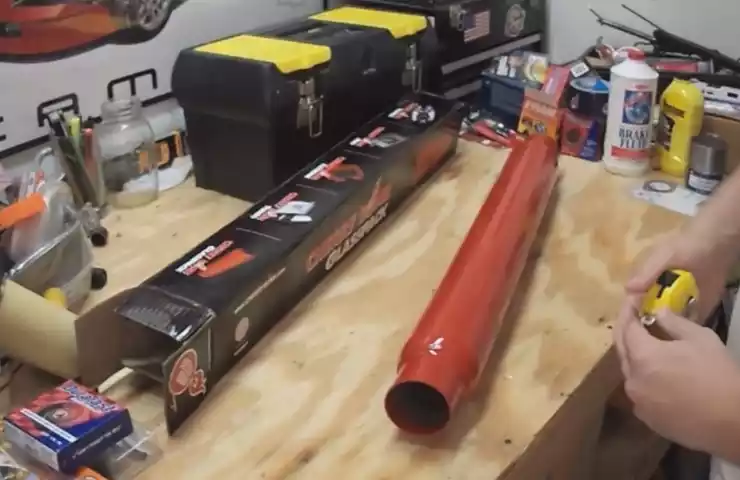
Cutting and Measuring the Pipes
Before connecting the exhaust pipes, it is essential to obtain accurate measurements and make precise cuts. Here’s how you can do it:
- Start by determining the desired length of the pipes based on your vehicle’s exhaust system and personal preferences.
- Using a measuring tape, mark the cutting points on the pipes, ensuring they are straight and aligned properly.
- When cutting the pipes, make sure to use the appropriate tools, such as a pipe cutter or a reciprocating saw equipped with a metal-cutting blade. This will provide clean and accurate cuts.
- Double-check the measurements and ensure all the pipes are cut to the same length for a seamless connection.
Fitting the Pipes Together Using Clamps or Welding Techniques
Once the pipes are properly cut and measured, the next step is to fit them together securely. There are two common methods for connecting the pipes: using clamps or welding techniques.
Using Clamps
Clamps offer a convenient and adjustable way to connect the exhaust pipes. Follow these steps to fit the pipes together using clamps:
- Slide the clamps onto the ends of the pipes, ensuring they are positioned correctly.
- Align the pipes and slide them together until they form a tight connection.
- Tighten the clamps using the appropriate tool, such as a wrench or a socket set, to secure the pipes in place.
- Ensure the clamps are tightened evenly to prevent any leaks or misalignment.
Welding Techniques
Welding is a permanent and strong method for connecting exhaust pipes. Here are the steps to follow when using welding techniques:
- Clean the ends of the pipes to remove any dirt, debris, or oxidation that may affect the quality of the weld.
- Position the pipes together, ensuring they are aligned correctly.
- Use a welding machine (such as a MIG welder) to bond the pipes together. Remember to follow proper welding procedures and safety precautions.
- Allow the welded area to cool down before moving onto the next steps of the installation process.
Both clamping and welding techniques can provide reliable connections between exhaust pipes. Choose the method that suits your preferences, skill level, and equipment availability.
With the exhaust pipes connected, you are one step closer to completing the Cherry Bomb muffler installation. In the next section, we will discuss the final steps of the process, ensuring everything is secure and ready for action.
Testing And Finishing Touches
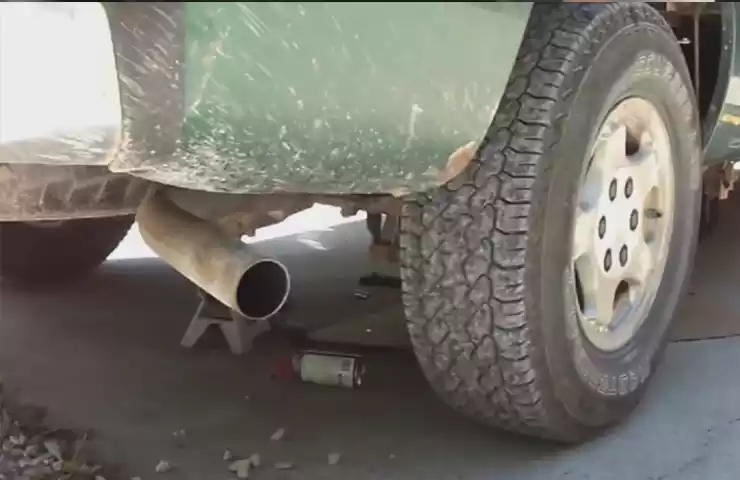
Once you have successfully installed your Cherry Bomb muffler, it’s important to thoroughly test everything and put the finishing touches on the installation. This will ensure that your new muffler is working effectively and that the overall appearance is professional. In this section, we will cover running the engine to check for leaks or any issues, adjusting the positioning of the Cherry Bomb muffler if necessary, and cleaning up and inspecting the installation for a professional finish.
Running the engine to check for leaks or any issues
After the installation is complete, it’s essential to run the engine and check for any leaks or potential issues. Start by thoroughly inspecting all the connections and joints to ensure they are tightly secured. Next, start the engine and listen carefully for any unusual noises or vibrations. Additionally, check for any signs of exhaust leakage, such as smoke or hissing sounds. It’s important to address any issues promptly to prevent further damage to your vehicle.
Adjusting the positioning of the Cherry Bomb muffler if necessary
In some cases, you may find that the positioning of the Cherry Bomb muffler needs adjustment to achieve the desired look or improve performance. To do this, first, loosen the clamps that hold the muffler in place. Then, carefully shift the muffler into the desired position. Once you have achieved the desired positioning, tighten the clamps securely. Take note of the manufacturer’s recommendations for proper muffler placement to ensure optimal performance and avoid any potential issues.
Cleaning up and inspecting the installation for a professional finish
With the installation complete, it’s time to give your work a final clean-up and inspection. Start by wiping down the muffler and piping with a clean cloth to remove any dirt or fingerprints. Next, visually inspect the entire installation for any loose bolts, misaligned components, or other imperfections. Tighten any loose fittings and make any necessary adjustments to ensure a professional finish. A clean and well-aligned installation not only looks better but also helps to prevent any potential rattling or unnecessary noise.
By following these steps, you can ensure that your Cherry Bomb muffler is installed correctly and working efficiently. Testing the engine for leaks or issues, adjusting the muffler placement if needed, and performing a thorough inspection will provide you with a reliable and professional installation. Now, you can enjoy the enhanced exhaust note and improved performance that the Cherry Bomb muffler has to offer.
Maintenance And Troubleshooting
Regular maintenance is essential to ensure the longevity and optimal performance of your Cherry Bomb exhaust system. By following these simple tips, you can avoid potential issues and enjoy the full benefits of your aftermarket exhaust:
Regular maintenance tips to prolong the lifespan of the Cherry Bomb
1. Clean the exhaust: Regularly cleaning the exterior of your Cherry Bomb exhaust not only keeps it looking pristine but also helps prevent rust and corrosion. Simply use a mild soap and water solution, and avoid abrasive cleaners that can damage the surface.
2. Inspect for leaks: Periodically check the connections and joints of your Cherry Bomb exhaust for any signs of leakage. Look for sooty residues or unusual sounds, which may indicate a loose or damaged component that needs to be tightened or replaced.
3. Check the hangers: Ensure that the exhaust hangers, which secure the system in place, are intact and in good condition. Replace any worn-out or damaged hangers to prevent unnecessary vibrations or potential hazards.
4. Keep it lubricated: Apply a high-temperature lubricant to the bolts and clamps of the exhaust system. This helps prevent seizing and makes it easier to remove components if necessary.
5. Listen for abnormal noises: Pay attention to any unusual sounds coming from your Cherry Bomb exhaust, such as rattles or excessive vibrations. These can be indicators of loose or damaged components that require immediate attention.
Troubleshooting common issues and how to fix them
If you encounter any issues with your Cherry Bomb exhaust, here are some common problems and their solutions:
Issue: Excessive smoke
Possible causes:
- Loose connections or leaks
- Worn-out or damaged gaskets
Solution:
- Inspect the connections and joints for leaks.
- Tighten any loose connections or replace damaged gaskets.
Issue: Unpleasant odor
Possible causes:
- Exhaust system contamination
- Excessive carbon buildup
Solution:
- Clean the exhaust system using a specialized cleaner designed for removing contaminants.
- Check for excessive carbon buildup and remove it using a wire brush or carbon cleaning solution.
Issue: Decreased performance or loud noises
Possible causes:
- Exhaust system damage
- Loose or missing components
Solution:
- Inspect the exhaust system for any visible damage or signs of wear.
- Check for loose or missing components and tighten or replace them accordingly.
By following these regular maintenance tips and troubleshooting techniques, you can keep your Cherry Bomb exhaust system in top condition, ensuring optimal performance and a satisfying driving experience. Remember, a well-maintained Cherry Bomb brings both style and substance to your vehicle!
Frequently Asked Questions For How To Install A Cherry Bomb
Can You Cherry Bomb Any Car?
No, you cannot cherry bomb any car.
Are Cherry Bomb Exhaust Worth It?
Cherry bomb exhausts offer improved performance and a louder, deeper exhaust sound. They are worth it for car enthusiasts who want a more distinctive and powerful engine sound. However, it’s important to consider local noise regulations and personal preferences before installing one.
What Does A Cherry Bomb Do To Your Exhaust?
A cherry bomb exhaust system increases the noise output of your vehicle’s exhaust. It enhances the sound by adding a deep, rumbling noise that some people find appealing.
Do Cherry Bombs Quiet Exhaust?
Yes, cherry bombs can quiet exhaust. They are mufflers specifically designed to reduce noise produced by the exhaust system.
Conclusion
Installing a Cherry Bomb is a simple and effective way to enhance the sound and performance of your vehicle’s exhaust system. By following the step-by-step guide provided in this blog post, you can easily complete the installation process yourself. Remember to prioritize safety and take your time to ensure a proper fit.
With a Cherry Bomb installed, you’ll experience a noticeable improvement in both the sound and power of your vehicle. So why wait? Get ready to enjoy the powerful roar of your new Cherry Bomb exhaust system!
