To install a torque converter in a 4L60E, first, remove the transmission pan and drain the fluid. Next, unbolt the torque converter from the flexplate and carefully slide it out of the transmission.
Installing a torque converter in a 4L60E transmission requires a few steps. The process begins by removing the transmission pan and draining the fluid. After that, the torque converter needs to be unbolted from the flexplate and carefully pulled out of the transmission.
It is crucial to handle the torque converter with care during this step. Following these initial steps will ensure a proper installation of the torque converter, allowing for optimal performance of the 4L60E transmission.
Identifying The Tools And Equipment Required For The Installation Process
Before you begin installing a torque converter in a 4L60E transmission, it is essential to gather all the necessary tools and equipment. Having the right tools on hand will not only make the installation process smoother but also help ensure the torque converter is installed correctly the first time. In this section, we will outline the list of essential tools and the additional equipment you may need to successfully complete the installation.
List of Essential Tools
- Socket wrench set
- Torque wrench
- Screwdrivers (both flathead and Phillips)
- Socket set
- Jack stands
- Hydraulic floor jack
- Oil drain pan
- Shop towels
- Safety goggles
- Latex gloves
Additional Equipment for a Successful Installation
In addition to the essential tools listed above, there are a few extra items that can help ensure a successful torque converter installation:
- Flex plate holding tool – This tool holds the flex plate in place while you remove or install the torque converter. It prevents the engine from rotating and helps avoid damage to the flex plate.
- Transmission jack – Although not essential, a transmission jack can make the installation process easier and safer. It allows you to lower and raise the transmission to align it with the engine, making the installation smoother.
- Threadlocker – Applying threadlocker to the torque converter bolts can help prevent them from loosening over time. This extra step ensures the torque converter stays securely in place.
Now that you have a clear understanding of the tools and equipment required for installing a torque converter in a 4L60E transmission, you can gather everything you need before starting the installation process. Having the right tools and equipment will make the process more efficient and reduce the chance of any complications. So, let’s get started with the installation!
Removing The Old Torque Converter
When it comes to installing a new torque converter in your 4L60E transmission, one of the first steps is to remove the old torque converter. This is an important part of the process and requires some careful steps to ensure it is done correctly. Follow the steps below to successfully remove the old torque converter:
Draining the Transmission Fluid
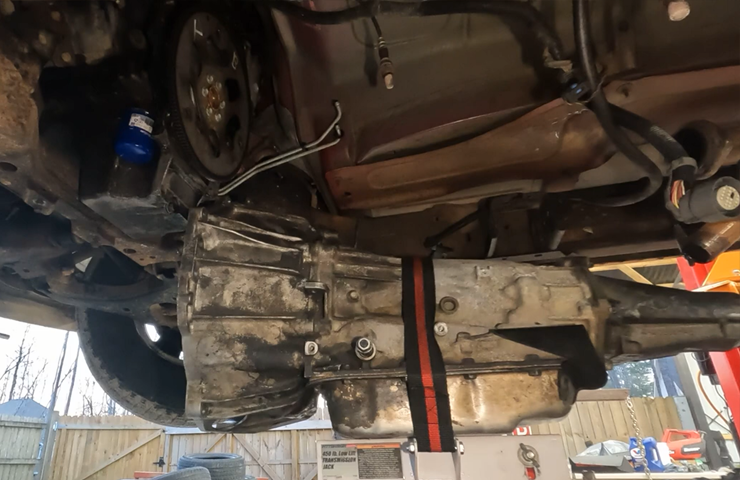
Before you can access the torque converter housing, you’ll need to drain the transmission fluid. This is an important step to prevent any spills or leaks during the removal process. To drain the transmission fluid, you can follow these steps:
- Start by locating the transmission fluid pan underneath your vehicle.
- Place a large catch pan underneath the pan to catch the fluid.
- Remove the pan’s bolts using a socket wrench, starting from one side and gradually working your way around.
- Once the bolts are removed, carefully lower the pan and allow the fluid to drain completely into the catch pan.
- Dispose of the old fluid properly according to local regulations.
Accessing the Torque Converter Housing
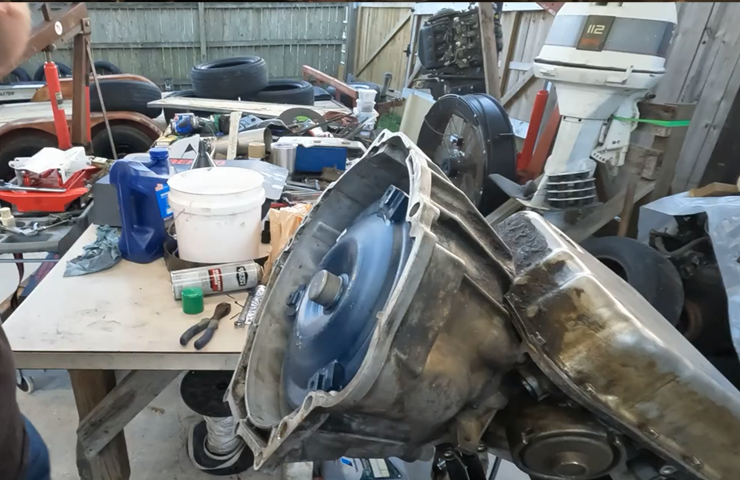
After draining the transmission fluid, you can now access the torque converter housing. This is where the old torque converter is located and needs to be removed. Follow these steps to access the housing:
- Locate the torque converter housing, which is usually located at the rear of the transmission.
- If necessary, remove any obstructions or components that may be blocking access to the torque converter housing.
- Once you have clear access to the housing, you can proceed with removing the bolts that secure the torque converter to the flexplate.
- Ensure that you keep track of the bolts you remove as you will need them when installing the new torque converter.
With the old torque converter removed, you are now ready to install a new one and complete the installation process. Stay tuned for our next blog post on how to install a new torque converter in a 4L60E transmission!
Installing The New Torque Converter
Welcome to the step-by-step guide on how to install a new torque converter in a 4L60E transmission. The torque converter is a crucial component of an automatic transmission, responsible for transferring power from the engine to the transmission. So, let’s dive into the process of installing the new torque converter, making sure that you position it correctly and align the splines and teeth with the transmission input shaft to ensure a smooth and successful installation.
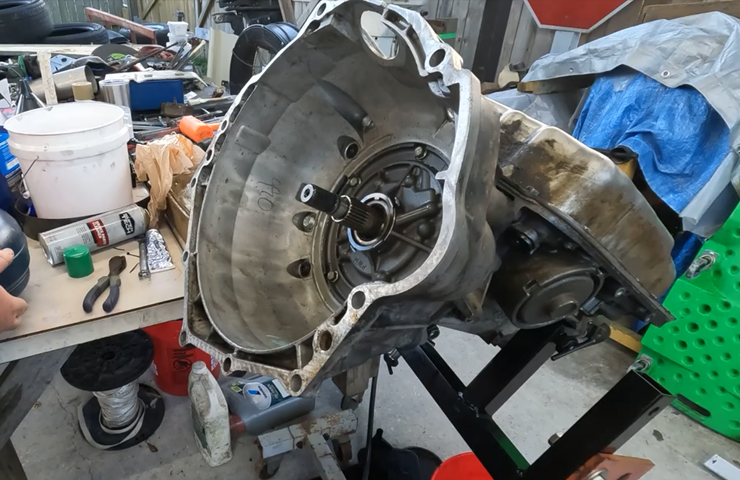
Positioning the New Torque Converter
To begin the installation, you need to ensure that the new torque converter is positioned correctly in the transmission. This involves aligning the splines and teeth of the torque converter with the corresponding splines and teeth on the transmission input shaft. Follow these steps to position the new torque converter accurately:
- Start by inspecting the torque converter and the transmission input shaft for any dirt, debris, or damage. Clean them thoroughly if necessary, ensuring a smooth mating surface.
- Hold the new torque converter by the front end, making sure to avoid touching the transmission input shaft or the internal components of the torque converter.
- Carefully align the splines on the torque converter with the splines on the input shaft, ensuring that they slide together smoothly.
- Gently push the torque converter towards the transmission until it seats against the flexplate or flywheel. Make sure it is fully engaged by rotating it slightly back and forth to verify proper alignment.
It is essential to be extremely cautious during this process to prevent any damage to the torque converter or the transmission input shaft.
Aligning the Splines and Teeth with the Transmission Input Shaft
Aligning the splines and teeth correctly is crucial for the torque converter and the transmission to function properly. Here’s how you can ensure a perfect alignment:
- Once the torque converter is positioned against the flywheel or flexplate, rotate it gently while pushing it toward the transmission. This movement helps align the teeth of the torque converter with the corresponding teeth on the transmission input shaft.
- Ensure that the torque converter rotates freely without any binding or resistance. If you encounter any difficulties or feel any unusual resistance, stop and double-check the alignment.
- Continue rotating the torque converter while gently pushing it until it seats fully against the transmission.
Remember, a proper alignment between the splines and teeth is vital for the torque converter to transmit power effectively. Incorrect alignment can result in transmission issues, such as slipping or poor performance.
By following these steps, you can successfully install a new torque converter in a 4L60E transmission. Positioning the torque converter accurately and aligning the splines and teeth correctly will ensure a smooth and trouble-free installation, ultimately leading to optimal transmission performance. Now that you have completed this crucial step, you are one step closer to enjoying a reliable and efficient transmission system!
Securing And Reassembling The Transmission Components
Reinstalling the transmission pan
Once you have successfully removed and replaced the torque converter in your 4L60E transmission, it’s time to secure and reassemble the remaining components. The first step in this process is reinstalling the transmission pan. The transmission pan is responsible for holding the transmission fluid and protecting the internal components of the transmission. Follow these steps to ensure a proper reinstallation:
- Start by cleaning the transmission pan and the mating surface on the transmission housing. This will remove any dirt or debris that might interfere with a tight seal.
- Apply a thin layer of transmission sealant to the gasket mating surface on the transmission pan. This will help create a tight seal and prevent leaks.
- Position the transmission pan underneath the transmission and carefully align it with the bolt holes on the transmission housing.
- Insert the transmission pan bolts and hand-tighten them. Make sure to start with the center bolts and work your way outwards in a crisscross pattern. This will ensure even pressure distribution and a tight seal.
- Using a torque wrench, tighten the transmission pan bolts to the manufacturer’s recommended torque specification. Be careful not to overtighten the bolts, as this can damage the transmission housing or strip the bolt threads.
- Double-check that all the transmission pan bolts are tightened securely and evenly. A loose transmission pan can lead to fluid leaks and transmission damage.
- Once the transmission pan is securely installed, you can move on to the next step in the reassembly process.
Tightening the torque converter bolts
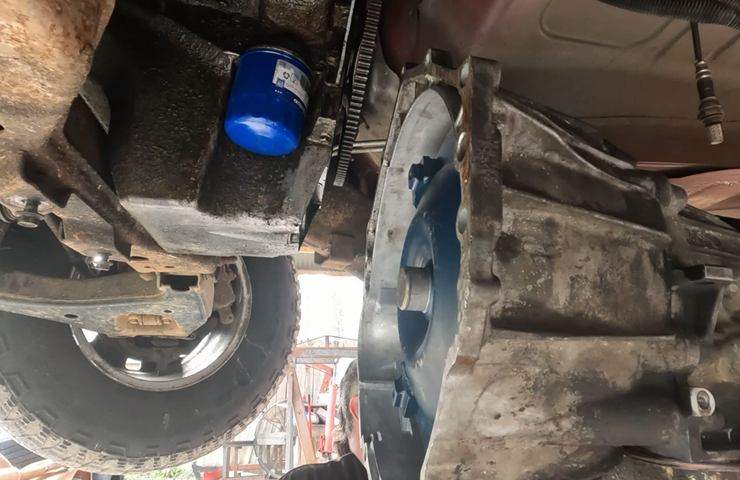
Now that the transmission pan is back in place, it’s time to tighten the torque converter bolts. These bolts are responsible for securing the torque converter to the flywheel and ensuring proper torque transfer between the engine and transmission. Follow these steps to tighten the torque converter bolts effectively:
- Locate the torque converter bolts on the flexplate or flywheel. These bolts can typically be accessed through a small access hole in the transmission bellhousing.
- Carefully rotate the engine using a breaker bar and socket to expose each torque converter bolt through the access hole.
- Tighten each torque converter bolt in a crisscross pattern using a torque wrench and the manufacturer’s recommended torque specification. This will ensure even pressure distribution and prevent the torque converter from shifting or coming loose.
- Double-check that all the torque converter bolts are tightened to the proper torque specification and are secure. Loose torque converter bolts can result in transmission slippage and potential damage to the transmission.
- Once the torque converter bolts are tightened, you have successfully secured and reassembled the transmission components in your 4L60E transmission.
Verifying Proper Installation
Once you have successfully installed a torque converter in the 4L60E transmission, it is crucial to verify its proper installation. This step ensures that everything is in order and functioning as expected. It consists of checking for any fluid leaks and ensuring smooth operation during the test drive.
Checking for any fluid leaks
It is important to check for any fluid leaks after installing a torque converter in a 4L60E transmission. Even a small leak can lead to major problems later on. Follow these steps to verify if there are any leaks:
- Start by inspecting the torque converter area for any visible signs of leakage.
- Check the transmission fluid level using the dipstick. Ensure that it is within the recommended range.
- Observe the ground underneath the vehicle for any fluid drips or puddles.
- If you notice any fluid leaks, identify the source. It could be a faulty seal or gasket that needs to be replaced.
- Consult with a professional if you are unsure about the cause or need assistance in fixing the leak.
Ensuring smooth operation during test drive
After confirming that there are no fluid leaks, it’s time to test the torque converter’s operation during a test drive. This will help ensure that everything is functioning smoothly. Follow these steps for a successful test drive:
- Start the vehicle and let it warm up for a few minutes.
- Engage the transmission in drive and slowly accelerate.
- Pay attention to any unusual noises, vibrations, or hesitation during gear shifts.
- Shift through each gear and assess their engagement and smoothness.
- Test the torque converter under different driving conditions, such as accelerating from a stop or cruising at a steady speed.
- If you notice any issues, such as rough shifting or delayed engagement, it may indicate a problem with the torque converter installation.
- Consult with a professional to diagnose and resolve any abnormalities you encounter during the test drive.
By diligently checking for fluid leaks and ensuring smooth operation during the test drive, you can have confidence in the proper installation of the torque converter in your 4L60E transmission. Taking these steps will help you avoid potential problems and maximize the performance and longevity of your vehicle.
Troubleshooting Common Issues
When installing a torque converter in a 4L60E transmission, it’s not uncommon to encounter a few issues along the way. However, by being aware of these potential problems and knowing the steps to address them, you can ensure a smooth and successful installation. In this section, we will discuss the most common issues that you may come across during the torque converter installation process, as well as the steps to troubleshoot and resolve them.
Identifying Potential Problems or Complications
Before we delve into troubleshooting common issues, it is important to be able to identify any potential problems or complications that may arise during the installation of a torque converter in a 4L60E transmission. By being proactive and attentive, you can address these issues early on, minimizing any negative impact on the overall installation process. Here are some common problems to watch out for:
- Improper Alignment: One of the most common issues during torque converter installation is an improper alignment between the transmission input shaft and the torque converter. This can cause difficulty in inserting the converter all the way into the transmission, resulting in a clunking noise or vibration when the vehicle is in gear.
- Damaged O-Rings: Another problem that may arise is the damage to O-rings. These rubber seals are responsible for preventing fluid leakage between the torque converter housing and the transmission. If these O-rings become worn or damaged, they can cause fluid leaks, leading to further complications.
- Insufficient Fluid Level: A low transmission fluid level can also cause issues during the installation process. It is crucial to ensure that the transmission is filled with the correct amount of fluid to prevent damage to internal components and ensure proper functionality.
Steps to Address Common Issues During Installation
Now that we have identified some potential problems or complications, let’s discuss the steps to address these issues and ensure a successful torque converter installation:
Improper Alignment:
If you notice an improper alignment between the transmission input shaft and the torque converter, follow these steps:
- Loosen the torque converter bolts or nuts.
- Rotate the torque converter gently until you feel it align with the splines on the transmission input shaft.
- Push the torque converter forward, ensuring it is fully engaged with the transmission input shaft.
- Tighten the torque converter bolts or nuts gradually and in a star pattern to ensure even pressure.
Damaged O-Rings:
If you suspect that the O-rings are damaged, follow these steps to address the issue:
- Remove the torque converter from the transmission.
- Inspect the O-rings for any signs of wear or damage.
- If necessary, replace the damaged O-rings with new ones.
- Lubricate the new O-rings with transmission fluid before reinstallation.
- Reinstall the torque converter, ensuring a proper alignment and engagement.
Insufficient Fluid Level:
If you determine that the fluid level is low, take these steps to address the issue:
- Check the transmission fluid level using the dipstick.
- If the fluid level is below the recommended range, add the appropriate transmission fluid until it reaches the correct level.
- Check for any leaks or other signs of fluid loss that may require further investigation and repair.
By following these troubleshooting steps for common issues during torque converter installation in a 4L60E transmission, you can ensure a smooth and successful installation process.
Frequently Asked Questions On How To Install A Torque Converter In A 4L60E
Do You Have To Fill A Torque Converter Before Installing 4L60E?
Yes, it is necessary to fill the torque converter before installing the 4L60E. Properly filling the torque converter ensures proper lubrication and reduces the risk of damage to the transmission during installation and operation.
Do You Fill A Torque Converter Before Installing?
Yes, it is necessary to fill a torque converter before installing it.
How Do You Line Up A Torque Converter?
To line up a torque converter, follow these steps: 1. Remove the flywheel or flexplate cover. 2. Rotate the engine manually until the converter’s pilot aligns with the crankshaft. 3. Slowly push the converter into the transmission until it engages with a click.
4. Line up the bolt holes of the converter with the flexplate/flywheel. 5. Secure the converter by tightening the bolts evenly.
What Is The Torque For Transmission To Engine Bolts On A 4L60E?
The torque for transmission to engine bolts on a 4L60E is typically around 45-50 ft-lbs.
Conclusion
To sum up, installing a torque converter in a 4L60E transmission can greatly enhance its performance and improve overall vehicle functionality. By following the step-by-step guidelines provided in this post, anyone can successfully navigate through the installation process. Whether you’re a seasoned mechanic or a DIY enthusiast, with the right tools and knowledge, you can complete this task with ease.
So don’t hesitate, give it a try and experience the benefits of a properly installed torque converter in your 4L60E.