To install a muffler without welding, you can use exhaust clamps, exhaust tape, or muffler hangers for a secure fit and easy installation. These methods do not require professional welding and can be done at home with basic tools.
Whether you want to replace a damaged muffler or upgrade to a performance muffler, these alternatives can save you time and money while ensuring a proper installation. Explore the following steps to learn how to install a muffler without welding and enjoy a quieter and more efficient exhaust system for your vehicle.
Why Choose A Weld-Free Installation Method
When it comes to installing a muffler, the traditional method is to use welding. However, not everyone has access to welding equipment or the skills to weld. That’s where a weld-free installation method comes in. Choosing a weld-free installation has several benefits that make it a popular choice for many vehicle owners.
Benefits of a weld-free installation
One of the main benefits of opting for a weld-free installation method is that it helps you avoid potential damage to your vehicle. Welding involves intense heat, which can put stress on the surrounding parts of your vehicle. This can lead to warping or even cracking, resulting in costly repairs.
By choosing a weld-free method, you eliminate the risk of causing damage to your vehicle. This can provide you with peace of mind knowing that you won’t have to deal with any unexpected issues or additional expenses.
Another advantage of a weld-free installation is its convenience. Welding requires specialized equipment and skills, making it a time-consuming and tedious process. On the other hand, a weld-free installation method is often quicker and easier to perform.
With simple tools and basic mechanical knowledge, you can get the job done efficiently without the need for welding. This can save you both time and effort, allowing you to enjoy the benefits of a new muffler sooner.
Furthermore, a weld-free installation method offers greater flexibility. Welding the muffler to your vehicle makes it a permanent attachment, which may not always align with your needs. If you anticipate wanting to make changes or upgrades to your exhaust system in the future, a weld-free installation provides the flexibility to do so.
Whether you need to replace the muffler, modify the exhaust system, or switch to a different design or performance muffler, a weld-free installation allows for easy removal and replacement. This versatility can be incredibly valuable, especially if you like to experiment with different exhaust configurations.
In conclusion, choosing a weld-free installation method for your muffler offers several benefits. By avoiding potential damage to your vehicle, ensuring convenience, and providing flexibility, a weld-free installation proves to be a great alternative to traditional welding. Whether you lack the necessary equipment or simply prefer an easier and more versatile approach, opting for a weld-free installation is a decision that can benefit both your vehicle and your overall experience.
Tools And Materials You’Ll Need
Installing a muffler without welding is a convenient and cost-effective way to upgrade your vehicle’s exhaust system. This method allows you to achieve the desired sound and performance without the need for specialized welding equipment. To successfully install a muffler without welding, you will need to have the following tools and materials ready:
List of required tools
Preparing the necessary tools beforehand will make the installation process smoother. Here is a list of tools you’ll need:
- Socket wrench set
- Adjustable wrench
- Jack stands
- Jack
- Exhaust hangers
- Exhaust clamps
- Hacksaw or reciprocating saw
- Penetrating oil
- Measuring tape
- Protective gloves
- Eye protection
Types of mufflers compatible with a weld-free installation
When it comes to choosing a muffler for a weld-free installation, there are several options available. These mufflers are designed to be easily installed using clamps or hangers, eliminating the need for welding. Here are the types of mufflers compatible with a weld-free installation:
| Muffler Type | Description |
|---|---|
| Axle-Back | This type of muffler replaces the rear portion of the exhaust system, starting from the rear axle. It offers a noticeable improvement in sound and performance. |
| Cat-Back | A cat-back muffler replaces the entire exhaust system from the catalytic converter to the rear of the vehicle. It provides enhanced horsepower and torque gains. |
| Universal | Universal mufflers are designed to fit a wide range of vehicles. They offer flexibility in terms of installation and can be easily modified to fit your specific vehicle’s exhaust system. |
By choosing the right type of muffler compatible with a weld-free installation, you can achieve the desired results while avoiding the need for welding.
Now that you know the tools and types of mufflers required, you’re ready to begin the installation process. Follow the step-by-step instructions in our next section to successfully install a muffler without welding.
Preparing Your Vehicle For Installation
When it comes to installing a muffler without welding, it’s crucial to properly prepare your vehicle beforehand to ensure a smooth and successful installation. This preparation involves safely lifting and securing your vehicle, as well as removing the old muffler. By following these steps, you’ll be one step closer to enjoying a newly installed muffler and a quieter ride!
Safely Lifting and Securing Your Vehicle
Before you begin the installation process, it’s important to prioritize safety. Safely lifting and securing your vehicle will provide a stable workspace, allowing you to work without any risk of accidents or injuries. Here’s how you can do it in a few simple steps:
- Find a level and solid surface to park your vehicle.
- Engage the parking brake to prevent any accidental movement.
- If you’re using ramps, carefully drive your vehicle up the ramps until it is securely positioned.
- If you’re using a jack and jack stands, place the jack in the designated lift points and raise the vehicle until the tires are off the ground.
- Securely place the jack stands under the appropriate spots on the vehicle’s frame or support points.
- Gently lower the vehicle onto the jack stands, ensuring it is stable and secure before proceeding.
Removing the Old Muffler
Now that your vehicle is safely lifted and secured, it’s time to remove the old muffler. Follow these steps to ensure a hassle-free removal process:
- Locate the old muffler, typically positioned towards the rear of your vehicle.
- Inspect the muffler and its connecting components to familiarize yourself with the layout.
- Using a socket wrench or suitable tools, carefully disconnect the clamps or fasteners that secure the muffler to the exhaust pipe.
- If applicable, detach any brackets or hangers that may be supporting the muffler.
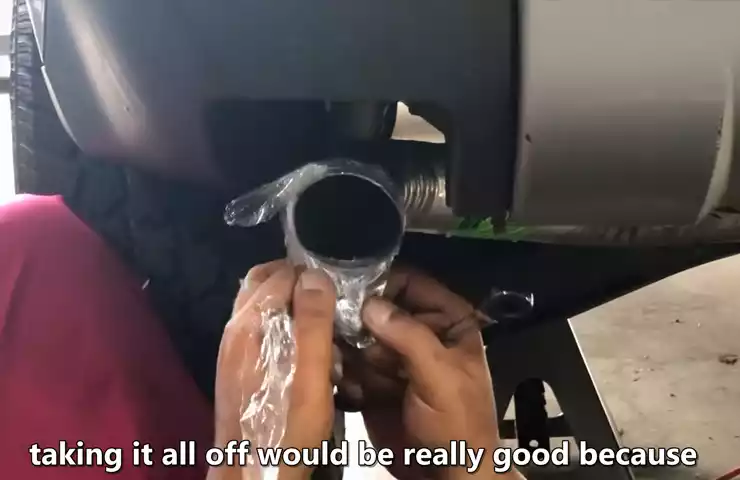
- Gently slide the old muffler out of the exhaust pipe, taking care not to damage any surrounding components or structures.
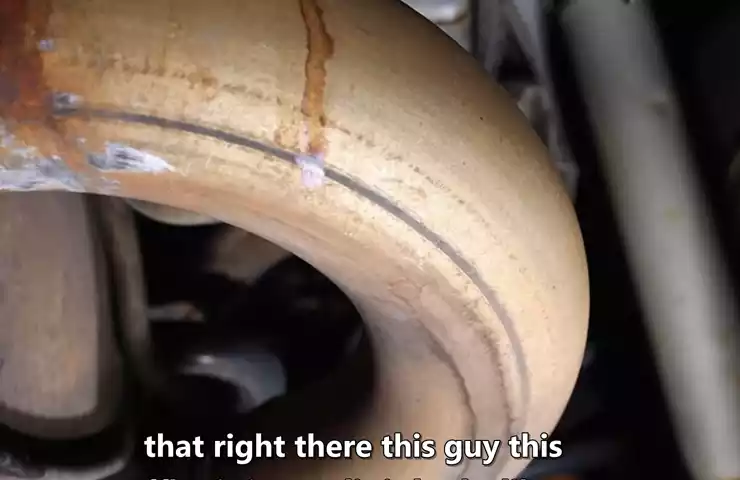
- Once the old muffler is removed, inspect the exhaust pipe for any signs of damage or wear that may require attention before installing the new muffler.
With the old muffler successfully removed, you’re now ready to install the new muffler without welding. Stay tuned for our next blog post, where we will guide you through the step-by-step process of installing a muffler without welding.
Choosing The Right Clamping System
When it comes to installing a muffler without welding, choosing the right clamping system is crucial for successful installation. With the right clamping system, you can secure the muffler firmly in place without the need for any welding equipment or expertise. In this section, we will explore different types of clamping systems available and important factors to consider when selecting one.
Different types of clamping systems available
There are several types of clamping systems available in the market that can be used to install a muffler without welding. Understanding the differences between these options will help you make an informed decision:
| Type of Clamping System | Description |
|---|---|
| T-Bolt Clamp | A T-bolt clamp is a popular option that provides a secure and tight fit. It consists of a band with a bolt and nut for easy installation and adjustment. |
| U-Bolt Clamp | U-bolt clamps are commonly used for exhaust systems. These clamps have a U-shaped bolt that wraps around the muffler and a plate on top that is secured with nuts. |
| Band Clamp | Band clamps feature a metal band that wraps around the muffler and is tightened using a screw or bolt. These clamps are known for their ease of installation and durability. |
| V-Band Clamp | V-band clamps consist of two flanges with a V-shaped groove, and a clamp that holds them together. These clamps provide a secure connection and are commonly used in high-performance applications. |
Factors to consider when selecting a clamping system
When selecting a clamping system for installing a muffler without welding, there are a few important factors to consider to ensure a secure and reliable installation:
- Compatibility: Ensure that the clamping system you choose is compatible with your muffler and exhaust system. Pay attention to the size, shape, and material requirements.
- Tightness: Look for a clamping system that provides a tight and secure fit. This will help prevent any leaks or unnecessary movement of the muffler.
- Durability: Consider the durability of the clamping system. It should be able to withstand high temperatures and resist corrosion to ensure a long-lasting installation.
- Ease of installation: Choose a clamping system that is easy to install, as this will save you time and effort. Look for options that come with clear instructions and require minimal tools.
- Budget: Lastly, consider your budget when selecting a clamping system. There are various options available at different price points, so choose one that fits within your budget without compromising on quality.
By considering these factors and choosing the right clamping system for your muffler installation, you can achieve a secure and reliable result without the need for welding.
Measuring And Aligning The Muffler
Installing a muffler without welding can be a convenient and cost-effective way to enhance your vehicle’s performance and sound. However, before diving into the installation process, it is crucial to measure and align the muffler correctly. This ensures optimal fitment and prevents any potential issues down the road. In this section, we will discuss how to determine the correct position for the new muffler and align it with the exhaust pipes.
Determining the correct position for the new muffler
Before starting the installation, it’s important to find the correct position for the new muffler. Here are some steps to help you with this process:
- Start by measuring the available space under your vehicle. This will give you an idea of where the muffler can fit without interfering with other components.
- Next, consider the muffler’s dimensions and shape. Measure the length, width, and height of the muffler, and compare it to the available space. Make sure to account for any bends or curves in the exhaust system as well.
- Based on the measurements, determine the most suitable location for the muffler. It should ideally be positioned in such a way that it doesn’t obstruct any other parts and allows for easy access during maintenance.
- Take into consideration the muffler’s orientation. Some mufflers have inlet and outlet ports, which need to be aligned with the exhaust pipes. Ensure that the chosen location allows for proper alignment.
Aligning the muffler with the exhaust pipes
Once you’ve determined the correct position for the new muffler, the next step is to align it with the exhaust pipes. Proper alignment is crucial for optimal exhaust flow and performance. Here’s how you can ensure a perfect fit:
- Inspect the exhaust pipes to identify any bends or curves. These can affect how the muffler aligns with the pipes, so it’s essential to take note of them.
- Carefully position the muffler, ensuring that the inlet and outlet ports align correctly with the exhaust pipes. Rotate the muffler if necessary to achieve a snug fit.
- Use exhaust clamps or hangers to secure the muffler in place. These will provide stability and prevent any unwanted movement or rattling.
- Double-check the alignment after securing the muffler. Ensure that it is centered properly and doesn’t touch any other components or the vehicle’s body.
By measuring and aligning the muffler correctly, you can ensure a hassle-free installation process and enjoy the benefits of a well-fitted exhaust system. This attention to detail will not only enhance the performance and sound of your vehicle but also extend the longevity of your newly installed muffler.
Attaching The Clamping System
Step-by-step instructions on installing the chosen clamping system
Installing a muffler without welding is an efficient way to modify your vehicle’s exhaust system. Attaching the clamping system is an essential step in this process that ensures a secure and reliable connection. In this section, we will provide you with easy-to-follow instructions on how to install the chosen clamping system for your muffler installation project.
- Begin by selecting a clamping system that best suits your muffler and exhaust pipe. There are various types of clamps available, such as band clamps, U-bolt clamps, and exhaust sleeve clamps. Choose the one that matches the dimensions and design of your muffler.
- Make sure you have the necessary tools for the installation, including a torque wrench, socket set, and pliers.
- Position the clamping system over the joint where the muffler and exhaust pipe meet. Ensure that the clamping system is centered and aligned correctly.
- Tighten the clamping system by following the manufacturer’s instructions. Typically, this involves tightening the bolts or screws that secure the clamping system in place. Be sure not to overtighten, as it can damage the clamping system or exhaust components.
- After tightening the clamping system, double-check the alignment and fitment of the muffler. Ensure that it is securely attached to the exhaust pipe and there are no gaps or leaks.
Proper tightening techniques
To ensure a secure and reliable connection, proper tightening techniques should be applied when attaching the clamping system. Here are some guidelines to follow:
- Use a torque wrench to tighten the bolts or screws according to the manufacturer’s specifications. This will help prevent overtightening or inadequate tightening, both of which can lead to issues.
- Start by tightening the bolts or screws evenly, gradually moving in a crisscross pattern. This technique helps distribute the pressure and ensures a balanced connection.
- Pay attention to the torque settings recommended by the manufacturer. Over-torquing can cause damage, while under-torquing can result in loose connections and potential exhaust leaks.
- Check for any signs of movement or play in the clamping system after tightening. If the clamping system is loose, re-tighten it until it is secure.
By following these step-by-step instructions on installing the chosen clamping system, and applying proper tightening techniques, you can achieve a successful and reliable muffler installation without the need for welding. Remember to choose the clamping system that fits your muffler, use the appropriate tools, and ensure a secure connection. Enjoy the enhanced performance and sound of your vehicle’s exhaust system!
Ensuring Proper Sealing And Reducing Noise
When installing a muffler without welding, it is essential to pay attention to two crucial factors: proper sealing and reducing noise. In this section, we will discuss the methods to achieve both, ensuring a successful installation process.
Using exhaust sealant to prevent leaks
One of the key aspects of securing your muffler without welding is to prevent any leaks that may occur. To achieve this, be sure to utilize an exhaust sealant. This specially formulated sealant is designed to create a strong and durable bond between the muffler and the exhaust pipe, eliminating any potential escape points for gases.
To properly apply the exhaust sealant, follow these steps:
- Clean the surfaces: Ensure that both the muffler and the exhaust pipe are clean and free of debris. This will provide a clean slate for the sealant to adhere to.
- Apply sealant: Using a brush or your gloved fingertips, apply a generous amount of sealant to both the mating surfaces.
- Align and secure: Carefully align the muffler with the exhaust pipe and firmly press the two together. Ensure that the sealant is evenly distributed and forms a tight seal.
- Allow to cure: Follow the manufacturer’s instructions for the recommended curing time of the sealant. This will vary depending on the brand and type of sealant used.
By using exhaust sealant, you can effectively seal any gaps or joints, providing a leak-free installation and preventing the escape of gases.
Tips for reducing exhaust noise
In addition to ensuring proper sealing, it is also important to address the issue of exhaust noise. While some noise is inevitable, there are several tips you can implement to minimize it:
- Choose a muffler with internal baffles: Opt for a muffler that includes internal baffles or soundproofing materials. These components help to muffle and reduce the noise generated by the exhaust gases.
- Install a resonator: A resonator is an additional component that can be added to the exhaust system to further reduce noise. It works by canceling out specific frequencies and harmonics, resulting in a quieter exhaust sound.
- Use an acoustic wrap: Wrapping the exhaust pipes with an acoustic wrap can help to absorb and dampen noise vibrations. This can be particularly effective in reducing high-pitched or metallic sounds.
- Regular maintenance: Ensure that your muffler and exhaust system are regularly inspected and maintained. Loose or damaged components can contribute to increased noise levels.
By implementing these tips, you can effectively reduce the noise generated by your muffler, creating a quieter driving experience.
Test And Adjust
Checking for any leaks or loose connections
After installing a muffler without welding, it is essential to test it thoroughly for any potential leaks or loose connections. These issues can have a significant impact on the performance and effectiveness of the muffler.
Start by visually inspecting the entire system, paying close attention to the joints, clamps, and connections. Look for any signs of wear, damage, or gaps that could lead to leaks. It’s best to perform this inspection while the vehicle is cool to avoid any accidental burns.
Next, it’s time to put the muffler to the test. Start the vehicle and listen carefully for any unusual sounds or hissing noises that could indicate the presence of leaks. If you suspect a leak, you can use a mixture of soapy water and spray it onto the joints and connections. If you notice any bubbles forming, it is a clear sign of a leak that needs to be addressed immediately.
Making necessary adjustments for optimal performance
Once you have completed the leak check and identified any issues, it’s time to make the necessary adjustments to ensure optimal performance from your muffler installation.
First, start by tightening any loose connections or clamps that may be causing the leaks. Use a wrench or a pair of pliers to ensure a secure and tight fit, taking care not to overtighten and cause damage to the connections.
Next, consider adjusting the position of the muffler for better alignment and clearance. This step is especially important if you noticed any contact between the muffler and other vehicle components during the visual inspection. Use the appropriate tools to adjust the angle or height of the muffler until it sits in the desired position without interfering with any other parts of the vehicle.
Finally, it is essential to test drive the vehicle once the adjustments have been made. Pay attention to the performance, sound, and overall driving experience. If you still notice any abnormal sounds or vibrations, it may be necessary to recheck the connections and make further adjustments as needed.
Remember, proper testing and adjustment are key to ensuring your muffler installation without welding is not only effective but also safe and long-lasting. By following these steps and addressing any issues that arise, you can enjoy the benefits of a well-functioning muffler without the need for welding.
Maintenance And Troubleshooting Tips
Installing a muffler without welding offers a cost-effective and convenient solution for vehicle owners. However, it’s important to ensure proper maintenance and troubleshoot any issues that may arise. This section will provide you with insights on regular inspection and cleaning, as well as common problems and their troubleshooting techniques.
Regular Inspection and Cleaning
Regular inspection and cleaning of your muffler are crucial to maintaining its performance and longevity. Follow these steps to keep your muffler in top shape:
- Start by visually inspecting the muffler’s exterior for any signs of damage or corrosion. Look out for rust, dents, or loose connections. Repair or replace any damaged parts as necessary.
- Next, examine the interior of the muffler. Use a flashlight to inspect the muffler’s baffles and internal pipes. Look for any blockages caused by debris or carbon buildup. Cleaning these obstructions can improve the muffler’s overall efficiency.
- To clean the muffler, use a high-pressure water hose to remove loose debris. You can also apply mild detergent to remove stubborn stains or grease. Ensure that the muffler is thoroughly rinsed and dried before reinstallation.
- Once the cleaning process is complete, inspect the mounting brackets and hangers for any signs of wear or damage. Tighten any loose connections and replace any faulty or worn-out parts.
Common Issues and Troubleshooting Techniques
While installing a muffler without welding might be relatively simple, you might encounter some common issues along the way. Here are a few troubleshooting techniques to help you address them:
| Issue | Troubleshooting Technique |
|---|---|
| Excessive Noise | Check for any loose connections or damaged parts. Ensure that all mounting brackets and hangers are securely in place. If necessary, tighten the connections or replace any faulty components. |
| Exhaust Leaks | Inspect the exhaust system for any signs of leaks, such as soot or a strong smell of fumes. Use a sealant or exhaust tape to seal any gaps or cracks. If the issue persists, consult a professional for further assistance. |
| Vibration | Check the muffler’s mounting brackets and hangers for any damages or misalignment. Adjust or replace them if necessary to reduce vibration. Additionally, check for any loose parts within the exhaust system and secure them accordingly. |
Alternative Weld-Free Methods
Brief overview of alternative methods
When it comes to installing a muffler without welding, not everyone has access to welding equipment or the necessary skills to perform a weld. Fortunately, there are alternative methods available that can still provide a secure and durable installation. These methods involve the use of clamps, exhaust tape, and exhaust paste, each with its own benefits and considerations. Below, we’ll explore these alternative methods in more detail, allowing you to choose the best option for your specific vehicle.
Choosing the best option for your specific vehicle
When it comes to installing a muffler without welding, one size doesn’t fit all. It’s important to choose the best option for your specific vehicle to ensure a secure and long-lasting installation. Here are the alternative methods to consider:
Clamp Method
The clamp method involves using specially designed U-bolts or clamps to secure the muffler or exhaust components in place. These clamps provide a strong and secure hold without the need for any welding. However, it’s important to select clamps that are suitable for your specific exhaust system size and material. This method is often preferred for its ease of installation and adjustability. Additionally, clamps can be used in combination with other methods for added stability.
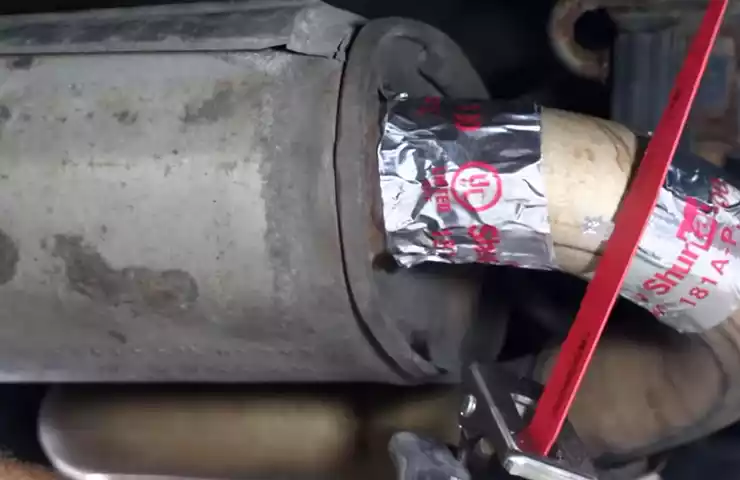
Exhaust Tape Method
The exhaust tape method is another popular option for installing a muffler without welding. This method involves wrapping a heat-resistant tape around the joints or connections of the exhaust system, providing a tight seal and preventing any leaks. This tape is commonly made of fiberglass or aluminum and is highly durable. It’s important to choose a high-quality tape that is designed to withstand high temperatures and is specifically designed for exhaust systems. This method is relatively easy to apply and can provide a reliable and cost-effective solution.
Exhaust Paste Method
The exhaust paste method involves applying a specialized exhaust paste to the joints or connections of the exhaust system. This paste is designed to harden and create a strong seal when exposed to high temperatures. It provides a reliable and leak-proof connection, eliminating the need for welding. As with the other methods, it’s important to select a high-quality exhaust paste that is suitable for your specific exhaust system. This method can be a great option for those who prefer a non-permanent solution and easy removal of the muffler or exhaust components in the future.
Choosing the best alternative method for your specific vehicle depends on factors such as the type of exhaust system, materials used, and personal preference. It’s recommended to consult with a professional or do thorough research to ensure that you select the most appropriate method for your needs. By considering these alternative methods, you can successfully install a muffler without welding and enjoy the benefits of a well-functioning exhaust system.
Frequently Asked Questions For How To Install A Muffler Without Welding
Do You Need To Weld To Replace A Muffler?
No, welding is not necessarily required to replace a muffler. It depends on the specific muffler and vehicle model. Some mufflers can be easily replaced by removing bolts or clamps, while others may require welding for a secure attachment.
How Do You Join An Exhaust Without Welding?
Joining an exhaust without welding is possible using exhaust clamps, sleeves, or band clamps. These connecting methods provide a secure seal between exhaust components without the need for welding, making it easier and more convenient to assemble or replace exhaust parts.
Can You Clamp A Muffler Instead Of Welding?
Yes, you can use a clamp instead of welding a muffler. Clamping is a simple alternative that allows for easy installation and removal without any permanent changes to the exhaust system.
Can You Install A Muffler By Yourself?
Yes, you can install a muffler by yourself. It is a relatively straightforward process. However, it is important to have the necessary tools and follow proper instructions to ensure a successful installation.
Conclusion
To wrap up, installing a muffler without welding is a practical alternative for those who don’t have welding equipment or skills. This method allows you to achieve the desired sound and performance without the need for professional assistance. By using clamps and hangers, you can easily attach a muffler to your vehicle’s exhaust system.
Remember to ensure a proper fit and tight connections to avoid leaks or vibrations. Follow our step-by-step guide, and you’ll be able to enjoy a quieter and smoother ride in no time. Happy muffler installation!