To install air shocks, follow these steps: Remove the old shocks using a socket wrench and lift the vehicle. Attach the air shocks with the provided hardware and connect the air lines.
Inflate the shocks to the recommended pressure and adjust as needed. Let’s now dive into the detailed process of installing air shocks for improving your vehicle’s suspension and ride quality. Introducing air shocks to your vehicle’s suspension can greatly enhance its performance and comfort.
Whether you use your vehicle for off-roading or simply want a smoother ride, installing air shocks is a relatively straightforward process. With the right tools and a little patience, you can upgrade your vehicle’s suspension and enjoy a more pleasurable driving experience. We will guide you through the step-by-step installation process for air shocks. So, without further ado, let’s get started!
Preparation And Tools Required
Gather the necessary tools and equipment
Before you begin installing air shocks on your vehicle, it is crucial to gather all the necessary tools and equipment. Having everything you need beforehand will make the installation process smoother and more efficient. Here are the tools and equipment you will need: 1. Jack stands: These are essential for safely lifting your vehicle off the ground. Make sure to choose sturdy and reliable jack stands that can support the weight of your vehicle. 2. Hydraulic jack: This will be used to lift your vehicle and provide access to the suspension components. A hydraulic jack is a must-have tool for any automotive DIY project. 3. Socket set: A socket set with various sizes will be required to loosen and tighten bolts during the installation process. Ensure you have the appropriate sizes for the bolts on your vehicle. 4. Adjustable wrench: An adjustable wrench is handy for turning nuts and bolts that may have different sizes. Its versatility makes it a valuable tool for many automotive tasks. 5. Torque wrench: This tool is crucial for accurately tightening the bolts to the manufacturer’s specifications. Over or under-tightening can lead to improper installation and potential safety hazards. 6. Plumb bob or leveling device: Having a plumb bob or leveling device will help you ensure that the air shocks are installed evenly and aligned correctly. This will help maintain proper suspension performance. 7. Air compressor: An air compressor is necessary for inflating the air shocks to the correct pressure. Make sure you have a compatible air compressor that can handle the pressure requirements of your air shocks.
Ensure you have the correct air shocks for your vehicle
Before you can begin the installation process, it is crucial to ensure that you have the correct air shocks for your specific vehicle. Using the wrong air shocks can lead to improper fitment and performance issues. Here are a few key considerations: 1. Check your vehicle’s make, model, and year: Each vehicle has different suspension specifications, so it is important to choose air shocks that are specifically designed for your vehicle. Refer to your vehicle’s manual or consult with an expert to determine the right air shocks for your vehicle. 2. Research the right type of air shocks: There are various types of air shocks available, including adjustable and non-adjustable options. Consider your specific needs and preferences when choosing the type of air shocks for your vehicle. 3. Verify the compatibility: Ensure that the air shocks you choose are compatible with your vehicle’s suspension system and axle weight rating. Consult the manufacturer’s specifications to verify compatibility. 4. Quality and brand reputation: Opt for reputable brands that are known for their quality and durability. Investing in high-quality air shocks will ensure better performance and longevity. Taking the time to gather the necessary tools and ensuring you have the correct air shocks for your vehicle will set a solid foundation for a successful installation process. It is always best to consult the manufacturer’s instructions and guidelines for any specific requirements pertaining to your vehicle model.
Removing The Old Shocks
Before installing air shocks on your vehicle, it is important to safely remove the old shocks. This will ensure a smooth and efficient installation process. In this section, we will guide you through the steps of safely lifting and securing your vehicle, as well as locating and removing the old shocks.
Safely lift and secure your vehicle
When removing the old shocks from your vehicle, it is crucial to prioritize safety. Follow these steps to securely lift and stabilize your vehicle:
- Park your vehicle on a flat surface and engage the parking brake to ensure it stays stationary.
- Locate the proper lifting points specified in your vehicle’s owner manual. These are typically located near the wheels.
- Using a reliable hydraulic jack, position it under the lifting points. Carefully jack up the vehicle, making sure it is fully supported by the jack stands.
- Place jack stands under the vehicle, ensuring they are securely positioned on strong support areas, such as the frame.
- Safely lower your vehicle onto the jack stands, ensuring it is stable and balanced before proceeding with the shock removal process.
Locate and remove the old shocks
Once your vehicle is safely lifted and secured, you can now proceed with locating and removing the old shocks. Follow these steps to successfully complete this task:
- Locate the old shocks by referring to your vehicle’s owner manual or using online resources that provide specific details for your make and model.
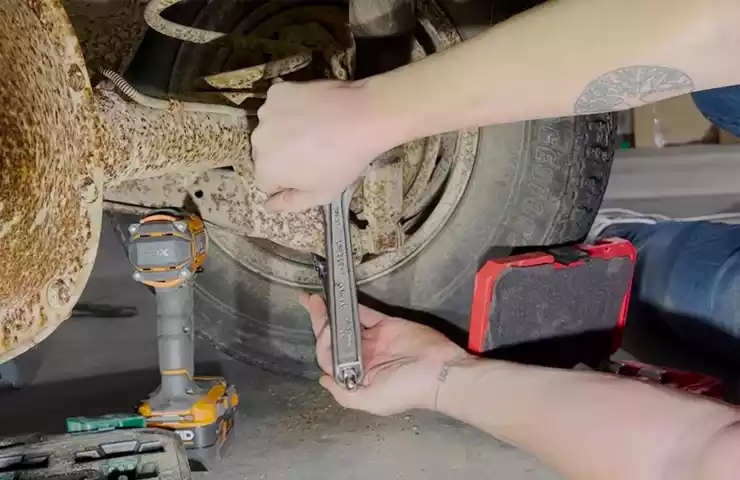
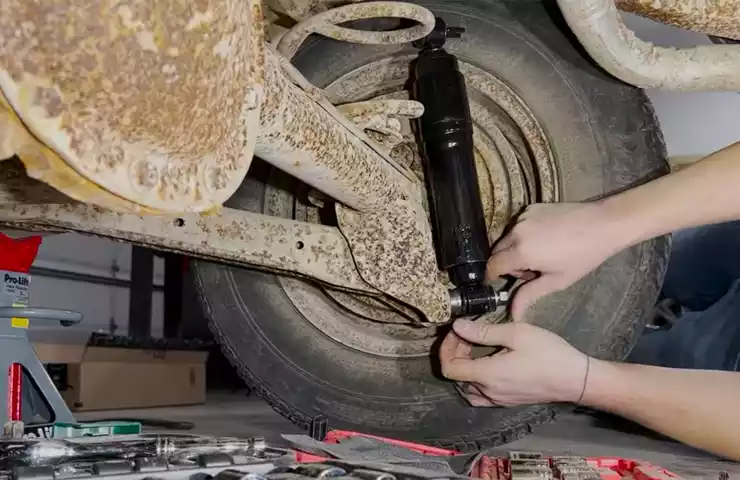
- Use a proper set of tools, such as a wrench or socket set, to remove the bolts or nuts securing the old shocks in place. Make sure to keep these fasteners in a safe place for later use.
- Gently lower the old shocks from their mounting points, taking care not to damage any surrounding components or the vehicle’s body.
- Inspect the old shocks for any signs of damage, such as leaking or excessive wear. If the old shocks are in poor condition, it is recommended to replace them with new ones.
- Dispose of the old shocks responsibly, following local regulations for proper waste management.
By following these steps, you will be able to safely and effectively remove the old shocks from your vehicle. Now that you have completed this stage, you are ready to proceed with the next step of installing air shocks!
Installing The Air Shocks
Installing air shocks on your vehicle can significantly improve its overall comfort and stability while driving. Whether you’re a seasoned DIY enthusiast or a novice, this guide will walk you through the steps to successfully install air shocks on your vehicle. Follow these instructions carefully to ensure a smooth installation process. Let’s get started!
Prepare the new air shocks for installation
Before you begin installing the new air shocks, there are a few preparatory steps you need to take.
- Start by inspecting the new air shocks for any visible damage or defects. Ensure that all components are intact and in good condition.
- Refer to the manufacturer’s instructions for any specific requirements or recommendations for the installation process.
- If necessary, apply a thin layer of lubricant to the piston rod to aid in smooth and easy installation.
- Adjust the air pressure in the shocks according to your vehicle’s specifications. This information can usually be found in your owner’s manual or by consulting with a professional mechanic.
Install the air shocks onto your vehicle
Now that you have prepared the new air shocks, it’s time to install them onto your vehicle. Follow these steps carefully:
- Locate the existing shock absorbers on your vehicle. They are usually attached to the frame or the axle.
- Carefully remove the old shock absorbers using the appropriate tools. Make sure to support the suspension system properly to prevent any accidents.
- Take the new air shocks and align them with the mounting points on your vehicle. Secure them tightly using the provided bolts and nuts.
- Double-check the installation to ensure that the air shocks are properly aligned and securely fastened. This will help prevent any future issues or malfunctions.
Connect the air lines for proper functionality
Once you have installed the air shocks onto your vehicle, it’s essential to properly connect the air lines to ensure their proper functionality. Follow these steps:
- Locate the air inlet valve on each air shock. These can usually be found near the top of the shocks.
- Attach the air lines to the designated air inlet valves. Ensure a secure connection by tightening the fittings with the appropriate wrench.
- Route the air lines away from any moving parts or areas of excessive heat. This will help prevent any potential damage or accidents.
- Check for any air leaks by applying a soap and water solution to the connections. If bubbles form, tighten the fittings further until the leaks are eliminated.
Once you have followed these steps, you have successfully installed the air shocks onto your vehicle and connected the air lines for proper functionality. Take your vehicle for a test drive to ensure that everything is working as expected. Enjoy the improved comfort and stability that air shocks provide!
Adjusting And Testing The Air Shocks
The proper adjustment and testing of air shocks is crucial for ensuring optimal performance and a comfortable ride. In this section, we will guide you through the steps of adjusting the air pressure to your desired level and testing the air shocks for proper functionality.
Adjust the air pressure to your desired level
Before adjusting the air pressure in your air shocks, it’s essential to consult the manufacturer’s recommendations for your specific vehicle and shock system. These guidelines will provide you with the appropriate pressure range to ensure optimal performance and safety.
To adjust the air pressure, follow these steps:

- Locate the air valve on each shock absorber. This valve allows air to be added or released from the shocks.
- Using a suitable air pressure gauge, check the current pressure in the shocks.
- If the pressure needs to be increased, add air using an air pump until the desired level is reached. If the pressure needs to be decreased, carefully release air from the shocks using a valve core tool.
- Repeat this process for each shock absorber, ensuring that the air pressure is consistent across all shocks.
Remember to regularly check and adjust the air pressure, as fluctuations can occur due to changes in temperature and load.
Test the air shocks for proper performance
Once the air pressure has been adjusted, it’s important to test the air shocks to ensure they are functioning as expected. This will help identify any issues or abnormalities that may affect your vehicle’s stability and comfort.
To test the air shocks, follow these steps:
- Take your vehicle for a short test drive on a smooth road, paying attention to any unusual noises, vibrations, or inconsistencies in the ride.
- Observe the vehicle’s handling and responsiveness. If you notice excessive bouncing, swaying, or uneven tire wear, it may indicate a problem with the air shocks.
- If you suspect an issue, have a qualified mechanic inspect the shocks to identify any potential defects or imbalances.
Regular testing and maintenance of your air shocks will help ensure they remain in good condition and provide optimal performance. By following these steps, you can adjust and test your air shocks to enjoy a comfortable and safe ride.
Tips And Safety Considerations
When installing air shocks, it is crucial to follow certain safety precautions to ensure a successful and safe installation. By adhering to these guidelines, you can safeguard yourself and your vehicle from potential risks and troubles. Additionally, being aware of common troubleshooting issues with air shocks can help you address any problems that may arise during or after installation.
Follow safety precautions during the installation process

Installing air shocks requires careful attention to safety procedures to prevent accidents or damage to the vehicle. Here are some important precautions to keep in mind:
- Park the vehicle on a level surface: Before beginning the installation, make sure your vehicle is parked on a flat and stable surface. This will ensure stability and reduce the risk of injury or damage.
- Use safety equipment: Wear necessary safety gear such as gloves and eye protection throughout the installation process. This will protect you from any potential hazards and ensure that you are working in a safe environment.
- Consult the vehicle’s manual: Before starting the installation, carefully read the vehicle’s manual to understand any specific instructions or precautions related to air shocks installation. Following these guidelines will guarantee a proper installation.
- Relieve the air pressure: Before removing any existing shocks or components, make sure to relieve the air pressure from the system. Failing to do so may cause unexpected release of pressure, leading to injury or damage.
- Secure the vehicle: Use appropriate tools or equipment to secure the vehicle in place during the installation. This will prevent any accidental movement or instability while working on the shocks.
Troubleshooting common issues with air shocks
Even with proper installation, it’s possible to encounter some issues with air shocks. Here are a few common problems and their solutions:
- Leakage: If you notice air leakage from the shocks, check for loose fittings or damaged components. Tighten any loose connections and replace any damaged parts to resolve the issue.
- Uneven ride height: In case your vehicle’s ride height is uneven after installing air shocks, adjust the air pressure in each shock as per the manufacturer’s recommendations. This will help to level the vehicle.
- Excessive bouncing: If your vehicle bounces excessively even with air shocks installed, check the air pressure. Adjusting the pressure to the recommended level will enhance the stability and eliminate excessive bouncing.
- Strange noises: Unusual noises coming from the air shocks might signify loose or worn-out components. Check for any loose bolts or damaged parts and tighten or replace them accordingly.
- System not inflating: If the system fails to inflate, check the air lines for any obstructions or leaks. Clear any blockages and repair any leaks to ensure proper inflation and functionality of the air shocks.
By being mindful of these safety precautions and troubleshooting tips, you can confidently install air shocks on your vehicle and enjoy a smoother and more comfortable ride. Remember, if you’re unsure about any aspect of the installation process or encounter persistent issues, it’s always best to consult a professional mechanic or refer to the manufacturer’s guidelines for further assistance.
Frequently Asked Questions For How To Install Air Shocks
How Do I Put Air In My Air Shocks?
To put air in your air shocks, follow these steps: 1. Locate the air valve on the shock. 2. Unscrew the valve cap. 3. Attach a pump with the appropriate valve fitting. 4. Pump air into the shocks until desired pressure is reached.
5. Replace the valve cap tightly.
How Much Air Should I Put In My Air Shocks?
To determine the ideal air pressure for your air shocks, consult your vehicle’s manual or the manufacturer’s recommendations. Properly inflated shocks can enhance performance and safety. Consider factors such as load and riding conditions to ensure optimal performance. Regularly inspect and adjust the pressure as needed.
Are Air Shocks Better Than Coilovers?
Air shocks and coilovers serve different purposes. Air shocks offer adjustable stiffness, making them great for heavy loads or off-roading. Coilovers have fixed stiffness and are ideal for high-performance driving. The decision depends on your specific needs.
Will Air Shocks Help?
Yes, air shocks can help improve your vehicle’s suspension system by providing better control and stability. They absorb bumps and oscillations, enhancing the overall ride quality and reducing the impact on your vehicle’s body.
Conclusion
Installing air shocks can significantly improve the performance and comfort of your vehicle. By following the step-by-step guide provided in this blog post, you can easily install air shocks without any professional help. Remember to gather all the necessary tools, read the manufacturer’s instructions, and take your time during the installation process.
With the right techniques, you’ll enjoy a smoother and more controlled ride on the road. So, get ready to enhance your driving experience with air shocks!